
Related Manuals for Onix ONS-620N HQ1 Free OSD

Summary of Contents for Onix ONS-620N HQ1 Free OSD
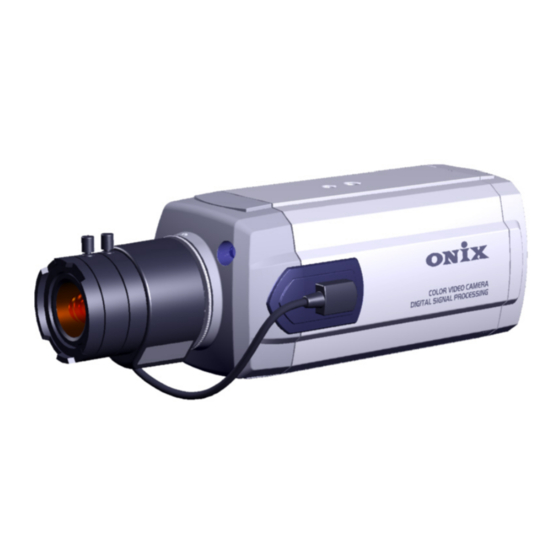
- Page 1 User’s Manual INSTALLATION / OPERATION High Resolution Color CCD HQ1 BOX Camera ONS- 620N HQ1 DUAL 620N HQ1 FREE 620P HQ1 DUAL 620P HQ1 FREE ONS- 620N HQ1 DUAL OSD 620N HQ1 FREE OSD 620P HQ1 DUAL OSD 620P HQ1 FREE OSD 1/28...
-
Page 2: Important Safeguards And Warnings
Important Safeguards and Warnings Prior to installation and use of this product, the following warnings should be observed. 1. Installation and service should be done only by qualified service and installation personnel. 2. Installation shall be done in accordance with all local and national electrical and mechanical codes utilizing only approved materials. - Page 3 Precautions Use the camera under condition where temperatures are within -20℃ to 50℃. Especially be careful for ventilation under high temperature. Severe lighting flicker can cause the camera to work improperly. Do not disassemble the camera. Do not install or use the camera in an environment where the humidity is high. Never use the camera close to a gas or oil leak.
-
Page 4: Specifications
Function MODEL Day & System Resolution System Drive Communication Night 24V AC/ 12V ONS-620N HQ1 DUAL NTSC 620 TV lines 24V AC/ 12V ONS-620P HQ1 DUAL 610 TV lines 90V AC ∼ 240V ONS-620N HQ1 Free NTSC 620 TV lines 90V AC ∼... - Page 5 Specifications MODEL NO. ONS-620N HQ1 ONS-620N HQ1 DUAL ONS-620P HQ1 ONS-620P HQ1 DUAL TDN OSD DUAL DUAL TDN OSD POWER SOURCE TERMINAL : DUAL VOLTAGE (10-36V DC and 18-30V AC) / UTP : 12-48V DC or 24V-28V AC IMAGE PICK –UP 1/3”...
- Page 6 Accessories You Talk, We Listen User’s Manual INSTALLATION / OPERATION High Resolution Color CCD HQ1 BOX Camera ONS- 620N HQ1 DUAL 620P HQ1 DUAL ONS- 620N HQ1 DUAL OSD 620P HQ1 DUAL OSD Iris Lens Plug Installation/Operation manual L-Wrench Glass Protecting Cap C-Mount Lens Adapter Remote Plug (For ONS-620 OSD series only)
-
Page 7: Camera Layout
Camera Layout <Front Layout> ①. Window for TDN ④. Camera Mount (True Day & Night) Adapter. CdS Sensor <Screw Specification> 1/4”-20 UNC (20 THREAD) L : 4.5mm ± 0.2mm ②. Back focus adjustment (ISO Standard) locking Wrench. or 0.197”(ASA Standard) ③. -
Page 8: Installation
Installation < LENS MOUNTING> The camera can use a fixed iris, manual iris or auto iris lens. The camera has factory set for a CS-mount lens, but it adjust for a C-mount lens easily. 1). C-mount Lens Only ---- Attach the C-mount adapter by rotating clockwise before installing the C-mount lens (The C-mount adapter offered accessory). -
Page 9: Power And Video Connections
Power and Video Connections <Composite Video Output BNC⑨ Connector> Connect a video cable to the SIGNAL OUT connector (BNC) on the back of the camera. 75 ohms impedance composite video signal output. Connect the video output jack to the monitor video input jack. <Power Terminal Connector ⑬>... -
Page 10: Mode Switches
Mode switches <Camera Power Select Switch ⑩> POWER OFF BOX Camera Power Off Mode. POWER OFF The BOX Camera Power is not offered. TER (Default setting) USE TERMINAL POWER. Enable the BOX Camera offered through the terminal⑬. USE RJ45 UTP POWER. Enable the BOX Camera offered through the UTP cable⑧. - Page 11 Tact switch & Volumes <LENS Level Adjustment Volume⑪> DC LEVEL Rotate the LENS Level adjustment volume⑪ until to get the enhanced object image. ---- Used to adjust video output level of DC driven auto iris lens. When the brightness control of the monitor does not operate correctly, you can get the optimum picture by controlling the DC level of camera.
- Page 12 UTP cable Description Twisted Pair UTP Cable Receiver ONU-2000 RJ-45 Jack ONS-620 HQ1 Series RJ-45Jack Pin NO Pin Description Pin Description Pin NO Video + Video + Video - Video - Rx+ , Tx+ Rx+ , Tx+ GND or 24~28V AC- GND or 24~28V AC- 12-48V DC or 24~28V AC+ 12-48V DC or 24~28V AC+...
- Page 13 UTP Receiver (ONU-2000) Description <ONU-2000 (Receiver)> *. Enable RS485 communication. *. Rotated the “Frequency EQ.” and “VIDEO AMP GAIN” adjustment volume until to get the enhanced object image thought the UTP Cable video signal. *. UTP Receiver(ONU-2000) can be supplied an order. <Select UTP power Switch and Select UTP Cable Length>...
- Page 14 Installation “UTP Receiver (with ONU-2000)” <ONU-2000 (Receiver) for MAX 4,000ft(1.2Km) Cable with local power supply > BOX UTP Series Model To RJ45 To Terminal LOCAL POWER Supply (DUAL Power 24V AC or 12V DC) MAX 4,000ft (1.2Km) UTP Cable (CAT5) *.
- Page 15 Installation “UTP Receiver (with ONU-2000)” <ONU-2000 (Receiver) for MAX 2,000ft(600M) Cable with UTP power supply > BOX UTP Series Model To RJ45 <UTP Cable (CAT5) length> 12V DC power : under 150ft (50M) 24V DC power : under 500ft(150M) 35V DC power : under 1,500ft(500M) 48V DC power : under 2,000ft(600M) 24V AC power : under 500ft(150M)
-
Page 16: Local Power Supply
Installation “UTP Driver (with ONU-1000)” <USE LOCAL POWER and RS485 Control (Composite Video & 12V DC power Analog Cameras)> CONTROL RS485 *. The Power Select Switch selects “From LOCAL”. UTP (Cat.5) Cable Driver ONU-1000 RJ-45 VIDEO MAX 4,000ft (1.2Km) RX+/Rx- UTP Cable (CAT5) Frequency EQ. - Page 17 Installation “UTP Driver (with ONU-1000)” <USE UTP POWER and RS485 (Composite Video & 12V DC power Analog Cameras)> CONTROL RS485 UTP (Cat.5) Cable Driver ONU-1000 RJ-45 VIDEO RX+/Rx- Frequency EQ. 12V DC POWER <UTP Cable (CAT5) length> 12V DC power : under 150ft (50M) 24V DC power : under 500ft(150M) *.
- Page 18 Inner mode switch < DIP Switches (only ONS-620 HQ1 Series)> DIP switch location 1 2 3 4 5 6 7 8 9 10 DIP switch Function Name Location Mode Function AWB1 AWB2 AWB3 Mode White balance mode Auto W/B mode (Default Setting) Manual Manual (White Balance Gain R /B up down Key Enable) AWB1...
- Page 19 ONS-620 HQ1 OSD Series Camera Layout <Rear Layout (ONS-620 HQ1 OSD series)> Ⓐ. Function Setup TACT Switches Ⓑ. REMOTE Connector <ONS-620 FREE OSD> <ONS-620 FREE> & & <ONS-620 OSD w/o UTP> <ONS-620 w/o UTP> *. For more information, please refer to the front pages with “Camera Layout”. 19/28...
-
Page 20: Remote Connector
ONS-620 HQ1 OSD Series <Function Setup TACT Switches Ⓐ> Function key application by OSD (On Screen Display). MENU Enable MENU mode. The displayed to the OSD (On Screen display) menu. ---- The button transferred the selected OSD to Left . ---- The button transferred the selected OSD to right. - Page 21 ONS-620 HQ1 OSD Series OSD Description < OSD (On Screen Display) Functions (ONS-620 HQ1 OSD Series Only)> TACT Switch actions of the REAR Panel Shift LEFT MENU / Shift Right & Select / & Mode change Return / Mode change Enter Shift up Shift down...
- Page 22 ONS-620 HQ1 OSD Series OSD Description “EFFECT” frame display initial value (Variable Range) 0 (-3 to +3) 0 (-3 to +3) OFF (ON,OFF) OFF (ON,OFF) OFF (LOW,MID,HIGH,OFF) REAR ’s CONTROL OFF (ON,OFF) CONNECTOR output Return initial value control Exit the this menu *.
- Page 23 ONS-620 HQ1 OSD Series OSD Description “EXPOSURE” frame display Auto (ELC) 1/60(50) 0 (-3 to +3) Fixed AUTO shutter 1/100(1/120) speed that “LENS OFF (ON,OFF) 1/250 TYPE” is ELC mode. But controls shutter AUTO (☞) 1/500 speed that “LENS 1/1,000 OFF (ON,OFF) TYPE”...
- Page 24 ONS-620 HQ1 OSD Series OSD Description “PRIVACY” frame display OFF (ON,OFF) 1 (1 to 8) OFF (ON,OFF) H.MOVE If MASK SHOW is ON (V.MOVE, H.SIZE, V.SIZE, H.MOVE) then enable Menu. Change “MOVE/SIZE” data “↔” 0 (-3 to +3) 0 (-3 to +3) 18F9 003C 0032 18EF Display “MOVE/SIZE”...
- Page 25 ONS-620 HQ1 OSD Series OSD Description “OSD” frame display 1 (OFF, 1 to 255) HIDE (SHOW,HIDE) HIDE (SHOW,HIDE) Set the user character. maximum 20 characters. Enter the selected character by the “UP(▲)/DOWN(▼)” key. And change the characters by “LEFT(◀)/RIGHT(▶)” key. Its characters selected by user.
-
Page 26: Troubleshooting
Troubleshooting If you experience a trouble of the camera, please refer to the following table. If the guideline is not enough to solve the problem, please contact the authorized technician. Problems solutions Nothing appears on the screen. -. Check the power connection and the cable connection between the camera and monitor has been made properly. - Page 27 Dimensions (unit : mm) 27/28...
-
Page 28: Manual Addendum
Manual Addendum Correct Disposal of This Product (Waste Electrical & Electronic Equipment) (Applicable in the European Union and other European countries with separate collection systems) This marking shown on the product or its literature, indicates that it should not be disposed with other household wastes at the end of its working lift.
Need help?
Do you have a question about the ONS-620N HQ1 Free OSD and is the answer not in the manual?
Questions and answers