Table of Contents
Advertisement
Quick Links
Advertisement
Table of Contents

Related Manuals for Sanyo SCP-810


Summary of Contents for Sanyo SCP-810
-
Page 1: User Guide
User Guide SCP-8100... -
Page 2: Table Of Contents
Table of Contents 1. The Basics ..........2 Front View of Phone . - Page 3 Changing the Display for the Standby Mode ......28 Saving a Phone Number From Call History ......47 Changing the Screen Saver .
- Page 4 Getting to Know Icon Indication ........70 Sending a Message .
- Page 5 SCP-8100 Dual Band Phone User Guide...
-
Page 6: The Basics
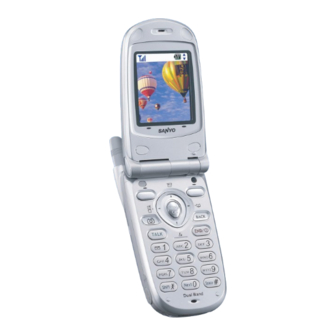
1. The Basics 5. Camera Lens: This built-in camera lens allows you to use auto focus function. Front View of Phone 6. Sub LCD: Lets you monitor the phone’s status and see who’s calling without opening the phone. 7. Earpiece: Lets you hear the caller’s voice. 7. -
Page 7: Viewing The Display Screen
Viewing the Display Screen Turning Your Phone ON and OFF This list identifies the symbols you’ll see on your display screen. Turning Your Phone ON shows your current signal strength. The more lines you To turn your phone on, press have, the stronger your signal. -
Page 8: Using The Battery
Using the Battery Charging the Battery Your phone comes with a rechargeable battery. You should Installing the Battery charge the battery as soon as possible so you can begin using Your phone comes with a LiIon battery. Follow these steps to your phone. -
Page 9: Displaying Your Phone Number
Displaying Your Phone Number Answering Calls 1. Make sure your phone is on. If your phone is off, incoming 1. Press to access the main menu. calls go to voicemail. 2. Highlight Phone Info and press 2. When a call comes in, answer the call by pressing 3. -
Page 10: Changing Ringer Volume
Changing Ringer Volume Dialling Options To change the ringer volume, adjust the Volume keys when the Dialling options are displayed when you press after phone is in Standby mode. entering numbers in the Standby mode. To select an option, highlight it and press Note: To change the ringer volume via the main menu, see “Adjusting the Phone’s Volume Settings”... -
Page 11: In-Call Options
In-Call Options End-of-Call Options During a call, your phone displays menu options by pressing After receiving a call from or making a call to a phone number that is not in your Internal Phone Book, the phone number and To select an option, highlight it and press the duration of the call is displayed. -
Page 12: Saving A Phone Number
Saving a Phone Number Finding a Phone Number Your phone can store a total of 500 phone numbers in You can search Internal Phone Book entries for phone numbers 300 Internal Phone Book entries. Each Phone Book entry can that end with the digits you entered. store seven phone numbers, and the entry’s name can contain To find a phone number: 16 characters. -
Page 13: Abbreviated Dialling
Abbreviated Dialling Headset Mode Enter four digits and press to display the 4-Digit Dialling This feature allows you hands-free phone use. Set the headset option. If you select Abbrev. Dial, your phone dials the phone mode to Voice Call and press the Turbo Button (the operation number in your Internal Phone Book that ends with the four digits button) on the headset to activate useful functions. -
Page 14: Your Phone's Settings
2. Your Phone’s Settings Selecting Ringer Types for Messages 1. Press to access the main menu. Reminder: To access the phone’s main menu, press from standby 2. Highlight Settings and press mode. Menu items may be selected by highlighting them with the Navigation key and pressing 3. -
Page 15: Setting A Start-Up/Power-Off Tone
Setting a Start-up/Power-off Tone Adjusting the Phone’s Volume Settings 1. Press To adjust the ringer/key volume: to access the main menu. 1. Press 2. Highlight Settings and press to access the main menu. 2. Highlight Settings and press 3. Highlight Sounds and press 3. -
Page 16: Alert Notification
Alert Notification Silence All Your phone comes with several different options to keep you 1. Press to access the main menu. aware of what’s going on by sounding the alert or ringer. 2. Highlight Settings and press Service sets alert On or Off for network services parameter 3. -
Page 17: Display Settings
Display Settings Changing the Backlight Time Length To change the Main LCD or Sub LCD backlight setting: Changing the Greeting 1. Press to access the main menu. To display or change your custom greeting which appears on 2. Highlight Settings and press your phone’s screen while in standby mode: 3. -
Page 18: Changing The Display Screen
Changing the Display Screen Changing the Display for Incoming Calls You can select an animation which your phone will display when 1. Press to access the main menu. in standby mode, for outgoing calls or during Service search. 2. Highlight Settings and press 1. -
Page 19: Changing The Display For The Standby Mode
Changing the Display for the Standby Mode Changing the Screen Saver 1. Press 1. Press to access the main menu. to access the main menu. 2. Highlight Settings and press 2. Highlight Settings and press 3. Highlight Display and press 3. -
Page 20: Changing The Display Colour
Changing the Display Colour Airplane Mode 1. Press to access the main menu. When your phone is in Airplane mode, it cannot send or receive any calls (except for emergency dialling) or access online 2. Highlight Settings and press information. You may still use the phone’s other features, such 3. -
Page 21: Phone Setup Options
Phone Setup Options Setting Call Answer This feature enables you to answer incoming calls by opening My Shortcut the clamshell so that you don’t have to press Your phone offers you the option of assigning a shortcut key to a 1. -
Page 22: Setting Abbreviated Dialling
Setting Abbreviated Dialling Sleep Mode Abbreviated Dialling is another form of Speed Dialling. If the last This feature helps conserve your battery power by restricting four digits you enter do not match any stored phone book entry, the display. the digits are automatically prefixed with the digits specified 1. -
Page 23: Security
3. Security Unlocking Your Phone 1. Press (left softkey). Unlock Accessing the Security Menu 2. Enter your lock code. You must enter your lock code to view the Security menu. Changing the Lock Code 1. Press to access the main menu. 1. -
Page 24: Restricting Calls
Restricting Calls Using Special Numbers You can save three special numbers in addition to your Internal You can restrict phone numbers your phone dials or receives. Phone Book entries (the same number may be in both (The Restrict Calls setting does not apply to emergency call or directories). -
Page 25: Erasing The Downloads
Should you recover or find your phone, you will need to take it 2. If you’re sure you want to reset your phone, highlight Yes and to a Telecom Dealer. The Dealer will send the phone to a Sanyo press approved Service Centre for unlocking. -
Page 26: Roaming
Changing the Passcode 4. Roaming To change the passcode for the special formatted SMS messages: Understanding Roaming 1. Press to access the main menu. Recognizing Icons on the Display Screen 2. Highlight Settings and press 3. Highlight Security and press Your phone’s display screen always lets you know when you’re off the home network. -
Page 27: Menu Navigation
5. Menu Navigation 7. Voicemail 1. Call Voicemail 2. Details Viewing the Menus 3. Clear Count Menu Diagram 4. Edit Voicemail# 8. Settings Menus let you check or change your phone settings. The 1. Sounds following outline shows your phone’s menu structure. 2. -
Page 28: Managing Call History
6. Managing Call History Making a Call From Call History 1. Press to access the main menu. Viewing History 2. Highlight Call History and press You’ll find the Call History feature very helpful. It is a list of the 3. Highlight Outgoing Calls, Incoming Calls, or Missed Calls. last 20 phone numbers (or Internal Phone Book entries) for each call that you placed, accepted, or missed. -
Page 29: Prefixing A Phone Number From Call History
Prefixing a Phone Number From Call History 7. Internal Phone Book If you need to make a call from Call History and you happen to Internal Phone Book Entry Options be outside your local area code, you can add the appropriate prefix by following these steps: To access an Internal Phone Book Entry’s options, display the 1. -
Page 30: Selecting A Character Input Mode
Selecting a Character Input Mode Adding a Word to the T9 Database If a word you want to enter does not display as an option when Your phone provides convenient ways to enter words, letters, you are using T9 Text Input, you can add it to the database. punctuation, and numbers whenever you are prompted to enter text (for example, when adding an Internal Phone Book entry). -
Page 31: Entering Characters By Tapping The Keypad
Entering Characters by Tapping the Keypad Entering Numbers, Symbols, Canned Suffix and Smileys To enter characters by tapping the keypad, select the Alphabet Entering NUMBER mode (see “Selecting a Character Input Mode” on page 50). 1. In a text entry field, press the right softkey. Press the corresponding key until the desired character appears. -
Page 32: Adding A New Internal Phone Book Entry
Adding a New Internal Phone Book Entry Finding Internal Phone Book Entries 1. From the Standby mode, enter the phone number you want Finding Names to save. You can review all the entries stored in your Internal Phone 2. Press to display the menu options. -
Page 33: Adding A Phone Number Or Address To An Internal Phone Book Entry
Finding Entries Adding a Phone Number or Address to To find an Internal Phone Book entry by entering the first letters: an Internal Phone Book Entry 1. Press of the Navigation key. 1. Press to access the main menu. 2. Enter the first letter of the name or part of the name using 2. -
Page 34: Editing An Internal Phone Book Entry
Editing an Internal Phone Book Entry Selecting a Ringer/Image Type for an Entry 1. Display an Internal Phone Book entry. You can assign a ringer/image type to an Internal Phone Book entry so you can identify the caller by the ringer or image type. 2. -
Page 35: Secret Internal Phone Book Entries
Secret Internal Phone Book Entries Storing Special Numbers in the Phone Book You can hide an entry’s phone number(s) by making them Using the Pause Feature secret, which requires your lock code to edit the entry. The Generally, when you call an automated system like voicemail boxes entry name is still displayed, but the entry’s phone numbers are or credit card companies, you are required to enter a password or replaced by “(Secret)”. -
Page 36: Personal Organizer
8. Personal Organizer Adding an Event to the Scheduler 1. Press to access the main menu. Managing Schedules 2. Highlight Calendar and press Calendar 3. Highlight the day you want to add an event by using the Use the Calendar to remind you of events or important calls you Navigation key and press need to make. -
Page 37: Event Alerts
Event Alerts Editing an Event 1. From the Event list display, highlight one of the events and There are several ways your phone alerts you of scheduled events: press By playing the alert tone (depending on the Alert and Ringer Volume setting). -
Page 38: Call Alarm Alerts
Call Alarm Alerts Editing a Call Alarm There are several ways your phone alerts you of scheduled call 1. From the Event list display, highlight one of the call alarms and alarms: press By playing the alert tone (depending on the Alert and Ringer 2. -
Page 39: Adding To Do Items
Adding To Do Items Deleting Items from the To Do List Your phone can store and manage 20 To Do items. 1. From the To Do List display, highlight the item you want to erase and press (right softkey). Options 1. -
Page 40: Purging All Events, Call Alarms Or To Do List
Purging All Events, Call Alarms or To Do List Using Your Phone’s Tools 1. From Event list display, press (right softkey). Options Using the Calculator 2. Highlight Erase Memory and press 1. Press to access the main menu. 3. Highlight one Options item and press 2. -
Page 41: Downloading Through Wireless Web
Downloading through Wireless Web To download a ringer file from the Ringer Setting Menu (Ringer Type and Start-up/Power-off Tone): Your phone allows you to download images (screen savers), 1. Press to access the main menu. ringers, games, etc., from a Web site. It is also possible to 2. -
Page 42: Confirming The Downloaded Data
To download an image file from the Display Setting Menu Confirming the Downloaded Data (Animation, Incoming Calls, and Screen Saver): The downloaded data will be automatically classified as games, 1. Press to access the main menu. ringers, images (screen savers) or an application folder. However, 2. - Page 43 Options: To confirm the downloaded applications folder: Play to play the downloaded ringer. 1. Press to access the main menu. Assign to assign the downloaded data to the Ringer Type, 2. Highlight Downloads and press Calendar, Start-up/Power-off Tone, or Phone Book. 3.
- Page 44 Options: Icon Indication Open to play the downloaded content. Type Item Icon (appears at the left side of the downloaded data) Options to select the options of the downloaded data. Properties shows the downloaded data property. From Web Ringers (~64KB) (New Data) (Assigned Data) Online Info shows the downloaded data information online.
-
Page 45: Viewing The Downloaded Data Size
Viewing the Downloaded Data Size Erasing old downloaded data to free space for new data If you try to download new data when the downloaded data’s This feature allows you to confirm each downloaded data size memory is full, the warning message appears. You will be and the rest of the download capacity. -
Page 46: Voice Services
9. Voice Services Reviewing Voice Dialling Tags 1. Press to access the main menu. Using Voice-Activated Dialling 2. Highlight Voice Service and press You can use a Voice Dial tag to automatically dial a phone number 3. Highlight Voice Dial and press in your Internal Phone Book. -
Page 47: Recording Voice Memos
Recording Voice Memos Reviewing Voice Memos To record a memo in Standby mode: 1. Press to access the main menu. 1. Press to access the main menu. 2. Highlight Voice Service and press 2. Highlight Voice Service and press 3. Highlight Voice Memo and press Press (right softkey) for the shortcut (steps 1 to 3 Memo... -
Page 48: Erasing Voice Memos
Erasing Voice Memos Setting Up Screen Call 1. Press This feature enables you to answer incoming calls by using pre- to access the main menu. recorded announcements, either one that is pre-recorded or one 2. Highlight Voice Service and press that you record. - Page 49 Selecting Announcement for Screen Call Recording Customized Announcement 1. Press to access the main menu. 1. Follow steps 1 to 4 on the previous page. 2. Highlight Voice Service and press 2. Highlight Custom and press Options (right softkey). 3. Highlight Screen Call and press 3.
-
Page 50: 10. Camera
10. Camera 3. Press the Side Camera key to take the picture. 4. Press the Side Camera key to save the picture. Taking Pictures Note: The picture will be saved automatically after 30 seconds. Taking pictures with your phone’s built-in Camera is as simple as choosing a subject, pointing the lens, and pressing a key. -
Page 51: Camera Mode Options
Camera Mode Options Setting Self-timer To activate the Self-timer and get yourself in on the picture: When the phone is open and in Camera mode, several user options are available. 1. With the phone open and in Camera mode, press Options Review: Press (left softkey) to enter Review/Share... -
Page 52: Sharing Mms Message
Sharing MMS Message Note: icons next to entry’s names represent Mobile Phone and email. When entering a new entry, use the left/right Once you’ve taken a picture, you can use the messaging Navigation key to toggle to the correct icon for the entry. capabilities of your phone to instantly share it with family and friends. -
Page 53: Sharing Mms Message From Messaging
Sharing MMS Message from Messaging Press (right softkey) to display the following options: Options Camera to switch to Camera mode. You can also share your pictures from your phone’s Messaging Save to Wallet to save a picture to the Picture Wallet. (See menu. -
Page 54: Picture Wallet
To view pictures stored in the Picture Wallet: Tip: In expanded view, press the up or down Navigation key to view a 1. Press to access the main menu. picture’s caption and number/count (for example 1/10 is the first of 10 stored pictures) at the bottom of the display screen. -
Page 55: Managing Mms Message
Managing MMS Message Sharing Online MMS Message 1. From the online MMS Message InBox, select a picture you Using the MMS Message Web Site wish to share and press (left softkey). Share Once you have uploaded pictures from your phone to your 2. -
Page 56: Accessing Online Mms Message Options From Your Phone
Accessing Online MMS Message Options From Your Phone To access your online Albums options from your Phone: 1. Display the album list in the online MMS Message menu. 1. Select a picture from your online MMS Message (see “Managing (See “Managing Online MMS Message From Your Phone” on Online MMS Message From Your Phone”... -
Page 57: 11. Messaging
11. Messaging Icon Indication Function Icons Details New Messages Folder A new message folder When you receive a new Message, your phone will alert you. Unread message Inbox Press View (left softkey) to display the message details. Read message Press (left softkey) to dial the phone number. -
Page 58: Sending A Message In The Drafts Folder
Sending a Message in the Drafts Folder 6. To add a recipient, press (right softkey), highlight Options Add Recipient, and press To edit and send a message in the drafts folder: Edit to edit the selected entry. 1. Press to access the main menu. Erase to erase the selected entry. -
Page 59: Message Options
Message Options Erase All to erase all messages in the folder (except locked messages). A warning message appears if there are unread Several options are available when you display a folder list, messages. message list, or message details. Tip: You can lock up to 40 messages. Locked messages will be displayed Folder List Options with Highlight Inbox, Sent, Outbox, Drafts, or your defined folder and... -
Page 60: Changing The Display Font Size Of A Message
Changing the Display Font Size of a Message Creating Folders for Messages After you display a Message in the Inbox, Sent, or your defined You can create up to ten folders to store your Messages. When folder, press (right softkey) to display message options. 10 user defined folders exist, the “Create Folder”... -
Page 61: Moving A Message Into Another Folder
Moving a Message Into Another Folder Erasing Selected Messages in All Folders After you display a message, press (right softkey) to 1. From the folder list display, press Options (right softkey). Options display message options. You need at least one defined folder. 2. -
Page 62: 12. Service Features
12. Service Features Retrieving Your Voicemail Messages 1. Press and hold . Follow the system prompts. Using Voicemail – or – All unanswered calls to your phone are automatically transferred 1. Press to access the main menu. to voicemail, even if your phone is in use or turned off. 2. -
Page 63: Responding To Call Waiting
Responding to Call Waiting When you’re on a call, Call Waiting alerts you to incoming calls With Web on your phone, you will be able to browse by sounding beeps. Your phone’s screen informs you that full-colour graphic versions – not just text versions – of your another call is coming in and displays the caller’s phone number. -
Page 64: Browsing The Web
Browsing the Web Editing a Bookmark 1. Launch the Web and press the right softkey. Going to a Specific Web Site 2. Select View Bookmarks and press the left softkey. To go to a particular Web site by entering a URL (Web site 3. -
Page 65: Email
Email Games Accessing Email Downloading Games 1. Press 1. Press to access the main menu. to access the main menu. 2. Select Messaging and press 2. Highlight Downloads and press 3. Select Go to Email and press . The browser will launch and 3. -
Page 66: Ringers
Ringers Assigning Downloaded Ringers Downloaded ringers may be assigned directly from the Downloading Ringers Downloads menu and are also available through the To download an available ringer to your phone: Settings menu. 1. Press to access the main menu. To assign a downloaded ringer through the Settings menu, see “Selecting Ringer Types for Voice Calls”... -
Page 67: Screen Savers
Screen Savers Assigning Downloaded Screen Savers (Images) Downloaded Screen Savers may be assigned directly from Downloading Screen Savers (Images) the Downloads menu and are also available through the Settings menu. To download an available Screen Saver (Image) to your phone: To assign a downloaded Screen Saver through the Settings 1. -
Page 68: Index
Index Dialling From Phone Book 16 Number With Pauses 15 Abbreviated Dialling 16, 34 Options 11 Airplane Mode 31 Speed Dialling 17, 33 Alert Notification 22 Voice-Activated Dialling 82 Answering Calls 9 Display Settings Any Key Answer 33 Backlight Time Length 25 Auto Answer 32 Colour 30 Auto Delete 103... - Page 69 Self-timer 93 Hard Pause 15 Net Guard 117 Quiet Ringer 9 Shortcut 32 Headset Mode 17 Shutter Sound 92 Side Key Guard 34 Online MMS Message Resetting Silence All 23 Icon Indication 4, 70, 79, 105 Auto Delete 103 Phone 40, 41 Sleep Mode 35 In-Call Options 12 Managing 100...
- Page 70 Version 70 Voice Dial Erasing 83 Programming 82 Reviewing 83 Using 82 Voice Memo Erasing 86 Recording 84 Reviewing 85 Voice Prompt 20 Voicemail Clearing Massage Icon 115 Notification 114 Retrieving 115 Volume Settings During a Conversation 10 Muting 10 Ringer 10, 21 Browsing 118 Launching 117...
Need help?
Do you have a question about the SCP-810 and is the answer not in the manual?
Questions and answers