Sanyo SCP-8100 User Manual
Qwest picture phone
Hide thumbs
Also See for SCP-8100:
- User manual (113 pages) ,
- Getting to know (1 page) ,
- User manual (71 pages)
Table of Contents
Advertisement
Quick Links
Advertisement
Table of Contents

Related Manuals for Sanyo SCP-8100


Summary of Contents for Sanyo SCP-8100
- Page 1 User’s Guide Qwest ® Picture Phone SCP-8100...
-
Page 2: Table Of Contents
Viewing the Display Screen ........12 Features of Your Sanyo SCP-8100 ......13 Turning Your Phone ON and OFF . - Page 3 Setting a Start-up/Power-off Tone ......33 Using Voice Prompt ........33 Adjusting the Phone’s Volume Settings .
- Page 4 Secret Internal Phone Book Entries ......87 Dialing Services ......... . .87 Storing Special Numbers in the Phone Book .
- Page 5 3B. Sprint PCS Vision ......... .151 Web .
-
Page 6: Introduction To This User's Guide
Introduction to this User’s Guide his User’s Guide introduces you to all the features of your new phone. It’s divided into four sections: Section 1: Getting Started Section 2: Understanding Your Phone Section 3: Using Service Features Section 4: Safety and Warranty Information Throughout the guide, you’ll find tips that highlight special shortcuts and timely reminders to help you make the most of your new phone and service. -
Page 7: Section 1: Getting Started
Section 1 Getting Started... -
Page 8: Setting Up Service
Setting Up Service In This Section Getting Started Setting Up Voicemail Getting Help his section walks you through unlocking your phone, setting up your voicemail, and how to contact Qwest 1A: Setting Up Service Section 1A ® for assistance. Section 1: Getting Started... -
Page 9: Getting Started
Getting Started Unlocking Your Phone Follow these steps to unlock your phone: 1. Press to turn the phone on. 2. Press Unlock (left softkey). Note: The left and right softkey buttons are located directly above the buttons, respectively, and they correspond with the softkey actions shown on the bottom line of your phone’s display screen. -
Page 10: Section 2: Understanding Your Phone
Section 2 Understanding Your Phone... -
Page 11: Viewing The Display Screen
Your Phone: The Basics In This Section Front View of Phone Viewing the Display Screen Features of Your Phone Turning Your Phone On and Off Using the Battery and Charger Displaying Your Phone Number Making and Answering Calls our phone is packed with features that simplify your life and expand your ability to stay connected to the people and information that are important to you. -
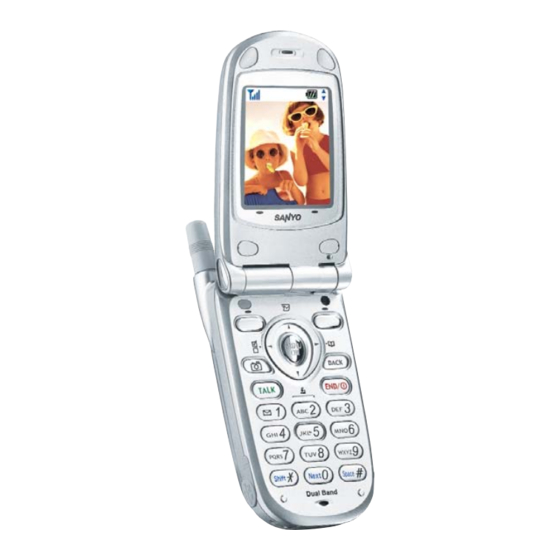
Page 12: Front View Of Phone
Front View of Phone 1. Side Camera 7. Main LCD 2. Volume Keys 3. Headset Jack 8. Softkey 4. LED (left) (green/red light) 9. Navigation 10. MENU/OK 11. Camera 5. Camera 12. TALK Lens Smart Camera Digital 13. Standard 6. Sub LCD 12:30p Jul21 Charger Jack Your Phone’s Features... -
Page 13: Viewing The Display Screen
Display indicators let you know when you’re off the network available to you and whether you’re operating in digital or analog mode. Features of Your Sanyo SCP-8100 Congratulations on the purchase of your Sanyo SCP-8100. This phone is easy-to-use and reliable. It also offers many significant features and service options:... -
Page 14: Turning Your Phone On And Off
Turning Your Phone ON and OFF Turning Your Phone ON To turn your phone on, press Once your phone is ON, it displays “Looking for service...” which indicates that your phone is searching for a signal. When your phone finds a signal, it automatically enters standby mode – the phone’s idle state. -
Page 15: Displaying Your Phone Number
Charging the Battery Your phone comes with a rechargeable battery. You should charge the battery as soon as possible so you can begin using your phone. Keeping track of your battery’s charge is important. If your battery level becomes too low, your phone automatically turns off and you will lose all the information you were just working on. -
Page 16: Answering Calls
Important: To maximize your phone’s performance, extend the antenna fully and do not touch the antenna during a call. Correct Incorrect Answering Calls 1. Make sure your phone is on. If your phone is off, incoming calls go to voicemail. 2. -
Page 17: Missed Call Notification
Missed Call Notification When an incoming call is not answered, your phone displays the Missed Call Notification. You can view the number of Missed Calls and the last caller’s name on the screen. To call the last missed call: Simply press To display the list of Missed Calls: Press any key except , then press... -
Page 18: In-Call Options
In-Call Options During a call, your phone displays menu options by pressing To select an option, highlight it and press Flash to answer an incoming Call Waiting call or connect a third party during Three-Way Calling. Mute or Unmute Select Mute to mute your phone’s microphone. Select Unmute to reactivate the microphone. -
Page 19: Saving A Phone Number
Saving a Phone Number Your phone can store a total of 500 phone numbers in 300 internal Phone Book entries. Each Phone Book entry can store seven phone numbers, and the entry’s name can contain 16 characters. Your phone automatically sorts the internal Phone Book entries alphabetically. -
Page 20: Four-Digit Dialing
Four-Digit Dialing Enter four digits and press to display the 4-Digit Dialing option. If you select Abbrev. Dial, your phone dials the phone number in your internal Phone Book that ends with the four digits you entered. See “Setting Abbreviated Dialing” on page 49. To use 4-Digit Dialing: 1. -
Page 21: Controlling Your Phone's Settings
Controlling Your Phone’s Settings In This Section Sound Settings Display Settings Location Settings Airplane Mode TTY Use Phone Setup Options his section describes how you can change your phone’s settings to best suit your needs. Take a few moments to review these options and add or adjust the settings that are right for you. -
Page 22: Sound Settings
Reminder: To access the phone’s main menu, press mode. Menu items may be selected by highlighting them with the Navigation key and pressing Sound Settings Ringer Types Ringer types help you identify incoming calls and messages. You can assign ringer types to individual phone book entries, types of calls, and types of messages. -
Page 23: Selecting A Tone Length
Selecting Ringer Types for Calendar To select a ringer types for calendar: 1. Press to access the main menu. 2. Highlight Settings and press 3. Highlight Sounds and press 4. Highlight Ringer Type and press 5. Highlight Calendar and press 6. -
Page 24: Adjusting The Phone's Volume Settings
Adjusting the Phone’s Volume Settings To adjust the ringer/key volume: 1. Press to access the main menu. 2. Highlight Settings and press 3. Highlight Sounds and press 4. Highlight Ringer/Key Vol and press 5. Select the menu you wish to change and press Ringer Volume for adjusting Ringer tone volume. -
Page 25: Silence All
Silence All There may be times when you need to silence your phone entirely. The phone’s Silence All option allows you to mute all sounds without turning your phone off. To activate Silence All: 1. Press to access the main menu. 2. -
Page 26: Changing The Backlight Time Length
Changing the Backlight Time Length The backlight setting lets you select how long the display screen and keypad are backlit after any key press is made. To change the Main LCD or Sub LCD backlight setting: 1. Press to access the main menu. 2. -
Page 27: Changing The Display For Incoming Calls
Changing the Display for Incoming Calls You can set the color or downloaded image (screen saver) data to be shown on the Incoming Calls display. Follow these steps: 1. Press to access the main menu. 2. Highlight Settings and press 3. -
Page 28: Changing The Screen Saver
Changing the Screen Saver Your new phone offers you the option of displaying a screen saver while in Standby mode. To assign a screen saver: 1. Press to access the main menu. 2. Highlight Settings and press 3. Highlight Display and press 4. -
Page 29: Location Settings
Location Settings Your phone is equipped with a Location feature which will allow the network to detect your position, making some applications easier to use. Turning Location off will hide your location from everyone except 911. Note: Even if the Location feature is enabled, no service may use your location without your expressed permission. -
Page 30: Tty Use
TTY Use A TTY (also known as a TDD or Text Telephone), is a telecommunications device that allows people who are deaf or hard of hearing, or who have speech or language disabilities, to communicate via a telephone. Your phone is compatible with selected TTY devices. Please check with the manufacturer of your TTY device to ensure that it supports digital wireless transmission. -
Page 31: Setting Call Answer
Setting Call Answer This feature enables you to answer incoming calls by opening the clamshell so that you don’t have to press To activate this feature: 1. Press to access the main menu. 2. Highlight Settings and press 3. Highlight Others and press 4. -
Page 32: Setting Side Key Guard
Setting Side Key Guard This feature enables you to lock your side key (Side Camera key and Volume keys) while the clamshell is closed. To activate this feature: 1. Press to access the main menu. 2. Highlight Settings and press 3. -
Page 33: Setting Your Phone's Security
Setting Your Phone’s Security In This Section Accessing the Security Menu Locking Your Phone Unlocking Your Phone Changing the Lock Code Calling in Lock Mode Restricting Calls Using Special Numbers Erasing the Internal Phone Book Erasing Downloads Resetting Your Phone Resetting Your Pictures Account y adjusting the security settings on your phone, you receive peace of mind without sacrificing flexibility. -
Page 34: Accessing The Security Menu
Accessing the Security Menu You must enter your lock code to view the Security menu. To access the Security menu: 1. Press to access the main menu. 2. Highlight Settings and press 3. Highlight Security and press 4. Enter your lock code. Tip: If you can’t recall your lock code, try using the last four digits of either your Social Security number or your phone number or try 0000. -
Page 35: Restricting Calls
Restricting Calls You can restrict which phone numbers you can dial or receive calls from. (The Restrict Calls setting does not apply to 911 or Qwest Wireless Repair.) To restrict calls: 1. From the Security Menu display (See “Accessing the Security Menu”... -
Page 36: Erasing The Downloads
Erasing the Downloads To erase all data downloaded from the Web: 1. From the Security Menu display (See “Accessing the Security Menu” on page 54), highlight Erase D/L and press 2. If you’re sure you want to erase all data downloaded from the Web, highlight Yes and press If you have assigned downloaded data, the function returns to its default setting. -
Page 37: Understanding Roaming
Understanding Roaming Recognizing Icons on the Display Screen Your phone’s display screen always lets you know when you’re off the network available to you and whether your phone is operating in analog or digital mode. The following chart indicates what you’ll see depending on where you’re using your phone. -
Page 38: Setting Your Phone's Roam Mode
Setting Your Phone’s Roam Mode Your phone allows you to control your ability to roam. By using the Roaming menu option, you can determine which signals your phone accepts. Set Mode Choose from three different settings on your dual band/tri mode phone to control your roaming experience: 1. -
Page 39: Navigating Through Menus
Navigating Through Menus In This Section Menu Navigation Menu Structure Viewing the Menus his section is a road map for using your phone. Every function and feature can be accessed through a menu. Take a few moments to learn your way around, you’ll find that it makes your phone easier to use. -
Page 40: Menu Navigation
Menu Navigation The Navigation key on your phone allows you to scroll through menus quickly and easily. To navigate through a menu, simply press the Navigation key up or down. Menu Structure Selecting Menu Items As you navigate through the menu, menu options are highlighted. Select any option by highlighting it and pressing For example, if you want to view your last incoming call: 1. -
Page 41: Managing Call History
7. Voicemail 1. Call Voicemail 2. Details 3. Clear Count 8. Settings 1. Sounds 2. Display 3. Vision 4. Location 5. Roaming 6. Messaging 7. Security 8. Airplane Mode 9. Others 9. Tools/Extras 1. PC Sync 2. Calculator 3. World Clock . -
Page 42: Viewing History
Viewing History You’ll find the Call History feature very helpful. It is a list of the last 20 phone numbers (or internal Phone Book entries) for each calls that you placed, accepted, or missed. Call History makes redialing a number fast and easy. It is continually updated as new numbers are added to the beginning of the list and the oldest entries are removed from the bottom of the list. -
Page 43: Prepending A Phone Number From Call History
After you have saved the number, the new internal Phone Book entry is displayed. (See “Internal Phone Book Entry Options” on page 76.) Note: You cannot save phone numbers already in your internal Phone Book or from calls identified as No ID or Restricted. If the selected entry has already been stored in the phone book, Alternate Phone Number from Call History”... -
Page 44: Using The Internal Phone Book
Using the Internal Phone Book In This Section Internal Phone Book Entry Options Adding a New Internal Phone Book Entry Finding Internal Phone Book Entries Selecting a Ringer Type Dialing Services ow you know the basics that make it easier to stay in touch with people and information. -
Page 45: Internal Phone Book Entry Options
Internal Phone Book Entry Options To access an internal Phone Book entry’s options, display the entry list, highlight an entry and press number and press Options (right softkey). To select an option, highlight it and press Edit to edit the entry. Call to dial the phone number. -
Page 46: Entering Characters By Tapping The Keypad
Entering Characters by Tapping the Keypad To enter characters by tapping the keypad, select the Alphabet mode (see “Selecting a Character Input Mode” on page 76). Press the corresponding key until the desired character appears. By default, the first letter of a word is capitalized and following letters are lowercase. -
Page 47: Adding A New Internal Phone Book Entry
Entering CANNED SUFFIXes To enter canned suffix, select the CANNED SUFFIX mode. (See “Selecting a Character Input Mode” on page 76.) 1. In a text entry field, press the right softkey. 2. Highlight CANNED SUFFIX and press 3. Highlight your desired word by using the Navigation key and press Entering SMILEYS To enter smiley pictures, select the SMILEYS mode. -
Page 48: Finding Internal Phone Book Entries
Finding Internal Phone Book Entries There are several ways to display your internal Phone Book entries. Follow steps outlined in the sections below to display entries from the internal Phone Book menu. Finding Names You can review all the entries stored in your internal Phone Book or find an entry quickly by following these simple steps: 1. -
Page 49: Adding A Phone Number Or Address To An Internal Phone Book Entry
Adding a Phone Number or Address to an Internal Phone Book Entry To add a phone number or address to an entry: 1. Press to access the main menu. 2. Highlight Phone Book and press 3. Highlight Find Name and press Press on the Navigation key for the shortcut (steps 1 through 3). -
Page 50: Selecting A Ringer/Image Type For An Entry
Selecting a Ringer/Image Type for an Entry You can assign a ringer/image type to an internal Phone Book entry so you can identify the caller by the ringer or image type. (See “Ringer Types” on page 30.) To select a ringer/image type for an entry: 1. -
Page 51: Storing Special Numbers In The Phone Book
Storing Special Numbers in the Phone Book Using the Pause Feature Generally, when you call an automated system like voicemail boxes or credit card companies, you are required to enter a password or calling card number. Rather than entering the numbers manually each time, you can store the numbers in your internal Phone Book, separated by special characters called “pauses”. -
Page 52: My Phone Number
1. Press to access the main menu. 2. Highlight Phone Book and press 3. Highlight Speed Dial #s and press 4. To select a corresponding Speed Dial number from 2-9, highlight an unassigned number and press 5. Highlight the entry from the list and press 6. -
Page 53: Managing Schedules
Managing Schedules Calendar Use the Calendar to remind you of events or important calls you need to make. You can schedule up to 100 events, 15 Call Alarms and 20 To Do Items. Setting the Time/Date In a no service area or Analog service area, it’s necessary to set actual time before using the Calendar function. -
Page 54: Event Alerts
Event Alerts There are several ways your phone alerts you of scheduled events: By playing the alert tone (depending on the Alert and Ringer Volume setting). By blinking the LED. By displaying the event’s description on the Main LCD when the clamshell is open. -
Page 55: Call Alarm Alerts
Call Alarm Alerts There are several ways your phone alerts you of scheduled call alarms: By playing the alert tone (depending on the Alert and Ringer Volume setting). By blinking the LED. By displaying the name or phone number on the Main LCD when the clamshell is open. -
Page 56: Going To Today's Scheduler Menu
Going to Today’s Scheduler Menu If you are viewing the Scheduler menu and wish to go to the Scheduler menu for today’s date: To view your scheduled events and Call Alarms: 1. Press to access the main menu. 2. Highlight Calendar and press 3. -
Page 57: Adding A To Do Item To The Schedule
Adding a To Do Item to the Schedule To add your To Do item to the schedule: 1. From the To Do List display, highlight the item you want to add to schedule and press Options 2. Highlight Add To Schedule and press 3. -
Page 58: Displaying Your Phone Information
Displaying Your Phone Information Displaying User Address To display the current user address you have signed in with: 1. Press to access the main menu. 2. Highlight Phone Info and press 3. Highlight Phone# UserID and press If you sign out, “Vision Disabled” appears on the display. Your phone number also appears on the display. -
Page 59: Confirming The Downloaded Data
Downloading Files Your phone allows you to download images (screen savers), ringers, games, etc., from a Website. It is also possible to download from certain menus (Phone Book, Ringer Setting, or Display Setting). To download a file from the Web: 1. - Page 60 To download a ringer file from the Ringer Setting menu (Ringer Type and Start-up/Power-off Tone): 1. Press to access the main menu. 2. Highlight Settings and press 3. Highlight Sounds and press 4. Highlight Ringer Type and press 5. Highlight Voice Calls, Voicemail, Messaging, or Calendar and press .
-
Page 61: Confirming The Downloaded Data
Confirming the Downloaded Data The downloaded data will be automatically classified as games, ringers, images (screen savers) or an application folder. However, if any data has a different category, it is classified in the Others folder. When you have just finished downloading by pressing the left softkey (see “Options”), you can also confirm the downloaded data, as follows: To confirm the downloaded games folder:... - Page 62 To confirm the downloaded applications folder: 1. Press to access the main menu. 2. Highlight Downloads and press 3. Highlight Applications and press 4. Highlight the downloaded data you want to confirm and press 5. Select Run from the options and press Options: Run to play the downloaded application.
-
Page 63: Viewing The Downloaded Data Size
Icon Indication Type Item Icon (appears at the left side of the downloaded data) From Web Ringers (~64KB) (New Data) Voice (~64KB) (New Data) Screen Savers/Images (~64KB) (New Data) Animation (~64KB) (New Data) Animation Ringer (~64KB) (New Data) Game (~100KB) (New Data) Application (~100KB) (New Data) -
Page 64: Using Your Phone's Voice Services
Erasing old downloaded data to free space for new data If you try to download new data when the downloaded data’s memory is full, the warning message appears. You will be prompted to erase some old downloaded data. To get new download data: 1. -
Page 65: Using Voice-Activated Dialing
Using Voice-Activated Dialing With your Sanyo SCP-8100, you can use a Voice Dial tag to automatically dial a phone number in your internal Phone Book. Your phone can store up to 30 Voice Dial tags. (To create a Voice Dial tag, see “Programming Voice Dial Tag to Your Phone”... -
Page 66: Recording Voice Memos
Recording Voice Memos To record a memo in Standby mode: 1. Press to access the main menu. 2. Highlight Voice Service and press 3. Highlight Voice Memo and press 4. Highlight Record and press Press and hold (right softkey) for the shortcut (steps 1 Memo to 4 above). -
Page 67: Erasing Voice Memos
Erasing Voice Memos To erase all Voice Memos: 1. Press to access the main menu. 2. Highlight Voice Service and press 3. Highlight Voice Memo and press Shortcut: Press (right softkey) to access the Voice Memo menu. Memo 4. Highlight Play and press 5. - Page 68 Selecting an Announcement for Screen Call 1. Press to access the main menu. 2. Highlight Voice Service and press 3. Highlight Screen Call and press 4. Highlight Announcement and press 5. Depending on your preference, highlight Pre-Recorded or Custom, and press Recording Your Name for a Pre-Recorded Announcement 1.
-
Page 69: Using Your Phone's Camera
Using Your Phone’s Camera In This Section Taking Pictures Sharing Picture Mail Storing Pictures Managing Picture Mail our phone gives you the ability to take full-color digital pictures, view your pictures using the phone’s display, and instantly share them with your family and friends. It’s fun and as easy to use as a traditional point-and-click camera –... -
Page 70: Taking Pictures
Taking Pictures Taking pictures with your phone’s built-in camera is as simple as choosing a subject, pointing the lens, and pressing a key. You can activate Camera mode and take pictures whether the phone is open or closed. To take a picture with the phone open: 1. -
Page 71: Creating Your Picture Mail
Creating Your Picture Mail Password The first time you use any of the picture management options involving the Picture Mail Website you will need to establish a Picture Mail password through your phone. This password will also allow you to sign in to the Picture Mail Website at http://pictures.qwest.com to access and manage your uploaded pictures. -
Page 72: Sharing Picture Mail
Setting the Self-timer To activate the Self-timer and get yourself in on the picture: 1. With the phone open and in Camera mode, press (right softkey). 2. Highlight Self-timer and press 3. Highlight the length of delay you want the timer to use (10 seconds or 5 seconds) and press Self-timer, highlight Off and press 4. -
Page 73: Sharing Picture Mail From Messaging
Note: icons next to contact’s names represent Mobile Phone and email. When entering a new contact, use the left/right Navigation key to toggle to the correct icon for the entry. Note: Only the email address OR the phone number may be selected for a recipient. -
Page 74: Picture Wallet
Press (right softkey) to display the following options: Options Camera to switch to Camera mode. Save to Wallet to save a picture to the Picture Wallet. (See “Picture Wallet” on page 135.) Upload to select Upload This or Upload All to upload a single picture or all pictures saved in Review/Share mode to the Picture Mail Website. -
Page 75: Managing Picture Mail
To view pictures stored in the Picture Wallet: 1. Press to access the main menu. 2. Highlight Pictures and press 3. Highlight Picture Wallet and press 4. Press Thumbnail (left softkey). Thumbnail pictures will display (up to four pictures per screen). 5. -
Page 76: Managing Online Picture Mail From Your Phone
Managing Online Picture Mail From Your Phone You can use your phone to manage, edit, or share pictures you have uploaded to the Picture Mail Website. (See “Review/Share Mode” on page 133 for information about uploading.) To view your online Picture Mail from your Phone: 1. -
Page 77: Accessing Online Picture Mail Options From Your Phone
Accessing Online Picture Mail Options From Your Phone 1. Select a picture from your online Picture Mail (see “Managing Online Picture Mail From Your Phone” on page 138). 2. Press (right softkey) to display options. Options 3. To select an option, highlight it and press Copy/Move to copy or move pictures to a selected album: Copy This to copy the selected picture to the album. -
Page 78: Section 3: Using Service Features
Section 3 Using Service Features... -
Page 79: Service Features: The Basics
Service Features: The Basics In This Section Using Voicemail Using Caller ID Responding to Call Waiting Making a Three-Way Call Using Call Forwarding ow that you’ve mastered your phone’s fundamentals, it’s time to explore the calling features that enhance your service. Section 3: Using Service Features Section 3A 3A: The Basics 145... -
Page 80: Using Voicemail
Note: You are charged for airtime minutes when you are accessing your voicemail from your phone. Using a Phone Other Than Your SCP-8100 to Access Messages: 1. Dial your wireless phone number. 2. When your voicemail answers, press 3. Enter your pass code. -
Page 81: Using Caller Id
Using Caller ID Caller ID lets people know who’s calling by displaying the number of the person calling. To block your phone number from being displayed for a specific outgoing call: 1. Press 2. Enter the number you want to call, and press To permanently block your number, call Qwest Wireless Repair. -
Page 82: Using Call Forwarding
Using Call Forwarding Call Forwarding lets you forward all your incoming calls to another phone number – even when your phone is turned off. You can continue to make calls from your phone when Call Forwarding is activated. To Activate Call Forwarding 1. -
Page 83: Your User Name
With Web access on your phone, you will be able to browse full- color graphic versions – not just text versions – of your favorite Websites, making it easier than ever to stay informed while on the go. Check sports scores, trade stocks, and shop all on your phone. -
Page 84: Signing In And Out Of Sprint Pcs Vision
Signing In and Out of Sprint PCS Vision You can sign out of Sprint PCS Vision off your phone; however, you will not have access to all services, including Web and messaging. While signed out, you can still place or receive phone calls, check voicemail, and use other voice services. - Page 85 Going to a Specific Website To go to a particular Website by entering a URL (Website address): 1. Launch the Web and press the right softkey. 2. Select Go to URL and press the left softkey. 3. Select Address and press the left softkey. 4.
-
Page 86: Messaging
Messaging Now you can chat and receive email on your phone. When you chat, you can have a conversation without talking. Join in a Web- based chat room to exchange information on a specific topic or read conversations that others have posted -- you can even launch a one-on-one chat for a more in-depth conversation. -
Page 87: Message Options
Message Options After you display a Message, press options. To select an option, highlight it and press Call Back to dial the phone number of the sender (if applicable). Save Phone# to save the sender’s phone number, if it is not already in your internal Phone Book (if applicable). -
Page 88: Extracting Phone Numbers From A Message
Extracting Phone Numbers From a Message After you display a Message, press To extract a phone number contained in the message: 1. Highlight Extract Info and press 2. Highlight Phone# and press All the phone numbers contained in the message are displayed. -
Page 89: Creating Folders For Messages
Creating Folders for Messages You can create up to ten folders to store your Messages. If 10 user defined folders exist, “Create Folder” menu disappears. 1. Press to access the main menu. 2. Highlight Messaging and press 3. Highlight Notifications and press appears). -
Page 90: Editing Folders
Editing Folders To edit a folder: 1. From the folder list display, highlight your desired folder except for Unfiled. 2. Press (right softkey). Options 3. Highlight Edit Folder and press 4. Select the box under your desired option to edit, and press Folder Name to edit the folder name. -
Page 91: Short Mail
Short Mail Using Short Mail With Short Mail, you can use a person’s wireless phone number to send instant text messages from your Sprint PCS Vision enabled phone to their messaging-ready phone – and they can send messages to you. When you receive a new message, you’ll automatically be notified with a one-way text message. -
Page 92: Chat
Chat Sprint PCS Vision gives you the ability to join wireless chatrooms from your phone. Send text messages and icons to chatroom participants or launch a one-on-one (private) chatroom. To access a chatroom from the browser: 1. Press to access the main menu. 2. -
Page 93: Downloading Games, Ringers, And Screen Savers
Downloading Games, Ringers, and Screen Savers With Sprint PCS Vision and your new phone, you have access to a wide variety of downloadable ringers, screen savers, and games. The basic steps required to access and download these files is outlined below. Accessing the Download Menus To access the Sprint PCS Vision download menus:... -
Page 94: Games
Games You can play a variety of entertaining and graphically-rich games on your phone. New games are easy to download and play. Tip: For complete instructions on downloading, see “Downloading Games, Ringers, and Screen Savers” on page 172. Downloading Games 1. -
Page 95: Ringers
Ringers Tip: For complete instructions on downloading, see “Downloading Games, Ringers, and Screen Savers” on page 172. Downloading Ringers To download an available ringer to your phone: 1. Press to access the main menu. 2. Highlight Downloads and press 3. Highlight Ringers and press 4. -
Page 96: Screen Savers
Screen Savers Tip: For complete instructions on downloading, see “Downloading Games, Ringers, and Screen Savers” on page 172. Downloading Screen Savers (Images) To download an available Screen Saver (Image) to your phone: 1. Press to access the main menu. 2. Highlight Downloads and press 3. -
Page 97: Sprint Pcs Vision
Sprint PCS Vision FAQs How will I know when my phone is ready for Sprint PCS Vision 9995554567@qwest.sprintpcs.com Your User name (for example, your phone number were 999-555-4567), will display on your phone’s display screen. How do I know when my phone is connected to Sprint PCS Vision services? Your phone automatically connects when Sprint PCS Vision service is used or an incoming message arrives. -
Page 98: Safety
Safety In This Section Getting the Most Out of Your Reception Maintaining Safe Use of and Access to Your Phone Caring for the Battery Acknowledging Special Precautions and the FCC Notice art of getting the most out of your phone is learning how the phone works and how to care for it. -
Page 99: Getting The Most Out Of Your Reception
Getting the Most Out of Your Reception Keeping Tabs on Signal Strength The quality of each call you make or receive depends on the signal strength in your area. Your phone informs you of the current signal strength by displaying a number of bars next to the signal strength icon. - Page 100 Do not engage in stressful or emotional conversations that may divert your attention from the road. Dial to report serious emergencies. It’s free from your wireless phone. Use your phone to help others in emergencies. Call roadside assistance or a special non-emergency wireless number when necessary.
-
Page 101: Caring For The Battery
Caring for the Battery Protecting Your Battery The guidelines listed below help you get the most out of your battery’s performance. Use only authorized batteries and desktop chargers. These chargers are designed to maximize battery life. Using other batteries or chargers voids your warranty and may cause damage. - Page 102 SAR values at or below the federal standard of 1.6 W/kg are considered safe for use by the public. The highest reported SAR values of the SCP-8100 are: AMPS mode (Part 22) - Head: 1.42W/kg; Body-worn: 0.79W/kg CDMA mode (Part 22) - Head: 1.37W/kg; Body-worn: 0.76W/kg PCS CDMA mode (Part 24) - Head: 1.34W/kg;...
-
Page 103: User's Guide Proprietary Notice
This will be helpful if you need to contact us about your phone in the future. Model: Sprint PCS Vision -enabled Phone SCP-8100 Serial No.: User’s Guide Proprietary Notice CDMA Technology is licensed by QUALCOMM Incorporated... - Page 104 Ringers 176 Screen Savers 178 T9 Text Input 77 Three-Way Calling 149 TTY Use 46 Unlocking Your Phone 55 Updates 167 Voicemail Notification 146 Retrieving 147 Setting Up 5, 146 Volume Settings 34 Web 152 Browsing 154 Launching 152 194 Index...
Need help?
Do you have a question about the SCP-8100 and is the answer not in the manual?
Questions and answers