Table of Contents
Advertisement
Available languages
Available languages
Owner's Manual
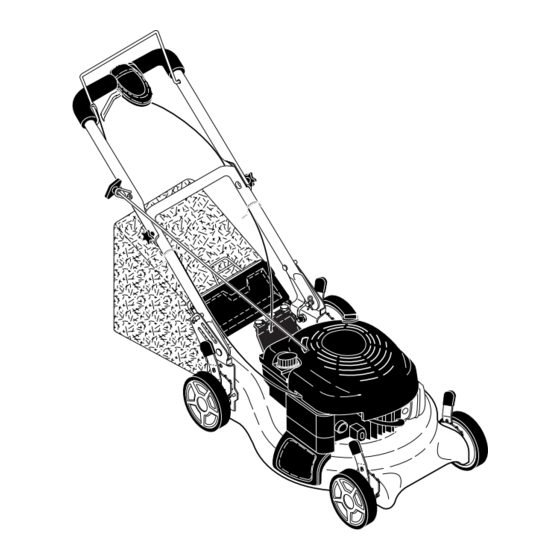
ROTARY LAWN MOWER
650 Series Briggs & Stratton Engine
Power-Propelled
21" Multi-Cut
Model Number 6521RS
Product Number 961 45 00-05
• Español, p. 19
CAUTION:
Read and follow all
Safety Rules and In struc tions
before operating this equipment
Advertisement
Table of Contents

Related Manuals for Husqvarna 6521RS


Summary of Contents for Husqvarna 6521RS
- Page 1 Owner’s Manual ROTARY LAWN MOWER 650 Series Briggs & Stratton Engine Power-Propelled 21" Multi-Cut Model Number 6521RS Product Number 961 45 00-05 • Español, p. 19 CAUTION: Read and follow all Safety Rules and In struc tions before operating this equipment...
-
Page 2: Table Of Contents
TABLE OF CONTENTS Safe ty Rules ..........2-3 Maintenance ........12-15 Warranty ...........4 Ser vice and Ad just ments....15-16 Prod uct Spec i fi ca tions ......5 Stor age ..........16-17 Assembly / Pre-Operation ......6 Trou ble shoot ing .........17-18 Op er a tion..........7-11 Re pair Parts........36-39 Maintenance Sched ule ......12 SAFETY RULES... - Page 3 Resources Code). Other states may have similar laws. Federal laws apply on federal lands. A spark arrester for the muffl er is available through your nearest Husqvarna or other authorized service center (See the REPAIR PARTS section of this manual).
-
Page 4: Warranty
Warranty Registration Card is properly fi lters, guide bars, lubricants, rewind springs, saw fi lled out and mailed to Husqvarna Forest & Garden chain, spark plugs, starter ropes and tines; Company. This card should be mailed within ten (10) (2) Natural discoloration of material due to ultraviolet days from the date of purchase in order to confi... -
Page 5: Product Specifications
ACCESSORIES These accessories were available when this lawn mower was produced. They are not shipped with your mower. They are also available at most Husqvarna retailers and service centers. Some of these accessories may not apply to your lawn mower. -
Page 6: Assembly / Pre-Operation
ASSEMBLY / PRE-OPERATION Read these instructions and this man u al in its entirety before you attempt to assemble or operate your new lawn mower. IMPORTANT: This lawn mower is shipped WITHOUT OIL OR GASOLINE in the engine. Your new lawn mower has been as sem bled at the factory with the ex cep tion of those parts left unassembled for shipping purposes. -
Page 7: Safe Ty Rules
OPERATION KNOW YOUR LAWN MOWER READ THIS OWNER'S MANUAL AND ALL SAFETY RULES BEFORE OP ER AT ING YOUR LAWN MOWER. Compare the illustrations with your lawn mower to familiarize yourself with the location of various controls and adjustments. Save this manual for future reference. -
Page 8: Operation
DRIVE CONTROL ADJUSTMENT The operation of any lawn Over time, the drive control system may mower can result in foreign become “loose”, resulting in decreased objects thrown into the eyes, speed. There is a turnbuckle on the drive which can result in severe control housing to increase tension on the eye damage. - Page 9 CAUTION: Do not run your lawn mower with out mulcher plate or plug, clip- ping de fl ec tor or approved grass catch er in place. Never at tempt to op er ate the lawn mower with the rear door re moved or propped open.
- Page 10 SIMPLE STEPS TO REMEMBER WHEN CAUTION: Alcohol blended fuels CONVERTING YOUR LAWN MOWER (called gasohol or using ethanol or metha- nol) can attract moisture which leads to FOR MULCHING - separation and for ma tion of acids during 1. Rear mulcher plug installed. storage.
- Page 11 MOWING TIPS MULCHING MOWING TIPS CAUTION: Do not use de-thatcher IMPORTANT: For best performance, blade attachments on your mower. Such keep mower housing free of built-up attachments are hazardous, will damage grass and trash. See “CLEANING” in the your mower and could void your warranty. Maintenance section of this manual.
-
Page 12: Maintenance Sched Ule
MAINTENANCE BEFORE AFTER EVERY EVERY EVERY BEFORE EACH EACH 25 HOURS STORAGE HOURS OR SEASON HOURS Check for Loose Fasteners Clean / Inspect Grass Catcher * Check Tires Check Drive Wheels *** Clean Lawn Mower **** Clean under Drive Cover *** Check Drive Belt / Pulleys *** Check / Sharpen / Replace Blade Lubrication... - Page 13 LAWN MOWER IMPORTANT: Blade bolt is heat treated. If bolt needs replacing, replace only with Always observe safety rules when per- approved bolt shown in the Repair Parts form ing any main te nance. section of this manual. TIRES Blade adapter Crankshaft •...
- Page 14 ENGINE 7. Continue adding small amounts of oil, rechecking the dipstick until oil level LUBRICATION settles at FULL. DO NOT overfi ll, or Use only high quality detergent oil rated engine will smoke heavily from the with API service classifi cation SG–SL. Se- muffl...
-
Page 15: Service And Adjustments
CLEANING • Keep fi nished surfaces and wheels free of all gasoline, oil, etc. IMPORTANT: For best performance, • We do not recommend using a garden keep mower housing free of built-grass hose to clean lawn mower unless the and trash. Clean the underside of your elec tri cal system, muffl... - Page 16 Husqvarna three height adjustment holes. or other qualifi ed service cen ter for repair and ad just ment.
- Page 17 Add fl ame or spark. Allow the engine to cool before storing in any enclosure. TROUBLESHOOTING - See appropriate section in manual unless directed to a Husqvarna Parts & Repair Center. PROBLEM CAUSE CORRECTION Does not start 1.
- Page 18 TROUBLESHOOTING - See appropriate section in manual unless directed to a Husqvarna Parts & Repair Center. PROBLEM CAUSE CORRECTION Does not start 9. Control bar defective. 9. Replace control bar. (continued) 10. Fuel valve lever (if so 10. Turn fuel valve lever equipped) in OFF position.
- Page 19 TABLA DE MATERIAS Reglas de Seguridad ........ 19-20 Programa de Mantenimiento ......29 Garantía............21 Servicio y Adjustes ........32-33 Especifi caciones del Producto....... 22 Almacenamiento........33-34 Montaje / Pre-Operación ....... 23 Identifi cación de problemas...... 34-35 Operación ..........24-28 Partes de repuesto ........
- Page 20 HACER: • Nunca llenar contenedores en un vehículo, en un camión o caravana con un forro de plástico. • Puede recortar a través de la superfi cie de Colocar siempre los contenedores en el suelo la cuesta, nunca hacia arriba y hacia abajo. lejos de su vehículo antes de llenar.
- Page 21 La prueba de compra ha de presentarse al revendedor una garantía, todas las reclamaciones en garantía autorizado Husqvarna a fi n de obtener el servicio de se tendrán que enviar al productor; y garantía. La prueba ha de incluir la fecha de compra el (4) Componentes del Sistema de Control de las Emisio- número del modelo, el número de serie, y el nombre y la...
- Page 22 Estos accesorios estaban disponibles cuando se produjo la segadora. No son facilitados junto al cortacesped. También están disponibles en la mayoría de las tiendas de Husqvarna y en los centros de servicio. Algunos de estos accesorios tal vez no se apliquen a su segadora.
- Page 23 MONTAJE / PRE-OPERACIÓN Lea estas instrucciones y el manual completamente antes de tratar de montar u operar su sega- dora nueva. IMPORTANTE: Este cortacesped viene SIN ACEITE O GASOLINA en el motor. Su segadora nueva ha sido montada en la fábrica con la excepción de aquellas partes que se de- jaron sin montar por razones de envío.
- Page 24 OPERACIÓN FAMILIARICESE CON SU SEGADORA LEA ESTE MANUAL DEL DUENO Y LAS REGLAS DE SEGURIDAD ANTES DE OPARAR SU SEGADORA. Compare las ilustraciones con su segadora para familiarizarse con la ubicación de los diversos controles y ajustes. Guarde este manual para referencia en el futuro. Estos símbolos pueden apareser sobre su segadora o en la literatura proporcionada con el producto.
- Page 25 AJUSTE DEL MANDO La operación de cualquier Ocasionalmente, el sistema de mando puede segadora puede hacer que “afl ojarse”, provocando una disminución de la salten objetos extraños dentro de velocidad. Hay un torniquete en la sede del sus ojos, lo que puede producir mando para apretar la tensión del cable.
- Page 26 PRECAUCIÓN: No haga funcionar su sega- dora sin el planco o tapón de la acolchadera, el desviador de recortes o sin el recogedor de césped, aprobados, en su lugar. Nunca trate de operar la segadora cuando se ha removido la puerta trasera o cuando está...
- Page 27 PASOS SIMPLES DE RECORDAR AGREGUE GASOLINA • Llene el estanque de combustible hasta la CUANDO CONVIERTA SU SEGADORA parte inferior del cuello de relleno del es- PARA ACOLCHAMIENTO - tanque de gasolina. No lo llene demasiado. 1. La plancha acolchadora trasera instalada. Use gasolina regular, sin plomo, nueva y lim- 2.
- Page 28 CONSEJOS PARA SEGAR CONSEJOS PARA SEGAR Y ACOL- PRECAUCIÓN: No utilizar dispositivos anti- CHAR paja de la hoja en la segadora ya que estos IMPORTANTE: Para obtener el mejor accesorios son peligrosos, pueden dañar su rendimiento mantenga la caja de la segadora segadora y anular su garantía.
- Page 29 MANTENIMENTO ANTES DESPUES CADA CADA CADA ANTES DEL DE CADA DE CADA 25 HORAS O ALMACE- HORAS TEMPORADA HORAS NAMIENTO Revisar si hay Sujetadores Sueltos Limpiar/Inspeccionar el Recogedor de Césped * Controlar los Neumáticos Controlar las Ruedas Motrices *** Limpiar la Segadora **** Limpiar debajo la Cubierta de la Transmisión *** Revisar las Correas y las Poleas Impulsadas *** Revisar / Afilar / Cambiar la Cuchilla...
- Page 30 SEGADORA 4. Instale el perno de la cuchilla con la aran- dela de seguridad y la arandela endurecida Siempre observe las reglas de seguridad cu- en el adaptador de la cuchilla y el cigueñal. ando haga el mantenimiento. 5. Use un bloque de madera entre la cuchilla y la caja de la segadora y apriete el perno LLANTAS de la cuchilla girándolo en el sentido en que...
- Page 31 • La caja de engranajes se llena con lubricante 4. Limpie todo el aceite derramado en la sega- hasta el nivel adecuado en la fábrica. La dora y en el lado del motor. única vez que el lubricante necesita atención 5.
-
Page 32: Servicio Y Ajustes
LIMPIEZA • Mantenga las superfi cies pulidas y las rue- das sin gasolina, aceite, etc. IMPORTANTE: Para obtener el mejor rendimineto, • No recomendamos el uso de una manguera mantenga la caja de la segadora sin acumulacion de jardín para limpiar la segadora a menos de cesped y basura. - Page 33 Mediana mango su centro de servicio Husqvarna o con un otro Baja centro de servicio cualifi cado para repararla y/o ajustarla. IMPORTANTE: Nunca manipule el regulador del motor, el que ha sido ajustado en la fábrica...
- Page 34 Permita que se enfríe el motor antes de la formación de depósitos de goma en el com- almacenarla en algún recinto cerrado. SOLUCIÓN DE PROBLEMAS - Vea la sección apropiada en el manual amenos que esté dirigido a un centro de servico Husqvarna. PROBLEMA CAUSA CORRECCIÓN No arranca 1.
- Page 35 SOLUCIÓN DE PROBLEMAS - Vea la sección apropiada en el manual amenos que esté dirigido a un centro de servico Husqvarna. PROBLEMA CAUSA CORRECCIÓN No arranca 7. Cuchilla suelta o adaptador 7. Apriete el perno de la cuchilla (continuado) de la cuchilla quebrado.
- Page 36 REPAIR PARTS...
- Page 40 532 41 37-72 Rev. 2 05.01.07 BY Printed in U.S.A.
Need help?
Do you have a question about the 6521RS and is the answer not in the manual?
Questions and answers