Philips VideoPlus DVDR75 Operating Instructions Manual
Hide thumbs
Also See for VideoPlus DVDR75:
- Service manual (117 pages) ,
- Operating instructions manual (90 pages) ,
- Owner's manual (72 pages)
Table of Contents
Advertisement
Quick Links
Table of contents
A
Introduction
....................................
Dear Philips customer,
....................................................................................
Regional code
....................................................................................................
Technical data
...................................................................................................
Accessories
........................................................................................................
Important
...........................................................................................................
Cleaning the discs
.............................................................................................
Special functions of your DVD recorder
B
Connecting the DVD recorder
Important information for customers in Great Britain
Preparing the remote control for operation
Connecting your DVD recorder to the TV set
Connecting with a scart cable and 'Easy Link'
Connecting with a scart cable without 'Easy Link'
Connecting with an S-Video(Y/C)cable
Connecting with video(CVBS) cable
C
Connecting additional devices
Connecting additional devices to the second scart socket
Connecting additional video recorders
Connect camcorder to the front sockets
Connecting audio devices to the analogue audio sockets
Connecting audio devices to the digital audio socket
D
Installing your DVD recorder
Initial installation
.............................................................................................
Using a satellite receiver
...............................................................................
Allocating a decoder
......................................................................................
Manual TV channel search
............................................................................
Sorting TV channels automatically (Follow TV)
Automatic TV channel search (Autoinstall)
Adding and clearing TV channels manually
Setting the language/country
........................................................................
Switching over audio recording (2-channel sound)
Setting the time and date
..............................................................................
E
On screen information
Symbols in the menu bar
..............................................................................
Menu bar 1
.......................................................................................................
Menu bar 2
.......................................................................................................
Field for temporary messages
.....................................................................
Status field
........................................................................................................
Disc type symbols
..........................................................................................
Operating mode symbols
.............................................................................
Tuner information box
.................................................................................
Timer information box
.................................................................................
Table of contents
....................................................
...
.........................
...........................................
......................................
..........................................
..................................
.....................................................
..........................................................
....
...................
.....................................................
................................................
....................
............................
......
......................................
.............................................
...............................................
................................
................
F
3
Playback
3
General notes on playback
6
Inserting a disc
................................................................................................
6
Playing a DVD video disc
6
Playing a DVD+RW/ +R disc
7
Playing an audio CD
.......................................................................................
8
Playing an MP3 CD
.........................................................................................
9
Playing a (Super) Video CD
G
11
Additonal playback features
11
Changing to another title/chapter
11
Searching a disc
...............................................................................................
12
Still picture
.......................................................................................................
13
Slow motion
....................................................................................................
14
Search by time
.................................................................................................
16
Repeat/Shuffle play
.........................................................................................
17
Repeating a passage (A-B)
Scan feature
.....................................................................................................
Camera angle
...................................................................................................
19
Zoom feature
..................................................................................................
Select the audio language
19
Subtitles
............................................................................................................
19
H
20
20
Manual recording
21
General
.............................................................................................................
Recording without automatic switch-off
22
Interrupt recording (Pause)
Recording with automatic switch-off (OTR one-touch-recording)
22
Preventing accidental erasing of discs
24
Lining up recordings within a title (assemble cut)
24
Selecting the recording type (Quality)
25
Automatic recording from a satellite receiver (Sat recording)
27
Direct Record
.................................................................................................
28
Switching 'Direct Record' on or off
29
I
30
31
Managing the disc contents
32
General
.............................................................................................................
Favorite Scene Selection
33
Insert chapter markers
Hiding chapters
...............................................................................................
33
Deleting chapter markers
33
Changing the index picture
33
Splitting titles
...................................................................................................
34
Editing recording titles (name)
34
Playing the entire title
34
Deleting recordings/titles
35
Disc settings
....................................................................................................
35
Changing the disc name
35
Finishing editing
...............................................................................................
Finalising DVD+R discs
Delete DVD+RW disks
........................................
...........................................................................
..............................................................................
.......................................................................
.........................................................................
..............................................................
............................................................................
..............................................................................
..........................
...................................................
.........................................................................
........................................................
..................................
.......................................................
...........................................................
...............................................................................
.................................................................................
.............................................................................
..........................................................................
....................................................................
...................................................................................
.............................................................................
................................................................................
.................................................................................
................................................................................
36
36
36
37
38
38
39
40
........
41
41
41
42
42
42
43
43
44
44
44
45
45
46
46
47
48
....
49
49
50
51
............
52
53
54
.........
55
55
56
56
56
57
58
58
59
59
60
60
61
61
62
62
Advertisement
Table of Contents

Related Manuals for Philips VideoPlus DVDR75


Summary of Contents for Philips VideoPlus DVDR75
- Page 1 Table of contents Introduction ........Playback ........Dear Philips customer, ..................General notes on playback ................Regional code ....................Inserting a disc ....................Technical data ....................Playing a DVD video disc ................Accessories ......................Playing a DVD+RW/ +R disc ...............
-
Page 2: Table Of Contents
Programming a recording (TIMER) ..........General ......................Programming recordings with the VIDEO Plus+ ® System ....Programming recordings without the VIDEO Plus+ ® System ....How to change or delete a programmed recording (TIMER) ..... 'NexTView Link' ..................... Problem solving for programmed recordings .......... -
Page 4: The Remote Control
The remote control MONITOR Monitor: This button lets you switch between the TV receiver (internal tuner) in the DVD recorder (TV picture on the TV set) and playback on the DVD recorder. STANDBY m Switch on or off: To switch set on or off, interrupt menu function, interrupt a programmed recording (TIMER) TV/DVD TV/DVD switch: Switches the scart socket EXT 2 AUX-I/O directly... -
Page 5: (Timer)
If this button is pressed during recording, the DVD recorder will also switch to pause. Additional TV functions This will only work with TV sets with the same remote control code *RC5) (e.g. Philips TV sets) TV VOLUME q TV volume: Increase TV volume... -
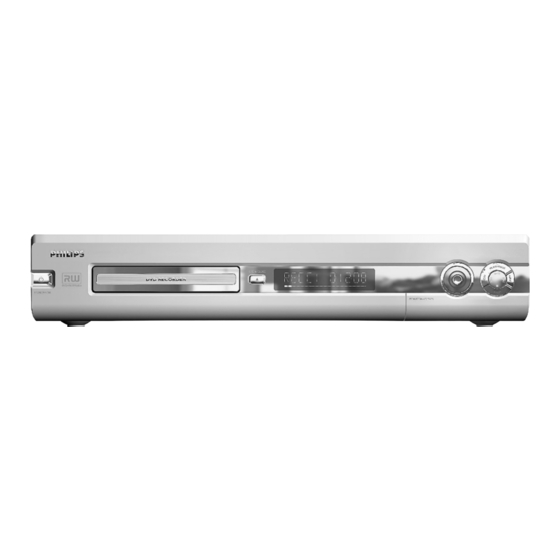
Page 6: Front Of The Device
Front of the device STANDBY/ON m Switch on or off: To switch off or on, interrupt a function, interrupt a programmed recording (TIMER) OPEN/CLOSE J Open/close disc tray: Open/close disc tray RECORD Record: Record the current TV channel Playback: To play a recorded disc Select previous title/search backwards Select next title/search forwards Stop: Interrupt playback/recording... -
Page 7: Back Of The Unit
Back of the unit 4MAINS Mains socket: Connection to the mains supply (230V/50Hz) ANTENNA IN Aerial input: Connection of the aerial TV OUT Aerial output: Connection of the TV set EXT 2 AUX-I/O Scart socket 2: Connection of an additional device (satellite receiver, set-top box, video recorder, camcorder, etc.) EXT 1 TO TV-I/O Scart socket 1: Connection of a TV set. -
Page 8: Messages In The Dvd Recorder Display
IIIIIIIIIIIIIII Disc bar: Displays the current position on the disc (disc pointer). Play/Record: Single flashing segment at the current position. Pause: Flashing segment on both sides of the current position. Stop: Illuminated segment at the current position. A satellite recording has been programmed. TIMER A recording (timer) has been programmed o(((... - Page 9 EMPTYDISC The disc inserted is either new or has been completely erased (no recordings). PROTECTED The disc is protected against recording. MAX TITLE The maximum number of titles per disc has been reached. The maximum number of titles per disc is 48. MAX CHAP The maximum number of chapters per title/disc has been reached.
-
Page 10: Introduction
Dear Philips customer, Instruction manuals are usually very dry since they are technically-oriented and often poorly translated. I have therefore been employed by Philips to help you. Allow me to introduce myself. My name is Phil. I will be guiding you through the instruction manual and helping you get to know your new DVD recorder. - Page 11 DVD recorder. Once this process is complete, no further recordings can be added. What can my DVD recorder do? Your Philips DVD recorder is a machine for recording and playing back digital video discs with "two-way" compatibility with the universal DVD video standard. This means: •) existing DVD video discs can be played on the recorder.
-
Page 12: Discs You Can Use
Discs you can use The following discs can be used in your DVD recorder for playback and recording: Playback and recording DVD+RW (Digital Versatile Disc + rewritable) DVD+R (Digital Versatile Disc + Recordable) Playback only: DVD Video (Digital Versatile Disc) DVD-R (DVD-Recordable) DVD-RW (DVD-Rewritable) These discs can only be played back if the recording was made in video mode and the recording was finalised. -
Page 13: Regional Code
Regional code Since DVD films are not normally released in all parts of the world at the same time, all DVD players have a specific regional code. Discs can be given a regional code. If the regional codes differ between the player and the disc, playback is not possible. DVDs must be marked 'ALL' for all regions or '2' for region 2 to work in this machine. -
Page 14: Important
Important Caution: Visible and invisible laser radiation. If the cover is open, do not look at the beam. Because of the risk of eye injuries, only qualified service engineers should open the machine and carry out maintenance or repair work. LASER Type: Semiconductor lasers InGaAlP (DVD), AlGaAs(CD) Wavelength: 660nm (DVD), 780nm (CD) -
Page 15: Cleaning The Discs
When installing the recorder in a cupboard ensure there is a gap of approximately 2.5 cm (1 inch) around the recorder to enable air to circulate freely and prevent overheating. Make sure that air can circulate freely through the ventilation slots on the machine. The machine should be placed on a firm surface. -
Page 16: Special Functions Of Your Dvd Recorder
B(Blue) are transmitted via separate channels. This reduces the interference that occurs with standard video cables. The Philips DVD recorder can play back pre-recorded DVDs and CDs. DVDs recorded using this DVD recorder can be played back on current and future DVD players. - Page 17 Dolby Laboratories standard for transmitting 5.1 channels. Five full-value channels are transmitted in this acoustic playback system. A further channel is used for low frequencies (effects). The loudspeakers are arranged front left, front middle, front right, rear left and rear right. This system is currently the most common system and is used in cinemas.
-
Page 18: Connecting The Dvd Recorder
Connecting the DVD recorder Important information for customers in Great Britain This set is fitted with an approved moulded 13 amp plug. To change the fuse in this plug or to attach a different plug, please proceed as follows: Take off the fuse cover and remove the old fuse Insert a new fuse. -
Page 19: Connecting Your Dvd Recorder To The Tv Set
Open the battery compartment, insert the batteries as shown and then close the battery compartment. The remote control is now ready to use. Its range is approximately 5 to 10 meters. 'Aim' correctly In the following sections, you will need the remote control for the first time. Aim the remote control at the DVD recorder and not at the TV set. -
Page 20: Connecting With A Scart Cable And 'Easy Link
Connecting with a scart cable and 'Easy Link' Your DVD recorder can exchange information with your TV set using 'Easy Link'. Your TV channels can also be transferred in the same order from your TV set to your DVD recorder using 'Easy Link'. -
Page 21: Connecting With A Scart Cable Without 'Easy Link
After the data transfer has been completed,, the following appears on the screen: 'EasyLink loading complete'. a 'Time', 'Year', 'Month', 'Date' appears on the TV screen Normally the date and time are taken from the data sent by the TV channel stored on programme P01. - Page 22 Insert one end of the supplied aerial cable into the TV OUT socket at the back of the DVD recorder and the other end into the aerial input socket at the back of the TV set. Plug a scart cable into the scart socket EXT 1 TO TV-I/O at the back of the DVD recorder and the scart socket for the DVD recorder at the back of the TV set (see TV set operating instructions).
-
Page 23: Connecting With An S-Video(Y/C)Cable
Connecting with an S Video(Y/C)cable This connecting cable, also known as the SVHS cable, is used to transmit the brightness signal (Y signal) and colour signal (C signal) separately. This mini DIN socket/plug is also called a Hosiden socket/plug. Have the following cables ready: an aerial cable (1, supplied), a mains cable (2, supplied), an S-Video(SVHS) cable (3), an audio cable (4, supplied, red/white plug). -
Page 24: Connecting With Video(Cvbs) Cable
Switch on the DVD recorder using STANDBY/ON m . IS TV ON?' will appear on the display. Then, read the paragraph on 'Initial installation' in 'Installing your DVD recorder'. Connecting with video(CVBS) cable This cable, usually with yellow Cinch connectors, is used for transmitting the Composite Video signal (FBAS, CVBS). - Page 25 Insert one end of the supplied mains cable into the mains socket 4MAINS at the back of the DVD recorder and the other end into the wall socket. The most important features of the DVD recorder will appear in scrolling text on the display. After the first installation is completed this function will be switched off.
-
Page 26: Connecting Additional Devices
Connecting additional devices Connecting additional devices to the second scart socket You can connect additional devices such as decoders, satellite receivers, camcorders, etc. to the EXT 2 AUX-I/O socket. When playback is started on this additional device the DVD recorder automatically connects the EXT 2 AUX-I/O scart socket with the EXT 1 TO TV-I/O scart socket. -
Page 27: Connect Camcorder To The Front Sockets
Connect camcorder to the front sockets To copy camcorder recordings, you can use the front sockets. These sockets are located behind the flap on the left hand side. Best picture quality If you have a DV or Digital 8 camcorder, connect the DV IN input of the DVD recorder to the appropriate DV output on the camcorder. -
Page 28: Connecting Audio Devices To The Digital Audio Socket
Connecting audio devices to the digital audio socket At the back of the DVD recorder there is a digital audio output socket DIGITAL AUDIO OUT for an coaxial cable. These can be used to connect the following: •) an A/V receiver or an A/V amplifier with a digital multi channel sound decoder •) a receiver with two channel digital stereo (PCM) Digital multi channel sound Digital multi-channel sound offers the best possible sound quality. -
Page 29: Installing Your Dvd Recorder
Installing your DVD recorder Initial installation After successfully connecting your DVD recorder to the TV set and other additional devices as described in the previous chapters, this chapter will show you how to start the initial installation. The DVD recorder automatically seeks out and stores all available TV channels. Connecting additional devices If you have connected additional devices such as a satellite receiver to the aerial cable, switch them on. - Page 30 Select the desired screen format position using CH- B or CH+ A . Virgin mode These settings will only be used if you insert a DVD that contains this information. TV Shape 4:3 letterbox 4:3 panscan Which screen formats can I select? 16:9 '4:3 letterbox' for a 'wide-screen' (cinema format) picture with black bars at...
-
Page 31: Using A Satellite Receiver
Satellite receiver If you are connecting a satellite receiver, please read the section on 'Using a satellite receiver'. Decoder If you are connecting a decoder, you must install it as described in the next section. a Sound may be distorted on some TV channels. b If the sound is distorted on any of the stored TV channels or if there is no sound at all, the wrong TV system may have been stored for the TV channel. -
Page 32: Manual Tv Channel Search
CH+ A and CH- B buttons or the number buttons Use the 0..9 on the remote control to select the TV channel for which you want to use the decoder. If necessary, use the MONITOR button to switch to the internal tuner. Press the SYSTEM-MENU button on the remote control. - Page 33 Select 'Installation' using CH- B or CH+ A and confirm with C . Select 'Manual search' using CH- B or CH+ A and confirm with In 'Channel/freq.', select the desired display using C . Installation Manual search 'Freq.'(Frequency), 'CH'(Channel), 'S-CH'(Special/hyperband channel) Channel/freq.
-
Page 34: Sorting Tv Channels Automatically (Follow Tv)
Sorting TV channels automatically (Follow TV) When the automatic channel search function is activated, the TV channels are stored in a specific order. This may differ from the order in which the TV channels appear on your TV set. This function changes the order of the TV channels stored in your DVD recorder to match the order on the TV set. -
Page 35: Automatic Tv Channel Search (Autoinstall)
a 'NOTV' will appear in the display. The DVD recorder is not receiving a video signal from the TV set. b Chech the connectors at both ends of the scart cable. b Check your TV's operating instructions to see which scart socket is used for video signals. -
Page 36: Adding And Clearing Tv Channels Manually
Select 'Autoinstall' using CH- B or CH+ A . Press C . 'Autoinstall' starts. Wait until all the TV channels have been found. Installation Autoinstall This can take several minutes. Searching for TV channels When Autoinstall has finished, 'Autoinstall complete' will appear on 00 Channels found the TV screen. -
Page 37: Setting The Language/Country
Using CH- B or CH+ A select the TV channel that you want to Installation Sort TV channels delete or whose order you want to change. • P01 BBC1 Confirm with C . P02 BBC2 P03 ITV Deleting TV channels Unwanted channels or those with poor reception can be deleted using CLEAR . -
Page 38: Switching Over Audio Recording (2-Channel Sound)
Select the appropriate setting using CH- B or CH+ A and confirm with OK . To end, press SYSTEM-MENU . Switching over audio recording (2 channel sound) Some TV programmes transmit an extra audio signal in stereo in addition to the normal audio signal (2-channel sound). -
Page 39: Setting The Time And Date
Setting the time and date If the display shows an incorrect time or '--:--', the time and date must be reset manually. Press SYSTEM-MENU on the remote control. The menu bar appears. ' symbol with D or C . Select ' Select 'Installation' using CH- B or CH+ A and confirm with C . -
Page 40: On Screen Information
On screen information You can check or change many of the functions and settings of your DVD recorder via the system menu bar. The menu bar cannot be displayed during recording. Symbols in the menu bar Press SYSTEM-MENU to open and close the menu bar (main menu). Use D and C to select the relevant function. -
Page 41: Field For Temporary Messages
Field for temporary messages The top left corner of the menu line contains a field for temporary messages relating to the various operating modes. This information appears briefly on the screen when certain disc functions have been activated: Shuffle Scan Repeat entire disc Repeat title Repeat track... -
Page 42: Operating Mode Symbols
Operating mode symbols Recording Stop Playback Playback Pause Record Pause Search forwards (8x speed) Search backwards (8x speed) Slow motion Tuner information box This field is located in the bottom left-hand corner of the screen. The aerial signal, the TV channel and the TV channel name for the selected programme are displayed. -
Page 43: Playback
Playback General notes on playback With this DVD recorder you can play back the following systems: •) DVD Video •) (Super)Video CD Disc •) DVD+RW Disc •) DVD+R Disc •) DVD-RW (video mode, finalised) •) DVD-R •) CD-R •) CD-RW •) Audio CD •) MP3 CD You can operate the video recorder using the remote control or the buttons on the front of the... -
Page 44: Playing A Dvd Video Disc
Opening/closing the tray using the remote control You can open and close the disc tray using the remote control. Press and hold the STOP h button on the remote control until the dialog box shows 'OPENING' or 'CLOSING'. Playback starts automatically. A menu may appear when a DVD is played back. -
Page 45: Playing A Dvd+Rw/ +R Disc
Playing a DVD+RW/ +R disc If the disc is write-protected or a finalised DVD+R disc, playback starts automatically. CH- B or If playback does not start automatically, use the C01 ANNA CH+ A button to select the title you want to play on the index screen. -
Page 46: Playing An Mp3 Cd
Playing an MP3 CD MP3 (MPEG1 Audio Layer-3) files are highly compressed music files. Using this technology the data volume can be compressed by a factor of 10. This means it is possible to record 10 hours of music in CD quality on a single CD-ROM. When creating MP3 CDs please note the following: File system: ISO9660 Directory structure: maximum of 8 levels... -
Page 47: Playing A (Super) Video Cd
Playing a (Super) Video CD (Super) Video CDs may be equipped with PBC (Play Back Control). This means that special playback functions (menus) can be directly selected. The video CD must be PBC compatible (see CD case). 'PBC' is active in the default settings. Insert a (Super) Video CD. -
Page 48: Additonal Playback Features
Additonal playback features Changing to another title/chapter If there is more than one title or chapter on a disc you can change to another title or chapter as follows. However if there are several chapters within a title, these will be selected. The title can then still be selected via the menu bar. -
Page 49: Still Picture
Still picture During playback, press PAUSE 9 to stop playback and display a still 2:04 picture. Frame advance via menu bar During a still picture press SYSTEM-MENU on the remote control. The menu bar will appear at the top of the screen. ' symbol using C or D and confirm with CH- B . -
Page 50: Repeat/Shuffle Play
Enter the start time with the digit keys 0..9 from where playback should start. Confirm with OK . a The time entered will flash on the screen b The selected title is shorter than the time entered. Enter a new time or Problem cancel the function by pressing SYSTEM-MENU . -
Page 51: Scan Feature
Scan feature This feature plays back the first 10 seconds of each chapter (DVD) or track (CD). During playback, press PLAY MODE . Select ' ' using PLAY MODE . After 10 seconds the DVD recorder switches to the next chapter/index. -
Page 52: Select The Audio Language
Confirm with OK . To stop the feature, press PLAY G and then SYSTEM-MENU . Select the audio language Many pre-recorded DVD discs have more than one audio language. The language initially selected for playback will be the one you selected when you first set up the DVD recorder. However you can change the audio language of the inserted disc at any time. -
Page 53: Manual Recording
Manual recording General Which discs can I use for recording? With this DVD recorder, you can record on two types of DVD: DVD+RW This disc can be written to and then the contents deleted. DVD+R This type of disc can only be recorded once. If you want to play this DVD in a DVD player it must be finalized using the 'Finalise disc' function. -
Page 54: Recording Without Automatic Switch-Off
Recording without automatic switch off Switch on the TV set and select the programme number for the DVD recorder. Insert a disc on which the recording is to be made. This disc is then checked for content and system. READING' will appear on the display. a Index display b A DVD+RW disc has been inserted that already contains recordings. -
Page 55: Interrupt Recording (Pause)
1:16:51 Insert chapter markers During recording you can mark scenes so you can find them or hide them later. During recording, press FSS & at the start point. 'Inserting marker' appears on the TV screen. In the display, the number of the 'CHAPTER' increases by one. -
Page 56: Recording With Automatic Switch-Off (Otr One-Touch-Recording)
Recording with automatic switch off (OTR one touch recording) Insert a disc. If necessary, use the MONITOR button on the remote control to switch to the internal tuner in the DVD recorder. Use CH+ A or CH- B to select the programme number (channel name) you want to record. -
Page 57: Lining Up Recordings Within A Title (Assemble Cut)
The entire disc is now protected. If an attempt is made to record on a protected disc, 'DISC LOCK' will appear on the display and 'Disc locked' will appear on the screen. Lining up recordings within a title (assemble cut) On a recorded DVD+RW disc you can add another recording to an existing title. -
Page 58: Selecting The Recording Type (Quality)
Selecting the recording type (Quality) You can select the picture quality of the recording using the recording quality feature and hence the maximum recording time per disc. You can check the quality by changing the recording mode and then watching the picture from the built-in tuner ( MONITOR button). -
Page 59: Automatic Recording From A Satellite Receiver (Sat Recording)
Automatic recording from a satellite receiver (Sat recording) You can use this function if you own a satellite receiver that can control other devices via a scart cable and a programming function (timer). For more information, please see the operating instructions for the satellite receiver. -
Page 60: Direct Record
Direct Record Can you record the right TV channel in seconds when the DVD recorder is switched off? No problem. If recording is started manually, the switched off DVD recorder takes the current TV channel from the TV set via the scart cable. You will find more information on how to switch 'Direct record' on or off in the next section 'Direct record'. -
Page 61: Switching 'Direct Record' On Or Off
Switching 'Direct Record' on or off Switch on the TV set. If required, select the programme number for the DVD recorder. SYSTEM-MENU on the remote control. The menu bar Press appears. ' symbol with D or C . Select ' Select 'Record settings' using CH- B or CH+ A and confirm with Select 'Direct Record' using CH- B or CH+ A . -
Page 62: Managing The Disc Contents
Managing the disc contents General Charly 1 00:29:59 • M1 Fri15/02/2003 When a recording is made to disc, the following additional information is also stored at the beginning of the recording: Empty title 01:30:01 •) Name of the recording If the TV station does not transmit a name, only the channel number and time will be stored as the name •) Length of the recording •) Record type (Quality) -
Page 63: Favorite Scene Selection
Favorite Scene Selection In this menu you can adapt a title to suit your particular needs. You can insert/delete chapter markers, hide chapters, select a new index, or split up a title. Press FSS & on the remote control during recording to open this menu. Insert chapter markers During recording, you can set or delete chapter markers within a title. -
Page 64: Deleting Chapter Markers
Using C select 'hidden'. The picture is shown darker. Switching quickly You can switch between show chapters ('visible') and hide chapters ('hidden') quickly and easily using SELECT . To end, press FSS & . During playback this chapter will be skipped. with C . -
Page 65: Changing The Index Picture
Changing the index picture Normally the first picture of a recording is used as the index picture. You can however choose any picture from the recording as the index picture. During playback, search for location of the new index picture. Press the PAUSE 9 button. -
Page 66: Playing The Entire Title
Editing recording titles (name) Some TV stations transmit the title (name) of a programme. In this case, the name will be included automatically (e.g. 'ROCKY'). Otherwise, the only the programme number (programme name) and the time are stored as the name of the recording. The name of the recording can only be changed after the recording has been completed. -
Page 67: Deleting Recordings/Titles
Deleting recordings/titles You can delete specific recordings from a disc. To do this, proceed as follows: Press the STOP h button or during playback press DISC-MENU . Using CH+ A or CH- B select the title you want to delete and confirm with C . -
Page 68: Changing The Disc Name
Changing the disc name In the 'Disc info display' press C . The 'Settings for' menu appears on the TV screen. Select 'Disc name' using CH+ A or CH- B and confirm with C . Settings for Philips1 Using C or D select the position where the letter/number/icon is to Disc name Philips1 be changed/re-entered. -
Page 69: Finalising Dvd+R Discs
Finalising DVD+R discs This feature is required to play back a DVD+R disc in a DVD player. Once the disc has been finalised no further recordings or changes can be made. In the 'Disc info display' press C . The 'Settings for' menu appears on the TV screen. -
Page 70: General
Programming a recording (TIMER) General Use 'Programming a recording (TIMER)', to automatically start and stop a recording at a later date. The DVD recorder will switch to the right programme number and begin recording at the correct time. With this DVD recorder, you can pre-programme up to six recordings within a period of one month. -
Page 71: Programming Recordings With The Video Plus+ System
Programming recordings with the VIDEO Plus+ ® System Thanks to this programming system, you no longer need to tediously enter the date, programme number, start and end time. All the information needed by the DVD recorder for programming is contained in the PlusCode programming number. This 9-digit PlusCode number is found in most TV listings magazine. -
Page 72: Programming Recordings Without The Video Plus+ System
The decoded data appears after confirmation. You can go back and Timer change the data. Select the appropriate input field with C or D . If VIDEO Plus+ system required, make changes using CH+ A , CH- B or the number Date Prog. - Page 73 Selecting daily/weekly recordings In 'Date' use SELECT to select from the following options: 'Mo-Fr': Repeated daily recordings from Monday to Friday 'Mon': Repeated weekly recordings (every week on the same day, e.g. Monday). Programme numbers of the 'EXT1' and 'EXT2'scart socket You can also programme recordings from external sources via scart socket EXT 1 TO TV-I/O ('EXT1') or EXT 2 AUX-I/O ('EXT2').
-
Page 74: How To Change Or Delete A Programmed Recording (Timer)
How to change or delete a programmed recording (TIMER) Switch on the TV set. If required, select the programme number for the DVD recorder. Press TIMER on the remote control. The programming mode selected last is marked. Select 'Timer List' using CH- B or CH+ A and confirm with C . Select the programmed recording (TIMER) you want to check, change Timer or delete with CH- B or CH+ A . -
Page 75: Problem Solving For Programmed Recordings
Problem solving for programmed recordings PROBLEM SOLUTION The DVD recorder is While a programmed recording is being made, you cannot operate your DVD recorder manually. If you want to cancel the programmed recording, press STANDBY m . not responding 'Switch off, timer The DVD recorder was switched on several minutes before the start of a programmed recording. -
Page 76: User Preferences
User preferences In this section you will learn how to set your user preferences on the DVD recorder. The symbols have the following meanings: Picture setting Sound setting Language setting Additional settings Remote control settings Disc settings Recording settings Installation Switch on the TV set. -
Page 77: Sound Settings
'Vertical video shift' Use this feature to adjust the position of the picture on your TV left or right using D , C to suit your TV set. 'SCART video' By default the recorder is set to 'RGB'. Select 'S-Video' if you want to connect an S-VHS recorder. -
Page 78: Language Settings
Language settings You can choose the following settings in this menu: 'Audio Language' Playback audio language Language Audio Language English Recording audio Language 1 'Recording audio' Subtitle English Menu English Audio recording Country Other 'Subtitle' Subtitle language 'Menu' Screen menu language 'Country' 'Country' Additional settings... -
Page 79: Remote Control Settings
'DVD player': The DVD recorder responds to a DVD player remote control. The DVD recorder also responds to the remote control of a DVD player (remote control code RC-6). Choose this setting if your Philips TV remote supports DVD functions. -
Page 80: Disk Feature Menu
Disk feature menu In this menu you can make the changes that relate to the disc: 'Access control' Please read the next chapter on 'Access control (child lock)'. Features Status box Standby 'Auto resume' Display Bright If playback of a pre-recorded DVD video disc or video CD is interrupted (button STOP h or OPEN/CLOSE J ) when the disc is reloaded (disc is started) playback starts at the precise location where it stopped. -
Page 81: Access Control (Child Lock)
Access control (Child Lock) Child lock (DVD and VCD) This feature enables discs to be locked for children. When Child Lock is on, a 4-digit code (PIN) needs to be entered before a disc can be played. You can also decide whether the inserted disc should always be played or should be played only once, despite the child lock •)'Play always': This disc is stored in a memory with space for 50 child-safe discs. -
Page 82: Authorising A Disc
Authorising a disc Insert a disc. The access control box will appear after a short delay. Using CH+ A or CH- B select 'Play once' or 'Play always'. Enter your PIN code using the number buttons 0..9 . Double-sided DVDs may have a different ID for each side. For these discs, each side must be authorised. -
Page 83: Changing The Country
(Disc features)' using CH- B or CH+ A and confirm Select ' with C . Confirm 'Access control' using C . Enter a 4-digit code of your choice. If the code is new, you may have to enter the code a second time as confirmation. Disc features Access control Enter code…... -
Page 84: Changing The Pin Code
To end, press D and then SYSTEM-MENU . Changing the PIN code Switch on the TV set. If required, select the programme number for the DVD recorder. Switch on the DVD recorder using STANDBY/ON m . Press SYSTEM-MENU . The menu bar appears ' icon using D or C . -
Page 85: Before You Call An Engineer
Before you call an engineer If you have any problems using this DVD recorder, the reason may be one of the following. You can also call the customer service centre in your country. The telephone numbers can be found on the back of this instruction manual. Have the model number (MODEL NO) and the production number (PROD.NO) of your recorder ready. - Page 86 PROBLEM SOLUTION There is no recording on the disc: Change disc. You inserted the wrong disc type: Your recorder can play back the following disc types: DVD Video, (Super)Video CD, DVD+R(W), Audio CD, , MP3-CD's You inserted the disc the wrong way: Insert the disc with the label facing upwards No playback on DVD Disc is dirty: Clean the disc recorder:...
-
Page 87: Digital Output
PROBLEM SOLUTION Distorted sound coming from a The DVD recorder is connected to the 'Phono-input' of your amplifier: This socket is provided only for record players without a preamplifier. Select a different audio input. connected hi fi amplifier The picture is The TV system of the disc does not match that of your TV set (PAL/NTSC). - Page 89 P-2795 L-A-VEHLA Phone: 2274 8250 Tel: 0810 00 12 03 PORTUGAL Phone: 352-1-4163063 OY PHILIPS AB PHILIPS INFO CENTER PHILIPS CE, The Philips Centre, Sinikalliontie 3, Alexanderstrasse 1 420 - 430 London Road, 02630 Espo 20099 Hamburg Croydon, Surrey Helsinki...
Need help?
Do you have a question about the VideoPlus DVDR75 and is the answer not in the manual?
Questions and answers