Philips Zenia 300 Vox User Manual
Hide thumbs
Also See for Zenia 300 Vox:
- User manual (47 pages) ,
- Specifications (2 pages) ,
- User manual (47 pages)
Table of Contents
Advertisement
Quick Links
Advertisement
Table of Contents

Related Manuals for Philips Zenia 300 Vox


Summary of Contents for Philips Zenia 300 Vox
- Page 2 By using the “pilot key” on the side of the handset you can scroll through the menus...
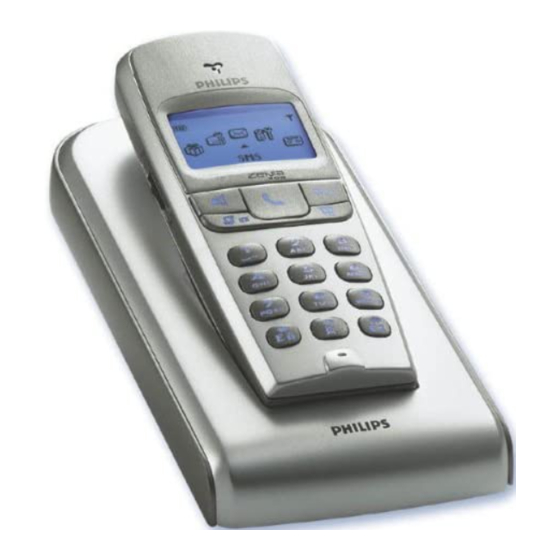
- Page 3 Zenia 300 Vox Handset Pilot key Line key Earpiece Intercom Correct key Cheapest rates Loudspeaker Headset connector Phonebook Call log Do not disturb & case mode Microphone Keypad lock & Edition Alarm clock Handset Zenia 300 Vox...
- Page 4 Icons on the display Steady ON Blinking Fast blinking The battery symbol Information on the base station display Handset & base displays...
- Page 5 Zenia 300 Vox Base station ON : OFF : ON : OFF : Blinking : Blinking fast : Answer machine control keys Base station...
-
Page 6: Table Of Contents
Setting the number of rings before answering Setting the voice prompts Philips has marked the battery and packaging with standard symbols designed to promote the recycling and appropriate disposal of your eventual waste. A financial contribution has been paid to the associated national recovery & recycling system. -
Page 7: Installing The Base Station
The Zenia 300 Vox handset charger is separate from the base so that it can be located in the most convenient place regard- less of the position of the telephone line connection. -
Page 8: Basic Use Of The Base Station
Connect the line and dial from the base station keypad When the phone rings, press to answer the call. Press again to end the call. (Redial last number called from the base) Press and then Press to activate/deactivate this mode with your own settings (see page 37). During an external call, you can access from the base to additional features. -
Page 9: Advanced Features Of Answer Machine
To increase/decrease the base loudspeaker volume during a call Call waiting Answer machine features To switch the Telephone Answer Machine (TAM) ON/OFF from the base To listen to your messages from the base To delete messages from the base The number of messages blinks fast on the base display when the answer machine is full. Call screening “call by call”... -
Page 10: Screen In Idle Mode
In idle mode, the Zenia 300 Vox display shows different information : In normal idle mode the display shows the date & time, the name of the handset and the instruction for using the menu. Missed call , new SMS... - Page 11 Basic principles Making a call from the handset Predialling Direct dialling Calling from phonebook Call Answering/ending a call Silence Calling from the call log Call To chain dial (predial mode) Calling/answering a call/other principles...
- Page 12 In-call features To mute the handset microphone Mute Unmute. Intercom (if there are several Zenia 300 Vox handsets) To record a conversation Record Warning : Recording a conversation may be illegal.We advise you to inform the person your are calling.
- Page 13 Editing systems Using capital letters The standard multi-tap system Keypad Keys Multi-tap Sequence ¤ ì G A 2 E ù f S X Q The Eatoni system Editing systems...
-
Page 14: Sending New Sms
The outgoing SMS can be up to a maximum of 160 characters long (E-mail address included). The special character ¤ counts for 2. Zenia 300 Vox can store up to 200 SMS (depending on the length of the SMS) for the 10 SMS boxes. -
Page 15: Reading The Sms List
To send an SMS to a fax number Send new SMS Send SMS to a fax Send Now To send an SMS to an E-mail address Send new SMS Send SMS to an E-mail Delivery report Send Now Reading the SMS Reply Forward to phone Copy to phonebook Call To reply to a new SMS... - Page 16 To copy a number to the phonebook Read SMS Copy to phonebook To call from the SMS list Read SMS Call View SMS View number Send again Delete SMS To read an SMS stored in the SMS list Read SMS View SMS To view the number Read SMS...
-
Page 17: Sms Settings
To delete an SMS Read SMS Delete SMS SMS settings To set the SMS mode SMS Settings Mode ON/OFF To set your personal SMS box SMS Settings SMS box Add new Change password Delete Warning :When an SMS box is deleted, so are the attached SMS. To set the SMS centre number(s) Incoming number Outgoing number... - Page 18 To set the validity period SMS Settings Validity period...
-
Page 19: Setting The Ringer Type
Sounds Babysit mode Registration Rename handset Languages Date & time Display contrast Backlight You can set the ringer for : - The external standard ringer for callers whose number is not stored in the phonebook or with no VIP settings (see page 30). - The internal ringer for intercom (if there are at least 2 handsets). -
Page 20: Setting The Notification Beep
Registration Warning : If you wish to associate non Philips handsets to the Zenia 300 Vox base station, make sure that this handset is GAP compliant otherwise it will not operate properly (see page 41). -
Page 21: Using The Zenia 300 Vox Handset With Several Base Stations
Using the Zenia 300 Vox handset with several base stations (Philips or non-Philips) Each Zenia 300 Vox handset can be used with up to 4 base stations.To use a handset with another base station, the handset must first be registered to that base station (see page 19). -
Page 22: Setting The Display Contrast
To set the time Handset Date & time Set time Warning : If your phone is connected to an ISDN line through an adapter the date & time may change after each call. Please check the date & time settings in the ISDN system. -
Page 23: Setting The Answer Machine On/Off
Navigation reminder : Answer machine (Go to) (Validate) (Scroll to) (Select) Using the answer machine Setting the answer machine To switch the Telephone Answer Machine (TAM) ON/OFF Answer machine TAM Settings ON/OFF Listening to your messages To listen to the new message(s) via the handset View To listen to saved messages via the handset Answer machine... -
Page 24: Deleting Messages
Once you have listened to the message you can delete it. 1- Go to Answer machine, validate 2- Select Saved messages, validate 3- Select the message to delete, validate 4- Scroll to Delete, validate Warning : If Answerphone full message appears on the handset display, there is no more space for messages. -
Page 25: Setting The Number Of Rings Before Answering
Setting the number of rings before answer To set the number of rings before answer Answer machine TAM Settings Number of rings before answering Setting the voice prompts To set the voice prompts Answer machine TAM Settings Voice prompts Message & date/Message only/OFF Setting the call screening To activate/deactivate the call screening Answer machine... -
Page 26: Setting The Recording Quality
To increase the volume of the base loudspeaker when on line, press several times. To decrease and/or deactivate the base loudspeaker when on line, press several times. There are 2 recording qualities : standard & high. In standard quality the total capacity is up to 60 mins. In high quality the total capacity is up to 30 mins. 1- Go to Answer machine, validate 2- Scroll to TAM Settings, validate 3- Scroll to Recording quality, validate... -
Page 27: Changing The Remote Control Code
The default code is 0000.We advise you to personalise it. 1- Go to Answer machine, validate 2- Scroll to TAM Settings, validate 3- Scroll to Remote control, validate 4- Scroll to Change code, validate 5- Delete the default code 0000 and enter the new remote c. code, validate Warning :The Remote Control code is not the Registration Code (RC). -
Page 28: Making Internal Calls/ Activating Babysit Mode
Navigation reminder : Intercom (Go to) (Validate) (Scroll to) (Select) Using the intercom nternal call or babysit mode activation Intercom, Mute Call transfer from the handset Intercom, Call End Intercom Transfer Intercom... -
Page 29: Using Conference Call
Conference call Intercom, Call Conference call Intercom... -
Page 30: Vip Settings
Navigation reminder : Phonebook (Go to ) (Validate) View Add new (Scroll to) (Select) Using the phonebook 255 names and numbers can be stored in the phonebook. The phonebook contains all the information related to the callers, especially the VIP settings.The names and numbers are shared with all the handsets registered to your base. -
Page 31: Viewing The Phonebook
Viewing the phonebook To view the phonebook To change a number Phonebook View Change number To change a name Phonebook View Change name To define VIP group Phonebook View Define the VIP group To set an SMS box number to a name Phonebook View Change SMS box... - Page 32 To delete a name Phonebook View Delete To send an SMS from the phonebook Phonebook View Send SMS New SMS/SMS list Delivery report Send Now Phonebook...
-
Page 33: Viewing The Call Log
Navigation reminder : Call log (Go to) (Validate) View Delete all (Scroll to) (Select) Call log Settings Using the call log to enter the call log.The call log stores up to 80 entries. : unanswered calls : outgoing calls : answered calls : local messages or recorded conversation : messages : messages (voice maibox/if info sent by... -
Page 34: Deleting The Call Log
To delete an entry from the call log Call log View Delete Warning : If a message is associated with the entry it is also erased from the answer machine. To send an SMS from the call log Call log View Send SMS New SMS/SMS list... -
Page 35: Using The Cheapest Rates Function
Navigation reminder : Network (Go to) (Validate) “ (Scroll to) (Select) Using the cheapest rates function To set the cheapest rates prefix Network Cheapest rates Fct Change name Change number To call with the cheapest operator rates To call with the cheapest rates Network Cheapest rates Fct Network... -
Page 36: Using The Operator Services
Using the operator services Example of service : Call forward To activate/deactivate call forward Network Operator Services Call forward Cancel call forward Network... -
Page 37: Setting The Vip Melody
Navigation reminder : Extra (Go to) (Validate) (Scroll to) (Select) VIP melodies To set the VIP ringers Extra VIP melody function Call cost and duration To view the call cost & time Extra Call cost & duration View total Reset Extra Call cost &... -
Page 38: Setting The “Do Not Disturb” Mode
To set the alarm ringer type Extra Alarm clock Alarm Clock Settings Ringer type To set the alarm ringer volume Extra Alarm clock Alarm Clock Settings Ringer volume “Do Not Disturb” mode To activate/deactivate the Do Not Disturb mode from the handset To activate/deactivate “Do Not Disturb”... -
Page 39: Setting The Ringer Type
Navigation reminder : Base station (Go to ) (Validate) (Scroll to) (Select) Setting the base station Setting the base station sounds To set the ringer type Base station Sounds Ringer type To record the personal melody Base station Sounds Record pers. melody Record new To set the ringer volume level Base station... -
Page 40: Registration Mode
Registration To register a DECT peripheral Base station Enable registration The line settings To change the dial mode (country dependent) Base station Line settings Dial mode Tone/Pulse To change the network type Base station Line settings Network type PSTN/PABX, To change the recall type Base station Line settings Recall type... -
Page 41: Setting The Service Codes
To change the operator type (country dependent) 1- Go to Base station, validate 2- Scroll to Line settings, validate 3- Scroll to Operator type, validate 4- Select among the suggested types and validate Note : Useful if the Caller Display service does not work when you subscribe to that service.The default setting is type 1. - Page 42 Using GAP standard compliance Register a DECT peripheral without keypad GAP standard...
-
Page 43: Conformity, Environment & Safety
Conformity, Environment and Safety Safety information Conformity : Power requirements : Warning ! Telephone connection : Safety precautions : Environmental care : Declaration of conformity Certificate of conformity... -
Page 44: Telephone Troubleshooting
- Un-register a handset (page 19) another handset - Wait until it is available Noise interference on your radio - The Zenia 300 Vox base station - Move the base station or power or television or mains power pack are too... - Page 45 Index Local message (Memo) 7, 26 Adding handset 19 Adding a name 29 Alarm clock 36 Making calls 7, 10 Answering call 7, 10 Message service (Operator voice mail) 32 Answer machine settings 23 Music on hold 38 Mute 4, 7, 11 Babysit mode 19, 27 Base keys 4 Name (Add, delete, change) 29, 30, 31...
Need help?
Do you have a question about the Zenia 300 Vox and is the answer not in the manual?
Questions and answers