OTARI MX-5050 Operation And Maintenance Manual
Master tape recorder
Hide thumbs
Also See for MX-5050:
- Instruction and maintenance manual (154 pages) ,
- Instruction manual (61 pages) ,
- Alignment procedure (2 pages)

Related Manuals for OTARI MX-5050


Summary of Contents for OTARI MX-5050
- Page 1 Part No. OS3-298 Lot: E MX-5050 MKIV-2, BIII-2 MASTER TAPE RECORDER OPERATION AND MAINTENANCE MANUAL FOURTH EDITION Printed: Dec 1997 Ed 4 (MA)
- Page 2 Copyright © 1992, 1997 Otari, Inc. and Otari Corporation Printed in Japan This manual may not be reproduced by any means without written permission.
- Page 3 CAUTION To prevent fire or shock hazard: Do not expose this unit to rain or moisture. Do not remove panels (unless instructed to do so). There are no user-serviceable parts inside. Refer servicing to qualified service personnel. PLEASE READ THROUGH THE SAFETY INSTRUCTIONS ON THE NEXT PAGE.
-
Page 4: Safety Instructions
SAFETY INSTRUCTIONS Read Instructions All the safety and operating instructions should be read before the device is operated. Retain Instructions The safety and operating instructions should be retained for future. Heed Warnings All warnings on the device and in the operating instructions should be adhered to. -
Page 5: Communication With Otari
: (49) 2159-1778 Another part of Otari’s continuing technical support program for our products is the continuous revision of manuals as the equipment is improved or modified. In order for you to receive the information and support which is applicable to your... -
Page 7: Table Of Contents
2.4.2 MX-5050 MKIV2 ........ - Page 8 Table of Contents MX-5050 Operation and Maintenance Manual 4.3 Operating the MX-5050 ..........4-5 4.3.1 Placing Reels on the Machine .
- Page 9 MX-5050 Operation and Maintenance Manual Table of Contents Section 7 Audio Alignment 7.1 Tools and Equipment Required ........7-2 7.2 Block Diagrams...
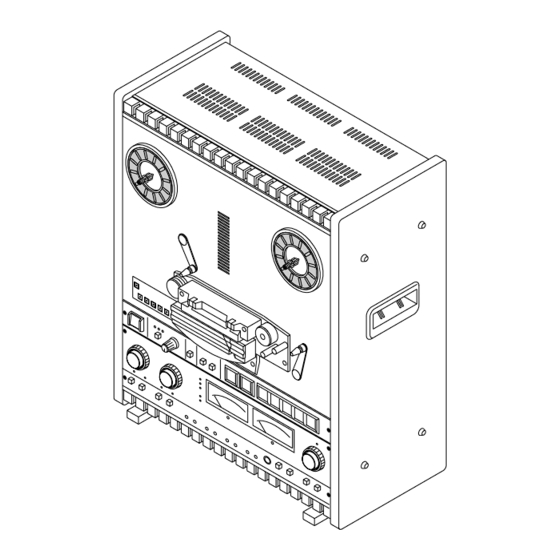
- Page 11 List of Figures Figure 1-1 Exterior Appearance ........1-2 Figure 2-1 Audio Connectors .
- Page 13 List of Tables Table 2-1 Standard Accessories ....... . . 2-2 2-2 Settings on Rear Panel .
-
Page 15: Section 1 Introduction
Section 1 Introduction This Section includes a general description of the features of the MX-5050 series tape recorders and information on the structure of this manual. 1.1 MX-5050 Series ........... . . 1-2 1.2 Using This Manual... - Page 16 Section 1 Introduction MX-5050 Operation and Maintenance Manual 1.1 The New MX-5050 Series The features of the MX-5050 Series tape recorders are described below. The new MX-5050 Series is divided into the following models: MX-5050 BIII-F Full Track, 1/4" Track Width MX-5050 BIII-2 2 Channel, NAB 1/4"...
-
Page 17: Using This Manual
Section 1 Introduction Features of the MX-5050 Series In addition to the usual tape recorder functions, the MX-5050 series has various additional features. All MX-5050 series tape recorders have the OTARI Standard Parallel I/O connector which allows for post production editing work with a synchronizer using time code. -
Page 18: Conventions Within This Manual
Section 1 Introduction MX-5050 Operation and Maintenance Manual Appendix A Block Diagrams This appendix includes block diagrams of the MX-5050 and level diagrams of the circuitry. Appendix B Troubleshooting This section describes some typical problems which may occur during operations, their possible causes and how to handle them. - Page 19 2.4.2 MX-5050 MKIV2 ........
-
Page 20: Unpacking And Inspection
Verify that all items, as listed in Table 2-1, have been received. Do not connect or operate the MX-5050 until this inspection has been completed. When sending the machine back to the local OTARI dealer or to OTARI, follow the packing directions printed on the carton. -
Page 21: Audio Signal Connection
MX-5050 Operation and Maintenance Manual Section 2 Installation 2.2 Audio Signal Connection 2.2.1 Audio Connectors The input to the machine is transformerless and balanced with an input impedance of 10 kΩ. The input level is fixed to +4dBu. The output from the machine is transformerless and balanced. The nominal output level is selected from +4 dBu or -16 dBu with the switch on the rear panel. - Page 22 Pin 1: Shield (GND) Pin 2: Cold Pin 3: Hot. When connecting an unbalanced machine to the MX-5050, change the pin assignment as shown in Figure 2-2. 1 GND COLD (SHIELD) COLD Balanced Input...
-
Page 23: Switch Position Adjustment
MX-5050 Operation and Maintenance Manual Section 2 Installation 2.3 Switch Position Adjustment If necessary, change the following switch settings on the rear panel before operating the machine. Table 2-2 Function Switch Setting Settings on Rear Panel MIC. Attenuator SW501 0dB/-20dB/OFF... - Page 24 Section 2 Installation MX-5050 Operation and Maintenance Manual DIP SW settings on the CONTROL PCB Note: When any of the following DIP SW settings are changed, the machine Table 2-3 must be turned off and on for the settings to take effect.
- Page 25 MX-5050 Operation and Maintenance Manual Section 2 Installation SW1-4, 1-5 Capstan PLL Reference Setting When the machine is in FIX mode, the capstan speed is adjusted with these switches (refer to § 6.7). Table 2-4 SW1-4 SW1-5 OFF SET (%) Capstan PLL Reference Setting + 0.2%...
- Page 26 Section 2 Installation MX-5050 Operation and Maintenance Manual SW2-3 This switch selects whether the audio signal is muted during the time from when the STOP button is pressed until the machine actually stops. ON: Not Mute OFF: Mute SW2-4 This switch selects whether the audio signal is muted during Fast Wind modes other than Fast Wind Cue mode.
-
Page 27: Pcb Assembly Location
MX-5050 Operation and Maintenance Manual Section 2 Installation 2.4 PCB Assembly Location 2.4.1 MX-5050 BIII The PCB Assemblies are located as shown in Figure 2-5. The CONTROL PCB Assembly is accessed by removing the rear panel. (Refer to Figure 2-9). The CONTROL PCB can be rotated to adjust parts on the COMP side. - Page 28 Section 2 Installation MX-5050 Operation and Maintenance Manual CONTROL PCB Assembly Rotation 1. Turn off the machine. Place the machine in the upright position. See Figure 2-7. 2. Remove the Foot and Deck Stand from the Rear Cover. 3. Remove the Rear Cover by removing the screws holding it in place.
-
Page 29: Mx-5050 Mkiv2
MX-5050 Operation and Maintenance Manual Section 2 Installation 2.4.2 MX-5050 MKIV2 The AMP section of the MKIV-2 is adjusted after removing the Top Panel. Accessing the AMP Section 1. Turn off the machine. Remove the Top Panel (for MKIV-2). 2. Adjust the PCB Assemblies (REC/REP AMP PCB Assembly) located inside the AMP section. - Page 30 Section 2 Installation MX-5050 Operation and Maintenance Manual CONTROL PCB Assembly Rotation Follow the steps below when adjusting the CONTROL PCB Assembly and internal parts of the MKIV-2. 1. Turn off the machine. Lay the machine on its side. 2. Remove the Bottom Panel by removing the screws holding it.
-
Page 31: Power Connection
When the AC Line Voltage is different from the factory setting, the Line Voltage connector should be changed to the proper one. In this case, contact OTARI or nearest OTARI dealer and order the proper Line Voltage connector. The Line Voltage connector (white) is located beside the Supply Reel Motor. -
Page 32: Fuse Replacement
Section 2 Installation MX-5050 Operation and Maintenance Manual 2.6 Fuse Replacement If a fuse is blown, first check the cause of the blown fuse, then replace the fuse with a new one as follows. CAUTION: For continued protection against fire hazard, replace only with the same type of fuse. -
Page 33: Speed Conversion (Biii-2)
FH7F010 VU Lamp 2.7 Speed Conversion (BIII-2) Normally, the MX-5050 BIII-2 is shipped from the factory with set at High Speed (15/7.5 ips). If you want to change this to Low Speed (7.5/3.75 ips), follow the steps below. 1. Remove the bottom panel to access the CONTROL PCB. Rotate the CONTROL PCB. -
Page 35: Section 3 Controls And Indicators
Section 3 Controls and Indicators This section describes the names and functions of the controls, indicators, and main components of the MX-5050. Drawings of the controls and indicators are used to associate the description with the real parts on the machine. -
Page 36: Tape Transport
Section 3 Controls and Indicators MX-5050 Operation and Maintenance Manual 3.1 Tape Transport TAPE SPEED TIME-IPS-% SEARCH ZERO REPEAT POWER SPEED MODE PITCH CONTROL SPEED REEL SIZE T.UP EXT FIX VARI DOWN EDIT Supply Reel Table Take Up Reel Table... -
Page 37: Transport Control Panel
MX-5050 Operation and Maintenance Manual Section 3 Controls and Indicators 3.2 Transport Control Panel TAPE SPEED TIME-IPS-% SEARCH ZERO REPEAT POWER SPEED MODE PITCH CONTROL SPEED REEL SIZE T.UP EXT FIX VARI DOWN EDIT 11 10 17 18 19 20 21... - Page 38 Similarly, when in Speed Change is being displayed, "P" appears in the rightmost column. [6] SEARCH ZERO Button Pressing this key places the MX-5050 into Search Zero mode. In Search Zero mode the tape is moved at Fast Wind speed to the location of 00:00:00 and is then stopped.
- Page 39 § 4.2.1. [16] EDIT Button Pressing this button while in Stop mode causes the MX-5050 to enter Edit Ready mode, in which the take-up motor is turned off and the safety switch for the Take-up tension Arm is deactivated. Pressing the PLAY button in Edit...
-
Page 40: Head Assembly
Section 3 Controls and Indicators MX-5050 Operation and Maintenance Manual 3.3 Head Assembly Figure 3-3 Head Assembly Numbers in square brackets [ ] refer to Figure 3-3. [1] Erase Head The Erase Head is made of ferrite. The track width is 2 mm for the MKIV-2 and BIII2, 2.75 mm for the MKIV2E and BIII2E, and 6.3 mm for the BIII-F. -
Page 41: Amplifier Panel
MX-5050 Operation and Maintenance Manual Section 3 Controls and Indicators 3.4 Amplifier Panel MK IV -8 CH 1 INPUT CH 2 REF FLUX OUTPUT LINE LINE HIGH 1 0 1 1 0 1 PEAK PEAK EQUALIZATION RECORD SEL-REP RECORD BIAS... - Page 42 Section 3 Controls and Indicators MX-5050 Operation and Maintenance Manual Numbers in square brackets [ ] refer to Figures 3-4 and 3-5. [1] Input Level Knobs The outer knob adjusts the line input signal level. The inner knob adjust the microphone input signal level.
-
Page 43: Audio Connector Panel
MX-5050 Operation and Maintenance Manual Section 3 Controls and Indicators 3.6 Audio Connector Panel PARALLEL CH 1 CH 2 CH 1 CH 2 CH 1 CH 2 LINE OUTPUT LINE INPUT INPUT GROUND POWER OUTPUT LEVEL EQUALIZATION REF FLUX MIC ATTENUATOR... - Page 44 Section 3 Controls and Indicators MX-5050 Operation and Maintenance Manual LINE OUTPUT LINE INPUT MIC INPUT CH 1 CH 2 CH 1 CH 2 CH 1 CH 2 OUTPUT LEVEL EQUALIZATION REF FLUX MIC ATTENUATOR LOW HIGH IEC NAB LOW MID HIGH...
- Page 45 This connector is for the supplied AC power cable. [10] PARALLEL I/O Connector This is the OTARI standard Parallel I/O connector. This 37 pin connector includes ports for Transport Control Command Status Tally Signal and External Capstan Speed Control Signal. For details refer to § 3.7.
-
Page 46: Connector Pin Assignments
Section 3 Controls and Indicators MX-5050 Operation and Maintenance Manual 3.7 Connector Pin Assignment Table 3-1 Parallel I/O Pin Assignment No. Signal Name Signal Level IN/OUT Function RECORD SW RECORD Switch PLAY SW PLAY Switch STOP SW STOP Switch F.FWD SW F.FWD Switch... - Page 47 MX-5050 Operation and Maintenance Manual Section 3 Controls and Indicators Table 3-3 Remote Control Connector (MKIV-8 Option) 1 - 14 5 - 18 2 - 15 6 - 19 3 - 16 7 - 20 4 - 17 8 - 21...
-
Page 49: Section 4 Operation
Section 4 Operation This section contains, first, a list and accompanying brief explanation of each of the operating conditions (or modes) of the MX-5050, and second, a detailed explanation of each operation or activity associated with the operation of the MX-5050 Tape Recorder. Please read both parts of this... -
Page 50: Operation Mode Reference Tables
Section 4 Operation MX-5050 Operation and Maintenance Manual 4.1 Operation Mode Reference Tables Table 4-1 Transport Modes MODE CONTROL EXPLANATION Stop STOP Tape motion stops. Play PLAY Tape moves from Supply to Take-up at the currently selected speed. F.Fwd F.FWD Tape moves from Supply to Take-up at Fast Wind speed. -
Page 51: Modes Of Operation
Edit Ready mode: To enter Edit Ready mode, press the EDIT button while in Stop mode. The Lamp on the EDIT button will flash when the MX-5050 is in Edit Ready mode. Edit Ready mode can be entered even if there is slack in the tape path. -
Page 52: Audio Channel Modes
Section 4 Operation MX-5050 Operation and Maintenance Manual 4.2.2 Audio Channel Modes Record Ready mode: When the RECORD and PLAY buttons are pressed, any channel which is in Record Ready will begin to Record. To place a channel into Record Ready mode, press the RECORD mode button for that channel. -
Page 53: Operating The Mx-5050
MX-5050 Operation and Maintenance Manual Section 4 Operation 4.3 Operating the MX-5050 4.3.1 Placing Reels on the Machine Using 5" or 7" EIA Reels 1. Turn the Reel Clamp portion of the Reel Spindle until it lines up with the three Reel Drive Pins on the Reel Table. -
Page 54: Threading The Tape
Section 4 Operation MX-5050 Operation and Maintenance Manual 4.3.2 Threading the Tape 1. Mount an empty reel on the Take-up side and mount a reel of tape on the Supply side. NOTE: Select the reel diameter by pressing the REEL SIZE T.UP S/L and REEL SIZE SUP S/L buttons after mounting the reels. -
Page 55: Operation Of The Transport
MX-5050 Operation and Maintenance Manual Section 4 Operation 4.4 Operation of the Transport 4.4.1 Playing Back the Tracks 1. Set both Record mode buttons to the SAFE position (not depressed). 2. Press the Monitor button to the TAPE position. 3. Press the PLAY button to start Play mode. -
Page 56: Sel-Rep Recording
Section 4 Operation MX-5050 Operation and Maintenance Manual 4.4.3 SEL-REP Recording SEL-REP operation means that the tape is reproduced with the Record Head instead of being reproduced with the Reproduce Head. With this operation, the signal reproduced with the Record head is recorded to the other track without time delay. -
Page 57: Tape Editing
MX-5050 Operation and Maintenance Manual Section 4 Operation 4.4.5 Tape Editing 1. Move the tape at the beginning of the edit section. When the tape reaches to the editing point, rotate the reel by hand to accurately locate the editing point, and finally place the editing point to the reproduce head. -
Page 58: Using The Pitch Control Feature
The pitch can be changed in 0.01% increments. The MX-5050 allows the last Vari Speed setting to be stored in memory for recall the next time the Vari Speed feature is used. -
Page 59: Locator Operation
MX-5050 Operation and Maintenance Manual Section 4 Operation 4.5 Locator Operation The MX-5050 Series tape recorders feature a built-in Auto Locator which has three cue point memories, a zero location memory, and the ability to repeat play between any two selected tape locations. -
Page 60: Search Play Mode
4.5.3 Search Play Mode To enter Search Play mode, press the PLAY button while in Search mode. The Lamp on the PLAY button will flash, and the MX-5050 will enter Play mode when the tape reaches the Cue Point. 4.5.4 Search Zero Mode To enter Search Zero mode, press the SEARCH ZERO button. -
Page 61: Repeat Mode
START REPEAT LOOP 4.6 Test Oscillator The MX-5050 includes a two-frequency Test Oscillator for use when recording reference tones for level matching or alignment purposes. 1. Press the desired Oscillator Frequency button (1kHz or 10kHz) to activate the internal Test Oscillator. -
Page 63: Section 5 Maintenance
Section 5 Maintenance The maintenance procedures described in this section should be performed at regular intervals. Cleaning and demagnetizing the heads and tape path should be performed before each recording session, and must be performed before any electronic alignments are performed. Lubrication should be performed after 1000 hours of operation or after 6 months, whichever comes first. -
Page 64: Maintenance Scheduling
1. Turn off the MX-5050 POWER switch. DEMAGNETIZER 2. With the demagnetizer at least 1 meter (3 feet) from the MX-5050, plug the HEAD demagnetizer into the AC mains and turn it on. 3. Slowly move the demagnetizer toward the Supply Tension Arm until the tip is approximately 3 mm (1/8") away from the arm. -
Page 65: Cleaning The Tape Path
K. Take-up Tension Arm F. Record Head 7. When all the above parts have been demagnetized, slowly move the demagnetizer at least 1 meter (3 feet) away from the MX-5050 and turn it off or unplug it. 5.3 Cleaning the Tape Path It is extremely important to clean the entire tape path regularly. -
Page 66: Lubrication
Section 5 Maintenance MX-5050 Operation and Maintenance Manual 5.4 Lubrication The Capstan Motor in MX-5050 machines utilizes an Oilite bearing at the front end, which requires lubrication. Use only Otari oil P/N PZ9E003. To lubricate the Capstan Motor bearing, follow these steps: 1. -
Page 67: Section 6 Transport Adjustment And Parts Replacement
Section 6 Transport Adjustment and Parts Replacement This section presents information and procedures for Transport Adjustment and Parts Replacement, and Adjustment after Replacement. Some parts require adjustment after replacement. 6.1 Transport Access ........... 6-2 6.2 Brake Torque Adjustment . -
Page 68: Transport Access
Section 6 Transport Adjustment and Parts Replacement MX-5050 Operation and Maintenance Manual 6.1 Transport Access The PCB Assemblies and main transport parts are located inside the machine. Therefore, to adjust these parts, certain panels must first be removed. Refer to § 2.4 for instructions on accessing these parts. - Page 69 MX-5050 Operation and Maintenance Manual Section 6 Transport Adjustment and Parts Replacement 8. Repeat steps 4 ~ 6 for a clockwise reading on the supply side. The readings should fall within the range listed in the table below. Table 6-2...
-
Page 70: Tape Lifter Adjustment
Section 6 Transport Adjustment and Parts Replacement MX-5050 Operation and Maintenance Manual 6.3 Tape Lifter Adjustment 1. Thread the machine with tape. 2. Check the gap between tape and the lifters in Stop mode. If the gap is 1 ~ 2 mm, then the following adjustment is not necessary. -
Page 71: Capstan Motor Adjustment And Pitch Control Adjustment
MX-5050 Operation and Maintenance Manual Section 6 Transport Adjustment and Parts Replacement 6.4 Capstan Motor Adjustment and Pitch Control Adjustment 1. Open the rear panel by removing the screws on the rear panel. 2. Turn on the machine, and load the tape on the machine. Make sure that the Tape Speed mode is set to the FIX. -
Page 72: Pinch Roller Pressure Adjustment
Section 6 Transport Adjustment and Parts Replacement MX-5050 Operation and Maintenance Manual 6.5 Pinch Roller Pressure Adjustment The pinch roller pressure against the capstan shaft is determined by the pinch roller solenoid spring. The pinch roller solenoid spring is adjusted with a nut as shown in Figure 6-5. - Page 73 MX-5050 Operation and Maintenance Manual Section 6 Transport Adjustment and Parts Replacement MX-5050MKIV-2 1. Remove the pinch roller cap screw and the roller cap. 2. Thread a hex socket head screw (M3, length 25~30mm) into the pinch roller. 3. Press the EDIT button and then press the PLAY button. The pinch roller will move to make contact with the capstan and both will rotate.
-
Page 74: Tape Speed Adjustment
Note: A special tape is required for this procedure. If an accurate speed tape is not available, please contact your Otari dealer for further information. Follow the procedure below to measure and adjust the tape speed. -
Page 75: Reel Table Height Adjustment
MX-5050 Operation and Maintenance Manual Section 6 Transport Adjustment and Parts Replacement 6.7 Reel Table Height Adjustment The Reel Table may be detached from the machine by removing the three cross-recessed screws accessible from the side of the transport. 1. Remove the side panel by removing the screws on the panel. -
Page 76: Head Assembly Replacement
Section 6 Transport Adjustment and Parts Replacement MX-5050 Operation and Maintenance Manual 6.8 Head Assembly Replacement The Head Assembly is mounted on the tape guide posts and is attached to the Guide Posts with screws marked "M" (refer to Figure 6-9). Each Head Stack is attached to the Head Bracket with screws marked "W", and the Head... -
Page 77: Head Position Adjustment
MX-5050 Operation and Maintenance Manual Section 6 Transport Adjustment and Parts Replacement 6.9 Head Position Adjustment Whenever replacing a head, the following head position adjustments are necessary. If the tape does not contact the heads properly, perform the following adjustments. - Page 78 Section 6 Transport Adjustment and Parts Replacement MX-5050 Operation and Maintenance Manual Wrap Adjustment 1. While reproducing 8kHz portion of the Low Speed Test Tape, apply pressure with a cotton swab to the left side of the head. Observe the level change. If the level increases by more than 0.5 dB, wrap adjustment is necessary.
-
Page 79: Section 7 Audio Alignment
Section 7 Audio Alignment This section includes the following sub sections. 7.1 Tools and Equipment Required ........7-2 7.2 Preliminary Adjustments . -
Page 80: Tools And Equipment Required
Section 7 Audio Alignment MX-5050 Operation and Maintenance Manual 7.1 Tools and Equipment Required • Alignment Tapes suitable for the tape speed most often used. Otari recommends the following Alignment Tapes. Table 7-1 Tape Speed Flux Level MRL* Catalog No. -
Page 81: Peak Indicator Level Adjustment
MX-5050 Operation and Maintenance Manual Section 7 Audio Alignment 7.2 Preliminary Adjustments These adjustments are performed when first receiving the machine, and then again only when an audio component, such as the Heads, is replaced. 7.2.1 Peak Indicator Level Adjustment NOTE: The PEAK indicator is factory preset to illuminate at a level equivalent to 1040 nWb/m, which corresponds to approximately 3% THD. -
Page 82: Test Oscillator Waveform And Level Adjustment
Section 7 Audio Alignment MX-5050 Operation and Maintenance Manual 7.2.2 Test Oscillator Waveform and Level Adjustment Perform this adjustment after the Level Matching Adjustment (§ 7.2.1) has been completed. 1. Set the Monitor button of CH1 to SOURCE position. 2. Press the 1kHz TEST OSC button on the AMP Panel. -
Page 83: Reproduce Adjustments
MX-5050 Operation and Maintenance Manual Section 7 Audio Alignment 7.3 Reproduce Adjustments 7.3.1 Reproduce Head Azimuth Adjustment 1. Turn off the power to the machine. 2. Clean and demagnetize the Heads, Lifters, and Tape Guides. Turn on the power to the machine. -
Page 84: Reproduce Level Adjustment
Section 7 Audio Alignment MX-5050 Operation and Maintenance Manual Improper Adjustment Improper Adjustment Proper Adjustment (180˚ Out of Phase) (90˚ Out of Phase) (In Phase) Figure 7-3 Wave shape On the Oscilloscope 7.3.2 Reproduce Level Adjustment Perform the following adjustment at the speed most often used. -
Page 85: Reproduce Equalization Adjustment
MX-5050 Operation and Maintenance Manual Section 7 Audio Alignment 7.3.3 Reproduce Equalization Adjustment NOTE: In this section, the Reproduce EQ is adjusted. Low Frequency Compensation will be covered in § 7.4.6. 1. Set the SPEED LO/HI switch to the HI position. -
Page 86: Record Electronics Adjustments
Section 7 Audio Alignment MX-5050 Operation and Maintenance Manual 7.4 Record Electronics Adjustments 7.4.1 Record Bias Level Adjustment 1. Thread the machine with the tape normally used for sessions. 2. Press down the RECORD READY button to the READY position and set the Monitor button to SOURCE position. -
Page 87: Record Head Azimuth Adjustment
MX-5050 Operation and Maintenance Manual Section 7 Audio Alignment 7.4.2 Record Head Azimuth Adjustment 1. Thread the machine with a reel of blank tape. 2. Set both Record Ready buttons to the READY position and set both Monitor buttons to TAPE position. -
Page 88: Record Level Adjustment
Section 7 Audio Alignment MX-5050 Operation and Maintenance Manual 7.4.3 Record Level Adjustment 1. Thread the machine with tape and set the SPEED Select Switches for the Tape Speed most often used. 2. Set both RECORD READY butons to the READY position. -
Page 89: Low Frequency Reproduce Equalization Adjustment
MX-5050 Operation and Maintenance Manual Section 7 Audio Alignment 7.4.5 Low Frequency Reproduce Equalization Adjustment 1. Thread a blank tape on the machine. 2. Connect the external oscillator to the CH1 and CH2 input connectors. 3. Set the Monitor button to SOURCE positon. Confirm that the VU meters indicate 0 VU. -
Page 91: Section 8 Specifications
Section 8 Specifications 8.1 Tape Transport ............8-2 8.2 Electronics . -
Page 92: Tape Transport
Section 8 Specifications MX-5050 Operation and Maintenance Manual 8.1 Tape Transport Track Configuration Tape Width: 1/4" Tape Width MX-5050 BIII-F Full Track MX-5050 BIII-2 2 Track NAB MX-5050 BIII-2E 2 Track DIN MX-5050 MKIV-2 2 Track NAB Heads BIII-F BIII-2... -
Page 93: Electoronics
MX-5050 Operation and Maintenance Manual Section 8 Specifications 8.2 Electronics Input Line Mode: Transformerless Active Balanced Input Impedance: 100kΩ, 20Hz–20kHz Nominal Level: +4dBu Max. Level: +30dBu Connectors: XLR Female type Mode: Transformerless Active Balanced Input Impedance: 10kΩ Min. Level: –70dBu/–50dBu/OFF switchable Mic. - Page 94 Section 8 Specifications MX-5050 Operation and Maintenance Manual Distortion Total Harmonic Distortion max. 0.3% (15 ips 1kHz, 250 nWb/m, AMPEX 456) Crosstalk MX-5050 BIII-2, MKIV-2 min. 55dB MX-5050 MKIV-2E, BIII-2E min. 48dB Depth of Erasure MX-5050 BIII-F min. 75dB MX-5050 BIII-2, MKIV-2 min.
- Page 95 MX-5050 Operation and Maintenance Manual Section 8 Specifications DIMENSIONS BIII EDIT PEAK PEAK MKIV-2 May 1992 8 - 5...
- Page 97 When ordering parts, give a full description, using both the part number and the name of the part. If there seems to be a discrepancy between the drawings herein and your MX-5050, contact OTARI. We assume no liability for improper servicing due to changes and improvements which we make that subsequently render certain of these documents obsolete.
-
Page 98: Biii
Section 9 and Exploded Views and Parts List MX-5050 Operation and Maintenace Manual BIII Case Assembly: K1168 No. Description Parts No. Notes Rear Cover Assembly K1168-A Grille, Ventilation CY5001A Plate C K102911 Foot CY4013 Panel, Side K116802 Hundle CY1004 Washer, Trim... - Page 99 MX-5050 Operation and Maintenance Manual Section 9 and Exploded Views and Parts List Case Assembly: K1168 May 1992 9 - 3...
- Page 100 Section 9 and Exploded Views and Parts List MX-5050 Operation and Maintenace Manual Chassis Assembly: T0067 No. Description Parts No. Notes Panel, Deck Cover T006702 Blind T006703 Control Assembly CB-23U Panel, Top T006701 Transformer, Power TF11030 Frame T006708 Angle T506405...
- Page 101 MX-5050 Operation and Maintenance Manual Section 9 and Exploded Views and Parts List Chassis Assembly: T0067 O3x8B O3x8B F4x15 F4x15 F4x12 F4x12 PS4x8 C3x12 PS3x6 TS3x6 PS3x6 PS3x6 TS3x6 PS3x6 F4x10 PS3x6 PS3x6 B4x8 C3x12 TS3x6 F4x10 PS3x6 30%, K.Sug...
- Page 102 Section 9 and Exploded Views and Parts List MX-5050 Operation and Maintenace Manual Head Assembly: KH-44K No. Description Parts No. Notes Head Housing Assembly KH-4Y-A Stud KH4Y009 Base, Head KH0C047 Spring, Head Adjustment GS2016 Bracket, Head KH0D178 Post, Guide KG4E001...
- Page 103 MX-5050 Operation and Maintenance Manual Section 9 and Exploded Views and Parts List Head Assembly: KH-44K C3x8B B3x8B TS3x6 C3x6B C3x12N C3x12B B3x8B C3x12B C3x12N B3x8B B3x8B F3x6N O3x30N O3x10B O3x10B O3x10B O3x10B PS3x8 PS3x8 C3x12 C3x12 PZ3x6 C3x12 50%, K.Sug...
- Page 104 Section 9 and Exploded Views and Parts List MX-5050 Operation and Maintenace Manual Reel Assembly : KW-41J No. Description Parts No. Notes Reel Shaft Assembly KW-41DG Reel Table Assembly KW-41EA Holder, Reel Table KW0B056 Protector, Reel KW0H007A Bracket, Reel Motor...
- Page 105 MX-5050 Operation and Maintenance Manual Section 9 and Exploded Views and Parts List Reel Assembly: KW-41J P3x8N F4x8N P3x8N F3x6 F4x8N C4x10 F3x6 F4x15 PS4x8 C4x10 F4x15 TS3x6 PS4x8 PS4x10 PS3x6 PS3x6 TS3x5 PS4x10 PS3x6 TS3x5 C3x6 PS3x6 C3x6 C4x10...
- Page 106 Section 9 and Exploded Views and Parts List MX-5050 Operation and Maintenace Manual Pinch Roller Assembly: KP-4X Capstan Assembly: KC-41H Shifter Assembly: KR-4W No. Description Parts No. Notes Cap, Pinch Roller KP0C034 Pinch Roller Assembly KP-4S-B Shaft, Pinch Roller KP0B060...
- Page 107 MX-5050 Operation and Maintenance Manual Section 9 and Exploded Views and Parts List Pinch Roller Assembly: KP-4X Capstan Assembly: KC-41H Shifter Assembly: KR-4W O3x10B F3x10 F3x10 F4x12 F4x12 PS3x6 PS3x6 PS4x6 PZ3x6 PS3x6 PS4x8 PS3x6 PS4x10 C4x8 PS4x6 K.Sugimo MX-5050...
- Page 108 Section 9 and Exploded Views and Parts List MX-5050 Operation and Maintenace Manual Tension Arm Assembly: KA-4X/KA-4Y Impedance Roller Assembly: KI-4T Timer Assembly: ZA-95G No. Description Parts No. Notes Cap, Arm KA0C005 Arm, Tension KA0A017A Shaft, Arm KA4J001 Washer, Polyslider...
- Page 109 MX-5050 Operation and Maintenance Manual Section 9 and Exploded Views and Parts List Tension Arm Assembly: KA-4X/KA-4Y Impedance Roller Assembly: KI-4T Timer Assembly: ZA-95G F2x4 F3x6 F2x4 F3x6 F3x12 TP2.6x6 PS4x6 C3x10 C3x10 PZ3x6 PS3x6 S3x4 B3x4 K.Sugimoto MX-5050 BQIII,...
- Page 110 Section 9 and Exploded Views and Parts List MX-5050 Operation and Maintenace Manual Control Assembly: CB-23U No. Description Parts No. Notes Panel, Control CB23U01 Sheet, Control Panel CB23U02 Switch, Power WH42062 Capacitor, Spark Killer CZ20001W TRANSPORT CONTROL SWITCH PCB Assembly...
- Page 111 MX-5050 Operation and Maintenance Manual Section 9 and Exploded Views and Parts List Control Assembly: CB-23U May 1992 9 - 15...
- Page 112 Section 9 and Exploded Views and Parts List MX-5050 Operation and Maintenace Manual Amplifier Assembly: A1220 No. Description Parts No. Notes Cap, Knob KN1102 Knob KN1100A Collar KZ7C111 Knob KZ1063B Spacer KZ6C017 Potentiometer RV224005 Amp Trim Panel Assembly A1220-A Panel, Amp. Top...
- Page 113 MX-5050 Operation and Maintenance Manual Section 9 and Exploded Views and Parts List Amplifier Assembly: A1220 December 1997 9 - 17...
- Page 114 Section 9 and Exploded Views and Parts List MX-5050 Operation and Maintenace Manual Connector Panel Assembly: CB-792 No. Description Parts No. Notes Panel, Connector CB79201 Connector, D sub 37pin CN237326 Terminal, Ground CN901040 Screw, Lock CN7B-212 AC Inlet CN603012 Connector, XL type, Male...
- Page 115 MX-5050 Operation and Maintenance Manual Section 9 and Exploded Views and Parts List Connector Panel Assembly: CB-792 May 1992 9 - 19...
- Page 116 Section 9 and Exploded Views and Parts List MX-5050 Operation and Maintenace Manual MKIV-2 Case Assembly: K1170 No. Description Parts No. Notes Tape Deck Assembly T0069 Head Assembly KH-44K Audio Amplifier Assembl A1221 Cover, Front K117001 Cover, Front K117002 Cover, Under...
- Page 117 MX-5050 Operation and Maintenance Manual Section 9 and Exploded Views and Parts List Case Assembly: K1170 May 1992 9 - 21...
- Page 118 Section 9 and Exploded Views and Parts List MX-5050 Operation and Maintenace Manual Chassis Assembly: T0069 No. Description Parts No. Notes Panel, Deck Cover T006711 Blind T006703 Control Assembly CB-23U Angle T007107 Panel, Deck T006701 Transformer, Power TF11030 Frame T007101...
- Page 119 MX-5050 Operation and Maintenance Manual Section 9 and Exploded Views and Parts List Chassis Assembly: T0069 O3x8B O3x8B F4x15 F4x15 F4x12 F4x12 TS3x8 TS3x6 PS4x8 PS3x6 PS3x6 PS3x6 PS3x8 PS3x6 TS3x6 PS4x6 PS3x6 PS3x6 PS3x6 B4x8 TS3x6 PS3x8 TS3x6 PS4x6 Y.Iwasaki...
- Page 120 Section 9 and Exploded Views and Parts List MX-5050 Operation and Maintenace Manual Head Assembly: KH-44K No. Description Parts No. Notes Head Housing Assembly KH-4Y-A Stud KH4Y009 Base, Head KH0C047 Spring, Head Adjustment GS2016 Bracket, Head KH0D178 Post, Guide KG4E001...
- Page 121 MX-5050 Operation and Maintenance Manual Section 9 and Exploded Views and Parts List Head Assembly: KH-44K C3x8B B3x8B TS3x6 C3x6B C3x12N C3x12B B3x8B C3x12B C3x12N B3x8B B3x8B F3x6N O3x30N O3x10B O3x10B O3x10B O3x10B PS3x8 PS3x8 C3x12 C3x12 PZ3x6 C3x12 MX-5050...
- Page 122 Section 9 and Exploded Views and Parts List MX-5050 Operation and Maintenace Manual Reel Assembly : KW-41J No. Description Parts No. Notes Reel Shaft Assembly KW-41DG Reel Table Assembly KW-41EA Holder, Reel Table KW0B056 Protector, Reel KW0H007A Bracket, Reel Motor...
- Page 123 MX-5050 Operation and Maintenance Manual Section 9 and Exploded Views and Parts List Reel Assembly: KW-41J P3x8N F4x8N P3x8N F3x6 F4x8N C4x10 F3x6 F4x15 PS4x8 C4x10 F4x15 TS3x6 PS4x8 PS4x10 PS3x6 PS3x6 TS3x5 PS4x10 PS3x6 TS3x5 C3x6 PS3x6 C3x6 C4x10...
- Page 124 Section 9 and Exploded Views and Parts List MX-5050 Operation and Maintenace Manual Pinch Roller Assembly: KP-4X Capstan Assembly: KC-41H Shifter Assembly: KR-4W No. Description Parts No. Notes Cap. Pinch Roller KP0C034 Pinch Roller Assembly KP-4S-B Shaft, Pinch Roller KP0B060...
- Page 125 MX-5050 Operation and Maintenance Manual Section 9 and Exploded Views and Parts List Pinch Roller Assembly: KP-4X Capstan Assembly: KC-41H Shifter Assembly: KR-4W O3x10B F3x10 F3x10 F4x12 F4x12 PS3x6 PS3x6 PS4x6 PZ3x6 PS3x6 PS4x8 PS3x6 PS4x10 C4x8 PS4x6 K.Sugimoto MX-5050...
- Page 126 Section 9 and Exploded Views and Parts List MX-5050 Operation and Maintenace Manual Tension Arm Assembly: KA-4X/KA-4Y Impedance Roller Assembly: KI-4T Timer Assembly: ZA-95G No. Description Parts No. Notes Cap, Arm KA0C005 Arm, Tension KA0A017A Shaft, Arm KA4J001 Washer, Polyslider...
- Page 127 MX-5050 Operation and Maintenance Manual Section 9 and Exploded Views and Parts List Tension Arm Assembly: KA-4X/KA-4Y Impedance Roller Assembly: KI-4T Timer Assembly: ZA-95G F2x4 F3x6 F2x4 F3x6 F3x12 TP2.6x6 PS4x6 C3x10 C3x10 PZ3x6 PS3x6 S3x4 B3x4 K.Sugimoto MX-5050 BQIII,...
- Page 128 Section 9 and Exploded Views and Parts List MX-5050 Operation and Maintenace Manual Control Assembly: CB-23U No. Description Parts No. Notes Panel, Control CB23U01 Sheet, Control Panel CB23U02 Switch, Power WH42062 Capacitor, Spark Killer CZ20001W TRANSPORT CONTROL SWITCH PCB Assembly...
- Page 129 MX-5050 Operation and Maintenance Manual Section 9 and Exploded Views and Parts List Control Assembly: CB-23U Y.Iwasaki MX-5050 BQIII, BIII-2, MKIV-2 CONTROL A'y CB-23U May 1992 9 - 33...
- Page 130 Section 9 and Exploded Views and Parts List MX-5050 Operation and Maintenace Manual Amplifier Assembly: A1221 No. Description Parts No. Notes Cap, Knob KN1102 Knob KN1100A Collar KZ7C111 Knob KZ1063B Spacer KZ6C017 Potentiometer RV224005 Amp. Trim Panel Assembly A1220-A Panel, Amp. Top...
- Page 131 MX-5050 Operation and Maintenance Manual Section 9 and Exploded Views and Parts List Amplifier Assembly: A1221 December 1997 9 - 35...
- Page 132 Section 9 and Exploded Views and Parts List MX-5050 Operation and Maintenace Manual Amp. Connector Assembly: A1221 No. Description Parts No. Notes Amp. Connector Panel Assembly A117701 Connector, XL type, Male CN103195 Connector, XL type, Female CN103194 9 - 36...
- Page 133 MX-5050 Operation and Maintenance Manual Section 9 and Exploded Views and Parts List Amp. Connector Assembly: A1221 December 1997 9 - 37...
- Page 134 Section 9 and Exploded Views and Parts List MX-5050 Operation and Maintenace Manual Connector Panel Assembly: CB-794 No. Description Parts No. Notes Panel, Connector CN7B-212 Connector, D sub 37pin CN237326 Screw, Lock CN7B-212 AC Inlet CN603012 Terminal, Ground CN901040 9 - 38...
- Page 135 MX-5050 Operation and Maintenance Manual Section 9 and Exploded Views and Parts List Connector Panel Assembly: CB-794 Y.Iwa MX-5050 MKIV-4,M May 1992 9 - 39...
-
Page 137: Appendix
Appendix Block Diagram Troubleshooting Hints (Electronics) Troubleshooting Hints (Transport) - Page 140 Troubleshooting Hints (Transport) Power is not being supplied to machine VU meter lamp does not illuminate Main fuse is blown Tape is threaded incorrectly Play, F.FWD, RWD modes do not work Tension Arm with safety switch is at lower position Timer does not work Tape is threaded or works in reverse...
- Page 141 Troubleshooting Hints (Electronics) Reproduce head is defective Set to SEL-REP and check if machine reproduces Reproduce amp is defective Reproduce amp is defective Set to INPUT and Machine does not check if input signal reproduce tape is output Power supply or output amp is bad Make sure output knob is not at minimum and...
- Page 143 Index AC Voltmeter, 7-2, 7-6, 7-7 Edge Type, 2-7 Adding Punch In, 2-7 EDIT Button, 3-5 AGFA, 7-8 EDIT Mode, 4-3, 4-9 AMP Section, 2-9, 2-11, EIA Reel, 4-5 Amplifier Panel, 3-7 Equalizer Change, 2-15 AMPEX, 7-8 Equalizer Indicator, 3-7 Attenuation Switch, 2-3 Equalizer Switch, 3-11 Audio Signal Connection, 2-3...
- Page 144 Index MX-5050 Operation and Maintenance Manual Level Type Signal, 2-7 Ready, 4-4, 4-7 Lifter Defeat, 4-3 Rear Head Escutcheon, 5-4 Line Input, 8-3 Recording, 4-7 Line Input Connectors, 3-9 Record Bias Level, 7-8 Line Output, 8-3 RECORD button, 3-5 Line Output Connectors, 3-9...
- Page 145 MX-5050 Operation and Maintenance Manual Index Tacho Roller, 3-2 Take Up Reel Table, 3-2 Tape Editing, 4-9 Tape Lifter Adjustment, 6-4 Tape Monitor Mode, 4-4 Tape Speed Accuracy, 8-2 Tape Speed Adjustment, 6-8 Tape Speed Deviation, 8-2 Tape Speed Indicator, 3-3...
Need help?
Do you have a question about the MX-5050 and is the answer not in the manual?
Questions and answers