Table of Contents
Advertisement
SERVICE MANUAL
CAUTION
Before servicing the oven, read the "Safety Precautions" section on page 2 of this manual.
SPECIFICATIONS
POWER REQUIREMENTS
230 Volts AC
10 Ampere (Single Circuit)
50 Hertz
Single Phase, 3 Wire Grounded
POWER OUTPUT
900 Watts nominal of R-F
microwave energy at operating fre-
quency of 2,450 MHz
Product Code No.
EM-FL50NEUK
1-437-602-13
This service information is intended for use by a service technician who is familiar with proper and safe procedures to be followed
when repairing any electrical or gas appliance and who is equipped with proper tools and testing devices. Repairs covered in this
publication and made by uninformed persons can result in hazards developing due to improper assembly or adjustment. While mak-
ing such repairs, persons not having the proper background may subject themselves to the risk of injury or electrical shock which
can be serious or even fatal.
A.
If the oven is operative prior to servicing, a microwave emission check should be performed prior to servicing the oven.
B.
Inform the manufacturer, importer, or assembler of any certified oven unit found to have a microwave emission level in excess
of 5 mW/cm2. Repair any unit found to have excessive emission levels at no cost to the owner and attempt to ascertain the cause
of the excessive leakage. The owner of the unit should be instructed not to use the unit until the oven has been brought into
compliance.
C. If the oven operates with the door open: 1) tell the user not to operate the oven and 2) contact the manufacturer and/or importer
immediately.
D. Remember to connect the monitor switch after replacement and to check interlock/monitor continuity.
The manufacturer will not be responsible for injury or property damage arising from service performed by anyone other than author-
ized Service Centers. If you perform service on your own products, you must assume responsibility for personal injury or property
damage which may result.
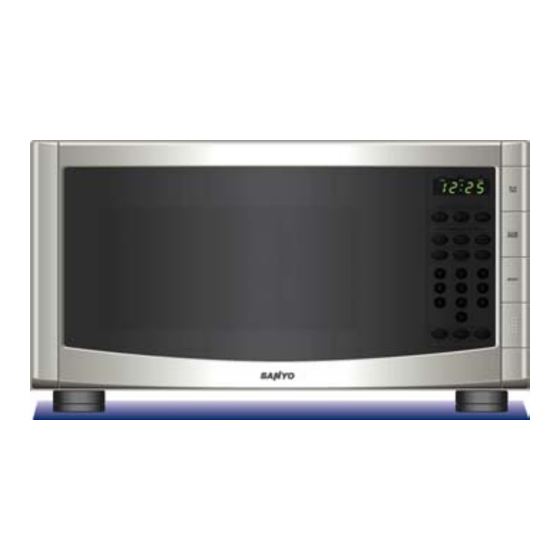
Model
EM-FL50N
UNIT DIMENSIONS
Width
520mm
292mm
Height
Depth
376mm
Shipping Weight
18.8kg
COOKING CAVITY DIMENSIONS
349mm
Width
Height
220mm
Depth
350mm
NOTICE
IMPORTANT NOTE TO THE CONSUMER
CONTENTS
Safety Precautions.......................................................................Cover
Installation Instructions ........................................................................2
General Information.............................................................................2
Microwave Radiation Test ...................................................................2
Safety Precautions for Disassembly and Repair.................................3
Description & Function of Components...............................................3
Electrical Operation .............................................................................4
Door & Interlock Adjustments ..............................................................4
Component Test Procedures ...............................................................5
Disassembly & Replacement of Parts.................................................6
Wiring Diagram ...................................................................................8
Schematic Diagram .............................................................................9
Exploded View ..................................................................................10
Exploded View Parts List...................................................................11
REFERENCE No.
SM
-2400014
Advertisement
Table of Contents

Related Manuals for Sanyo EM-FL50N


Summary of Contents for Sanyo EM-FL50N
-
Page 1: Table Of Contents
Model EM-FL50N SERVICE MANUAL CAUTION Before servicing the oven, read the “Safety Precautions” section on page 2 of this manual. SPECIFICATIONS CONTENTS POWER REQUIREMENTS UNIT DIMENSIONS Safety Precautions...............Cover 230 Volts AC Width 520mm Installation Instructions ................2 10 Ampere (Single Circuit) -
Page 2: Installation Instructions
PRECAUTIONS TO BE OBSERVED BEFORE AND DURING SERVICING TO AVOID POSSIBLE EX- POSURE TO EXCESSIVE MICROWAVE ENERGY (a) Do not operate or allow the oven to be latches, (5) evidence of dropping or and microwave generation and transmis- operated with the door open. abuse. -
Page 3: Safety Precautions For Disassembly And Repair
TO PERFORM MICROWAVE LEAKAGE CHECK: no heating power. high voltage capacitor. When replacing or 1. Fill 275 milliliters or 9 ounces of tap water An open filament lead or “dead” filament trans- checking parts, create a short between in a 2 cup measuring cup. former will give the same indication as an open oven chassis and the negative high termi- 2. -
Page 4: Electrical Operation
MONITOR (MIDDLE) INTERLOCK 1. Fill a measuring cup with one quart of tap magnetron to oscillate and produce the 2450 water and measure temperature of the MHz cooking frequency. SWITCH water with a thermometer or thermocouple The microwave energy produced by the mag- This interlock switch disables the control panel tester. -
Page 5: Component Test Procedures
6. Tighten and secure the plastic bracket with Test: Ohmmeter check from MSC to MSNC cabinet removed, discharge the capacitor screws. indicates short circuit. with an insulated screwdriver. 7. To be totally sure that switches are func- 3. If the switch does not operate as described 2. -
Page 6: Disassembly & Replacement Of Parts
7. If filament voltage is normal, unplug the 1. Set volt ohmmeter to read ohms using b. If bulb lights normally both ways when power cord, discharge the capacitor, rein- RX10,000 or higher scale. leads are reversed, diode is shorted. stall the high voltage lead and refer to the 2. - Page 7 2. Remove the screw(s) from capacitor mounting bracket and swing it out of the 1. Unplug the power cord, remove the outer way. cabinet and discharge the capacitor. 3. If replacement capacitor is used, replace 2. Remove the fuse. wire for wire. 3.
-
Page 8: Wiring Diagram
4. Remove the 2 screws securing the turntable NOTE: AFTER REPAIRS HAVE BEEN mal protector terminals. motor. Withdraw the motor and disconnect MADE, IT IS VERY IMPORTANT TO MAKE A 3. Remove the thermal protector mounting the 2 lead wires from the motor. MICROWAVE LEAKAGE CHECK OF THE screw. -
Page 10: Exploded View
Exploded View Model EM-FL50N... -
Page 11: Exploded View Parts List
EXPLODED VIEW PARTS LIST FOR EM-FL50N(EUK) REF No DESCRIPTION PART.No BODY MO- M 1179 CAVITY ASSY MO- A 0653EC BOTTOM PLATE MO- M 1063 DOOR ASSY MO- A 0499 SWITCH PANEL MO- D 2338 MEMBRANE SWITCH MO- S 1172 MAGNETRON...
Need help?
Do you have a question about the EM-FL50N and is the answer not in the manual?
Questions and answers