
Related Manuals for Medion MD 85173


Summary of Contents for Medion MD 85173
-
Page 1: Instruction Manual
DIGITAL CAMERA MD 85173 Medion Electronics Ltd. INSTRUCTION MANUAL 120 Faraday Park • Faraday Road Dorcan • Swindon SN3 5JF • Wilts. Phone: 0870 7270 370 Fax: 01793 715716 E-Mail: hotline@medion.co.uk www.medion.com... -
Page 2: Table Of Contents
Table of contents 2 Safety Instructions ............. 4 WARNINGS................4 Batteries ..................5 PRECAUTIONS................. 5 3 Getting started............7 Parts of your camera ..............7 Inserting the batteries ..............8 Inserting and removing the SD/MMC card ........ 9 Attaching the carrying strap............. 10 4 Basic operation ............ - Page 3 5.10 Setting the driver ..............28 5.11 Protecting photos against accidental deletion ......28 5.12 Viewing images on a television set.......... 29 5.13 Setting the date and time............29 5.14 Setting the LOGO ..............30 6 Installing the software ..........31 Supported operating systems..........
-
Page 4: Contents Of Package
1 Contents of package Please ensure that the following items are included in the box: 1x Digital camera MD 85173 1x user manual 2x AAA batteries 1x USB cable 1x TV cable 1x audio cable 1x CD-ROM (driver and application software) -
Page 5: Safety Instructions
2 Safety Instructions 2.1 WARNINGS To prevent possible injury, please observe the following warnings when using this product. • Do not aim the viewfinder at the sun or other intense light. Aiming at the sun through the viewfinder could injure your eyesight. -
Page 6: Batteries
2.2 Batteries Observe the following instruction when handling battery used in this product. • Improper use of battery may lead to leakage or explosion. • Check battery polarity before inserting. Do not attempt to insert the battery upside down or backward. •... - Page 7 • Avoid rapid temperature change. Rapidly moving the equipment between hot and cold temperatures may form water droplets on its exterior and interior. To prevent the condensation, place the equipment in its carry case or a plastic bag before exposing it in a rapid temperature change. •...
-
Page 8: Getting Started
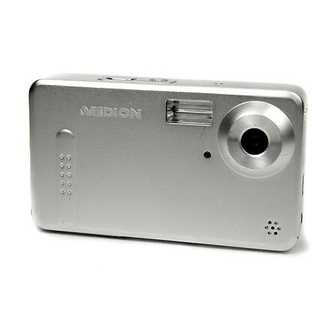
3 Getting started 3.1 Parts of your camera Familiarise yourself with the parts of your camera before use. That makes it easier to operate the camera. Shutter release On/off button Flash Lens Indicator of self-timer USB terminal Battery slot TV output Card slot Photo/configuration button Play mode button... -
Page 9: Inserting The Batteries
3.2 Inserting the batteries Use two AAA (micro) batteries. Push the cover of the battery compartment in the direction indicated to open the com- partment. Open the cover of the battery compartment. Insert the batteries into the battery compartment and ensure that the polarity is correct. -
Page 10: Inserting And Removing The Sd/Mmc Card
3.3 Inserting and removing the SD/MMC card You can use SD or MMC cards to increase the memory capacity. Switch off the camera before inserting the card. Insert the card as follows (photographs, sound and video recordings are no longer stored in the internal memory, but stored on the card). -
Page 11: Attaching The Carrying Strap
3.4 Attaching the carrying strap Attach the carrying strap for your convenience and for safety reasons. Pass the loop of the carrying strap through the eye as shown in the illustration. Pull the other end of the carrying strap through the loop of the thin cord and pull the carrying strap tight. -
Page 12: Basic Operation
4 Basic operation 4.1 Switching the camera on and off Switching the camera on On/off button Press the On/Off button for 1-2 seconds to switch the camera on. If the camera is not switched on, check the polarity of the batteries and ensure that they are charged. -
Page 13: Using The Mode Buttons
4.2 Using the mode buttons The camera features five operating modes. • Still image mode – for taking digital images/photographs • Video mode – for taking high-quality videos with sound • Recording mode – for crystal clear sound recordings • Play mode – for watching/listening to all recordings •... -
Page 14: Taking Photographs
4.3 Taking photographs 4.3.1 LCD descriptions display Status symbols in the photography mode Number of 0.5 megapixel image mode photographs taken, number of photographs available Battery status 0.8 megapixel image mode Single shot mode 2.0 megapixel image mode Burst mode 3.0 megapixel image mode Self-timer mode 4.0 megapixel image mode... - Page 15 4.3.2 Snapshot Press the On/Off button to switch the camera on. Photo/configuration Select single mode button shot mode When the camera is switched on, it is automa- tically in still photograph mode. If this is not the case, press the mode button to select the photography mode.
- Page 16 Taking a photograph Press the shutter release down fully to take a photgraph. A sound signals that the photograph has been taken. Photographs taken with the camera are saved as JPEG files. When you press the menu button in photography mode, the following menu functions are available for selection: •...
-
Page 17: Recording Audio
4.4 Recording audio Press the button twice to activate the digital recording function. The symbol is shown on the LCD. Before recording, the information shown at right is displayed. Press the shutter release once to start sound recording. The information shown here is displayed when recording was started using the shutter release. -
Page 18: Making Video Clips
4.5 Making video clips 4.5.1 LCD descriptions The elapsed time is shown at the top right. The remaining time is shown at the bottom left. The display is not changed during recording and is not updated until recording is complete. 4.5.2 Making a video clip Switch the camera on. -
Page 19: Playing Images, Audio And Videos
4.6 Playing images, audio and videos 4.6.1 LCD descriptions Status symbols in play mode 2004:02:11 Current system time: 11.02.2004, 12:02:47 12:02:47 01/10 Number of photographs taken / total photographs Photo is protected Photo is not protected Current file is a photograph (jpg) Current file is a video (avi) Current file is a sound recording (wav) 4.6.2... -
Page 20: Deleting Recordings
Thumbnail view While playing photos, videos and sound recordings, you can open the thumbnail view by pressing the confirm button (OK button). This mode allows you to view several photos, videos or sound recordings at once. Use the control buttons to select a file and press OK to play the file. - Page 21 Formatting the memory You may wish to format the memory in order to re-set the orginal data structure of the internal memory or the external card, resp. Please note that all the recordings will be lost during formatting. Press the button to open the configuration mode.
-
Page 22: Advanced Operation
5 Advanced operation 5.1 Using the flash If there is not enough available light for your photo, the built-in flash can provide the additional light required. Switch the camera on and select the photo mode (single shot or self-timer mode). You can set the flash to “Auto”... -
Page 23: Changing Menu Options
5.3 Changing menu options The camera features image, playback and configuration menus. Press the menu button to select these menus from the photography or playback mode. For the configuration mode menu, press twice. Press the (up) and (down) buttons to select the corresponding option and press the OK button to confirm. -
Page 24: List Of Menu Options
5.4 List of menu options The menu contents vary in accordance with the operating mode. The menu contents may vary in accordance with the camera model. See “Specifications” on page 36 for further details. Photography mode Menu Setting Description Single Take a single photograph Capture Mode Sequence... -
Page 25: Playback Mode
Playback mode Menu Setting Description Lock Current Protect current photo to prevent accidental deletion Unlock Current Cancel protection for current photo Protect Lock All Protect all photos to prevent accidental deletion Unlock All Cancel protection for all photos Current Delete current photo Delete Delete all photos 2 x 2... -
Page 26: Exposure Compensation
5.5 Exposure compensation By correcting the exposure value (EV), you can adjust images which appear too light or too dark. Selecting the image mode Press the menu button in photography mode. Selecting EV Select the EV item in the menu and press OK to open the exposure option. -
Page 27: Setting The Image Resolution
Select the “Language” menu item and press OK to confirm. Select the required language. 5.7 Setting the image resolution The basic setting for the image resolution is 3.0 megapixels. Press the menu button in photography mode. Press to select the “Resolution” option and press OK to confirm. -
Page 28: Setting Image Effects
Press “up” or "down” to select the “Exposure” option and press OK to confirm. • “Super fine” is the best quality which requires most memory, • “Fine” is medium quality with a medium memory requirement and • “Economy” is normal quality with a low memory requirement. Setting image effects The standard image effect setting when the camera is switched on is “Normal”. -
Page 29: Setting The Driver
5.10 Setting the driver The default driver setting is MASS (see also the tabel “Configuration mode” on page 24). Press the button to activate the configuration menu. Select the “Drive Type” item in the menu and press OK to confirm. Press to select the required driver type and press OK to confirm. -
Page 30: Viewing Images On A Television Set
Note Protected photos cannot be deleted but can be formatted. 5.12 Viewing images on a television set Connect the TV output of the camera to the video input of the television set using the cable supplied. Connect the audio input of the TV to the headphone jack of the camera. -
Page 31: Setting The Logo
Now change the time setting. Select the setting required using the control buttons , and then change the value using the control buttons. Press OK to confirm the values after you have finished making the settings. The date and time can only be displayed by the camera in playback mode. -
Page 32: Installing The Software
6 Installing the software 6.1 Supported operating systems • Windows 98 SE • Windows Me • Windows 2000 • Windows XP Microsoft Windows 98, Windows 98 SW, Windows 2000 Professional, Windows ME or Windows XP systems are pre-installed. 6.2 Installing the driver Driver installation is similar for the various Windows systems. - Page 33 When the camera is connected to the computer in MASS mode, the Found New Hardware Wizard appears on your PC monitor. Click “Next” to open the next window Select “Search for the best driver for your device” and click “Next”. Select “Specify a location”...
-
Page 34: Installing The Driver In Twain Mode
Click “Finish” to complete installation. You may be prompted to insert the Windows 98 CD during the installation process: 6.2.2 Installing the driver in TWAIN mode Connect the camera to the computer. The system should automatically recognise that a new device has been connected. In TWAIN mode, the driver must be installed for all systems. - Page 35 When installing the driver on Windows XP the Found New Hardware Wizard appears. Select “Install the software automatically” (recommended). The following window may appear. Click “Continue” and wait until the installation is complete. The installation procedure under Windows ME is similar. Either of two driver modes can be selected for the camera.
-
Page 36: Transferring Files To Your Pc
7 Transferring files to your PC After you install the drivers, you can transfer your photos, videos and sound recordings to the PC using the USB cable, and view, play and edit them on your PC. The camera switches to USB mode. Switch your PC on. -
Page 37: Specifications
8 Specifications Sensor 1/2" CMOS Pixels 3.1 million Effective resolution 2048x1536, 1600x1200, 1024x768, 800x600 Interpolated resolution 2560x1920, 2304x1728 Photo: JPEG (EXIF 2.1 Version) File formats Video: AVI/Motion JPEG 640*480 Sound: WAV format Special effects Standard, black and white, sepia modes Zoom factor 8x digital zoom LCD monitor... -
Page 38: Memory Requirement
9 Memory requirement Resolution/ Image size Quality PIXELS in kB Superfine appr. 830 2560x1920/ Fine appr. 600 5 MP Economy appr. 510 Superfine appr. 620 2304x1728/ Fine appr. 480 4 MP Economy appr. 400 1024 Superfine appr. 530 2048x1536/ Fine appr. -
Page 39: Troubleshooting
10 Troubleshooting If your camera does not work properly, please check the following items. If the problem still exists please contact your dealer. Symptoms Cause and solution Cause: Not enough light Error A Camera does not take Change angle of camera to include more light photos Solution: or use automatic flash. -
Page 40: Further Information
11 Further information 11.1 Safety instructions Although this product is safe, please observe the following information and warnings. Caution 1. Do not modify or dismantle the camera. 2. Contact your dealer for repairs and inspections. 3. Do not shake the camera or subject it to hard knocks. The camera may be damaged if it falls. -
Page 41: Photo Tips
11.3 Photo tips For excellent photographs, please observe the following tips: • Do not move the camera quickly to prevent the photos being out of focus. Hold the camera steady when pressing the shutter release. Do not move the camera immediately after pressing the shutter release. Wait until you hear the sound signal before moving the camera. - Page 42 • Battery power is reduced in cold environments (−10°C or colder, applies to alkaline batteries in particular). • Warm up batteries before use in cold environments (e.g. in your pocket). • When using a heat source, do not allow batteries to come into contact with it.
Need help?
Do you have a question about the MD 85173 and is the answer not in the manual?
Questions and answers