Table of Contents
Advertisement
Advertisement
Table of Contents

Related Manuals for Medion MD 86929


Summary of Contents for Medion MD 86929
-
Page 2: Table Of Contents
Table of Contents On this Manual ..................... 7 In this guide, used symbols and signal words ......7 1.1. Intended Use ................8th 1.2. CE compliance ....................9 1.3. Safety instructions ................... 10 Second Risks to children and people with reduced ability ..... 10 2.1. - Page 3 6.6. Video Mode ........................33 Display ads ....................34 Displays for recording ................. 34 7.1. Display ads for photo playback ............36 7.2. Displays for video playback ............37 7.3. Turning Display ads on and off ..............38 7.4.
- Page 4 12.7. Using the mode aperture setting ............. 81 12.8. Using the mode lock setting ..........81 12.9. Using the manual exposure mode ..........82 13. Playback Functions ..................83 13.1. show images in a slide show ................. 83 13.2.
- Page 5 6 of 102 N ALDI N content MSN 5004 7601 final REV1.indd 6 N ALDI N content MSN 5004 7601 final REV1.indd 6 11.03.2015 08:08:46 11.03.2015 08:08:46...
- Page 6 1. About this manual Before you start the safety instructions carefully. Note the warnings on the device and in the manual. Keep this manual always close to hand. If you sell the device or pass on, please be sure to include this manual and the warranty card. 1.1.
-
Page 7: Intended Use
NOTE! Advice in the manual! WARNING! Warning of danger of electrical shock! Bullet / information on events during operation • • Action to guide 1.2. Intended Use This camera is for capturing photos and videos in digital format. The device is intended for use only the private and not for industrial / commercial overall. •... -
Page 8: On This Manual
1.3. CE compliance Hereby, Medion AG, agrees that this product meets with the following European arrival: EMC Directive 2004/108 / EC • RoHS Directive 2011/65 / EU. • Complete declarations of conformity are available under www.medion.com/conformity. 9 102 N ALDI N content MSN 5004 7601 final REV1.indd 9 N ALDI N content MSN 5004 7601 final REV1.indd 9... - Page 9 2. Safety 2.1. General This device is not intended for use by persons (including by children) with reduced physical, sensory or mental abilities or lack of experience and / or by persons lacking knowledge, unless they are supervised by a person responsible for their safety or they have been instructed how the device is to be used.
-
Page 10: Warnings
Operate the power adapter only on grounded sockets with 230 V ~ 50Hz. If • you lungsort the power supply at the installation site are not sure, ask the relevant energy supplier. Do not cover the AC adapter to avoid damage through unacceptable •... -
Page 11: Second Safety Instructions
Only use the included USB power adapter ( Only use the included USB power adapter ( Only use the included USB power adapter ( Ktec KSAS0060500100VEU Ktec KSAS0060500100VEU Ktec KSAS0060500100VEU ) And ) And ) And • the supplied battery (NP-50) with the camera! When disassembling the device, the risk of Hochspan- is voltage electric •... - Page 12 WARNING! Risk of explosion if improper replacement of the battery. Kutyp substitute an equivalent AK- only with the same or. Check before inserting the battery, whether the contacts in the device and on the • batteries are clean and clean them if necessary. Put basically only the supplied battery.
-
Page 13: Precautions
Also remove an empty battery from the device. • At low temperatures, the capacity of the battery may significantly abneh- • men by slowing the chemical reaction. Make sure you have a second battery in a warm place (eg trouser pocket) for shooting in cold weather. Avoid shocks or impacts acting on the battery, do not squeeze him, do •... - Page 14 Avoid excessive heat • Do not use or store the camera under sunlight or high temperatures. Such loading can lead to leakage, or to deformation of the housing. Avoid strong temperature fluctuations • If you move the unit quickly from a cold environment to a warm environment or vice versa, condensation can form which can lead to malfunctions and damage to the equipment in and on the device.
- Page 15 treat the lens and all moving parts carefully Do not touch the lens and the • lens barrel. Be careful when handling the memory card and the battery. These parts are not designed for heavy loads. • batteries At low temperatures, the battery capacity can be greatly disadvantage. When photographing in cold weather, keep a warm spare battery.
-
Page 16: Repair Never Even
WARNING! Try under any circumstances, open the device itself or to repair. There is a risk of electric shock! Apply to be avoided in case of failure of the Medion Service Center or other • suitable specialist workshop hazards. 17 of 102 N ALDI N content MSN 5004 7601 final REV1.indd 17... -
Page 17: Third Delivery
3. delivery Please check the delivery is complete and inform us within half 14 days after purchase if delivery is not complete. With The purchased product includes the following: Camera MD 86929 • 2 x 3.7 V lithium ion battery •... -
Page 18: 4Th Device Overview
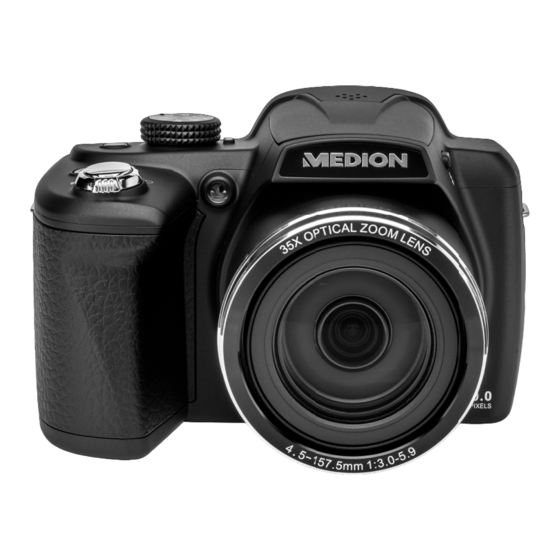
4. Product Overview 4.1. front Self-timer LED / AF lamp Camera lens with lens 19 of 102 N ALDI N content MSN 5004 7601 final REV1.indd 19 N ALDI N content MSN 5004 7601 final REV1.indd 19 11.03.2015 08:08:47 11.03.2015 08:08:47... -
Page 19: Back
4.2. back LC display Series Record button LED display AE / AF LOCK button : Playback button QM - Navigation keys Key / QM - Navigation keys Key / 8th) Trash: Delete 10) OGPW: call menu 10) OGPW: call menu 10) OGPW: call menu 20 of 102 N ALDI N content MSN 5004 7601 final REV1.indd 20... -
Page 20: Top
4.3. top / W (Zoom wheel): screwing in the subject and zooming out (Press half: activate autofocus) Trigger Video button 14) QP1QHH: on or off camera 14) QP1QHH: on or off camera 14) QP1QHH: on or off camera 15) Mode dial: set various photo / video modes 16) Microphone 21 of 102 N ALDI N content MSN 5004 7601 final REV1.indd 21... -
Page 21: Bottom
4.4. bottom Battery / memory card cover tripod mount 22 of 102 N ALDI N content MSN 5004 7601 final REV1.indd 22 N ALDI N content MSN 5004 7601 final REV1.indd 22 11.03.2015 08:08:50 11.03.2015 08:08:50... - Page 22 4.5. page Lock button Flash flap Eyelet for the wrist strap speaker Eyelet for the wrist strap USB port 23 of 102 N ALDI N content MSN 5004 7601 final REV1.indd 23 N ALDI N content MSN 5004 7601 final REV1.indd 23 11.03.2015 08:08:50 11.03.2015 08:08:50...
-
Page 23: Navigation Key
4.6. navigation key mode description button In Capture mode: switch for close-up macro In playback mode: View previous recording Video playback: Fast rewind or fast forward one turn off Exit menu / submenu to go through the menus / submenus to in the menu the left 24 of 102... - Page 24 mode description button In Capture mode: change exposure settings In Video How- dergabemodus: Start playback / pause mode in the photo re- Image by 90 ° turn go to the menu / submenu upward in the menu In Capture mode: select Flash style In playback mode See next picture...
-
Page 25: 5Th Commissioning
commissioning 5.1. Replace lens cover and carrying strap Fix for better handling of the camera and for safety reasons the strap. • Perform the smaller loop through the eye of the lens cover. • Pull the other end of the strap through the smaller loop cord and goats you hen the loop tight. •... -
Page 26: Insert Battery
• Then pull the belt as shown in the figure, nous by the Rieme-. • Pull the strap to make sure it will not come out of the eyelet. • Please make sure the strap is securely attached at two points (A). •... - Page 27 • Insert the battery with the contacts toward the camera pointing in accordance with the waste education. Press the battery carefully into the camera until it clicks. 28 of 102 N ALDI N content MSN 5004 7601 final REV1.indd 28 N ALDI N content MSN 5004 7601 final REV1.indd 28 11.03.2015 08:08:53 11.03.2015 08:08:53...
-
Page 28: Removing The Battery
• Close the battery compartment cover in the arrow direction and slide the stopper in the direction NQEM. Close the battery compartment cover in the arrow direction and slide the stopper in the direction NQEM. 5.3. Removing the battery • To detach the battery, open the battery compartment as described. -
Page 29: Charging The Battery Via Usb
5.4. Charging the battery via USB NOTE! When you purchase the battery is not charged. You must charge the battery before using the camera. You can charge the battery using either the provided USB power adapter or via the USB port of your PC or another device with a USB port. -
Page 30: Insert The Sd Card And Remove
5.5. Insert the SD card and remove If no card is inserted, the pictures in the internal memory are stored. Please note that the internal memory is limited. Therefore, use an SD memory card to increase the memory capacity. When a card is inserted, the images on the card are stored. - Page 31 • Close the battery compartment and close the locking latch. 5.5.2. take card • To remove the card, first open the battery compartment, as described above ben. • Then press the card briefly to unlock it. The card is ejected part way out and can be removed. •...
-
Page 32: 6Th First Steps
6. Getting Started 6.1. switch on camera • Press the key QP1QHH, to turn on the camera. The lens extends, the power light is green and Press the key QP1QHH, to turn on the camera. The lens extends, the power light is green and Press the key QP1QHH, to turn on the camera. -
Page 33: Power Saving Function
In addition to the date and time you can also set the date format. You've got the following possibilities: (Year month day); YY / MM / DD • MM / DD / YY (Month / day / year); • (Day month Year) DD / MM / YY •... -
Page 34: Recording And Playback Mode
6.5. Recording and playback mode After switching on the recording mode is active: You can make just photos. In playback mode, you can play, edit and delete photos, audio and video clips. • To enter the playback mode, press the button , the Wiederga- besymbol appears on the left top of the display. -
Page 35: Display Ads
7. Display ads 7.1. Displays for recording In recording mode, the following displays are possible: Display current recording mode flash setting self-timer Zoom adjustment Remaining recording / recording time (at the current resolution) battery status Location (internal memory or card) Wind Slash turned 8th) Display of video resolution... - Page 36 date stamp 11) Warning: camera shake! Image Stabilizer turned on histogram ISO setting Displays the shutter speed aperture setting focus area activated AE / AF lock exposure Control 20) Macro setting 21) White Balance face recognition AF tracing active metering quality setting Size / Resolution AF lamp activated...
-
Page 37: Display Ads For Photo Playback
7.2. Display ads for the Photo Playback In playback mode, the following displays are possible: Display of the mode (recording or reproduction) The image is protected Sound recording Recalling key function Current / Total number of shots battery status Location (internal memory or card) Shooting information 8th) DPOF enabled... -
Page 38: Displays For Video Playback
7.3. Display ads for the video playback In playback mode for video clips following displays are possible: Display Mode (Play) The video is protected video recording Recalling key function Current / Total number of shots battery status Location (internal memory or card) Shooting information 8th) Resolution / File Size... -
Page 39: Turning Display Ads On And Off
7.4. Turning Display ads on and off In the settings menu you can turn the displays, switch off or show in detail under "Display Mode". • Use the buttons • and • the settings menu. Use the buttons • and • the settings menu. Use the buttons •... - Page 40 7.4.2. In playback mode With key indicators With all ads without ads The displays can not be changed: during the recording and playback of audio and video clips; • displayed during a slideshow or thumbnails; • is cut during a photo (in edit mode). •...
-
Page 41: 8Th. Making First Recordings
8. make First recordings 8.1. Setting the recording mode When the camera is turned on, the recording mode is automatically activated. Top left of the display symbol for the selected shooting mode appears. More about the recording mode and the symbols see page 82nd 8.2. -
Page 42: Create Photo
Enter your images depth by capturing multiple layers in the image, such. For example, by • choosing a suitable front and / or background. Select the image format to match the subject, such. B. towers and tall buildings look even more •... - Page 43 NOTE! If the recording threatens to blur, the icon also appears In this case, you should hold the camera steady to-switch the image stabilizer or use a tripod. Enable the macro mode by pressing the - to provide to ER- Close button. Enable the macro mode by pressing the - to provide to ER- Close button.
- Page 44 description symbol Flash forced off The flash only works in single and self-timer mode. It can not be used in image sequences and video recordings. By using the flash, the battery consumption increases. When the battery is running low, the flash will take longer to load.
- Page 45 NOTE! For video recording, digital zoom is not available. When the digital zoom of the enlarged image will be enlarged by interpolation; the picture quality may suffer somewhat. 8.3.4. Setting the Focus Mode This function allows you to define the type focus when you take a photo or a Vi deo. •...
- Page 46 solver is released. • You can unlock AE / AF at one of the following ways: Press the CG 1CH "NQEM- button Press the CG 1CH "NQEM- button Press the CG 1CH "NQEM- button • Rotate the zoom control • Turn the mode dial •...
-
Page 47: Recording Video Clips
8.4. record video clips In addition to the photo, the camera offers the possibility of video clips up zuzeichnen and thus save not only rigid, but also moving images. • Press the record button " to start recording. the recording time is displayed. •... - Page 48 8.4.1. PIV function (Picture in Video) You have the option to create a photo during video recording: • Press during the video shoot the shutter button fully down, the display shows an icon is displayed during video recording. • If you press down the shutter button, the current screen can be saved as a photo without the video recording will stop.
-
Page 49: 9Th View / Listen To Recordings
view / listen 9. shots 9.1. display pictures individually You can give the recordings made most recently in display mode successively re. • Press the play button to switch to playback mode. The last recorded image appears on the display, depending on the type the following displays are possible: Video photo •... -
Page 50: Display Pictures As Thumbnails
9.2. play back the pictures as thumbnails • In Playback mode, press the zoom wheel once counter-clockwise to display up to nine thumbnail images. • Using the directional keys • or •• • or • You can select a desired file. Using the directional keys •... - Page 51 9.2.1. zoom into photos In photographs you can view individual image sections. • Repeatedly pressing the Zoomrads clockwise (to the right) in the full-screen view, you can store up to 12 times zoom the image. By repeatedly pressing the zoom wheel in the direction V " to 12 times zoom the image.
-
Page 52: Video Recording And Voice Memos Playing
9.3. play video and voice notes • Select the desired recording. • Press the key QM, to start playback. Press the key QM, to start playback. Press the key QM, to start playback. • When playing video clips, press the keys • or •• to start fast forward or rewind. When playing video clips, press the keys •... -
Page 53: Delete Recordings
9.4. Deleting Pictures NOTE! If a memory card is inserted, you can delete only the files on the memory card. When the memory card is read-only, you can not delete the existing files on the memory card. (There the message "Card locked".) A deleted file can not be restored. - Page 54 9.4.3. All files • Select the playback mode using the keys • or • an image. Select the playback mode using the keys • or • an image. Select the playback mode using the keys • or • an image. Select the playback mode using the keys •...
-
Page 55: The Menus
10. The menus 10.1. Navigating the menus • Press the key OGPW, to open the menus. Press the key OGPW, to open the menus. Press the key OGPW, to open the menus. • Use the arrow keys • or • th the attitude that möch- change. Use the arrow keys •... - Page 56 attitude symbol importance The resolution determines the quality of the image substantially. The higher the resolution, the more memory a sumption. The highest resolutions are mainly for large prints len (larger than A4) or subsequent image sections be recommended. 20 M 5152 x 3864 3264 x 2448 IMAGE SIZE...
- Page 57 attitude symbol importance The white balance is automatically adjusted. Pressing the button • on the 4-way Steue- tion takes you to the the button • on the 4-way Steue- tion takes you to the the button • on the 4-way Steue- tion takes you to the function WB SHIFT.
- Page 58 attitude symbol importance This setting changes the light sensitivity of the sensor. A higher value increases the sensitivity to light, but also leads to increased noise, which can negatively affect the image quality. Therefore, set the ISO value according to the shooting conditions as low as possible.
- Page 59 attitude symbol importance Use this function to take photos with different loading glade correction. At an exposure series advertising the 3 shooting in the following order made: Standard exposure, underexposure and overexposure. Imagesetter TUNG SERIES From Aperture stop ± ± 0.3 Aperture stop ±...
- Page 60 attitude symbol importance Here you can choose to print the date and time on the images. DATE DATE / DATE STAMP TIME AUTO-VOR After recording, the picture taken for a few seconds is displayed. You can enable or disable this feature. LOOKING Here you can set the blink or disable ( OUT).
-
Page 61: The Video Recording Menu
10.3. The video recording menu attitude importance symbol The resolution determines the quality of the image substantially. The higher the resolution, the more memory recording. Video resolution 1280x720 30 frames per second FILM 720P30 (using egg ner Class 6 SDHC memory card) MODE Video resolution 640x480 30 VGAP30... -
Page 62: The Settings Menu
10.4. The settings menu attitude importance symbol Here you can select one of three tones as startup S.SOUND sound or turn off the startup sound. Here you can turn on or off the sound when TRIGGER triggered VOLUME Adjusting the volume for sounds To save battery power, the camera turns off automatically after the selected time. - Page 63 attitude symbol importance Here you can set dei icon display on the LCD screen in ascent takeover mode and DISPLAY in playback mode. Choose: AT, DETAIL INFO or OUT. in playback mode. Choose: AT, DETAIL INFO or OUT. in playback mode. Choose: AT, DETAIL INFO or OUT. in playback mode.
-
Page 64: The Playback Menu
10.5. The playback menu If you want to open the playback menu, go first to the Wiederga- configuration mode is by pressing the button attitude symbol importance SLIDE SHOW You can (only photos) run as a slide show, the image recordings. SLIDE SHOW You can (only photos) run as a slide show, the image recordings. - Page 65 attitude symbol importance Choose the color with arrow keys • or. •• Choose the color with arrow keys • or. •• Choose the color with arrow keys • or. •• Choose the color with arrow keys • or. •• FARBVERSTÄR- , which is to be reinforced.
- Page 66 attitude symbol importance The colors are represented invertiv. • Press the key QM " and then select TO SAVE, to Press the key QM " and then select TO SAVE, to Press the key QM " and then select TO SAVE, to Press the key QM "...
- Page 67 attitude symbol importance • Choose between the image sizes 640, 320 or 160th Choose between the image sizes 640, 320 or 160th Choose between the image sizes 640, 320 or 160th Choose between the image sizes 640, 320 or 160th •...
- Page 68 attitude symbol importance DPOF (Digital Print Order Format), you can Druckin- formations on the memory card. In the camera DPOF menu you can specify which images should be printed and how many. This information is stored in the internal memory or on a memory card. If the pressure is started, the Dru- cker read the embedded on the memory card and print the specified images.
- Page 69 attitude symbol importance The function to retouch faces can be applied to images taken with face detection. Here are ways to change settings in each of 4 stages: FACE RETU- SCHIEREN SMOOTH, Lighten, EYE ZOOM. SMOOTH, Lighten, EYE ZOOM. SMOOTH, Lighten, EYE ZOOM. •...
-
Page 70: The Mode Dial
11. The mode dial It can be adjusted by rotating the mode wheel 8 shooting, DAR under angep. Scene shooting mode, Advanced Shooting, shooting, Manuel- le exposure, aperture, shutter setting and program. With a single rotation of the wheel mode, the selected mode is immediately started automatically even in the playback mode, or during the video recording. - Page 71 mode description symbol With this function, you can set the encryption circuit speed. The Ka is ra automatically obtain the VERSCHLUSSEIN- VERSCHLUSSEIN- POSITION blend value off to adjust the brightness. The camera automatically sets the appropriate PROGRAM recording settings such. As exposure time and aperture values.
-
Page 72: Using The Mode Scene That
11.1. Using Mode Custom Scene This feature is especially useful for beginners. You get respectable results without basic knowledge of photography and photographic technology to possess. If you set the camera to this mode, it automatically detects various ne 7 shooting modes, and selects this the optimal capture of. The camera automatically detects shooting modes Portrait, Landscape, Sonnenun- tergang, Macro, Backlit, Backlit Portrait, Night Scene and Night Portrait. -
Page 73: Use Of The Recording Mode
11.2. Use of the recording mode The camera offers 17 modes to shoot with the most appropriate attitudes. • Turn the dial to the position UEP. in the upper left corner of the icon for the selected mode is Turn the dial to the position UEP. in the upper left corner of the icon for the selected mode is Turn the dial to the position UEP. - Page 74 attitude symbol importance Suitable to take images with rapid movement up. SPORTS PARTY Suitable for interior shots and parties. candle Light Produced recordings in warm light. This function is comparable applies for taking pictures with egg NACHTPORT- ner night scene or a dark background. ADVISES RUNNING A gentle effect during rapid movements of.
-
Page 75: 12Th Using Different Recording Modes
12. The use of different recording modes 12.1. Using the Children mode Children are especially difficult to photograph because they are almost always in motion and so challenging. Take children mode for children images. This mode uses a faster shutter speed and always focuses on the moving subject. -
Page 76: Using The Panorama Mode
12.4. Using the Panorama mode This feature allows you to create a panoramic picture. The camera supports this by supporting graphics and an automatically controlled trigger. • Use the mode wheel option out. in the upper left-hand icon for the Panorama mode appears in the display •... - Page 77 • Press the key •• to open the selection menu for the Press the key •• to open the selection menu for the Press the key •• to open the selection menu for the shooting direction of the panoramic image. •...
- Page 78 • If the recording bar has completely filled, the recording is completed and the image is stored. NOTE! The following settings are defined for the panorama function and can not be changed: The flash is always off. • The self-timer is turned off. •...
-
Page 79: Using The Art Effect Mode
12.5. Using the arts ff ect mode • Set the shooting mode ART EFFECT by rotating the mode-Ra of the option CTV on. Set the shooting mode ART EFFECT by rotating the mode-Ra of the option CTV on. Set the shooting mode ART EFFECT by rotating the mode-Ra of the option CTV on. Set the shooting mode ART EFFECT by rotating the mode-Ra of the option CTV on. - Page 80 attitude symbol importance fisheye This function creates a hemispherical image EFFECT The image is provided with star-shaped light reflections. ASTRAL POSTER This function takes pictures with the effect of al- POSTER This function takes pictures with the effect of al- th poster or illustration on.
-
Page 81: Using The Continuous Shooting Mode
12.6. Using the continuous shooting mode • Press the button for continuous shooting. mode description symbol SINGLE RECORD Press the shutter release button, SINGLE RECORD Press the shutter release button, to make a recording. Keep pressing the shutter complete charge to a shooting to ma chen until you release the shutter SEQUENCE or the memory card is full. -
Page 82: Using The Mode Aperture Setting
12.7. Using the mode aperture setting This mode makes it possible to control the aperture values m anually, the appropriate comparison circuit times are calculated automatically by the camera. The aperture setting affects the depth of field of an image, when selecting a HO- hen panel (= possible small f-number) is focused only one object and the back- ground is indistinct. -
Page 83: Using The Manual Exposure Mode
12.9. Using the manual exposure mode This mode makes it possible to control the aperture value and / or shutter settings manu- ell. • Turn the dial to the position O. Turn the dial to the position O. in the upper left corner of the icon for the mode appears tung manual imagesetter in the display. -
Page 84: Playback Functions
13. Playback Functions Call the playback function in which the key to press. Then press the button OGPW, to the playback menu. Then press the button OGPW, to the playback menu. Then press the button OGPW, to the playback menu. 13.1. -
Page 85: Record Voice Memo
13.2.2. multiple files • in the playback menu, select the entry " PROTECT "And then the option" MULTI " out. in the playback menu, select the entry " PROTECT "And then the option" MULTI " out. in the playback menu, select the entry " PROTECT "And then the option" MULTI " out. in the playback menu, select the entry "... -
Page 86: Filter Effects
NOTE! You can only voice notes, add video clips not photos. Protected images, you can not add voice memos. 13.4. Filter ff ects The filter effect function is only the aspect ratio of 4: 3 fekten with other artistic ef- available. The edited with this feature images are saved as new files. -
Page 87: Change Size
1 enlarged image 2 4-way display 3 Trimmed size 4 The approximate location of the trimmed image area 5 • In playback mode, select the photo you want. • Open it in the Playback menu, select " CROP ". the editing window appears on the dis- play. Open it in the Playback menu, select "... -
Page 88: Start Screen
• Select one of the following resolutions 640, 320 or 160 and confirm the selection with the key QM. Select one of the following resolutions 640, 320 or 160 and confirm the selection with the key QM. Select one of the following resolutions 640, 320 or 160 and confirm the selection with the key QM. Select one of the following resolutions 640, 320 or 160 and confirm the selection with the key QM. -
Page 89: The Copy Function
NOTE! You can specify up to 99 copies for DPOF. If you len 0 copies einstel-, the DPOF setting of that image is automatically disabled. 13.9. The Copy function With this function, you can copy pictures from internal memory to the memory card or from the memory card to the internal memory. -
Page 90: Insert Movie" Function
• Choose " YES "And confirm with the QM to protect all files or unlock button. Choose " YES "And confirm with the QM to protect all files or unlock button. Choose " YES "And confirm with the QM to protect all files or unlock button. Choose "... -
Page 91: Connecting To Tv And Pc
NOTE! After the combination of the video is only the new, longer video in memory, the two individual videos will be deleted. The total length of the combined video must not exceed 30 minutes. 14. Connecting to TV and PC 14.1. - Page 92 NOTE! The functions described below must be supported by PICT Bridge com- patible printer so that they are applied nen kön-. After the connection between the printer and camera is manufactured, the selection menu of the print mode is displayed. Print Mode includes three choices: SELECT PRINTING: You can choose those off, to print out all the stored images.
-
Page 93: Transfer Data To A Computer
14.2.3. Specify the print settings • Use the arrow keys • or • the desired setting. Use the arrow keys • or • the desired setting. Use the arrow keys • or • the desired setting. Use the arrow keys • or • the desired setting. Use the arrow keys •... -
Page 94: Connect Usb Cable
14.4. Connect USB cable • Turn off the camera. • Connect the included USB cable at once switched computer with the USB connector on the camera and a USB port on the PC. When the compound of camera is manufactured with the computer "appears on the camera screen education choice MASS computer "appears on the camera screen education choice MASS STORAGE "Or"... -
Page 95: Dcf Memory Standard
14.5. DCF memory standard The recordings on your camera (stored, etc .; named DCF = Design Rule for Camera File System) managed on the camera after so-called DCF standard. Recordings on memory cards of other DCF cameras can be given re on your camera. 14.6. - Page 96 install a software On the supplied CD is "CyberLink PhotoDirector," a program for pro- cessing your images To install CyberLink PhotoDirector: • Insert the installation CD into the DVD / CD drive. • The CD will run automatically and displays a selection screen. •...
-
Page 97: Troubleshooting
15. Troubleshooting If the camera does not work properly, check the following points. If the problem persists, contact the MEDION service. 15.7.1. The camera does not turn on. • The batteries are inserted incorrectly. • The batteries are empty. 15.7.2. The camera does not take photos. - Page 98 15.7.7. The camera turns off. • The batteries are empty. The battery type is not set correctly. • The camera turns off after a preset time to save battery charge. Start the camera. • 15.7.8. The recording was not saved. The camera was turned off before the recording could be saved.
-
Page 99: Maintenance
Do not press on the display and use of purifying any hard objects genstände. • Do not use strong cleaning agents for the housing and the lens (our experts are on to the Medion Service or an authorized workshop, if dirt can not be removed). - Page 100 18. Technical Data 18.7.1. camera 20 Mega Pixel Pixel: Sensor: 20 MP CMOS 1 / 2.3 " Cover: F = 3.0 ~ 5.9 Shutter Speed: 1/2000 ~ 15 sec f = 4.5 ~ 157.5 mm (equivalent to small format: 25 mm ~ 875 Focal length: Optical zoom: 35 fold...
-
Page 101: Technical Specifications
All rights reserved. This manual is protected by copyright. Copying in mechanical, electronic and any other form without the written permission of the manufacturer's prohibitions The copyright is owned by the company: Medion AG Am Zehnthof 77 45307 Essen Germany... - Page 102 MTC - Medion Technology Center 45467 Mülheim / Ruhr Germany Hotline: 01805 - 633 633 Fax: 01805-665566 (0.14 Euro / minute from the German fixed network. Mobile max. 0.42 euro / min) Please use the contact form at www.medionservice.de www.medion.de ALDI N Cover MSN 5004 6764 RC1.indd 1...
Need help?
Do you have a question about the MD 86929 and is the answer not in the manual?
Questions and answers