
Related Manuals for Marvel 61HK


Summary of Contents for Marvel 61HK
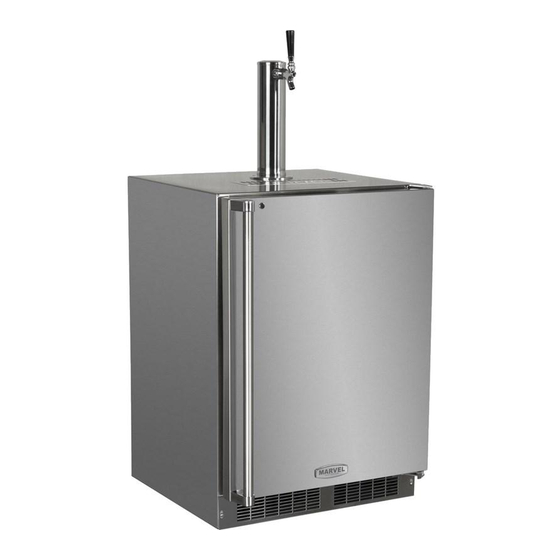
- Page 1 MARVEL Installation Operation Maintenance Instructions Keg Dispenser 61HK 6OHK...
-
Page 2: Table Of Contents
Important Safety Instructions Tap cleaning kit...........4 Warnings and safety instructions appearing in this Dimensions For 61HK & 6OHK-SS Solid Door..5 guide are not meant to cover all possible condi- Recommended Rough in Opening Dimensions tions and situations that may occur. Common sense, For Models 61HK &... -
Page 3: Unpacking Your Refrigerator
UNPACKING YOUR REFRIGERATOR Remove Packaging Warranty Registration Your refrigerator has been packed for shipment with It is important you send in your warranty registration card im- all parts that could be damaged by movement securely mediately after taking delivery of your refrigerator or you can fastened. -
Page 4: Installing Your Refrigerator
3 prong grounded receptacle required. erator condenser. For this reason it is important this area to not be obstructed and be kept clean. Marvel does not rec- ommend the use of custom made grilles as air flow may be Do not use an extension cord restricted because of inadequate openings. -
Page 5: Using Your Refrigerator
The higher the number you Please retain both the Marvel beer dispenser manual and select, the cooler the temperature. (See figure 3). The tem- the Micro Matic tap equipment manual for future refer- perature range of the refrigerator is from 33°... -
Page 6: Dimensions For 61Hk & 6Ohk-Ss Solid Door
(7.62 to 8.26cm) 24-1/16” (61.11cm) 26” (66.04cm) Recommended Rough in Opening Dimensions, Model 61HK & 6OHK-SS Solid Door Electrical Requirements: 115 volts, 3.3 amps running max. 15 amp dedicated circuit required. 3 prong grounded receptacle required. Power outlet can be located in the back wall behind unit. -
Page 7: Dimensions For Model 61Hk Solid Overlay Door
3” to 3-1/4” (55.88cm) (7.62 to 8.26cm) 23-5/16” (59.21cm) Recommended Rough in Opening Dimensions, Model 61HK Solid Overlay Door Electrical Requirements: 115 volts, 3.3 amps running max. 15 amp dedicated circuit required. 3 prong grounded receptacle required. Power outlet can be located in the back wall behind unit. -
Page 8: Dimensions For Model 6Ohk-Ssx Solid Door
DIMENSIONS FOR MODEL 6OHK-SSX SOLID DOOR 22” (55.88cm) 25-11/16” (65.25cm) 11-15/16” (30.33cm) 47” (119.38cm) 11” 15-1/4” (27.94cm) (38.74cm) 36-15/16” (93.83cm) 6-3/8” (16.21cm) 23-7/8” 24-1/16” (60.66cm) (61.11cm) 26” (66.04cm) Electrical Requirements: 115 volts, 3.3 amps running max. 15 amp dedicated circuit required. 3 prong grounded receptacle required. -
Page 9: Full Overlay Panel Installation Instructions
FULL OVERLAY PANEL INSTALLATION INSTRUCTIONS Step 4: Cut overlay panel Step 1: Verify door alignment Depending on the refrigerator model cut the overlay The door should be parallel to the sides and top of the panel to the dimensions shown in Figure 6 below. refrigerator. - Page 10 FULL OVERLAY PANEL INSTALLATION INSTRUCTIONS Step 6: Drill holes in overlay panel Step 8: Assemble the lock parts Remove the hinge adapter bushings from the top and Two (2) lock extensions are supplied with the lock. Use bottom door hinge adapters. (See Figure 10).Using the the longer extension for a 3/4”...
- Page 11 FULL OVERLAY PANEL INSTALLATION INSTRUCTIONS Step 9: Secure overlay panel to the door. With the #8 wood screws provided fasten the overlay panel to the door. (See Figure 9). Clearance hole through door gasket channel Step 10: Install lock cam (Models with locks only). Attach the lock cam to the back of the lock assembly with the phillips head machine screw provided.
-
Page 12: Care And Cleaning
CARE AND CLEANING Condenser Air Flow The machine compartment located beneath the cabinet does not require frequent cleaning; however, satisfactory performance depends on adequate ventilation. Be sure nothing obstructs the required air flow openings in front of the cabinet. At least once or twice a year, brush or vacuum lint and dirt from the front grille openings. -
Page 13: Troubleshooting Guide
TROUBLESHOOTING YOUR REFRIGERATOR Before You Call for Service If the unit appears to be malfunctioning, read through this manual first. If the problem persists, check the troubleshoot- ing guide below. Locate the problem in the guide and refer to the cause and its remedy before calling for service. The problem may be something very simple that can be solved without a service call. -
Page 14: Obtaining Service
OBTAINING SERVICE If Service is Required: • If the product is within the first year warranty period please call Marvel Customer Service at 800.223.3900 for directions on how to obtain war- ranty coverage in your area. • If the product is outside the first year warranty period, Marvel Customer Service can provide recommen- dations of service centers in your area. -
Page 15: Household Product Warranty
Limited One Year Parts and Labor Warranty Not Supplied or Designated by Marvel Marvel warrants that it will supply all necessary parts and The above warranties also do not apply if: labor to repair or replace in the end user’s home or office, any component which proves to be defective in material •... - Page 16 Northland-Marvel P .O. Box 400 1260 E. Van Deinse St. Greenville MI 48838 800.223.3900 41011770-EN Rev E All specifications and product designs subject to change without notice. Such revisions do not entitle 11/10/09 the buyer to corresponding changes, improvements, additions, replacements or compensation for...
Need help?
Do you have a question about the 61HK and is the answer not in the manual?
Questions and answers