Table of Contents
Advertisement
Quick Links
Owners Guide
DANGER
If you smell gas:
1. Shut off gas to the appliance.
2. Extinguish any open flames.
3. Open lid
4. If odor continues, keep away from the
appliance and immediately call your gas
supplier or your fire department.
Leaking gas may cause a fire or explosion
which can cause serious bodily injury or
death, or damage to property.
WARNING
1. Do not store spare liquid propane
cylinder within 10 feet (3m) of this
appliance.
2. Do not store or use gasoline or other
flammable liquids or vapors within 25
feet (8m) of this appliance.
WARNING: Follow all leak-check
procedures carefully in this manual prior
to barbecue operation. Do this even if the
barbecue was dealer-assembled.
NOTICE TO INSTALLER: These
instructions must be left with the owner
and the owner should keep them for future
use.
THIS GAS APPLIANCE IS DESIGNED FOR
OUTDOOR USE ONLY.
WARNING: Do not try to light this
appliance without reading the "Lighting"
Instructions section of this manual
Liquid Propane Gas
®
®
Y
OU MUST READ THIS
BEFORE OPERATING YOUR GAS GRILL
A023.c
B019.a
C018.a
D002.e
O
G
WNERS
UIDE
®
55025 04/10/00
Advertisement
Table of Contents

Related Manuals for Weber Genesis Platinum-B


Summary of Contents for Weber Genesis Platinum-B
- Page 1 Owners Guide DANGER If you smell gas: Liquid Propane Gas 1. Shut off gas to the appliance. 2. Extinguish any open flames. 3. Open lid 4. If odor continues, keep away from the appliance and immediately call your gas ® ®...
-
Page 2: Warranty
Improper assembly may be dangerous. Please carefully follow the assembly instructions in this manual. After a period of storage, and/or nonuse, the Weber Gas Barbecue should be checked for gas leaks and burner obstructions before use. See instructions in this manual for correct procedures. - Page 3 The charges must be prepaid. Weber will return parts to the phone number is on the warning decal, which is purchaser, freight or postage prepaid.
-
Page 4: Table Of Contents
Contents Danger & Warnings ............... A-2 Warranty ..................A-3 General Instructions ..............A-5 Exploded View ................A-6 Parts List ..................A-10 Assembly Instructions ..............B-1 Installing work surfaces and gas supply Guidelines ...... C-1 Operating ..................D-1 Lighting ..................D-1 Manual Lighting ................ -
Page 5: General Instructions
• The gas must be turned OFF at the LP cylinder Your Weber Gas Barbecue is a portable outdoor when the Weber Gas Barbecue is not in use. cooking appliance. With the Weber Gas Barbecue you • When the Weber Gas Barbecue is stored indoors,... - Page 6 Genesis Platinum-B LP...
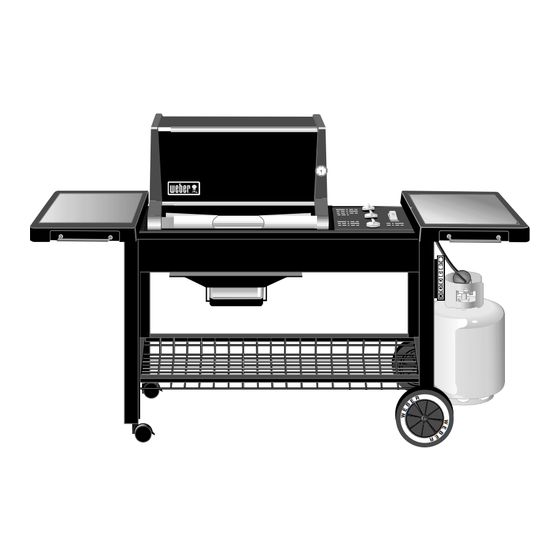
- Page 7 Hair Pin Cotter Thermometer Hinge Pin Right Endcap Left Endcap Cooking Grate (Large) Shroud Burner Control Knobs 1/4-20 x 1 1/2 inch Bolt Control Panel Handle lock Igniter Button Handle Control Panel Hardware Warm-Up ™ Basket Crossover Tube Warming Rack Front and Back Burners Smoker Assembly Center Burner...
- Page 8 ® of Weber-Stephen Products Co., 200 East Daniels Road, Palatine, IL, 60067-6266, U.S.A. This product is covered by one or more United States patents and patents in other nations globally. Printed in the U.S.A.
- Page 9 Remove Packaging from Grill Remove Grill from Lower Packaging Remove all tape from packaging. Remove bottom rack from top of packaging. Remove outer box. Pull out WARNING: Lifting the barbecue from the lower bottom tray from cooking box. Remove packaging packaging requires at least two people.
- Page 10 You will need: 1/2 inch bolts (1/4 x 20 x 1/2 inch bolts) - 4 Phillips screwdriver 7/16 open-end or an adjustable wrench Nylon Washers - 4 Flavorizer Bars Left Work Surface - 1 Cooking Grates Smoker Box Right Work Surface - 1 Bottom Shelf - 1 LP Cylinder - 1 Slide Out Buttom Tray - 1...
-
Page 11: Assembly Instructions
Assembly Instructions Install the slide out bottom tray Slide the bottom tray onto the mounting rails under the You will need: the slide out bottom tray(1), catch pan cooking box with finger grip toward you(1). holder(2), catch pan and one disposable drip pan. WARNING: Do not line bottom tray with alumi- num foil. - Page 12 You will need: five Flavorizer Bars and two cooking You will need: Warm-Up Basket grates. Insert one end of the Weber Warm-Up Basket into the Place the Flavorizer Bars side by side in the cooking hole at the right side of the inside of the lid, and the box.
- Page 13 Installing work Surfaces & Gas Connection Guidelines Install Left Work Surface Check that all burner valves are off You will need left work surface, two 1/2 inch bolts, two You will need: burner control knobs. nylon washers and a 7/16 inch or adjustable wrench. Valves are shipped in the OFF position, but you should Insert the left work surface tabs in the slots in the check to be sure that they are turned OFF.
- Page 14 Tighten the wing nut. this barbecue. NEVER fill the tank beyond 80% full. Your Weber gas grill is equipped with a cylinder supply system designed for vapor withdrawal. WARNING: Only use this grill outdoors in a well- ventilated area.
- Page 15 As a safety precaution however, you should recheck all fittings for leaks before using your Weber Gas Barbecue. Shipping and handling may loosen or damage a gas fitting. WARNING: Perform these leak checks even if your barbecue was dealer or store assembled.
- Page 16 Remove the control panel Check: (1) Unscrew the two phillips screws, located on the 1) Hose to manifold connection. right edge of the control panel. WARNING: If there is a leak a connection(1), (2) Take off the burner control knobs. retighten the fitting with a wrench and recheck for leaks with soap and water solution.
- Page 17 Reinstall control panel (after checking for gas Install Right Work Surface leaks) You will need right work surface, two 1/2 inch bolts, (1) Set the control panel in place over both sides of two nylon washers and a 7/16 inch or adjustable the frame.
-
Page 18: Operating
WARNING: If the burner does not light, turn the not use the barbecue. Replace using only Weber Front burner control knob to OFF and wait 5 authorized replacement hose. Contact the Cus-... -
Page 19: Manual Lighting
3) Turn the cylinder on by turning the cylinder valve Manual Lighting counterclockwise. DANGER 4) Strike a match and put the flame into the matchlight hole in the front of the cooking box. Failure to open the lid while igniting the WARNING: Do not lean over open barbecue. -
Page 20: Cooking
The control settings: High (H), Medium (M), the slide out bottom tray are free from debris that Low (L), or Off (O) are described in your Weber might obstruct the flow of combustion or ventilation air. cookbook. The cookbook uses these notations to The Spider Stopper ™... - Page 21 1) Turn the LP cylinder so the opening of the valve is either to the front, side or rear of the Weber Gas The LP cylinder supplied with your barbecue is Barbecue. Lift and hook the cylinder onto the fuel equipped with an OPD (Overfilling Prevention guage.
- Page 22 7) Check for leaks by wetting the fitting with the soap and water solution and watching for bubbles. If bubbles form, or if a bubble grows, there is a leak. 2) Loosen the cylinder lock wing nut. Swing the cylinder lock down. Tighten the wing nut. To Connect the hose to the cylinder: 3) Remove the plastic dust cover from the valve.
- Page 23 The LP cylinder and connections supplied with your pressure, inside a cylinder, LP gas is a liquid. As the Weber Gas Barbecue have been designed and tested pressure is released, the liquid readily vaporizes and to meet government, American Gas Association, and becomes gas.
-
Page 24: Annual Maintenance
The burners have been flame tested. As a safety precaution however, you should recheck all fittings for leaks before using your Weber Gas Barbecue. Shipping and handling may have loosened or damaged a gas fitting. WARNING: Perform these leak checks even if your barbecue was dealer- or store-assembled. -
Page 25: General Maintenance
The Weber Gas Barbecue burners have been factory Weber Spider Stopper™ Guards set for the correct air and gas mixture. The correct Your Weber Gas Barbecue, as well as any outdoor gas flame pattern is shown. appliance, is a target for spiders and other insects. -
Page 26: Replacing Main Burners
Replacing Main Burners 7) Lift and twist the burner assembly slightly, to separate the crossover tube(1) from the burners. 1) Your Weber Gas Barbecue must be OFF and cool. Remove the burners from the cooking box. 2) Turn gas OFF at source. -
Page 27: Crossover Ignition System Operations
9) Reinstall the Spider Stopper Guards. Slightly Crossover® Ignition System Operations rotate the Spider Stopper Guards so that the If the Crossover Ignition System fails to ignite the Left seams are in line with the Venturi fins(1). There burner, light the Left burner with a match. If the Left should be no gaps in the seams or in the fit around burner lights with a match, then check the Crossover the burners(2) and valves(3). -
Page 28: Troubleshooting
Troubleshooting Problem Check Cure Burners burn with a yellow or Inspect Weber Spider Stopper Clean Weber Spider Stopper orange flame, in conjunction with Guards for possible obstructions. Guards. (See Section “Annual the smell of gas. (Blockage of holes.) Maintenance”) Burners do not light. -or- Burners...
Need help?
Do you have a question about the Genesis Platinum-B and is the answer not in the manual?
Questions and answers