Table of Contents
Advertisement
Quick Links
Download this manual
See also:
Installation Manual
Advertisement
Table of Contents

Subscribe to Our Youtube Channel
Related Manuals for Sun Microsystems Blade X6450


Summary of Contents for Sun Microsystems Blade X6450
- Page 1 Sun Blade X6450 Server Module Service Manual Sun Microsystems, Inc. www.sun.com Part No. 820-3539-13 May 2009, Revision A Submit comments about this document by clicking the Feedback[+] link at: http://docs.sun.com...
- Page 2 Cette distribution peut comprendre des composants développés par des tierces parties. Sun, Sun Microsystems, le logo Sun, Java, Netra, Solaris, Sun Ray, Sun™ ONE Studio, Sun Blade X6450 Server Module, Sun StorageTek™ RAID Manager software et Sun company logo sont des marques de fabrique ou des marques déposées de Sun Microsystems, Inc. aux Etats-Unis et dans d'autres pays.
-
Page 3: Table Of Contents
Contents Preface xv Introduction to the Sun Blade X6450 Server Module 1–1 Features of the Servers 1–2 Service Processor 1–3 Sun Blade X6450 Server Module Overview 1–4 1.3.1 Server Module Front Panel 1–4 1.3.2 Server Module Components 1–6 Identifying Sun Blade X6450 Server Module Revisions 1–7 ▼... - Page 4 USB Configuration 2–17 2.3.4.9 PCI Configuration 2–18 2.3.4.10 MPS Configuration 2–19 2.3.4.11 Event Log Configuration 2–20 2.3.4.12 Boot Menu 2–21 2.3.4.13 Boot Settings Configuration 2–22 2.3.4.14 Boot Device Priority 2–23 Sun Blade X6450 Server Module Service Manual • May 2009...
- Page 5 2.3.4.15 Hard Disk Drives 2–24 2.3.4.16 Server 2–25 2.3.4.17 AST2000 LAN Configuration 2–26 2.3.4.18 Remote Access Configuration 2–27 2.3.4.19 Reset BMC Password 2–28 2.3.4.20 Security Settings 2–29 2.3.4.21 Exit 2–30 Resetting the BMC, BIOS, and CMOS 2–33 ▼ To Reset the SP Password Using the BIOS Setup Utility 33 ▼...
- Page 6 To Remove a Fabric Expansion Module 42 3.4.7 Installing or Replacing an Optional Solid-State Drive (FRU) 3–44 3.4.7.1 Conditions for Provisioning SSDs 3–44 3.4.7.2 Installing an Optional Solid State Drive 3–45 Sun Blade X6450 Server Module Service Manual • May 2009...
- Page 7 ▼ To Install an Optional Solid State Drive 45 ▼ To Replace an Optional Solid State Drive 49 3.4.8 Replacing the Motherboard (FRU) 3–50 ▼ To Replace the Motherboard 51 Performing Diagnostic Tests 4–1 Pc-Check Diagnostics Overview 4–1 ▼ To Access the Pc-Check Diagnostics 2 System Information Menu 4–3 Advanced Diagnostics 4–5 Hard Disk Testing 4–6...
- Page 8 How BIOS POST Memory Testing Works B–2 Redirecting Console Output B–2 ▼ To Redirect Console Output 2 Changing POST Options B–3 ▼ To Change POST Options 3 POST Codes B–4 Index Index–1 viii Sun Blade X6450 Server Module Service Manual • May 2009...
- Page 9 Figures FIGURE 1-1 Server Module Front Panel 1–5 FIGURE 1-2 Server Module Replaceable Component Locations 1–6 FIGURE 1-3 The Location of the FRU ID Label 1–8 FIGURE 1-4 Dongle Cable Connections 1–10 FIGURE 2-1 Power Button and Power/OK LED Location 2–3 FIGURE 2-2 Ethernet Port Chassis Labeling Designations 2–7 FIGURE 2-3...
- Page 10 FIGURE 3-10 Removing a DIMM 3–26 FIGURE 3-11 Installing a DIMM with Slot Alignment Key 3–27 FIGURE 3-12 The Internal Numbering Designation of the CPUs and the CPU Fault LEDs 3–29 Sun Blade X6450 Server Module Service Manual • May 2009...
- Page 11 FIGURE 3-13 Removing the Heatsink and CPU 3–30 FIGURE 3-14 Replacing the CPU 3–31 FIGURE 3-15 Installing a RAID Expansion Module Battery 3–34 FIGURE 3-16 Removing the Cap From the REM Connector 3–35 FIGURE 3-17 Routing the Cable and Installing the RAID Expansion Module 3–37 FIGURE 3-18 Removing a RAID Expansion Module 3–39 FIGURE 3-19...
- Page 12 Sun Blade X6450 Server Module Service Manual • May 2009...
- Page 13 Tables TABLE 1-1 Summary of Features 1–2 TABLE 1-2 Accessory Kit 1–11 TABLE 1-3 CRU and FRU List 1–12 TABLE 2-1 Server Module NIC Naming 2–7 TABLE 2-2 BIOS Setup Screens Summary 2–8 TABLE 3-1 Front Panel LED Functions 3–4 TABLE 3-2 The ELOM System Monitoring Tab Submenu Screens and Tasks 3–6 TABLE 3-3...
- Page 14 Sun Blade X6450 Server Module Service Manual • May 2009...
-
Page 15: Preface
It is important that you review the safety guidelines in the Sun Blade 6000 Modular System Safety and Compliance Guide (820-0053). Product Updates For product updates that you can download for the Sun Blade X6450 server module, go to: http://www.sun.com/servers/blades/downloads.jsp... -
Page 16: Related Documentation
For the most up-to-date information about the Sun Blade X6450 server module, navigate to the Sun Blade X6450 server module document collection using the High- End Servers and Blade Servers product category links. Translated versions of some of these documents might also be available after the product’s world-wide release date. -
Page 17: Typographic Conventions
Typographic Conventions Typeface Meaning Examples The names of commands, files, Edit your.login file. AaBbCc123 and directories; on-screen Use ls -a to list all files. computer output % You have mail. What you type, when contrasted AaBbCc123 with on-screen computer output Password: AaBbCc123 Book titles, new words or terms,... -
Page 18: Sun Welcomes Your Comments
You can submit your comments by going to: http://www.sun.com/hwdocs/feedback Please include this title and document part number with your feedback: Sun Blade X6450 Server Module Service Manual, 820-3539-13 xviii Sun Blade X6450 Server Module Service Manual • May 2009... -
Page 19: Introduction To The Sun Blade X6450 Server Module
C H A P T E R Introduction to the Sun Blade X6450 Server Module This chapter provides an overview of the Sun Blade X6450 server module, and contains the following sections: Section 1.1, “Features of the Servers” on page 1-2 ■... -
Page 20: Features Of The Servers
Features of the Servers The Sun Blade X6450 server module is designed to fit into the Sun Blade 6000 and Sun Blade 6048 chassis systems. summarizes the features of the server TABLE 1-1 module. Summary of Features TABLE 1-1 Feature or... -
Page 21: Service Processor
■ For additional documentation, see the ILOM 3.0 documentation collection and the Integrated Lights Out Manager 3.0 Supplement for Sun Blade X6450 Server Module. ILOM 2.0 – This version of the service processor software is also described in this ■... -
Page 22: Sun Blade X6450 Server Module Overview
The activity depends upon whether the server module is ELOM-based or ILOM-based. For a description of the LED activities, see Section 3.1.1, TABLE 3-1 “Monitoring System Components Using the External Service Action Required Indicator LED” on page 3-2. Sun Blade X6450 Server Module Service Manual • May 2009... -
Page 23: Figure 1-1 Server Module Front Panel
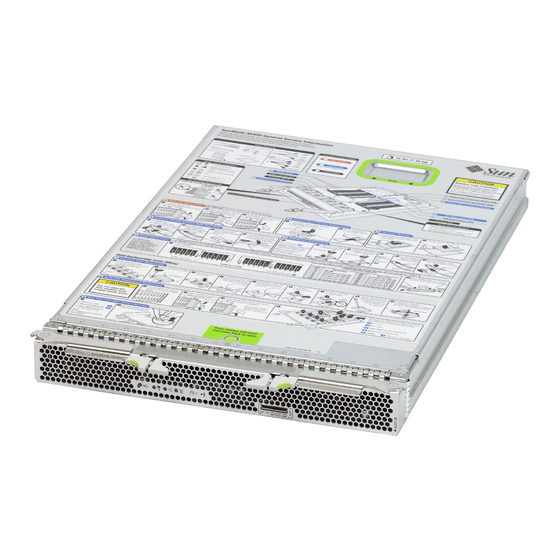
Server Module Front Panel FIGURE 1-1 Figure Legend White Locate LED button Blue Ready to Remove LED Amber Service Action Required LED Green OK LED Chapter 1 Introduction to the Sun Blade X6450 Server Module... -
Page 24: Server Module Components
Heaksink and CPU assemblies (4) Motherboard and chassis assembly DIMMs (24 in 2 Banks of 12 Each) Fabric expansion module (Optional) Battery for optional RAID expansion module, or solid-state drive (SSD) Sun Blade X6450 Server Module Service Manual • May 2009... -
Page 25: Identifying Sun Blade X6450 Server Module Revisions
Identifying Sun Blade X6450 Server Module Revisions The Sun Blade X6450 server module has two motherboard (MB) revisions (revision 1 and revision 2). Some optional hardware components, such as a SSD and low voltage DIMMs, work with revision 2 MB only, and some procedures in this manual are specific to revision 2 motherboards. -
Page 26: To Identify Mb Revision Using The Elom Or Ilom Web Interface Or Cli
Log in to either the ELOM or ILOM web interface or CLI. See the corresponding ILOM documentation for more information. The revision 2 FRU part number is F540-7821-xx. where xx is irrelevant version information. Sun Blade X6450 Server Module Service Manual • May 2009... -
Page 27: Using The Multi-Port Dongle Cable For Testing
1. Insert the multi-port dongle cable into the universal connector port (UCP) on the server module front panel. See FIGURE 1-1 2. Connect the multi-port dongle cable connections as appropriate. Chapter 1 Introduction to the Sun Blade X6450 Server Module... -
Page 28: Figure 1-4 Dongle Cable Connections
Caution – Disconnect the multi-port dongle cable when you are finished using the cable. Otherwise, the cable, blade, or chassis could be damaged when the chassis door is closed or the cable abruptly pulled. 1-10 Sun Blade X6450 Server Module Service Manual • May 2009... -
Page 29: Accessory Kits
707-0198-10 Sun Blade X6450 Server Module Installation Guide 820-3535 (printed documentation) Where to Find Sun Blade X6450 Server Module Documentation (printed sheet) 820-3542 Additional safety and license documentation Additional Options and Replaceable Components Supported components and their part numbers are subject to change over time. For the most up-to-date list, go to: http://sunsolve.sun.com/handbook_pub/Systems/... -
Page 30: Table 1-3 Cru And Fru List
Sun Blade RAID 5 Expansion Module (with or without battery) Sun Blade RAID 5 Expansion Module Battery Sun Blade RAID Expansion Module Sun Blade 10 GigabitEthernet Multi-Fabric Expansion Module Miscellaneous CR2032 battery Cable kit 1-12 Sun Blade X6450 Server Module Service Manual • May 2009... -
Page 31: Powering On The Server Module, Configuring Bios And Resetting Bios, Sp And Cmos
C H A P T E R Powering On the Server Module, Configuring BIOS and Resetting BIOS, SP and CMOS This chapter contains information about powering the server on and off, configuring the BIOS, resetting the BMC and BIOS passwords, clearing the CMOS password and updating firmware. -
Page 32: Powering On The Server Module
This section contains procedures for powering on the server module. Note – Before powering on your server for the first time, follow the installation instructions provided in the Sun Blade X6450 Modular Server Installation Guide, (820-1182.) Caution – Severe damage to server components can occur if the server is operated without adequate cooling mechanisms. -
Page 33: Figure 2-1 Power Button And Power/Ok Led Location
Power Button and Power/OK LED Location FIGURE 2-1 Figure Legend Green OK LED Power on/standby button Chapter 2 Powering On the Server Module, Configuring BIOS and Resetting BIOS, SP and CMOS... -
Page 34: Powering Off The Server
SP and the power supply fans, and the Power/OK LED blinks. When main power is off, the Power/OK LED on the front panel blinks, indicating that the server is in standby power mode. Sun Blade X6450 Server Module Service Manual • May 2009... -
Page 35: Configuring Bios Settings
Configuring BIOS Settings This section describes how to use the BIOS Setup Utility to view and modify the BIOS settings. The BIOS Setup Utility is stored in the BIOS memory. You access the BIOS Setup Utility by rebooting the server, watching the POST messages, and pressing F2 when prompted. -
Page 36: To Configure The Bios
The slots for the PCIe ExpressModules are detected by the BIOS during startup in this order: 1. PCI EM BLx.1 2. PCI EM BLx.0. For example, if the server module is in slot 3, the BIOS boot priority will be 3.1, 3.0. Sun Blade X6450 Server Module Service Manual • May 2009... -
Page 37: Ethernet Port Device And Driver Naming
2.3.3.2 Ethernet Port Device and Driver Naming The Sun Blade X6450 server modules have up to two 10/100/1000BASE-T Gigabit Ethernet ports provided by the NEMs installed in the Sun Blade 6000 or 6048 chassis. The lower NEM port provides NET 0 and the upper NEM port provides NET 1. The... -
Page 38: Bios Option Rom Size Limitation
Save or discard changes and load defaults. summarizes the BIOS Configuration Utility menu tree. See Section 2.3.4, FIGURE 2-3 “BIOS Setup Menu Screens” on page 2-10 for examples of each of these screens. Sun Blade X6450 Server Module Service Manual • May 2009... -
Page 39: Figure 2-3 Server Module Bios Configuration Utility Menu Tree
Server Module BIOS Configuration Utility Menu Tree FIGURE 2-3 Chapter 2 Powering On the Server Module, Configuring BIOS and Resetting BIOS, SP and CMOS... -
Page 40: Bios Setup Menu Screens
Utility. On this screen you can set the System Time and the System Date, and you can view server-specific BIOS and CPU information (see FIGURE 2-4 BIOS Setup Menu Main Screen FIGURE 2-4 Sun Blade X6450 2-10 Sun Blade X6450 Server Module Service Manual • May 2009... -
Page 41: Advanced Settings
2.3.4.2 Advanced Settings The Advanced Settings screen allows you to configure CPU, Memory, IDE, Super I/O, Trusted Computing, USB, PCI, MPS and Event Log settings (see FIGURE 2-5 BIOS Setup Menu Advanced Screen FIGURE 2-5 Chapter 2 Powering On the Server Module, Configuring BIOS and Resetting BIOS, SP and CMOS 2-11... -
Page 42: Cpu Configuration
The Advanced/CPU Configuration screen allows you to view CPU-specific information and enable and disable various CPU functions (see FIGURE 2-6 BIOS Setup Menu Advanced Configure CPU Screen FIGURE 2-6 2-12 Sun Blade X6450 Server Module Service Manual • May 2009... -
Page 43: Memory Configuration
2.3.4.4 Memory Configuration The Memory Configuration screen allows you to configure system memory settings (see FIGURE 2-7 BIOS Setup Menu Advanced Memory Screen FIGURE 2-7 Chapter 2 Powering On the Server Module, Configuring BIOS and Resetting BIOS, SP and CMOS 2-13... -
Page 44: Ide Configuration
The IDE Configuration screen allows you to change the system’s IDE settings (see ). Changes made on this screen take effect on the next boot. FIGURE 2-8 BIOS Setup Menu Advanced IDE Configuration Screen FIGURE 2-8 2-14 Sun Blade X6450 Server Module Service Manual • May 2009... -
Page 45: Super I/O
2.3.4.6 Super I/O The Super I/O screen allows you to configure the Super I/O chipset. Use this screen to specify the address of serial port 1 and serial port 2 (see FIGURE 2-9 BIOS Setup Menu Advanced Super I/O Screen FIGURE 2-9 Chapter 2 Powering On the Server Module, Configuring BIOS and Resetting BIOS, SP and CMOS... -
Page 46: Trusted Computing
2.3.4.7 Trusted Computing The Trusted Computing screen allows you to enable and configure TCG and TPM support (see FIGURE 2-10 BIOS Setup Menu Advanced Trusted Computing Screen FIGURE 2-10 2-16 Sun Blade X6450 Server Module Service Manual • May 2009... -
Page 47: Usb Configuration
2.3.4.8 USB Configuration The USB Configuration screen allows you to view USB module version information and enable and configure USB devices (see FIGURE 2-11 BIOS Setup Menu Advanced USB Configuration Screen FIGURE 2-11 Chapter 2 Powering On the Server Module, Configuring BIOS and Resetting BIOS, SP and CMOS 2-17... -
Page 48: Pci Configuration
PCI Configuration The PCI Configuration screen allows you to enable and disable the server’s LAN and Ethernet controllers (see FIGURE 2-12 BIOS Setup Menu Advanced PCI Configuration Screen FIGURE 2-12 2-18 Sun Blade X6450 Server Module Service Manual • May 2009... -
Page 49: Mps Configuration
2.3.4.10 MPS Configuration The MPS Configuration screen allows you to select the MPS revision (see FIGURE 2-13 BIOS Setup Menu Advanced MPS Configuration Screen FIGURE 2-13 Chapter 2 Powering On the Server Module, Configuring BIOS and Resetting BIOS, SP and CMOS 2-19... -
Page 50: Event Log Configuration
The Event Log Configuration screen allows you to view and clear the event log. You can also manage the log by marking messages (see FIGURE 2-14 BIOS Setup Menu Advanced Event Logging Screen FIGURE 2-14 2-20 Sun Blade X6450 Server Module Service Manual • May 2009... -
Page 51: Boot Menu
2.3.4.12 Boot Menu The Boot Menu allows you to access the Boot Settings submenu screens. The Boot Settings submenu screens allow you to configure system boot settings, boot device priority, and hard drives or the compact flash card (see FIGURE 2-15 BIOS Setup Menu Boot Screen FIGURE 2-15 Chapter 2... -
Page 52: Boot Settings Configuration
). For more information about the options presented in this FIGURE 2-16 screen, see Section B.4, “Changing POST Options” on page B-3. BIOS Setup Menu Boot Configuration Screen FIGURE 2-16 2-22 Sun Blade X6450 Server Module Service Manual • May 2009... -
Page 53: Boot Device Priority
2.3.4.14 Boot Device Priority The Boot Device Priority screen allows you to arrange your server’s boot device order. With this screen you can designate a primary boot device, as well as manage secondary boot devices (see FIGURE 2-17 BIOS Setup Menu Boot Device Priority Screen FIGURE 2-17 Note –... -
Page 54: Hard Disk Drives
The Boot Hard Disk Drives screen shows you the boot sequence of available hard drives. The Sun Blade X6450 server module is a diskless blade. However, when installed, the compact flash card and the SSD can appear as a boot drives in this screen (see ). -
Page 55: Server
2.3.4.16 Server The Server screen allows you to verify the status of the BMC (SP), view version information for IPMI and BMC, view NIC MAC addresses, and configure AST2000 LAN and remote access settings. You can also configure AC power loss restoration, the external serial port, event logging, and you can reset the BMC password. -
Page 56: Ast2000 Lan Configuration
Use the LAN Configuration screen to configure the AST2000 LAN settings, such as channel number, IP address, MAC address, and subnet mask. You can also verify the channel number status. BIOS Setup Menu Server LAN Configuration Screen FIGURE 2-20 2-26 Sun Blade X6450 Server Module Service Manual • May 2009... -
Page 57: Remote Access Configuration
2.3.4.18 Remote Access Configuration The Server Remote Access Configuration screen allows you to configure remote access type and parameters. For example, you can enable or disable remote access, set the serial port number and mode, flow control, redirection after POST, and terminal type. -
Page 58: Reset Bmc Password
Tip – Use the web interface or the CLI to create a backup root account with administrator privileges. See the ILOM 3.0 documentation collection for details. BIOS Setup Menu Server Reset BMC Password Screen FIGURE 2-22 2-28 Sun Blade X6450 Server Module Service Manual • May 2009... -
Page 59: Security Settings
2.3.4.20 Security Settings The Security Settings screen allows you to view the status of the Supervisor password. The screen also allows you to change the password (see FIGURE 2-23 When you change or create a password, the status indicator on this screen changes from Not Installed to Installed. -
Page 60: Exit
). The Exit screen also allows you to load optimal defaults (see FIGURE 2-24 ) and load failsafe defaults (see FIGURE 2-25 FIGURE 2-26 BIOS Setup Menu Exit Screen FIGURE 2-24 2-30 Sun Blade X6450 Server Module Service Manual • May 2009... -
Page 61: Figure 2-25 Bios Setup Menu Exit Load Optimal Defaults Screen
BIOS Setup Menu Exit Load Optimal Defaults Screen FIGURE 2-25 Chapter 2 Powering On the Server Module, Configuring BIOS and Resetting BIOS, SP and CMOS 2-31... -
Page 62: Figure 2-26 Bios Setup Menu Exit Load Failsafe Defaults Screen
BIOS Setup Menu Exit Load Failsafe Defaults Screen FIGURE 2-26 2-32 Sun Blade X6450 Server Module Service Manual • May 2009... -
Page 63: Resetting The Bmc, Bios, And Cmos
BIOS Setup Utility. You can connect the multi-port dongle cable to the UCP on the front of the ■ server and attach a KVM to the dongle cable (see the Sun Blade X6450 Server Module Installation Guide). -or- You can use the ELOM or ILOM Remote Console application, and configure the ■... -
Page 64: To Reset The Bios Password And Clear Cmos Using J42
J42 is located on the rear corner of the motherboard near the CF card slot. J42 is the 6-position jumper located to the left of a 10-pin jumper (see FIGURE 2-27 2-34 Sun Blade X6450 Server Module Service Manual • May 2009... -
Page 65: Figure 2-27 Location Of J42 On The Motherboard With Pin 1 Shown
Location of J42 on the Motherboard With Pin 1 Shown FIGURE 2-27 Two jumper caps are preinstalled on J42. The caps are set in the default or safe position. shows the pin numbering for jumper J42 and the jumper caps in the FIGURE 2-28 default or safe position: Chapter 2... -
Page 66: Figure 2-29 J42 With The Jumper Set To Reset The Bios Password
View from rear of server b. To clear the CMOS password, move the jumper cap from pins 3 and 5 to pins 1 and 3 (see ), and proceed to Step FIGURE 2-30 2-36 Sun Blade X6450 Server Module Service Manual • May 2009... -
Page 67: Figure 2-30 J42 With The Jumper Set To Clear The Cmos Password
J42 With the Jumper Set to Clear the CMOS Password. FIGURE 2-30 Jumper Caps View from rear of server c. To reset the BIOS password and clear the CMOS password move the jumper cap from pins 4 and 6 to pins 2 and 4, and move the jumper from pins 3 and 5 to pins 1 and 3 (see ), and proceed to Step... -
Page 68: Recovering From A Corrupt Service Processor
Two jumper caps to short the pins on jumper blocks J19 and J44 ■ A keyboard, video, and mouse (KVM) attached to the server module to monitor ■ the recovery process and respond to system prompts 2-38 Sun Blade X6450 Server Module Service Manual • May 2009... -
Page 69: To Recover From A Corrupt Service Processor
1. Determine the revision of your server module’s motherboard. For information about how to determine the revision of your server module’s motherboard, see Section 1.4, “Identifying Sun Blade X6450 Server Module Revisions” on page 1-7. 2. Copy all BMC files from the Tools and Drivers CD to a DOS-bootable USB flash device. -
Page 70: Figure 2-32 Location Of Jumpers J19 And J44 On The Motherboard
J51 from pins 1 and 2 (default position) to pins 2 and 3 (see FIGURE 2-33 Depending on the type DIMMs installed in your server module, the jumper cap might already set to pins 2 and 3. 2-40 Sun Blade X6450 Server Module Service Manual • May 2009... -
Page 71: Figure 2-33 The Location And Default Setting Of J51
The Location and Default Setting of J51 FIGURE 2-33 11. With the pins shorted on jumper block J19, J44, and pins 2 and 3 of J51 (revision 2 MB only), remove the wrist strap’s grounding cord from the chassis, and replace and secure the top cover. - Page 72 22. Verify the status of the BMC and the BMC version in the BIOS Setup Utility under the Server screen. 23. Exit the BIOS Setup Utility. Press Esc or F10 to exit. 2-42 Sun Blade X6450 Server Module Service Manual • May 2009...
-
Page 73: Power-On Self-Test (Post)
Power-On Self-Test (POST) For information about BIOS POST testing, POST codes, POST code checkpoints, and console redirection, see Appendix Chapter 2 Powering On the Server Module, Configuring BIOS and Resetting BIOS, SP and CMOS 2-43... - Page 74 2-44 Sun Blade X6450 Server Module Service Manual • May 2009...
-
Page 75: Maintaining The Server
C H A P T E R Maintaining the Server This chapter contains information and procedures for servicing your Sun Blade X6450 server module hardware, including component removal and replacement procedures. The following topics are covered in this section: Section 3.1, “Monitoring System Components” on page 3-2 ■... -
Page 76: Monitoring System Components
LEDs, you can isolate server issues to a specific component, such as a CPU or a DIMM. For more information about using the external front panel LED and the internal fault LEDs to troubleshoot server issues, see Section 3.3, “Troubleshooting Server Issues” on page 3-17. Sun Blade X6450 Server Module Service Manual • May 2009... -
Page 77: Figure 3-1 External Leds
External LEDs FIGURE 3-1 Figure Legend White Locate LED button Blue LED – Ready to Remove Amber LED – Service Action Required Green LED – OK Chapter 3 Maintaining the Server... - Page 78 On – Server is in main power mode. ELOM and ILOM 2.0 Startup The blue, amber, and green LEDs blink at 1 second intervals until the ILOM services are running. Sun Blade X6450 Server Module Service Manual • May 2009...
-
Page 79: Monitoring The System And Components Using The Sp Web Interface
Front Panel LED Functions (Continued) TABLE 3-1 LED Name Description ILOM 3.0 Startup The blue, amber, green, and white LEDs blink three times, at one second invervals (.5 sec On, .5 sec Off). After the three blinks, the green LED goes to fast blink while the ILOM performs power calculations (.125 sec On, .125 sec Off). -
Page 80: Figure 3-2 The Components Submenu Tabs
CPUs, the memory (DIMMs), and the NIC. Use the CPU and Memory screens in conjunction with the Service Action Required LED to further investigate service-related issues. Sun Blade X6450 Server Module Service Manual • May 2009... -
Page 81: Table 3-3 The Elom System Monitoring Tab Submenu Screens And Tasks
View events, including details such as event ID, class, type, severity, date and time, and description of event. For more information about using the web interface to monitor and manage the server, see Sun Blade X6450 Server Module Embedded Lights Out Manager Administration Guide. For ILOM: ■... - Page 82 Monitor power consumption, power history, and (ILOM 3.0 only) power metrics. d. See the corresponding ILOM documentation collection for more information about using the System Monitoring tab to monitor and manage the server. Sun Blade X6450 Server Module Service Manual • May 2009...
-
Page 83: Monitoring System Components Using The Sp Cli
3.1.3 Monitoring System Components Using the SP CLI You can use the ELOM or ILOM CLI to monitor the status of the server module, and to investigate the system when the front panel Service Action Required LED is on or blinking. - Page 84 Navigate to one of the CPU namespaces and view properties for that namespace: –> cd CPU0 –> show /SYS/CPU/CPU0 Targets: Properties: Designation = CPU 0 Manufacturer = Intel Name = Tigerton Speed = 2933MHz Status = enabled Target Commands: show 3-10 Sun Blade X6450 Server Module Service Manual • May 2009...
- Page 85 b. To view the /SYS/Memory namespace: –> cd /SYS/Memory –> show Executing the show command returns the following: /SYS/Memory Targets: DIMM_A0 DIMM_A1 DIMM_A2 DIMM_A3 DIMM_A4 DIMM_A5 DIMM_B0 DIMM_B1 DIMM_B2 DIMM_B3 DIMM_B4 DIMM_B5 DIMM_C0 DIMM_C1 DIMM_C2 DIMM_C3 DIMM_C4 DIMM_C5 DIMM_D0 DIMM_D1 DIMM_D2 DIMM_D3 DIMM_D4...
-
Page 86: To Monitor System Components Using The Ilom Cli
Servicing the Server Module This section contains preparatory service procedures and other information, including a list of required tools and supplies, and information about obtaining up-to-date supported components and part numbers. 3-12 Sun Blade X6450 Server Module Service Manual • May 2009... -
Page 87: Tools And Supplies Needed
3.2.1 Tools and Supplies Needed The server can be serviced with the following items: No. 2 Phillips screwdriver ■ Adjustable-setting torque driver (5–20 in-lbs) ■ Antistatic wrist strap ■ A non-conducting pointed object, such as a stylus, to press the recessed Power ■... -
Page 88: Figure 3-3 Removing A Server Module
Caution – Do not operate the system with empty slots. Always insert a filler into an empty slot to reduce the possibility of module shutdown. 3. Set the server module on an antistatic surface. 3-14 Sun Blade X6450 Server Module Service Manual • May 2009... -
Page 89: To Remove The Main Cover
Caution – Damage to system components can occur through improper handling. Observe the proper ESD precautions when handling the CPU. Wear a securely grounded ESD wrist strap. Handle components by the edges only. Do not touch metal contacts. ▼ To Remove the Main Cover 1. -
Page 90: Figure 3-5 Inserting The Server Module
, box 1 in [1]. FIGURE 3-5 Inserting the server module. FIGURE 3-5 4. Push the server module into the slot until the server module stops. [2]. FIGURE 3-5 3-16 Sun Blade X6450 Server Module Service Manual • May 2009... -
Page 91: Troubleshooting Server Issues
Troubleshooting Using the Internal Fault Indicator LEDs The Sun Blade X6450 server module has internal Fault Indicator LEDs for each DIMM slot and each CPU. When the external front panel Service Action Required LED is on or blinking, you can eject the server module from the chassis, remove the cover, and press the internal Remind button to blink the internal Fault Indicator LED for the failed component(s). -
Page 92: To Troubleshoot Using The Internal Fault Indicator Leds
Note – The Remind button charging circuitry can maintain operation for 30 - 45 minutes. To recharge the circuit, insert the server module in the chassis for approximately 5 minutes. 3-18 Sun Blade X6450 Server Module Service Manual • May 2009... -
Page 93: Figure 3-6 Cpu And Dimm Fault Reminder Leds
CPU and DIMM Fault Reminder LEDs FIGURE 3-6 DIMM Fault LEDs (24) Fault CPU Fault Remind LEDs (4) Button Internal LED Functions TABLE 3-7 LED Name Description DIMM Fault LED This LED has two states: • Off: DIMM is operating properly. •... -
Page 94: Replaceable Component Procedures
Caution – Before handling components, attach an ESD wrist strap to the grounding post that is built into the rear of the chassis. The system’s printed circuit boards contain components that are extremely sensitive to static electricity. 3-20 Sun Blade X6450 Server Module Service Manual • May 2009... -
Page 95: Replacing The System Battery (Cru)
3.4.1 Replacing the System Battery (CRU) The system battery is a customer replaceable unit (CRU). It is located on the motherboard. If an optional RAID Expansion Module is installed, you must remove the card to access the battery. ▼ To Replace the System Battery 1. -
Page 96: Replacing The Compact Flash Card (Cru)
The compact flash card is located on the motherboard and accessible from the rear of the server module. ▼ To Replace the Compact Flash Card 1. If necessary, back up any data that is contained on the compact flash (CF) card. 3-22 Sun Blade X6450 Server Module Service Manual • May 2009... -
Page 97: Figure 3-8 Replacing The Compact Flash
2. Power off the server and remove the server module from the chassis as described in “To Remove the Server Module From the Chassis” on page 3-13. Caution – Possible chassis shutdown. Do not operate the system with empty slots. Always insert a filler into an empty slot to reduce the possibility of module shutdown. -
Page 98: Replacing Dimms (Cru)
All of the above, plus: A5, B5 All of the above, plus: C2, D2 All of the above, plus: C5, D5 shows the DIMM numbering and positions FIGURE 3-9 3-24 Sun Blade X6450 Server Module Service Manual • May 2009... -
Page 99: To Replace A Dimm
DIMM Numbering and Position FIGURE 3-9 ▼ To Replace a DIMM 1. Power off the server and remove the server module from the chassis as described in “To Remove the Server Module From the Chassis” on page 3-13. Caution – Possible chassis shutdown. Do not operate the system with empty slots. Always insert a filler into an empty slot to reduce the possibility of module shutdown. -
Page 100: Figure 3-10 Removing A Dimm
This action partially ejects the DIMM from the slot. b. Carefully lift the DIMM straight up to remove it from the slot (see FIGURE 3-10 Removing a DIMM FIGURE 3-10 3-26 Sun Blade X6450 Server Module Service Manual • May 2009... -
Page 101: Figure 3-11 Installing A Dimm With Slot Alignment Key
6. To install a DIMM: a. Ensure that the DIMM slot ejectors at each end of the memory socket are fully open (rotated outward). b. Align the notch on the bottom edge of the DIMM with the key in the DIMM slot. -
Page 102: Replacing A Cpu And Heatsink (Fru)
The numeric designation of the four CPUs in the server and the CPU fault LEDs are shown in . There is a fault LED on the motherboard for each CPU: FIGURE 3-12 3-28 Sun Blade X6450 Server Module Service Manual • May 2009... -
Page 103: Figure 3-12 The Internal Numbering Designation Of The Cpus And The Cpu Fault Leds
The Internal Numbering Designation of the CPUs and the CPU Fault LEDs FIGURE 3-12 Fault Indicator LEDs (4) Heatsinks CPUs (4) If the... Then... LED is off. The CPU is operating properly. LED is blinking (amber). The CPU has failed, and should be replaced. 5. -
Page 104: Figure 3-13 Removing The Heatsink And Cpu
Lift the CPU out of the socket, leaving the lever in the open position. 7. To install the new CPU, or install the existing CPU: a. Ensure that the CPU socket release lever is in the fully open position. 3-30 Sun Blade X6450 Server Module Service Manual • May 2009... -
Page 105: Figure 3-14 Replacing The Cpu
b. Align the CPU over the CPU socket. Use the triangle symbols on the CPU and the CPU socket for proper alignment. Caution – Possible irreparable damage to the CPU or motherboard from excessive downward pressure. Do not press down on the CPU. The CPU does not need to be forcibly seated in the socket. -
Page 106: Installing And Removing A Raid Expansion Module
Note – RAID expansion modules are installed in the right side bay, over the compact flash card socket and the system battery. 3-32 Sun Blade X6450 Server Module Service Manual • May 2009... -
Page 107: Installing A Raid Expansion Module (Cru)
Note – If your system has a Solid State Drive (SSD), you cannot install a Sun Blade RAID 5 expansion module because the Sun Blade RAID 5 expansion module requires a separate battery, which is mounted on the MB using the same mounting hardware that is used for mounting the SSD. -
Page 108: Figure 3-15 Installing A Raid Expansion Module Battery
Caution – Irreparable hardware damage and component failure can occur due to overheating if battery is incorrectly installed. Do not mount the battery onto the RAID Expansion Module. Safe installation of the battery for the Sun Blade X6450 server module requires that you mount the battery on the motherboard as described in this procedure. -
Page 109: To Install A Raid Expansion Module
▼ To Install a RAID Expansion Module If you are installing a Sun Blade RAID 5 expansion module, install the battery, as described in “To Install a Sun Blade RAID 5 Expansion Module Battery” on page 3-33 before proceeding. 1. If you have not already done so, prepare the system for servicing. a. - Page 110 Because of thermal issues, cable routing is critical. Ensure that the cable is routed away from the battery and through the bracket opening nearest the center of the server. 3-36 Sun Blade X6450 Server Module Service Manual • May 2009...
-
Page 111: Figure 3-17 Routing The Cable And Installing The Raid Expansion Module
Routing the Cable and Installing the RAID Expansion Module FIGURE 3-17 5. Install the RAID Expansion Module: a. Slide the edge of the RAID Expansion Module into the clips on the support bracket. b. Press the card carefully down into the REM connector until the edge of the card is secured under the eject lever clip (see FIGURE 3-17 6. -
Page 112: Removing A Raid Expansion Module And Battery (Cru)
Sun Blade X6450 Server Module Operating System Installation Guide ■ For information about configuring RAID on a Windows system, see: Sun Blade X6450 Server Module Windows Operating System Installation Guide ■ 3.4.5.2 Removing a RAID Expansion Module and Battery (CRU) To remove a RAID expansion module and battery, or to remove only the battery, first remove the RAID expansion module and then remove the battery. -
Page 113: To Remove A Sun Blade Raid 5 Expansion Module Battery
Removing a RAID Expansion Module FIGURE 3-18 5. To remove the RAID expansion module, grasp the edges of the card, nearest the ejector lever, and carefully lift, tilting the card upward slightly, until the card is free of the connector. The other edge of the card is secured under the clips on the support bracket. -
Page 114: Installing And Replacing A Fabric Expansion Module
Caution – Irreparable hardware damage and component failure can occur due to overheating if battery is incorrectly installed. Do not mount the battery onto the RAID expansion module. Safe installation of the battery for the Sun Blade X6450 server module requires that you mount the battery on the motherboard as described in the relevant procedure in this manual. -
Page 115: Figure 3-19 Removing The Connector Cap
Removing the connector cap FIGURE 3-19 4. Position the fabric expansion module (connector side down) over the fabric expansion module connector on the motherboard, and insert the (opposite) edge of the fabric expansion module into the slots on the center support bracket (see FIGURE 3-20 Chapter 3 Maintaining the Server... -
Page 116: To Remove A Fabric Expansion Module
“To Remove the Server Module From the Chassis” on page 3-13. Caution – Do not operate the system with empty slots. Always insert a filler into an empty slot to reduce the possibility of module shutdown. 3-42 Sun Blade X6450 Server Module Service Manual • May 2009... -
Page 117: Figure 3-21 Removing A Fabric Expansion Module
2. Remove the main cover as described in “To Remove the Main Cover” on page 3-15. The fabric expansion module connector is located on the left side of the center support bracket. 3. Press down on the ejector lever to unlock the edge of the fabric expansion module. -
Page 118: Installing Or Replacing An Optional Solid-State Drive (Fru)
Module Revisions” on page 1-7. Note – To use the optional SSD, your Sun Blade X6450 server module mother board must be revision 2 (rev. 2). For more information about SSD requirements and Rev. 2 motherboards see the Sun Blade X6450 Server Module Product Notes. -
Page 119: Installing An Optional Solid State Drive
The server module must be revision 2 or newer. 2. Verify that your server module contains the appropriate BIOS and SP (for more information, see the Sun Blade X6450 Server Module Product Notes). 3. Power off the server and remove the server module from the chassis as described in “To Remove the Server Module From the Chassis”... -
Page 120: Figure 3-22 Ssd Cable Routing And Connectors
The connection is keyed for proper installation. 10. Press the other end of the cable (SSD power) into the white connector labeled JP5 (see FIGURE 3-22 SSD Cable Routing and Connectors FIGURE 3-22 3-46 Sun Blade X6450 Server Module Service Manual • May 2009... -
Page 121: Figure 3-23 Installation Of The Ssd Mounting Bracket
11. Take up any slack in the cable by gently pulling the excess cable through the center support bracket and towards the right side. Do not place any strain on the motherboard connectors. 12. Position the four holes in the SSD mounting bracket over the four threaded standoffs on the motherboard so that the open end of the mounting bracket is toward the rear of the server (see FIGURE 3-23... -
Page 122: Figure 3-24 Installation Of The Ssd
“To Install a Fabric Expansion Module” on page 3-40). You might need to position the SSD power and SATA cables to limit contact with the underside of the expansion module. 3-48 Sun Blade X6450 Server Module Service Manual • May 2009... -
Page 123: To Replace An Optional Solid State Drive
▼ To Replace an Optional Solid State Drive 1. Power off the server and remove the server module from the chassis as described in “To Remove the Server Module From the Chassis” on page 3-13. Caution – Do not operate the system with empty slots. Always insert a filler into an empty slot to reduce the possibility of module shutdown. -
Page 124: Replacing The Motherboard (Fru)
The motherboard is shipped installed in a server module enclosure. Do not remove the motherboard from the enclosure. Instead, remove components from the old motherboard and enclosure assembly, and install these components into the new motherboard and enclosure assembly. 3-50 Sun Blade X6450 Server Module Service Manual • May 2009... -
Page 125: To Replace The Motherboard
Note – The motherboard is an FRU and must be replaced only by qualified service technicians. Contact your Sun Service representative for assistance. ▼ To Replace the Motherboard 1. Power off the server as described in “To Monitor the System and Components Using the SP Web Interface”... - Page 126 3-52 Sun Blade X6450 Server Module Service Manual • May 2009...
-
Page 127: Performing Diagnostic Tests
C H A P T E R Performing Diagnostic Tests This chapter describes how to use the Pc-Check diagnostic tests, provided on the Embedded Lights Out Manager (ELOM). If you are having a problem with your system, use the diagnostics to diagnose and solve it. This chapter contains the following sections: Section 4.1, “Pc-Check Diagnostics Overview”... -
Page 128: To Access The Pc-Check Diagnostics
■ Manual – Selects the manual version, which runs untill it is stopped by user ■ intervention. Note – Select the Manual option to complete this procedure. c. Click Save. Sun Blade X6450 Server Module Service Manual • May 2009... -
Page 129: System Information Menu
4. Click the Redirection submenu tab. The Redirection screen appears. 5. Click the Launch Redirection button. The Redirection screen appears. 6. Power-cycle the server module as described in “Powering Off the Server” on page 2-4. If you selected the Manual option (ILOM) or Boot from PC-Check (ELOM), the system boots to the Pc-Check main menu, which offers the following selections: System Information Menu ■... -
Page 130: Table 4-1 System Information Menu Options
Tests the processor speed. CMOS RAM Utilities Shows the CMOS settings of the system. Text File Editor Opens a file editor. Start-Up Options Enables you to set up startup options for diagnostics testing. Sun Blade X6450 Server Module Service Manual • May 2009... -
Page 131: Advanced Diagnostics
Advanced Diagnostics Advanced Diagnostics are used to test an individual device on the system. Most of the selections on this menu display information about the corresponding devices, and then offer a menu of testing options. For example, to test CPU 0, you can select Advanced Diagnostics, and then select Processor, and then select CPU0. -
Page 132: Hard Disk Testing
3. From the Select Drive menu, choose the hard disk you need to test. The Hard Disk Diagnostics dialog opens. It displays information about the selected hard drive and the Hard Disk Tests menu, which includes the following options: Select Drive ■ Sun Blade X6450 Server Module Service Manual • May 2009... - Page 133 Test Settings ■ Read Test ■ Read Verify Test ■ Non-Destructive Write Test ■ Destructive Write Test ■ Mechanics Stress Test ■ Internal Cache Test ■ SMART Immediate Test ■ View Error Log ■ Utilities Menu ■ Exit ■ 4. Click Select Drive to select a hard drive to test. 5.
- Page 134 Tip – Each of these scripts tests the operating status of your entire system. To test specific disk drives independently of the rest of the system, use the procedures in Section 4.4, “Hard Disk Testing” on page 4-6. Sun Blade X6450 Server Module Service Manual • May 2009...
-
Page 135: Performing Immediate Burn-In Testing
4.5.1 Performing Immediate Burn-In Testing Use Immediate Burn-In Testing to run test scripts. ▼ To Perform Immediate Burn-in Testing 1. From the Diagnostics main menu, select Immediate Burn-In Testing. The screen displays a list of settings shown in and a Burn-In menu. TABLE 4-3 2. -
Page 136: Performing Deferred Burn-In Testing
TABLE 4-3 Select Tests ■ Opens a listing of the tests available for your workstation configuration and the currently loaded test script. 4-10 Sun Blade X6450 Server Module Service Manual • May 2009... -
Page 137: Show Results Summary
3. When you are done, select Save Burn-In Script and type the name for the new script. Enter d:\testname.tst Where testname is the name of the script that you have created. 4. To run the newly created script, go to Immediate Burn-In Testing in Section 4.5.1, “Performing Immediate Burn-In Testing”... -
Page 138: Print Results Report
The About Pc-Check window includes general information about the Pc-Check software, including resident and nonresident components, such as mouse devices. Exit The Exit option exits the Pc-Check software and reboots the server module. 4-12 Sun Blade X6450 Server Module Service Manual • May 2009... -
Page 139: Updating Elom Firmware
C H A P T E R Updating ELOM Firmware This chapter describes how to update the firmware on a Sun Blade X6450 server module equipped with an ELOM service processor. You can update firmware for the BIOS, the Service Processor (SP), the Command Programmable Logic Device (CPLD), and the RAID expansion module (REM) using procedures in this chapter. -
Page 140: Updating The Bios And The Sp Firmware Using The Elom Web Interface
The Embedded Lights Out Manager (ELOM) web interface offers an easy to use method for updating both the BIOS and SP firmware. For more information about using the web interface, see the Sun Blade X6450 Server Module Embedded Lights Out Manager Administrative Guide. -
Page 141: Updating The Bios And Sp Firmware Using The Command-Line Interface (Cli)
SP and the BIOS firmware at the same time, using the combined BIOS and SP (BMC) image on the Sun Blade X6450 Server Module Tools and Drivers CD. For more information about using the CLI, see the Sun Blade X6450 Server Module Embedded Lights Out Manager Administrative Guide. -
Page 142: Updating The Bios From A Dos-Bootable Usb Disk
Prepare OK! Update Successful starting update... 5.1.3 Updating the BIOS from a DOS-Bootable USB Disk This procedure describes how to update the BIOS from a DOS-Bootable USB disk. Sun Blade X6450 Server Module Service Manual • May 2009... -
Page 143: To Update The Bios From A Dos-Bootable Usb Disk
The following procedure is rarely used, and should not be done unless instructed by Sun Service personnel. For more information about using the web interface, see the Sun Blade X6450 Server Module Embedded Lights Out Manager Administrative Guide. ▼ To Update CPLD Using the ELOM Web Interface 1. -
Page 144: Updating The Rem Firmware
Multi-port dongle cable ■ A USB keyboard ■ A monitor ■ You can also update the REM firmware using the procedures in the Sun StorageTek RAID Software Manager User’s Guide. Sun Blade X6450 Server Module Service Manual • May 2009... -
Page 145: To Update The Rem Firmware From A Dos-Bootable Usb Thumb Drive
▼ To Update the REM Firmware from a DOS-Bootable USB Thumb Drive 1. On a system with internet access, download the Tools and Driver CD ISO image from: http://www.sun.com/servers/blades/downloads.jsp 2. Burn a CD or mount the ISO image. 3. Insert the DOS-bootable USB flash drive into the USB port. 4. - Page 146 The utility displays a message “Please restart the computer” then offers another list of selections. 17. Select Exit, and confirm by selecting Yes. The utility exits to DOS. 18. Press Alt+Ctrl+Del to reboot the server module. The server module reboots. Sun Blade X6450 Server Module Service Manual • May 2009...
-
Page 147: System Specifications
A P P E N D I X System Specifications This appendix contains physical, power, environmental, and acoustic noise emission specifications for the Sun Blade X6450 server modules. Server Module Specifications Server Module Physical Specifications TABLE A-1 Specification Value Width... - Page 148 Sun Blade X6450 Server Module Service Manual • May 2009...
-
Page 149: Bios Power-On Self-Test (Post) Codes
A P P E N D I X BIOS Power-On Self-Test (POST) Codes The system BIOS provides a rudimentary power-on self-test (POST), during which the BIOS checks the basic devices required for the server to operate. The progress of the self-test is indicated by a series of POST codes. This chapter explains the BIOS POST testing, provides an alternate method for viewing the codes, describes how to change POST options, and lists the POST codes. -
Page 150: How Bios Post Memory Testing Works
3. Power cycle or power on the server. 4. Initialize the BIOS Setup Utility by pressing the F2 key while the system is performing the power-on self-test (POST). The BIOS Main Menu screen appears. Sun Blade X6450 Server Module Service Manual • May 2009... -
Page 151: Changing Post Options
5. Select Server. The Server screen appears. 6. Select AST2000 LAN Configuration. The LAN Configuration screen appears. 7. Select the IP Address menu item. The SP’s IP address appears 8. Start a web browser and type the SP’s IP address in the browser’s address bar. 9. -
Page 152: Post Codes
81 and the last two digits are from port 80. The Response column describes the action taken by the system on encountering the corresponding error. The choices are: Sun Blade X6450 Server Module Service Manual • May 2009... -
Page 153: Table B-1 Error Messages And Responses
Warning or Not an Error – The message appears on the screen. An error record is ■ logged to the system event log (SEL). The system continues booting with a degraded state. The user might want to replace the unit. Pause –... - Page 154 0152 Processor Failed BIST Pause 0153 Processor Failed BIST Pause 0154 Processor Failed BIST Pause 0155 Processor Failed BIST Pause 0156 Processor Failed BIST Pause 0157 Processor Failed BIST Pause Sun Blade X6450 Server Module Service Manual • May 2009...
- Page 155 Error Messages and Responses (Continued) TABLE B-1 Error Code Error Message Response 0158 Processor Failed BIST 0159 Processor Failed BIST 015A Processor Failed BIST 015B Processor Failed BIST 015C Processor Failed BIST 015D Processor Failed BIST 015E Processor Failed BIST 015F Processor Failed BIST 0160...
- Page 156 Unsupported Memory Vendor : DIMM_B1 Warning 5187 Unsupported Memory Vendor : DIMM_B2 Warning 5188 Unsupported Memory Vendor : DIMM_B3 Warning 5189 Unsupported Memory Vendor : DIMM_B4 Warning 518A Unsupported Memory Vendor : DIMM_B5 Warning Sun Blade X6450 Server Module Service Manual • May 2009...
- Page 157 Error Messages and Responses (Continued) TABLE B-1 Error Code Error Message Response 518B Unsupported Memory Vendor : DIMM_C0 Warning 518C Unsupported Memory Vendor : DIMM_C1 Warning 518D Unsupported Memory Vendor : DIMM_C2 Warning 518F Unsupported Memory Vendor : DIMM_C3 Warning 5190 Unsupported Memory Vendor : DIMM_C4 Warning...
- Page 158 Not enough space in runtime area. SMBIOS data will not be available. 8601 Error: BMC Not Responding 8701 Insufficient Runtime space for MPS data.!!. System may operate in PIC or Non-MPS mode. B-10 Sun Blade X6450 Server Module Service Manual • May 2009...
-
Page 159: Index
Index CD-ROM/DVD, 4-5 coin battery replacement, 3-21 accessory kit contents, 1-11 comments and suggestions, -xviii Advanced Configurable Power Interface (ACPI), testing, 4-6 component overview figure, 1-6 ATA, diagnosing, 4-5 configuring BIOS, 2-5 ATAPI devices console output, redirecting, B-2 diagnosing, 4-5 display information about, 4-5 fault LED, 3-19 tests against, 4-12... - Page 160 Option ROM size, 2-8 viewing BIOS Setup Utility using, 2-5 options available, 1-11 input device testing, 4-11 internal LEDs, 3-17 Pc-Check utility, 4-1 viewing information on, 4-12 Jumper J19, 2-42 PCI-X Index-2 Sun Blade X6450 Server Module Service Manual • May 2009...
- Page 161 3-31 tools required, 3-13 redirecting console output, B-2 typographic conventions, -xvii related documentation, -xvi replaceable components list, 1-11 revisions of Sun Blade X6450 server modules, identifying, 1-7 device connection, 1-10 devices, diagnosing, 4-6 tests against, 4-12 safety guidelines, -xv...
- Page 162 Index-4 Sun Blade X6450 Server Module Service Manual • May 2009...
Need help?
Do you have a question about the Blade X6450 and is the answer not in the manual?
Questions and answers