Table of Contents
Advertisement
OPERATOR'S MANUAL
18 VOLT CHAIN SAW
CCW180LBC
Your chain saw has been engineered and manufactured to our high standard for dependability, ease of operation, and operator
safety. When properly cared for, it will give you years of rugged, trouble-free performance.
WARNING:
To reduce the risk of injury, the user must read and understand the operator's manual before using this product.
Thank you for your purchase.
SAVE THIS MANUAL FOR FUTURE REFERENCE
Advertisement
Table of Contents

Subscribe to Our Youtube Channel
Related Manuals for Ryobi CCW180LBC


Summary of Contents for Ryobi CCW180LBC
- Page 1 OPERATOR’S MANUAL 18 VOLT CHAIN SAW CCW180LBC Your chain saw has been engineered and manufactured to our high standard for dependability, ease of operation, and operator safety. When properly cared for, it will give you years of rugged, trouble-free performance.
-
Page 2: Table Of Contents
TABLE OF CONTENTS Introduction ............................2 General Safety Rules ........................3-5 ........................6 Specific Safety Rules Symbols ............................7-8 Features ............................9 Assembly ............................10 Operation ............................10-18 Maintenance ..........................19-24 Troubleshooting ..........................25 Warranty ............................26 Parts Ordering and Service ....................Back Page INTRODUCTION This product has many features for making its use more pleasant and enjoyable. -
Page 3: General Safety Rules
Ryobi service dealer. READ ALL INSTRUCTIONS Check for damaged parts. Any part or guard... - Page 4 GENERAL SAFETY RULES KICKBACK Do not cut above shoulder height or overreach when See Figures 1 - 3. cutting. WARNING: Kickback may occur when the Follow the sharpening and maintenance instructions for the saw chain. moving chain contacts an object at the upper portion of the tip of the guide bar or when the ...
- Page 5 Do not use the chain saw in damp or wet When making a replacement, be sure to order one locations. of the Ryobi bars listed for the saw in this operator’s Do not use the chain saw near flammable liquids, manual. gases, or in any type of explosive atmosphere.
-
Page 6: Battery Safety
GENERAL SAFETY RULES BATTERY SAFETY Do not charge unit in a damp or wet location. Following this rule will reduce the risk of electric Battery operated units do not have to be shock. plugged into an electrical outlet; therefore, they ... -
Page 7: Symbols
SYMBOLS The following signal words and meanings are intended to explain the levels of risk associated with this product. SYMBOL SIGNAL MEANING Indicates an imminently hazardous situation, which, if not DANGER: avoided, will result in death or serious injury. Indicates a potentially hazardous situation, which, if not avoided, WARNING: could result in death or serious injury. -
Page 8: Features
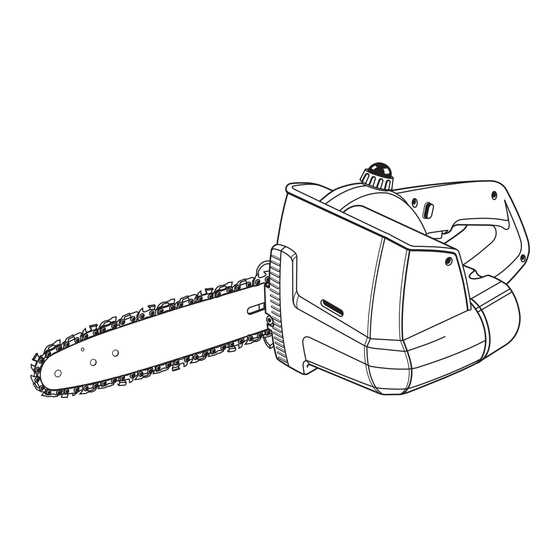
SYMBOLS Some of the following symbols may be used on this product. Please study them and learn their meaning. Proper interpretation of these symbols will allow you to operate the product better and safer. SYMBOL NAME DESIGNATION/EXPLANATION Kickback DANGER! Beware of kickback. Bar Nose Contact Avoid bar nose contact. - Page 9 FEATURES KNOW YOUR CHAINSAW See Figure 4. The safe use of this product requires an understanding of the information on the product and in this operator’s manual as well as a knowledge of the project you are attempting. Before use of this product, familiarize yourself with all operating features and safety rules.
-
Page 10: Assembly
Please call eyes resulting in possible serious injury. Ryobi Customer Service or contact an authorized service center for assistance. -
Page 11: Operation
Felling small trees up to 7 in. diameter cause damage to the bar and chain. Bucking the fallen tree into shorter lengths This product will accept Ryobi One + 18 V lithiumion CHAIN OIL SYSTEM battery packs and Ryobi One + 18 V nickel-cadmium See Figure 6. -
Page 12: Preparation For Cutting
OPERATION STARTING AND STOPPING THE CHAIN See Figure 7. WARNING: Keep body to the left of the chain line. Never straddle the saw or chain, or lean over past the chain line. Starting the chain saw: LOCK-OUT Place the chain saw on a flat bare surface and BUTTON make sure no objects or obstructions are in immediate vicinity which could come in contact with the bar and chain. - Page 13 OPERATION WARNING: Never use a left-handed (cross-handed) grip, or any stance which would place your body or arm across the chain line. Maintain a proper grip on the saw whenever the unit is running. The fingers should encircle the handle and the thumb is wrapped under the handlebar.
- Page 14 OPERATION PROPER CUTTING STANCE See Figure 11. CHAIN LINE Weight should be balanced with both feet on STRAIGHT ARM solid ground. POSITION Keep left arm with elbow locked in a “straight arm” position to withstand any kickback force. ...
- Page 15 OPERATION The chain saw operator should keep on the uphill WARNING: side of the terrain as the tree is likely to roll or Do not cut trees or branches near buildings, slide downhill after it is felled. which may result in serious injuries or property ...
- Page 16 OPERATION Felling Backcut. The backcut is always made level and horizontal, and at a minimum of 2 in. above the horizontal cut of the notch. See Figures 13 - 14. Never cut through to the notch. Always leave a band of wood between the notch and backcut NOTCH (approximately 2 in.
- Page 17 OPERATION WARNING: the ground. After completing the cut, wait for the saw chain to stop before you move the chain Never climb into a tree to limb or prune. Do saw. Always stop the motor before moving from not stand on ladders, platforms, a log, or in tree to tree.
- Page 18 OPERATION LIMBING A springpole is any log, branch, rooted stump, or See Figure 20. sapling which is bent under tension by other wood so that it springs back if the wood holding it is cut Limbing is removing branches from a fallen tree. or removed.
-
Page 19: Maintenance
Upon removal, cover the battery pack’s missing or damaged parts are replaced. Please call terminals with heavy-duty adhesive tape. Do not Ryobi Customer Service or contact an authorized attempt to destroy or disassemble battery pack service center for assistance. or remove any of its components. Lithium-ion Avoid using solvents when cleaning plastic parts. -
Page 20: Replacing Bar And Chain
MAINTENANCE REPLACING BAR AND CHAIN RECOMMENDED BAR AND CHAIN COMBINATIONS See Figures 23 - 27. Bar Part Number - 10 in. WARNING: 671256002 or 671834007 Remove the battery pack from the chain saw Chain Part Number 671256003 or 690583001 and make sure the chain has stopped before you do any work on the saw. -
Page 21: Chain Tension
MAINTENANCE Replace the chain cover, washer and chain cover CAUTION: screw. Tighten the chain cover screw finger tight Chain tensioned while warm, may be too tight only. The bar must be free to move for tension upon cooling. Check the “cold tension” before adjustment. next use. ... -
Page 22: Chain Maintenance
NOTE: Inspect the drive sprocket for wear or damage when replacing the chain. If signs of wear or damage are present in the areas indicated, have the drive sprocket replaced by a Ryobi Service dealer. HOW TO SHARPEN THE CUTTERS See Figures 32 - 33. - Page 23 MAINTENANCE DEPTH GAUGE CLEARANCE Put a few firm strokes on every tooth. File all left See Figure 36 - 38. hand cutters in one direction. Then move to the The depth gauge should be maintained at a other side and file the right hand cutters in the clearance of .025 in. Use a depth gauge tool for opposite direction. Occasionally remove filings checking the depth gauge clearances.
- Page 24 MAINTENANCE After lowering each depth gauge, restore original shape by rounding the front. Be careful not to DEPTH GAUGE JOINTER damage adjoining drive links with the edge of the file. Depth gauges must be adjusted with the flat file in the same direction the adjoining cutter was filed with the round file. Use care not to contact cutter face with flat file when adjusting depth gauges. GUIDE BAR MAINTENANCE FLAT FILE See Figure 39. Fig. 37 When the guide bar shows signs of wear, reverse it on the saw to distribute the wear for maximum bar life.
-
Page 25: Troubleshooting
TROUBLESHOOTING PROBLEM CAUSE SOLUTION 1. Tension chain. Refer to Chain 1. Check chain tension for Bar and chain running Tension earlier in this manual. hot and smoking. over tight condition 2. Check oil tank. 2. Chain oil tank empty. 1. Retension chain, Refer to Chain Motor runs, but chain is 1. -
Page 26: Warranty
LIMITED WARRANTY TTI warrants this outdoor product to be free of defects in material or workmanship for 24 months from the date of purchase by the original purchaser, subject to the limitations below. Please keep your invoice as proof of date of purchase. This warranty is only applicable where the product is used for personal and non-commercial purposes.
Need help?
Do you have a question about the CCW180LBC and is the answer not in the manual?
Questions and answers