Table of Contents
Advertisement
Advertisement
Table of Contents

Subscribe to Our Youtube Channel
Related Manuals for T-Fal T-fal


Summary of Contents for T-Fal T-fal
- Page 1 CONVECTION AND ROTISSERIE OVEN Instructions for use...
-
Page 2: Important Safeguards
IMPORTANT SAFEGUARDS When using electrical appliances, basic safety precautions should always be followed, in- cluding the following: • Read all instructions before using. • Do not touch hot surfaces. Use handles or knobs. • To protect against electric shock, do not immerse or partially immerse cord, plugs or appliance in water or other liquid. -
Page 3: Grounded Plug
Grounded plug • As a safety feature, this appliance is equipped with a grounded plug, which will only fit into a three- prong outlet. Do not attempt to defeat this safety feature. Improper connection of the grounding conductor may result in the risk of electric shock. Consult a qualified electrician if you are in doubt as to whether the outlet is properly grounded. - Page 4 Thank you for buying this appliance. Read the instructions in this leaflet carefully and keep them within reach. Any commercial use, inappropriate use or failure to comply with the in- structions, the manufacturer accepts no responsibility and the guarantee will not apply. For your safety, this product conforms to all applicable standards and regulations (Electric Safety, Food Compliant Materials, Environment, …).
-
Page 6: Before Using For The First Time
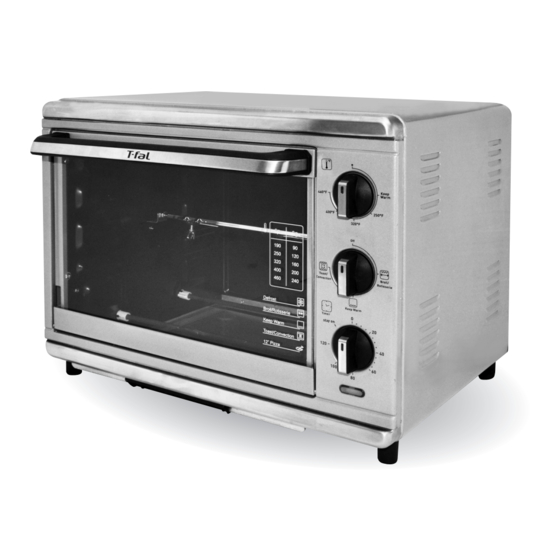
Description 1 Thermostat 8 Door handle 2 Function switch 9 Crumb tray 3 Timer 10 Chrome bake rack 4 Indicator light 11 Bake pan 5 Rack support guides 12 Tray/Rack handle 6 Heating elements 13 Rotisserie forks with screws/ Rotisserie spit 7 Glass door 14 Rotisserie handle Before using for the first time... - Page 7 Plug in the toaster oven. Put the crumb tray back in place. In order to remove any possible residues from manufacturing, run the appliance empty for 20 minutes. Select the Oven function and set the temperature dial to 460°F (240°C). Set the timer dial to 20 minutes.
-
Page 8: Rack Positions
Rack positions For all functions the position of the cooking rack will play an important role in the final cooking result. Note that there are 8 separate positions for the cooking rack. Place your tray in the center of the rack at the desired height. Warning: Do not pull the cooking rack more than 2/3-out. -
Page 9: Crumb Tray
Crumb tray The crumb tray should be cleaned in warm soapy water. (Do not wash the crumb tray in the dishwasher). Leave the crumb tray in place while the appliance is in operation. Do not touch the crumb tray during or immediately after operation. Allow to cool completely. - Page 10 Toast/Convection function Warning: 1.Never leave unattended during use. 2.Do not use the « stay on » function. Plug in the toaster oven. Insert the rack at the desired level. Select the Toast/Convection function. Set the temperature dial to the desired temperature Set the timer dial on the desired cooking time.
- Page 11 When cooking is completed, you will hear a beep and the timer automatically returns to the off position, the power indicator light will turn off. 0 min Turn the temperature dial to the position •. Using oven mitts or pot holders, lower oven door to the full open position and remove the cooked...
-
Page 12: Broil Function
Broil function Warning: 1 inch mini 1. Never leave unattended during use. 2. Do not use the « stay on » function. Plug in the toaster oven. Use shelf position #7. There must be a minimum space of 1 inch (2 cm) between the food and the top elements. - Page 13 When the cycle is completed, you will hear a beep, the timer automatically returns to the off position and the power indicator light turn off. 0 min Turn the temperature dial to the position •. Using oven mitts or pot holders, lower oven door to the full open position and remove the cooked...
-
Page 14: Rotisserie Function
Rotisserie function Warning: 1. Never leave unattended during use. 2. Do not use the « stay on » function. Plug in the toaster oven. Insert the tray at the lowest position. Pour water in the tray 10 fl oz (30 cl). Place the poultry or meat onto the spit. - Page 15 Monitor the poultry. When cooking is completed, you will hear a beep and the timer automatically returns to the Off position, the power indicator light turns off. 0 min Turn the temperature dial to the position •. Using oven mitts or pot holders, lower oven door to the full open position and remove the cooked...
-
Page 16: Keep Warm Function
Keep warm function Never leave unattended during use. Plug in the toaster oven. Place the food on the rack using an appropriate dish. Select the Keep Warm 250°F function. MAXI You have two options: Set the timer dial on Set the timer dial on Stay on. -
Page 17: Cleaning And Care
Turn the temperature dial to the position •. Using oven mitts or pot hold- ers, lower oven door to the full open position and remove the cooked food. Let the appliance cool down for 20 minutes before unplugging it. Cleaning and care Do not allow grease to accumulate inside the appliance. - Page 18 Baking information list Pre- Bread crust color heating Light 460°F / 240°C 5 min. 5 min. + 1.55 min. Medium 460°F / 240°C 5 min. 8 min. + 2.36 min. Dark 460°F / 240°C 5 min. 13 min. + 3.55 min. The above informations is just for reference.
- Page 19 TEFAL / T-FAL. d)In cases where the product is not repairable in the new country, the international TEFAL / T-FAL guarantee is limited to a replacement by a similar product or an alternative product at similar cost, where possible.
- Page 20 INTERNATIONAL GUARANTEE : COUNTRY LIST CIJA 1 an (0)41 28 18 53 9 rue Puvis de Chavannes - Saint Euquene 1 year ALGERIA Oran GROUPE SEB ARGENTINA S.A. 2 años ARGENTINA 0800-122-2732 Billinghurst 1833 3° - C1425DTK 2 years Capital Federal - Buenos Aires ՓԲԸ...
- Page 21 FRANCE GROUPE SEB FRANCE 1 an Incluant uniquement 09 74 50 47 74 Service Consommateur Tefal 1 year Guadeloupe, Martinique, BP 15 - 69131 ECULLY CEDEX Réunion, Saint-Martin ΕΛΛΑΔΛ 2 χρόνια SEB GROUPE ΕΛΛΑΔΟΣ Α.Ε. 2106371251 GREECE Οδός Καβαλιεράτου 7 Τ.Κ. 145 64 Ν. Κηφισιά...
- Page 22 ESPAÑA 2 años 902 31 24 00 C/ Almogàvers, 119-123, Complejo Ecourban SPAIN 2 years 08018 Barcelona TEFAL SVERIGE SUBSIDIARY OF GROUP SEB NORDIC SVERIGE 2 år 08 594 213 30 Truckvägen 14 A, SWEDEN 2 years 194 52 Upplands Väsby...
- Page 23 T E FA L / T- FA L I N T E R N AT I O N A L G U A R A N T E E Date of purchase: ....../ Date d'achat / Fecha de compra / Data da compra / Data d'acquisto / Kaufdatum / Aankoopdatum / Købsdato / Inköpsdatum / Kjøpsdato / Ostopäivä...
- Page 24 2 - 19 Ref. NC00113127 - 05/12 Subject to modifications...
Need help?
Do you have a question about the T-fal and is the answer not in the manual?
Questions and answers