Table of Contents
Advertisement
Advertisement
Table of Contents

Related Manuals for Den-Mat Sapphire

Summary of Contents for Den-Mat Sapphire
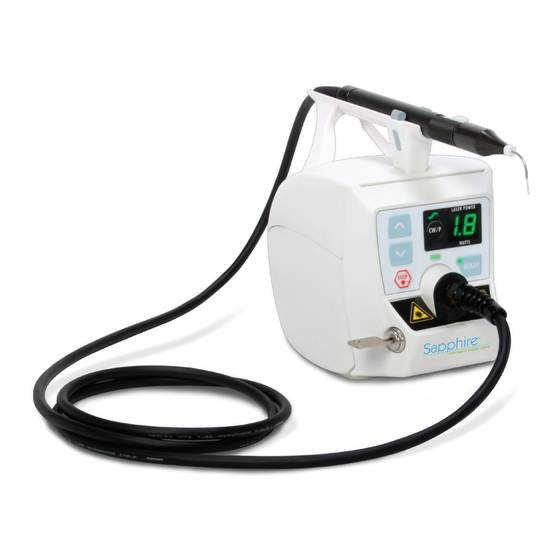
- Page 1 Sapphire Portable Diode Laser ® Instructions for Use...
-
Page 2: Table Of Contents
Emergency Termination of Laser Emissions .......................6 3. SAPPHIRE PORTABLE DIODE LASER INDICATIONS FOR USE ..............6 ® 4. SAPPHIRE PORTABLE DIODE LASER FACILITY AND ENVIRONMENTAL CONSIDERATIONS ....7 Heating and Ventilation ..............................7 Lighting: ....................................7 Combustible Chemicals and Gases ..........................7 Plume evacuation ................................7 Operatory Access during Sapphire Portable Diode Laser Use ................7... - Page 3 Gingival Contouring with the Sapphire Portable Diode Laser System ............22 Gingivectomy, Gingivoplasty and Papillectomy with the Sapphire Portable Diode Laser ......23 Gingival Troughing & Tissue Retraction for Impressions with Sapphire Portable Diode Laser ....24 Sulcular Debridement with the Sapphire Portable Diode Laser System ............25 Labial Frenectomy with the Sapphire Portable Diode Laser System ..............
-
Page 4: Introduction
Safety is paramount when using any energy-based surgical instrument and your office should implement a safety program for the Sapphire Portable Diode Laser. If your office does not already have a safety officer, one should be appointed to be responsible for understanding proper use, safe operation, and maintenance of the Sapphire Portable Diode Laser system. -
Page 5: Warnings And Cautions
Warning: Visible and Invisible Laser Radiation – Avoid eye or skin exposure to direct or scattered radiation CLASS 4 Laser Product Above Warning is affixed to the front panel of the Sapphire Portable Diode Laser Control Module. LASER APERTURE at the end of handpiece Above Warning is affixed to the cover overhanging the power/communications cord receptacle. -
Page 6: Emergency Termination Of Laser Emissions
3. SAPPHIRE PORTABLE DIODE LASER INDICATIONS FOR USE The Sapphire Portable Diode Laser is indicated for use in dental intraoral soft tissue general, oral maxilla-facial and cosmetic surgery including ablating, incising, excising, vaporizing and coagulation of soft tissues using a fiber optic delivery system. -
Page 7: Sapphire Portable Diode Laser Facility And Environmental Considerations
4. SAPPHIRE PORTABLE DIODE LASER FACILITY AND ENVIRONMENTAL CONSIDERATIONS In order to insure the safe use of the Sapphire Portable Diode Laser in your facility, please check to make sure that the proposed location is compatible with the specifications listed below. -
Page 8: General Safety With The Sapphire Portable Diode Laser
Holdings, LLC recommends implementation of a safety ® program for the safety of your patients and office staff in connection with the use of the Sapphire Portable Diode Laser. Den-Mat Holdings, LLC also recommends checking and complying with applicable state and provincial... -
Page 9: Electromagnetic Environment Guidance
0.0025/0.0063 Table 1 NOHD Never point the Sapphire Portable Diode Laser tip directly at the face, eyes or skin of anyone while emitting energy. Emergency Shutdown Options: Perform any of these actions to terminate laser emissions in the event of a real or perceived emergency: 1. -
Page 10: Sapphire Portable Diode Laser Installation And Setup
Control Module. Power Switch – The power switch for the Sapphire Portable Diode Laser is located on the rear panel of the Control Module. This switch must be in the “ON” position when the Sapphire Portable Diode Laser unit is to be used. - Page 11 Operating Key Switch – In order to operate the Sapphire Portable Diode Laser unit, the Laser Operating Key must be inserted into the key switch on the side of the Sapphire Portable Diode Laser Control Module and turned clockwise to the “ON” position to place the unit in STANDBY status. Prior to leaving the office, your safety officer should check to see that the key switch has been turned off, removed and stored in a safe place and that the rear Power Switch is in the “OFF”...
-
Page 12: Sapphire Portable Diode Laser Controls And Displays
PORTABLE DIODE LASER CONTROLS AND DISPLAYS ® Sapphire Portable Diode Laser Handpiece: The Sapphire Portable Diode Laser Handpiece includes the components and functions as shown below: Avoid Exposure-Laser Radiation is emitted from this aperture Sapphire Portable Diode Laser Handpiece Components 1. -
Page 13: Sapphire Portable Diode Laser Control Panel
Sapphire Portable Laser Control Panel: The Sapphire Portable Laser Control Panel has the following features and control functions: Figure 1 1. “READY” Button 2. “READY” Indicator Light • Green in “READY” status • Unlit in “STANDBY” status 3. “UP” adjustment for Laser Power 4. -
Page 14: Sapphire Portable Diode Laser Power Level Adjustment
Aiming Beam Adjustment: The Sapphire Portable Diode Laser provides a visible light that illuminates the site at which the Laser working beam will be active, allowing the operator to aim the beam before and during activation. The Aiming Beam is active in READY status and therefore also serves as a visual indicator of READY status at the Handpiece. -
Page 15: Emergency Deactivation Of Laser
When the Sapphire Portable Diode Laser is in READY and the ON/OFF button on the Handpiece is held down, or the footswitch is depressed and held down, the active mode icon will turn from GREEN to RED and an audible “chirp” will be heard, indicating that the laser working beam has been activated. After a 200 micro- second delay, the Handpiece will begin delivering laser working beam emissions to the target tissue by means of the disposable 400 micrometer fiberoptic delivery tip. -
Page 16: Portablility Of The Sapphire Portable Diode Laser
Sleep Mode and Conserving Power: In order to conserve battery power, the Sapphire Portable Diode Laser will go into a ‘Sleep Mode’ if the unit has been left ON but has not been used or had any adjustments made to any settings. When the unit is in Sleep Mode, all displays will go blank except for the LED in the battery indicator icon, which will flash green. -
Page 17: Pulsed Energy Mode
Cool the tissues being treated by using periodic blasts of air from a triplex syringe and high speed suction. You may also use water to cool in areas where there is prolonged exposure to the Sapphire Portable Diode Laser beam. Avoid using the air syringe when you have an opening in soft tissue adjacent to or within the surgery site, as an air embolism may occur resulting from air captured within the tissue during the cooling process. - Page 18 Handpiece receptacle and firmly press the Tip onto the Handpiece. We recommend that you set the Sapphire Portable Diode Laser to READY with the aiming beam at default (0.4 mW) after installing a new Fiber Optic Tip to evaluate the shape and the intensity of the beam to ensure the integrity of the fiber Optic system: the aiming beam spot should be round and the beam should be focused and not diffuse.
-
Page 19: Initiating The Fiber
Hard Tissue Procedures: The Sapphire Portable Diode Laser is not indicated for hard tissue procedures. The Sapphire Portable Diode Laser is attracted to melanin, hemoglobin and to some extent to water. Avoid prolonged exposure of the energy when working in and around the cervical areas of the tooth. Due to the thin layer of enamel in this area, energy may be absorbed by the hemoglobin in the pulp and pulpal hyperemia may occur. - Page 20 20% of each setting. If not, replace the Fiber Optic Tip and recheck power outputs. If output displays are still outside the ±20% tolerance, return the unit to Den-Mat Holdings, LLC for recalibration. There are no methods available for the user to adjust the calibration of the unit and the Handpiece must not be opened by the user for...
-
Page 21: Procedural Recommendations For Using The Sapphire Portable Diode Laser
Always test-fire the Sapphire Portable Diode Laser prior to using it intra-orally. Set working beam power to 1.0W CW, and place the Sapphire Portable Diode Laser in the READY mode. Activate the working beam for 1 - 2 seconds while aiming the fiber tip onto a 2 x 2 gauze sponge moistened with water. Do not use alcohol or any other combustible material to wet the 2 x 2 sponge, as it may ignite. -
Page 22: Gingival Contouring With The Sapphire Portable Diode Laser System
Gingival Contouring with the Sapphire Portable Diode Laser: ® Tip: Initiated Mode: Continuous Wave Power: 0.8 W Anesthesia: Local, as required Technique: Contact 1. After anesthesia is profound, insert a periodontal probe into the sulcus down to the crest of the bone. -
Page 23: Gingivectomy, Gingivoplasty And Papillectomy With The Sapphire Portable Diode Laser
Gingivectomy, Gingivoplasty and Papillectomy with the Sapphire Portable Diode Laser: Tip: Initiated Mode: Continuous Wave Power: 1.0 W Anesthesia: Local, as required Technique: Contact 1. Using a periodontal probe, record the depth of the pocket to be treated and evaluate its condition, either acute or chronically inflamed. -
Page 24: Gingival Troughing & Tissue Retraction For Impressions With Sapphire Portable Diode Laser
Gingival Troughing & Tissue Retraction for Impressions with Sapphire Diode Portable Laser: ® Tip: Initiated Mode: Continuous Wave Power: 0.8 W Anesthesia: Topical or Local, as required Technique: Contact 1. Following preparation of the tooth, cleanse the area (optional) with H and then rinse with a light spray of water. -
Page 25: Sulcular Debridement With The Sapphire Portable Diode Laser System
Sulcular Debridement with the Sapphire Portable Diode Laser: (Including removal of sulcular tissue and granulation tissue) Tip: Initiated Mode: Pulsed Power: 0.8 W Anesthesia: Topical or Local, as required Technique: Contact Time: 30 seconds Technique: Contact 1. After conventional instrumentation has been completed, insert the fiber tip to the full pocket depth. -
Page 26: Labial Frenectomy With The Sapphire Portable Diode Laser System
1. Place tension on the frenum by retracting the lip or cheek. 2. Beginning at the base of the attachment to the gingival tissue, make an incision with the Sapphire Portable Diode Laser that is perpendicular to the length of the frenum. -
Page 27: Abcess Excision With The Sapphire Portable Diode Laser
5. Once you have established the base of the parulis, back the fiber optic (therapy) tip out approximately 2 mm and activate the Sapphire Portable Laser as you slowly withdraw the tip. 6. Remove the tip briefly and allow any exudate to drain. -
Page 28: Hemostasis With The Sapphire Portable Diode Laser
Hemostasis with the Sapphire Portable Diode Laser ® Tip: Uninitiated Mode: Continuous Wave Power: 1.0 W Anesthesia: Topical or as required Technique: Non-Contact Place the Fiber Optic Tip 2 mm above the gingival sulcus, in non- contact with tissue. Direct energy into sulcus and away from the dentin and cementum. -
Page 29: Sapphire Portable Diode Laser Specifications
400 µm x 2 inch Style: Polymer-clad fiber Accessories: Foot Switch (EN 60529, IP 38 compliant; includes contact guard) Sanitary, disposable single-use only Barrier Sleeve for Handpiece 400 µm Single-Use ONLY Fiber Optic Tips Contact Den-Mat Holdings, LLC Sales to order accessories. -
Page 30: Servicing The Sapphire Portable Diode Laser
® In the event that the laser fails to operate correctly and your 1Call Representative is unable to help, the unit will need to be returned to Den-Mat Holdings, LLC for repair, there are no user-repairable parts found with ®... -
Page 31: System Warranty
Holdings, LLC will contact the customer with a price quotation for the cost of repairs. This is a limited warranty and the liability of Den-Mat Holdings, LLC is to repair or replace the system with new or refurbished parts. Den-Mat Holdings, LLC has no liability to refund any part of the purchase price and no liability for consequential damages, loss of profits, and damages to person or injury by reasons of any defects in said system from any cause whatsoever. - Page 32 ©2011 Den-Mat Holdings, LLC. World Rights Reserved. 823057500 05/11DO ®...
Need help?
Do you have a question about the Sapphire and is the answer not in the manual?
Questions and answers