Table of Contents
Advertisement
www.ma163.com
u5[ P b€ g /• D e™ • Q
Dell E153FPc
Service Manual
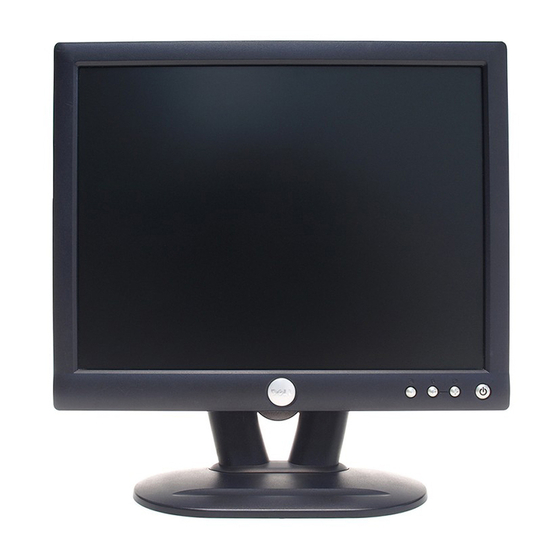
15" LCD MONITOR
DELL E153FPc
THESE DOCUMENTS ARE FOR REPAIR SERVICE INFORMATION ONLY.EVERY REASONABLE EFFORT
HAS BEEN MADE TO ENSURE THE ACCURACY OF THIS MANUAL; WE CANNOT GUARANTEE THE
ACCURACY OFTHIS INFORMATION AFTER THE DATE OF PUBLICATION AND DISCLAIMS RELIABILITY FOR
CHANGES, ERRORS OR OMISSIONS.
Advertisement
Table of Contents

Subscribe to Our Youtube Channel
Related Manuals for Dell E153FPc


Summary of Contents for Dell E153FPc
-
Page 1: Service Manual
P b€ g /• D e™ • Q Dell E153FPc Service Manual 15” LCD MONITOR DELL E153FPc THESE DOCUMENTS ARE FOR REPAIR SERVICE INFORMATION ONLY.EVERY REASONABLE EFFORT HAS BEEN MADE TO ENSURE THE ACCURACY OF THIS MANUAL; WE CANNOT GUARANTEE THE ACCURACY OFTHIS INFORMATION AFTER THE DATE OF PUBLICATION AND DISCLAIMS RELIABILITY FOR CHANGES, ERRORS OR OMISSIONS. -
Page 2: Table Of Contents
/• D e™ • Q Dell E153FPc Table of contents Table of contents------------------------------------------------------------------------------------------------------------------------- 02 Revision List-----------------------------------------------------------------------------------------------------------------03 Important Safety Notice ----------------------------------------------------------------------------------------------------------------04 1. Monitor Specifications --------------------------------------------------------------------------------------------------------------05 2. LCD Monitor Description ---------------------------------------------------------------------------------------------------------- 06 3. Operation instructions --------------------------------------------------------------------------------------------------------------07 3.1 General Instructions -------------------------------------------------------------------------------------------------------------07 3.2 Control buttons -----------------------------------------------------------------------------------------------------------------07... -
Page 3: Revision List
/• D e™ • Q Dell E153FPc Revision List Revision Release Date Revise History TPV model T560KCLHM8DLN Mar.-11-2005 Initial Release T560KCLHM8DRN Add “Important Safety Notice” Nov.-22-2005 Add” Definition Of Pixel Defects” Mar.-31-2006 Add” Max Brightness measurement” on... -
Page 4: Important Safety Notice
REFER TO BACK COVER FOR IMPORTANT SAFETY GUIDELINGS Proper service and repair is important to the safe, reliable operation of all Dell Company** Equipment. The service procedures recommended by Dell and described in this service manual are effective methods of performing service operations. -
Page 5: Monitor Specifications
P b€ g /• D e™ • Q Dell E153FPc 1. Monitor Specifications Driving system TFT Color LCD Size 38cm(15.0") Pixel pitch 0.297mm(H) x 0.297mm(V) LCD Panel û û Viewable angle (H) 100 Brightness 200cd/m (Min) Response time (typ.) 16 ms... -
Page 6: Lcd Monitor Description
/• D e™ • Q Dell E153FPc 2. LCD Monitor Description The LCD MONITOR will contain a main board, an inverter/power board, keypad board, which house the flat panel control logic, brightness control logic and DDC. The power board will provide AC to DC Inverter voltage to drive the backlight of panel and the main board chips each voltage. -
Page 7: Operation Instructions
P b€ g /• D e™ • Q Dell E153FPc 3. Operation instructions 3.1 General Instructions Press the power button to turn the monitor on or off. The other control buttons are located at front panel of the monitor. -
Page 8: Adjusting The Picture
P b€ g /• D e™ • Q Dell E153FPc 3.3 Adjusting the Picture To set the OSD menu, perform the following steps: Briefly press the SELCT / MENU button to activate the OSD menu. The main menu appears on the screen with icons for the setting functions. -
Page 9: Adjusting The Brightness And Contrast
/• D e™ • Q Dell E153FPc Adjusting the brightness and contrast Calling the Brightness / Contrast setting window using Brightness button. Setting the brightness of the display Brightness With this function you change the brightness of the background lighting. -
Page 10: Setting Language
/• D e™ • Q Dell E153FPc Setting display of the OSD menu Calling the OSD Set up setting window Horizontal Setting the horizontal position of the OSD menu Position With this function you move the OSD menu to the left or to the right. -
Page 11: Input/Output Specification
P b€ g /• D e™ • Q Dell E153FPc 4. Input/Output Specification 4.1 Input Signal Connector Pin No. Description Pin No. Description Green Detect Cable Blue Ground Ground DDC-Serial Data Ground H-Sync R-Ground V-Sync G-Ground DDC-Serial Clock... -
Page 12: Power Supply Requirements
/• D e™ • Q Dell E153FPc 4.3 Power Supply Requirements A/C Line voltage range 100 V ~ 240 V± 10 % 50 ± 3Hz, 60 ± 3Hz A/C Line frequency range Input Voltage transients 280 volts AC for 10 sec @40℃... - Page 13 P b€ g /• D e™ • Q Dell E153FPc 4.4.3 Optical Characteristics The optical characteristics are measured under stable conditions as follows:...
-
Page 14: Block Diagram
/• D e™ • Q Dell E153FPc 5. Block Diagram 5.1 Monitor Exploded View... - Page 15 P b€ g /• D e™ • Q Dell E153FPc Item Description Part Number Quantity BEZEL 34L1228AY2 T REAR COVER 34L1229 Y2 T KEYPAD BUTTON 33L4670 GV POWER BUTTON 33L4669 GV MAIN FRAME 15L5941 1 B SHIELD INVERTER...
- Page 16 P b€ g /• D e™ • Q Dell E153FPc Item Description Part Number Quantity RISER REAR 34L1232 Y2 RISER FRONT 34L1231 Y2 VEVA COVER 34L1230 Y2 BASE 34L1233 Y2 2T BRACKET RISER 20L 008 HINGE ASSY 37L 483...
-
Page 17: Software Flow Chart
P b€ g /• D e™ • Q Dell E153FPc 5.2 Software Flow Chart... - Page 18 P b€ g /• D e™ • Q Dell E153FPc MCU Initializes. 2) Is the EEprom blank? 3) Program the EEprom by default values. 4) Get the PWM value of brightness from EEprom. 5) Is the power key pressed? 6) Clear all global flags.
-
Page 19: Electrical Block Diagram
P b€ g /• D e™ • Q Dell E153FPc 5.3 Electrical Block Diagram 5.3.1 Main Board... - Page 20 /• D e™ • Q Dell E153FPc 5.3.2 Inverter/Power Board AC input Bridge Rectifier Transformer Rectifier CMOS EMI filter and Filter MOSFET Start Circuit Q903 R906, R907 CON102 Voltage Feedback Over Circuit Control IC Voltage Protect ON/OFF...
-
Page 21: Mechanical Instruction
/• D e™ • Q Dell E153FPc 6. Mechanical Instruction Tools: 2 Power screwdrivers (φ=5mm,L=60mm); 1 small cross screwdriver; turnbuckle driver; Setting: Power screwdriver torque A=11 kgF. Cm; torque B=6 kgF. Cm Remark Rear cover Remove stand: Remove the 4 screws and remove the stand ass’y by... - Page 22 /• D e™ • Q Dell E153FPc Cable hook Remove bezel: Key board Disconnect the Key board connector and remove the bezel Note: When installing monitor fixes the cable use Black Adhesive Tape and screw shield the cable hook.
- Page 23 /• D e™ • Q Dell E153FPc Remove the main frame: Disconnect the back light connectors Remove the four screws and remove the main frame by manual or torque = 3kgF.Cm LVDS cable Remove the main frame and at the same...
- Page 24 /• D e™ • Q Dell E153FPc Black Adhesive Tape When installing monitor. Fix the LVDS by Black Adhesive Tape. 10mm should be kept between the tape and the connect end. Power board Mylar Remove the Power board and main board:...
- Page 25 /• D e™ • Q Dell E153FPc The end Lay the FFCL as the figure show...
-
Page 26: Schematic
Dell E153FPc 7. Schematic 7.1 Main Board R128 1/16W R129 1/16W PC5V CN100 FB101 1/16W R101 C104 0.047uF RED+ gndR 1/16W DAT_DDC FB102 1/16W R104 C106 0.047uF GREEN+2 gndG 1/16W FB103 1/16W R105 C108 0.047uF... - Page 27 P b€ g /• D e™ • Q Dell E153FPc 3.3V_DVDD 1.8V_DVDD +3.3V_VDD +1.8V_VDD 3.3V_PVDD 3.3V_DVDD 1.8V_DVDD 139m A 58.27m A 3.3V_AVDD U102 L102 C130 C131 C132 C133 C134 C135 L101 C123 C124 C125 C126 C127 C128 120 OHM 3.3V_LAVDD...
- Page 28 P b€ g /• D e™ • Q Dell E153FPc Q102 PMBS3904 R154 RP103 LED_O LED_G Q101 LED_O LED_G 4.7K 1/16W PMBS3904 R155 4.7K 1/16W 4.7K 1/16W CN101 LED_GREEN LED_ORANGE KEY _MENU ENTER R157 ...
-
Page 29: Panel Interface
P b€ g /• D e™ • Q Dell E153FPc LVDS_O[0..9] LVDS_O0 CN103 LVDS_O1 LVDS_O2 LVDS_O3 LVDS_O0 RXO0- RXO0+ LVDS_O1 LVDS_O4 LVDS_O2 RXO1- RXO1+ LVDS_O3 LVDS_O5 LVDS_O4 RXO2- RXO2+ LVDS_O5 LVDS_O6 LVDS_O6 RXOC- RXOC+ LVDS_O7 LVDS_O7 LVDS_O8 RXO3-... - Page 30 P b€ g /• D e™ • Q Dell E153FPc CN104 BLON/OFF R162 4.7K 1/16W PBIAS DIMMING +3.3V_VDD FB105 TO263 C163 U105 0.1uF/16V C164 AIC1084-33M 147m A CONN C162 0.1uF/16V VOUT 100uF/16V D113 SR24 C165 C167 C168...
-
Page 31: Power Board
/• D e™ • Q Dell E153FPc 7.2 Power Board R920 C920 1/2W 0.001uF/500V T901 F902 D910 31DQ10 FUSE TO INVERTER L903 CN102 BD901 2KBP06M R906 R904 C906 R903 C922 C924 C928 FB903 1/4W 1/4W 0.0015uF/2KV... - Page 32 P b€ g /• D e™ • Q Dell E153FPc Q203 SI4431DY -T1 CN201 C215 C226 39pF/3KV 39pF/3KV +12V L201 R212 R224 R225 R226 R227 R214 3.9K 1/16W CONN 1/16W 1/16W 1/16W 1/16W ...
-
Page 33: Pcb Layout
P b€ g /• D e™ • Q Dell E153FPc 8. PCB Layout 8.1 Main Board... -
Page 34: Inverter/Power Board
/• D e™ • Q Dell E153FPc 8.2 Inverter/Power Board... -
Page 35: Maintainability
P b€ g /• D e™ • Q Dell E153FPc 9. Maintainability 9.1 Equipments and Tools Requirement 1. Voltage meter 2. Oscilloscope 3. Pattern Generator 4. LCD Color Analyzer 5. Service Manual 6. User Manual... -
Page 36: Trouble Shooting
/• D e™ • Q Dell E153FPc 9.2 Trouble shooting 9.2.1 Main Board No Display Check Power board, is there DC level output? Measured CN104 pin5 = 5 V? Check U105 pin3=5V, U105 pin2=3.3V? Measured U101 pin 44= 5V? Is there any shortage or cold solder? Measured U105 pin 2= 3.3V? - Page 37 /• D e™ • Q Dell E153FPc Panel Power Circuit Check the PPWR panel power relative circuit, Q105, Q104 In normal operation, Check R172 should have response from when LED =green, R172 should =5V 0V to 5V when we switch the power...
- Page 38 /• D e™ • Q Dell E153FPc U102-date Output Measured DCLK (pin 57 from U102) DVS, DHS (pin 54,55 from U102) Is the waveform ok? DCLK around 48 MHZ, DVS=60.09Hz, DHS around 80 Replace ZAN3XL (U102) or KHz? (Refer to input signal=640x480@60 Hz, and LED is replace Main board.
- Page 39 /• D e™ • Q Dell E153FPc 9.2.2 Inverter/Power Board No Power Check to CN102 Pin12=12V Check Interface board Check AC line volt 110V or 220V Check AC line Check the voltage of C904(+) Check F901, bridge rectified circuit...
- Page 40 /• D e™ • Q Dell E153FPc No Backlight Check C201(+) =12V Change F902 Check D201/Q209/Q210 Check ON/OFF signal Check Interface board Check U201 pin9=12V voltage of C905(+) Change Q201 or Q202 Check the pin1 of U201 have saw tooth wave Change U201 Check D201 (-) have the output of square wave at short time.
- Page 41 /• D e™ • Q Dell E153FPc 9.2.3 Key Board OSD is unstable or not working Is Keypad board connecting normally Connect Keypad Board Is Button Switch normally Replace Button Switch Is Keypad board normally Replace Keypad Board...
-
Page 42: White Balance Adjustment
Dell E153FPc 10. White balance, Luminance adjustment Approximately 2 Hours should be allowed for warm up before proceeding White-Balance adjustment. Before started adjust white balance, please setting the Chroma-7120 MEM. Channel 3 to 6500 K colors, MEM. Channel 4 to 9300 K colors, MEM. -
Page 43: Edid Content
P b€ g /• D e™ • Q Dell E153FPc 11. EDID Content 12. ISP (In System Program) User Manual 12.1 Connect ISP Writer preparation action Connect RXD and TXD of PC to RXD (P3.0) and TXD (P3.1) of CPU through RS-232. -
Page 44: To Use Isp Writer
/• D e™ • Q Dell E153FPc 12.2 To Use ISP WRITER Press the “–“ key at front bezel and plug the AC power cord in, then the MCU enter ISP mode; a. You will enter the window as follow after executing the ispwriter.exe file. - Page 45 /• D e™ • Q Dell E153FPc...
- Page 46 /• D e™ • Q Dell E153FPc c. Click the “Select Bank0” button and selecting a file which a binary Format required.
- Page 47 /• D e™ • Q Dell E153FPc d. Select the communication Setting: Port Name e. Click the “ConNect” button.
-
Page 48: Executing Isp
P b€ g /• D e™ • Q Dell E153FPc f. Click “Program all” to start programming. 12.3. Executing ISP a. “Program All” button that will execute erase and program and verify. Then you can get the window as follow, and click “OK”... -
Page 49: Bom List
/• D e™ • Q Dell E153FPc 13. BOM List Different Parts List Part NO Description Quantity Unit Remark 750LLC50G091ZB CPT 15" 021 ZB PANEL For T560KCLHM8DLN model 750LLC50G092ZB CPT 15" 011 ZB PAMEL For T560KCLHM8DRN model... - Page 50 /• D e™ • Q Dell E153FPc 40L 457624 1B CPU LABEL 40L 45762412B CBPC LABEL 67L309V220 3 22UF +-20% 16V C122 67L309V220 3 22UF +-20% 16V C129 67L305S220 3H 22UF 16V MINI TYPE C136 67L309V220 3...
- Page 51 /• D e™ • Q Dell E153FPc 65L0603220 31 CHIP 22PF 50V NPO C147 65L0603220 31 CHIP 22PF 50V NPO C148 65L0603104 12 0.1UF +-10% 16V X7R C149 65L0603104 12 0.1UF +-10% 16V X7R C150 65L0603102 32...
- Page 52 /• D e™ • Q Dell E153FPc 61L0603101 CHIPR 100 OHM +-5% 1/10 R102 61L0603101 CHIPR 100 OHM +-5% 1/10 R104 61L0603101 CHIPR 100 OHM +-5% 1/10 R105 61L0603750 9F 75OHM 1% 1/10W R106 61L0603750 9F 75OHM 1% 1/10W...
- Page 53 /• D e™ • Q Dell E153FPc 61L0603472 CHIPR 4.7K OHM +-5% 1/1 R163 61L0603102 CHIPR 1K OHM +-5% 1/10W R164 61L0603102 CHIPR 1K OHM +-5% 1/10W R165 61L0603472 CHIPR 4.7K OHM +-5% 1/1 R168 61L0603000 CHIPR 0OHM +-5% 1/10W...
- Page 54 /• D e™ • Q Dell E153FPc 61L 58120 WT NTCR 12OHM 20% 2A SCK-1 NR901 80LL15T 7DNG X'FMR PT201 57G 761 6 2SC5706-P-E Q206 57G 761 6 2SC5706-P-E Q207 80LL17T 2 T X'FMR T901 PWPC1521SED1AI POWER BOARD FOR AI 65L0805104 22 0.1UF +-10% 25V X7R 080...
- Page 55 /• D e™ • Q Dell E153FPc 61L1206472 CHIP 4.7KOHM 5% 1/4W R909 61L1206472 CHIP 4.7KOHM 5% 1/4W R910 61L1206472 CHIP 4.7KOHM 5% 1/4W R911 61L1206101 CHIP 100 OHM 5% 1/4W R912 61L1206103 CHIP 10KOHM 5% 1/4W...
- Page 56 /• D e™ • Q Dell E153FPc 61G 20036252T 3.6KOHM 1% 1/4W R923 61G 20024252T 2.4KOHM 1% 1/4W R924 61L 17210252T 1K OHM 5% 1/4W R925 61L 17210252T 1K OHM 5% 1/4W R926 61L 17210152T 100 OHM 5% 1/4W...
- Page 57 /• D e™ • Q Dell E153FPc 73L 253 91 LS CHOKE BY LI SHIN L903 73L 253 91 LS CHOKE BY LI SHIN L904 61L 58120 WT NTCR 12OHM 20% 2A SCK-1 NR901 80LL15T 7DNG X'FMR...
- Page 58 /• D e™ • Q Dell E153FPc 61L1206105 CHIP 1MOHM 5% 1/4W R901 61L1206105 CHIP 1MOHM 5% 1/4W R902 61L1206519 CHIPR 5.1OHM +-5% 1/4W R908 61L1206472 CHIP 4.7KOHM 5% 1/4W R909 61L1206472 CHIP 4.7KOHM 5% 1/4W R910 61L1206472 CHIP 4.7KOHM 5% 1/4W...
- Page 59 /• D e™ • Q Dell E153FPc 61L175L47052T 47OHM +-5% 1/2W R920 61L175L47052T 47OHM +-5% 1/2W R921 61G 20033352T 33KOHM 1% 1/4W R922 61G 20036252T 3.6KOHM 1% 1/4W R923 61G 20024252T 2.4KOHM 1% 1/4W R924 61L 17210252T...
- Page 60 P b€ g /• D e™ • Q Dell E153FPc 4L061210M 00 METAL WASHERS12.0*6.03* 4L061210T 00 METAL WASHERS12.0*8.00* 4L061210T 01 METAL WASHERS12.0*4.72* 15L 483110 BRACKETS 15L 483130 BRACKETS 28L0618070 SHAFTS...
-
Page 61: Definition Of Pixel Defects
/• D e™ • Q Dell E153FPc 14. Definition of Pixel Defects CLAA150XG 09... - Page 62 /• D e™ • Q Dell E153FPc...
Need help?
Do you have a question about the E153FPc and is the answer not in the manual?
Questions and answers