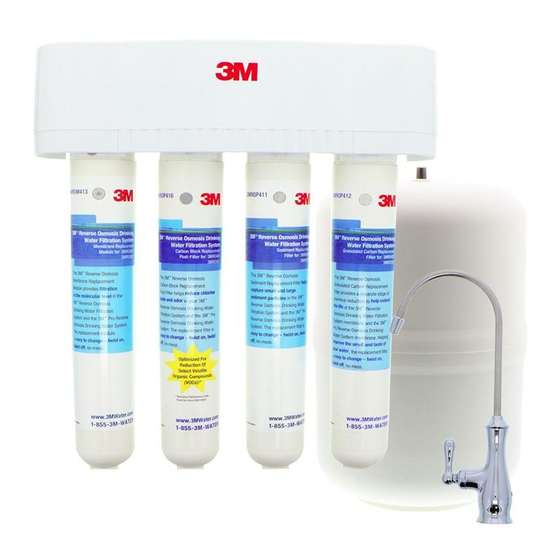
3M 3MRO401 Installation And Operating Instructions For
Reverse osmosis drinking water filtration system
Hide thumbs
Also See for 3MRO401:
- Installation and operating instructions manual (12 pages) ,
- Installation and operating instructions manual (12 pages)
Table of Contents
Advertisement
Quick Links
- 1 Prefill and Sanitize the Storage Tank
- 2 Install the Feed Water Connection and Tubing
- 3 Flush the System and Check the Operation
- 4 Installation Troubleshooting
- 5 Replacing the Filters
- 6 Replacing the Ro Membrane Module
- 7 Operation & Maintenance Instructions
- 8 Sanitizing the Ro System
- Download this manual
Advertisement
Table of Contents

Summary of Contents for 3M 3MRO401
- Page 1 Installation and Operating Instructions For 3MRO401 Reverse Osmosis Drinking Water Filtration System Installer: Please leave manual with homeowner. Homeowner: Please retain for operation and future maintenance instructions.
-
Page 2: Safety Information
3MRO401 Reverse Osmosis Drinking Water Filtration System. Retain these instructions for future reference. Intended use: The 3MRO401 Reverse Osmosis Drinking Water Filtration System is intended for use in fi ltering drinking water in resi- dential locations and has not been evaluated for other uses. The system is typically installed beneath a kitchen sink, and must be installed as specifi... - Page 3 • Ensure all tubing and fi ttings are secure and free of leaks. • Do not install unit if any fi tting collets are missing. Contact 3M if collets are missing from any fi ttings. • All hydropneumatic tanks must have an appropriate pressure relief valve installed.
-
Page 4: Table Of Contents
• Installation may require drilling a hole in your sink top. A variable speed drill and specialized drill bits may be needed. We highly recommend professional installation! This manual explains the installation, operation and maintenance of the 3MRO401 Reverse Osmosis Water Filtration System. Please read each section of this manual carefully. -
Page 5: Installation Instructions
I. Installation Instructions A. DETERMINE THE SYSTEM LOCATION B. PREPARE THE AREA FOR INSTALLATION The system should be located under a sink. The exact placement Inspect the cold water supply line and determine if any special of the various components will vary from installation to installation. fittings, in addition to what is included in the kit, are required. -
Page 6: Mount The Faucet
Drilling hole through Porcelain/Enamel/Ceramic Sinks the faucet on its flats with a padded adjustable wrench. Use care not to mar the finish. If you are reading this section, professional installation is highly recommended. Recommended Tools: • Variable Speed Drill Faucet with Air Gap •... -
Page 7: Install The Feed Water Connection And Tubing
G. INSTALL THE FEED WATER CONNECTION AND TUBING H. PREFILL AND SANITIZE THE STORAGE TANK 1) Open faucet and turn off cold water supply to relieve pressure. Prefilling the storage tank is always recommended so that there is 2) Locate the cold water stem on the underside of the faucet fixture. pressure to check for leaks as well as sufficient water to flush the carbon Unscrew the cold water feed tube from the faucet stem. -
Page 8: Install The Filtration Assembly And Storage Tank
drains, consult your professional installer for special drain saddles. • Tubing runs should generally follow the contour of the cabinet The drain saddle should always be installed above (before) the trap rather than interfere with the cabinet storage area. and on the vertical or horizontal tailpiece. Never install the drain saddle •... -
Page 9: Installation Troubleshooting
Possible Cause: An obstructed or damaged valve seat in the faucet Possible Cause: mechanism. Tank has not had time to fill. Solution: Call Customer Care team at 855-3M-WATER (855-369-2837) • Tank has little or no air charge. for assistance in attempt to repair. -
Page 10: Operation & Maintenance Instructions
II. Operation & Maintenance Instructions Failure to install, operate or maintain your fi lter system in accordance with these use instructions or any other installation or use instructions accompanying this product may result in product failure and property damage, including water leakage and will void warranty. A. -
Page 11: Sanitizing The Ro System
Firmly pull the module away from the head. (It may be Remove the red SFC tubing from necessary to twist the module slightly from side to side.) the fitting before completely Remove the new RO membrane module from its protective removing the RO membrane module wrap. -
Page 12: Limited Warranty
This warranty does not cover failures resulting from abuse, misuse, Parkway, Meriden, CT 06450. Proof of purchase (original sales receipt) alteration or damage not caused by 3M Purifi cation Inc. or failure to follow must accompany the warranty claim, along with a complete description of installation and use instructions.


Need help?
Do you have a question about the 3MRO401 and is the answer not in the manual?
Questions and answers