Table of Contents
Advertisement
Quick Links
Advertisement
Table of Contents

Related Manuals for Palsonic TFTV6044FHD


Summary of Contents for Palsonic TFTV6044FHD
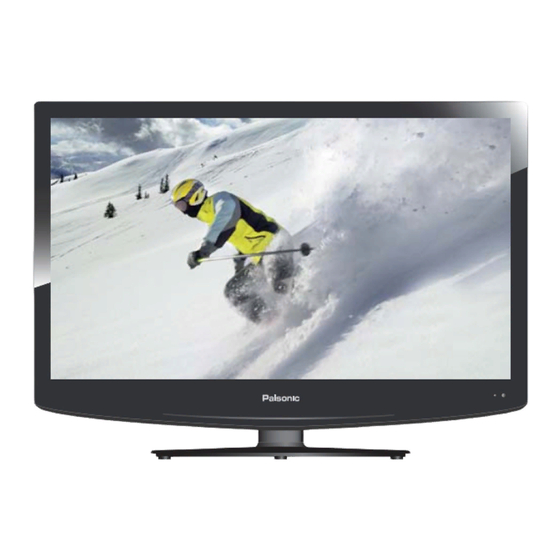
- Page 1 1080p Full HDTV Resoultion LCD TV Liquid Crystal Display...
-
Page 2: Important Safety Information
Important Safety Information WARNING CAUTION This symbol is intended to tell the user that parts inside the product pose a RISK OF ELECTRIC risk of electric shock to persons. SHOCK; DO NOT OPEN CAUTION: CAUTION TO REDUCE THE RISK OF ELECTRIC SHOCK, DO NOT This symbol is intended to tell the user REMOVE COVER. - Page 3 placing near or over a radiator or heat source. ype of power source indicated on the marking label. If you are not sure of the type of power supplied to your home, consult your television dealer or local power company. power outlet, contact your electrician.
- Page 4 a vacation,remove the plug from the wall outlet to economise power. placing the television near a window. Do not push or scratch the LCD screen. Do not place heavy objects on the LCD screen.Those may cause the screen to lose conformity or cause LCD panel to malfunction. malfunction.
-
Page 5: Table Of Contents
Table of Content Overview of the LCD TV.......... Features ......................Opening the packing ..................Product Components ................Front View ......................Rear View ......................Remote Control ............................(only available in DTV mode) Using the OSD Menu ........................7 Channel Adjustment ................9 Picture Adjustment ................10... -
Page 6: Overview Of The Lcd Tv
Congratulation on purchasing the LCD Television. This product has been designed to provide you with a variety of audio and video experience. This monitor enables you to watch broadcast, nect a computer to use the display as a monitor. The television is equipped with convenient control buttons and a handy remote control to let you adjust the television settings and custom- ize the television preferences through an easy-to -use on screen menu system. -
Page 7: Product Components
Product Components Front view Remote control sensor and Power Indicator OPEN Eject a DVD disc (only available in TV with DVD player). PLAY Play a DVD disc (only available in TV with DVD player). INPUT Switch the input sources. MENU Press the button to enter On Screen Display (OSD). -
Page 8: Rear View
Rear View POWER IN POWER IN HDMI IN POWER IN Insert power plug during initial setup. Connect to USB device such as USB Drive, Portable Hard Drive etc. HDMI IN Connect to the HDMI enabled devices. PC IN Connect to the VGA output of your device. PC AUDIO IN Connect to the audio output from your PC or portable computer. -
Page 9: Remote Control
Remote Control -/- - INPUT O O K K SUBTITLE AUDIO Notes: 1. If direct sunlight shine directly on the remote sensor, the remote control’s operation may be unstable, and the effective range will be reduced. 2. Do not hit or violently shake the remote control. 3. -
Page 10: Button Functions
BUTTON FUNCTIONS 1. STANDBY Turn the TV ON or OFF to Standby. 2. MUTE Disable the audio output. 3. NUMBE KEYS Press number keys to enter channel numbers. Search the channels what the user needs with number 0 to number 99. / Press to show the DVD program in 4. -
Page 11: Epg (Only Available In Dtv Mode)
EPG (only available in DTV mode) Press the EPG on the remote control to enter EPG menu. Press the RED record you want. Press the GREEN button to display the detail information about the program. Press the YELLOW button to display the schedule list that you can see the settings you have done before. -
Page 12: Using The Osd Menu
Using the OSD Menu The On-Screen Display (OSD) menu system provides a quick and simple method to adjust LCD TV base setting. OSD menu can be viewed using both the remote control and the control but- tons on the front panel. Note: In order to save the energy, you’d better make the settings of “Picture Mode”... - Page 13 Press button to select AFC. Press button to select ON or OFF. Press button to select search, then press OK button to start tuning. DTV Manual Tunin g Current CH VHF CH5 Colo r System Soun d System Fine - Tune 44.00MHZ Search Press OK to searc h...
-
Page 14: Picture Adjustment
Picture Adjustment Press MENU button to display the main menu. Press PICTURE in the main menu. Picture Personal Personal Contrast Contrast Brightness Brightness Color Color Tint Sharpness Sharpness Color Te ormal ormal oise eduction iddle Exit Select PICTURE menu. 2. Press OK button to enter. MENU button to save and return back to the previous menu. -
Page 15: Sound Adjustment
Sound Adjustment Press MENU button to display the main menu. Press SOUND in the main menu. Sound Personal Personal Treble Treble Bass Bass Bass Balance uto Volume SPDIF D Switch D Switch D Switch Exit Select menu. the previous menu. Sound Mode Sound Mode the value of Treble and Bass when Personal mode is selected. -
Page 16: Time Adjustment
Time Adjustment Press MENU button to display the main menu. Press button to select TIME in the main menu. Clock 20 Jul 13:12 TI M Sleep Timer Auto Standby OSD Timer Move EXIT Return Select Exit MENU 1. Press button to select the option that you want to adjust in the TIME menu. -
Page 17: Lock Adjustment
Lock Adjustment Press MENU button to display the main menu. Press LOCK in the main menu. Loc k System Se t Password Block Program Lock Parental Guidance y Lock Exit Select LOCK menu. button to enter or adjust. MENU button to save and return back to the previous menu. -
Page 18: Hotel Adjustment
Hotel Adjustment Hotel Mode Source Lock HOTEL Default Source Default Prog Max Volume Import Export Clear Lock Move Exit Return EXI T MENU Select Hotel Mode Press button to select Hotel Mode, then press button to select On or Off. Source Lock Press button to select Source Lock, press OK button to enter the submenu.then press... -
Page 19: Setup Adjustment
Setup Adjustment Press MENU button to display the main menu. Press SETUP in the main menu. SETUP menu. button to adjust. MENU button to save and return back to the previous menu. OSD Language OSD Language TT Language TT Language Hearing Impaired Hearing Impaired PVR File System... -
Page 20: Pc Mode
Aspect Ratio Aspect Ratio Blue Screen Blue Screen First Time Installation First Time Installation Reset Reset Software Update ( USB ) Software Update ( USB ) PC Mode PC Mode... -
Page 21: Recording Function
MENU button to display the main menu. Press SETUP in the main menu. PVR File System Check PVR File System Select Disk Format Time Shift Size Speed Press button on the remote control to record the current program. recording. It will then return to normal broadcast. It wil l stop P... - Page 22 When the storage space is low, a warning message will appear on the screen. Recording will automatically stop and returns to normal broadcast. Press INDEX button to see the recorded list. Press OK button to playback selected program. Time Shift Press on the remote control when watching DTV, it will pause the image and start recording the program.
-
Page 23: Media Operation
Media Operation Note: Before operating Media menu, Plug in USB device, then press INPUT button to set the Input Source to Media. Press button to select Media in the Source menu, then press OK button to enter. USB2.0 MUSI C PHOTO MOVIE TEX T... - Page 24 Stop Press button to select Stop, press OK to stop. Stop Repeat All Repeat All Press button to select Repeat Option, press OK to select Repeat none all 1. Music Music Press button to select Music, press OK to play background music. Play list Playlist Press...
-
Page 25: Music
Music Press button to select MUSIC in the main menu, then press OK button to enter. USB2.0 MUSI C PHOT O MOVIE TEX T Press button to select drive disk you want to listen, then press OK button to enter. Press button to select Return then press OK or press EXIT button to go back to the previous menu. -
Page 26: Movie
Stop Press button to select Stop, press OK to stop. Stop Repeat All Press button to select Repeat Option, press OK to select Repeat none all 1. Re pe at Al l MUTE Press button to select MUTE, press OK to disable the audio output. MUTE Play list Press... - Page 27 Basic Function (Movie) Pause Pause Press button to select FB, press OK to fast rewind the movie. Press button to select FF, press OK to fast forward the movie. Prev. Press button to select Prev., press OK to display the previous movie . Prev.
-
Page 28: Text
Basic Function (Movie) Press button to select Goto Time, press OK to enter. You can set the section to start playing. Goto Time Zoom in Zoom Out Zoom I n You can choose to enlarge or reduce the picture. Zo om O ut Aspect Ratio Press button to select Arpect Ratio, press OK to enter. - Page 29 Basic Function ( Text ) Prev.Page Press button to select Prev.Page, press OK to display previous page. Prev.Page Next Page Press button to select Next Page, press OK to display next page. Next Page Prev. Press button to select Prev., press OK to display the previous text. Prev.
-
Page 30: Dvd Operation
DVD Operation To select DVD press the INPUT button and using the buttons select DVD and press OK. Insert a DVD disc with the label FACING FORWARD. Inserting a disc incorrectly may cause damage to the Laser Optic. Do not place any damaged, dirty or disc not 12cm in diameter intu the loader. -
Page 31: Audio Setup
Screen Saver TV System Video Output Brightness Contrast Audio Setup Digital Output Downmix Custom Setup Style Angle Mark Default... - Page 32 OTICE TFTV6044FHD Instructions to Insert DVD Disc in DVD Play Slot To operate DVD player on the TFTV6044FHD model, please follow the instructions indicated BELOW CORRECT INSTRUCTIONS The mirror side of the DVD must face towards the front of the TV as indicated in the picture below...
- Page 33 Display 23.6 inches 1920*1080 PC input TV Functions Earphone Coaxial output Standards Color system Progressive scan 438mm×585mm×210mm 508mm×660mm×175mm Gross weight 6. kg Speaker Power consumption 55w 2.5w+2.5w Sports, Personal Function Video mode Personal English, Espanol, Francais, Deutsch, Portugues, Italiano...
-
Page 34: Troubleshooting
Troubleshooting LCD TV does not operate and plugging it in again after 1 to 2 minutes. Power is cut off suddenly and clean them to remove dust. and that remote control is aimed at the remote control sensor in the TV . Strange color, light color, or color misalignment... - Page 35 Palsonic Customer Service Telephone (Australia) 1300 657 888 Palsonic C ABN 34 000 474 108 1 Joynton Avenue, Waterloo NSW 2017 Australia Telephone (02) 9313 7111 Facsimile (02) 9697 0655 www.palsonic.com.au...
Need help?
Do you have a question about the TFTV6044FHD and is the answer not in the manual?
Questions and answers