Table of Contents
Advertisement
Quick Links
Advertisement
Table of Contents

Related Manuals for Palsonic TFTV1950DT


Summary of Contents for Palsonic TFTV1950DT
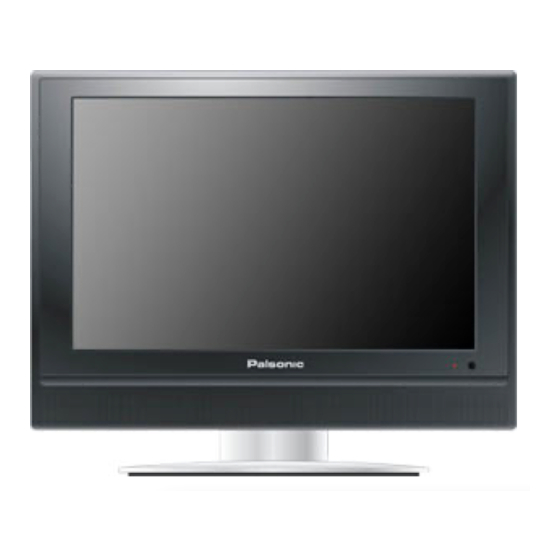
- Page 1 LCD TV/DVD COMBO TFTV1950DT USER'S MANUAL...
-
Page 2: Table Of Contents
Table Of Contents Important Safety Instructions -------------------------------------------------------- Disc Information --------------------------------------------------------------------------- Front Panel --------------------------------------------------------------------------------- Rear Panel ---------------------------------------------------------------------------------- Remote Control --------------------------------------------------------------------------- System Connections ------------------------------------------------------------------- Connecting to Power Supply ------------------------------------------------------------ Connecting Earphone --------------------------------------------------------------------- Connecting to External AV Signal Source -------------------------------------------- Connecting to External AV Signal Source (YPbPr) -------------------------------- Connecting to External AV Input Device (AV Output) ----------------------------- Connecting DVB-T Antenna ------------------------------------------------------------- Connecting to PC ---------------------------------------------------------------------------... -
Page 3: Important Safety Instructions
Important Safety Instructions The lightning flash with arrowhead symbol, within an equilateral triangle, is intended to alert the user to the presence of uninsulated “Dangerous Voltage” within the product’s enclosure that may be of sufficient magnitude to constitute a risk of electric shock to persons. The exclamation point within an equilateral triangle is intended to alert the user to the presence of important operating and maintenance (servicing) instructions in the literature accompanying the appliance. - Page 4 Important Safety Instructions Note: Read these instructions. IMPORTANT FOR LASER PRODUCTS Keep these instructions. 1. CLASS 1 LASER PRODUCT Heed all warnings. 2. DANGER: Visible laser radiation when open and interlock failed or defeated. Avoid direct exposure to beam. Follow all instructions. 3.
-
Page 5: Disc Information
Disc Information Discs Supported DISC LOGO CONTENTS SIZE MAXIMUM TIME 133min(SS-SL) Audio+Video 242min(SS-DL) 12cm (active picture) 266min(DS-SL) 484min(DS-DL) Audio 12cm 74min JPEG Still high resolution 12cm DIVX 12cm Operating systems and features of individual DVD discs is specified by the software maker. Please refer to the instructions accompanying the disc. -
Page 6: Front Panel
Front Panel Colour TFT screen Eject button SOURCE button Press to eject the disc out. Press to select mode among TV, Power button COMPOSITE, S-VIDEO, COMPONENT, Press to enter or exit the standby mode. VGA, DVD and DVB. SD/MS/MMC Card Port On setup menu, the same function as Insert the SD, MS or MMC card into the ENTER button. -
Page 7: Rear Panel
View of Unit (Continued) Back Panel Open the back cover on the right side of the unit's rear panel, and you will see all jacks, as shown below: VGA Input Jack Y/Pb/Pr Input Jack Connect VGA signal source. Connect Y/Pb/Pr signal source in DVB-T Input Jack COMPONENT mode. -
Page 8: Remote Control
Remote Control STEREO/AUDIO button For TV Operation Press to change sound parameters when receiving Nicam or A2 broadcasts in TV mode. VOL+/- button Press to increase or decrease the volume. MUTE button Press to turn on or off speaker output. EXIT button Press to exit from the setup menu. - Page 9 Remote Control For DVD Operation EXIT button Press to exit from the setup menu. Direction buttons( In the setup menu, press the button to select a desired item and press the button to adjust or set. ENTER button Press to confirm your selection. PLAY button Press to play a disc when in the DVD mode.
- Page 10 Remote Control /+10 buttons CARD button When in DVD mode, press to select Press to shift among disc playback, USB numbers greater than 10. playback and SD/MS/MMC playback. SCAN/SUBTITLE button Under teletext mode, press to select four When in DVD mode, press to select groups 3-digit numbers that displayed in alternate subtitle languages during different colours at the bottom of the screen.
- Page 11 Remote Control For DVB Operation FB (RED) button In DVB mode, press the button to select the red page. FF (GREEN) button In DVB mode, press the button to select the green page. EPG button Press to display or close EPG (Electronic Program Guide) in DVB mode.
-
Page 12: Using Of Remote Control
Remote Control Using of Remote control Preparation of Remote Control Point the remote control unit from no more than Softly push the back cover to open the battery about 7m from the remote control sensor and compartment. within about 60 degrees of the front of the unit. Insert two batteries 1.5V, size AAA), please make sure the polarity matches the marks inside the compartment. -
Page 13: System Connections
System Connections Do not connect the power cord until all other connections have been made. Ensure that you observe the colour cables when connecting audio and video cables. Before connecting, open the cover on the right side of the unit's rear panel. Connecting Power Supply Power is supplied through the provided power adapter. -
Page 14: Connecting To External Av Signal Source
System Connections (Continued) Connecting External AV Signal Source Use the AV cables to connect external AV signal source to AV input jacks on the jack panel of the unit. And use the S-Video cable to connect external S-Video signal source to the S-VIDEO input jack on the rear panel of the unit. -
Page 15: Connecting To External Av Input Device (Av Output)
System Connections (Continued) Connecting External AV Device (AV Output) Use the AV cables to connect external AV device to the audio and video output jacks on the jack panel of the unit to output TV or COMPOSITE signals. After connection, turn on the unit and external AV device and press the SOURCE button to shift to corresponding mode. -
Page 16: Connecting To Pc
System Connections (Continued) Connecting PC Follow the steps and figure below to connect PC to the unit. Connect one end of the VGA cable to the VGA input jack on the rear panel of the unit and the other end to the PC. Connect one end of the audio cables to the PC audio input jack on the rear panel of the unit and the other end to the PC audio output jack. -
Page 17: Connecting To Tv Antenna
System Connections (Continued) Connecting TV Antenna Connect TV signal source to the TV jack on the jack panel of the unit. After connection, turn on the unit and press the SOURCE button to shift to TV mode. If you have been scanned TV programs, take the following steps to select a channel. -
Page 18: Tv Function
TV Function NOTE: In other mode. you can refer to the following instructions in TV mode to go on with some settings Preparation After connection, press the POWER button to turn on the unit. Press the SOURCE button to shift to TV mode. You can go on with the following operations. Image Setting Note: This item is only available when there is signal input... - Page 19 TV Function Brightness Setup Press the button to select Brightness and press the button to adjust the value . Press the MENU button to return to the previous menu. Contrast Setup Press the button to select Contrast and press the button to adjust the value.
- Page 20 TV Function When the VGA signal is connected to the unit, the Advanced setup menu is shown below: Press the " " button to select the desired item and press the "ENTER" button to enter it's setup menu. Press the "MENU" button to return to the previous menu.
-
Page 21: Audio Setting
TV Function Audio Setting Press the MENU button once to enter the setup menu. Press the button to select Audio and press the ENTER button to enter the menu shown on the right. In the Audio setup menu, press the button to select the desired item. -
Page 22: Setup Setting
TV Function Setup Setting Press the MENU button once to enter the setup menu. Press the button to select Setup and press the ENTER button to enter the menu shown on the right. In the Setup menu, press the button to select the desired item. - Page 23 TV Function Prog Organizer Press the button to select the Prog Organizer and press the ENTER button to enter the menu shown on the right. In the Prog Organizer setup menu, press the button to select the desired item. Press the MENU button to return to the previous menu.
- Page 24 TV Function Search Press the button to select Search and press the to start searching forward or backward. Press the MENU button to return to the previous menu. Colour System Press the button to select Colour Sys. and press the ENTER button to browse the colour system. of current country.
-
Page 25: Nicam Function
NICAM Function The unit support NICAM function under TV mode. Under NICAM TV broadcast: 1. When receiving stereo audio signals, press the STEREO/AUDIO button on the remote control repeatedly to shift the sound tracks between Nicam Stereo and Mono and the screen will appear corresponding display as shown below: Nicam Stereo Mono... -
Page 26: Dvd Playback Operation
DVD Playback Preparation: Disc Loading Steps: Connect the unit to the power supply and press the POWER to turn on the unit. Press the SOURCE button and select DVD mode. Handing the disc with its printed side outward vertically to the disc tray and gently insert the disc into the disc tray. - Page 27 DVD Playback Fast Playback During playback, press the button to activate fast backward or forward playback. During fast playback, press the PLAY button to resume normal playback. SLOW During DVD disc playback, press the SLOW button to activate slow playback. During slow playback, press PLAY button to resume normal playback.
- Page 28 DVD Playback CD Playback After loading a CD disc, the unit will play all tracks on the disc by default. You can use the button, or number buttons to select a track. Stop Press the STOP button once to stop playback and press the PLAY button to resume normal playback.
-
Page 29: Jpeg Playback
DVD Playback JPEG Playback JPEG is a common picture format that requires small amounts of storage per image and has low loss in resolution. Hundreds of pictures can be stored on a disc in this format. In order to view JPEG photo albums, you can ask your film development company to make a "PICTURE CD"... -
Page 30: Divx Playback
DVD Playback DIVX Playback DIVX is the name of a revolutionary new video code, which is based on the new DIVX compression standard for video. Play After loading a DIVX disc, a root menu appears on the screen. Use the button to select desired item and press the ENTER button to play. -
Page 31: Usb And Sd/Ms/Mmc Card Function
USB and SD/MS/MMC Card Function Preparation 1. Connect the unit to the power supply. 2. Press the POWER to turn on the unit. 3. Press the SOURCE button to shift to DVD mode. 4. Insert the USB into the unit's USB slot, or insert the SD/MS/MMC card into the SD/MS/MMC card slot on the right side of the unit. -
Page 32: Dvd System Setup
DVD System Setup Preparations In DVD mode, press the Setup button to open DVD setup menu. Press the button to select setup menu. Press the Setup button again to exit DVD setup. General Setup Page Press the DVD SETUP button to enter the General setup menu. The screen will display as the below: - - General Setup Page - - In the menu, Use the... - Page 33 DVD System Setup OSD Lang The item is used to select the OSD language. - - General Setup Page - - Press the direction buttons to select OSD TV Display Angle Mark Lang. OSD Lang English Captions French Press the ENTER button to enter the setup. Screen Saver Spanish Use the...
-
Page 34: Audio Setup Page
DVD System Setup Media Center Press the direction buttons to select - - General Setup Page - - Media Center. TV Display Angle Mark Press the ENTER button to enter the setup. OSD Lang Captions Use the direction buttons to select DVD, Screen Saver USB, SD/MMC or MS. -
Page 35: Video Setup
DVD System Setup Dynamic Press the direction buttons to select - - Dolby Digital Setup - - Dynamic. FULL Dual Mono Press the ENTER button to enter the setup, the Dynamic screen will display as left: Press the OK button to enter. Use the direction buttons to adjust. - Page 36 DVD System Setup Video Quality Setup Select Quality, press the ENTER button to enter the menu as below: - - Video Quality Setup - - In the menu, Use the direction buttons to Sharpness High select the desired item. Brightness Medium Contrast Press the ENTER button to enter the item.
-
Page 37: Preference Setup
DVD System Setup Note: This item is allowed to set when there is no disc or all the operation has been stopped. Preference Setup Press the SETUP button to enter the General setup menu, then use the direction buttons to select Preference Page, the screen will display as the below: - - Preference Page - - In the menu, press the ENTER or direction button to... -
Page 38: Password Setup
DVD System Setup Parental - - Preference Page - - DVD discs equipped with the child lock function are Audio 1. KID SAF rated according to their contents and settings vary Subtitle 2. G from disc to disc. Depending on the disc, you can Disc Menu 3. - Page 39 DVD System Setup Password Mode Press the direction buttons to select - - Password Setup Page - - Password Mode. Password Mode Press the ENTER button to enter the setup, Password see the left figure: Press the direction buttons to select On or Off.
-
Page 40: Dvb System Setup
DVB-T Setup Preparation In DVB mode, press the SETUP button to open DVB setup menu. Press the button to select setup menu. Press the SETUP button again to exit DVB setup menu. Main Menu Press the SETUP button, the screen will display as below: Main Menu System Setting In the main menu, press the... - Page 41 DVB-T Setup Time Setting You can set the time zone or display timer. Press the button to select Time Setting, press the ENTER button to enter the Time Setting menu, the screen will display as below: System Setting Time Zone Setting In the menu, press the button to select Time Zone Display Timer Setting...
- Page 42 DVB-T Setup A/V Setting A/V Setting This item is used to set the audio and video items. Bright&Contrast Press the buttons to select A/V Setting, press the ENTER button to enter, the screen will display as Saturation left. 16:9 Conversion In the menu, press the buttons to select items, press the...
-
Page 43: Channel Setting
DVB-T Setup 1. Change Pin Code In the menu, press the button to select Change Pin Code, press the ENTER button to enter the menu as shown below: Change Pin Code New Pin Code In the menu, according to the indication to input the pin Enter Pin Again code. - Page 44 DVB-T Setup Search Type Select the Search Type, press the button to enter, then press the direction buttons to select Automatic, Manual or By NIT, press ENTER button to confirm. Press the EXIT to return. Channel No. Select the Channel No. use the number buttons to input the channel number, press the button to delete the incorrect input.
-
Page 45: Channel List
DVB-T Setup Channel List Select the Channel List, press the ENTER button to confirm and enter, the screen will display as below: Channel List No Items BandWidth Quality: Frequency Strength: ENTER-Play -TV/Radio Right-PopUp Menu For the first time setting, you should add some programs into the channel list. Press the ENTER button to start playback, press the (RED) button to select TV or Radio, press the right direction... -
Page 46: Favourites List
DVB-T Setup Favourites List Select the Favorites List, press the ENTER button to enter, the screen will display as below: Favorite List Fav Group: News In the menu, press the (RED) button to select No Item different Fav Group. -Favorite Switch Right-Popup Menu ? ENTER-Confirm EXIT-Cancel Press the... -
Page 47: System Info
DVB-T Setup System Info Select System Info, press the ENTER button to enter, the screen will display as below: System Info In the menu, press the direction buttons to Software Version select the desired item, press the ENTER button to Hardware Version enter. -
Page 48: Troubleshooting
Troubleshooting Take steps described in the tables below to solve simple problems before contacting customer service. If you suspect something wrong with this unit, immediately turn the power off and disconnect the power connector from the unit. Never try to repair the unit yourself because it is dangerous to do SYMPTOM CHECK ITEM There is no display on the... -
Page 49: Specifications
Specifications TFT-LCD Screen Size 19 inches Power AC100~240V, 50/60Hz DV 12V Power Consumption <60W Dimension 494mm x 184mm x 412mm (LxWxD) Weight About 9.2 Kg Ambient Temperature 10~45 DESIGN AND SPECIFICATIONS ARE SUBJECT TO CHANGE WITHOUT NOTICE Manufactured under license from Dolby Laboratories. "Dolby"... - Page 50 PALSONIC CORPORATION PTY LTD 1 JOYNTON AVENUE WATERLOO NSW 2017 AUSTRALIA TEL: (02) 9313 7111 FAX: (02) 9313 7555 www.palsonic.com.au PALSONIC CUSTOMER SERVICE TELEPHONE AUSTRALIA: 1300 657 888...
Need help?
Do you have a question about the TFTV1950DT and is the answer not in the manual?
Questions and answers