Table of Contents
Advertisement
Quick Links
Advertisement
Table of Contents

Related Manuals for VisionNet FS-9510HD

Summary of Contents for VisionNet FS-9510HD
- Page 1 High Definition PVR Satellite Digital Innovation Life User's Manual FS-9510HD...
-
Page 3: Table Of Contents
INDEX INDEX ............................. 3 Precautions ........................... 5 1. Important Safety Instructions...................... 5 2. Notice ............................5 3. Copyright ............................ 6 4. Disclaimer........................... 6 5. Trademarks ..........................6 Before You Begin ........................7 1. Main Features ..........................7 2. Accessories ..........................8 Hardware Description...................... - Page 4 PVR (Personal Video Recorder) Function ................ 23 1. Recording ..........................23 1.1 Recording methods ......................23 1.2 Recording Edit........................25 1.3 Long Time recording ......................25 1.4 Pause during recording .......................25 2. Time Shifting..........................27 3. Playback (Play List)........................28 3.1 Recorded Files ........................28 3.2 Imported Files ........................29 3.3 Music ...........................29 3.4 Photo ...........................29 4.
-
Page 5: Precautions
Precautions Important Safety Instructions Read these instructions. Keep these instructions. Heed all warnings. Follow all instructions. Do not use this apparatus near water. Clean only with dry cloth. Do not block any ventilation openings. Install in accordance with the manufacturer’s instructions. Do not install near any heat sources such as radiators, heat registers, stoves, or other apparatus (including amplifiers) that produce heat. -
Page 6: Copyright
To reduce the risk of electric shock, do not remove the cover (or back). No user serviceable parts are inside. Refer servicing to qualified service personnel. The Lightning Flash with arrowhead symbol The exclamation point within an within an equilateral triangle, is intended to equilateral triangle is intended to alert the user to the presence of un- alert the user to the presence of... -
Page 7: Before You Begin
Before You Begin Main Features Digital Satellite receiver & PVR Ready H.264 / MPEG4 - HD,SD / DVB-S2 Tuner Powerful compatibility through Embedded Linux OS Recording & Playback with External USB 2.0 Devices Recording and Time Shifting Simultaneously Recording and Playback Simultaneously Powerful Extended EPG supports and Event Recording USB 2.0 Host Support (MP3 Player &... -
Page 8: Accessories
Accessories User's Manual Remote Control AAA size Batteries HDMI Cable NOTE : If any accessories listed above are missing, contact the sales representative where you purchased this unit. -
Page 9: Hardware Description
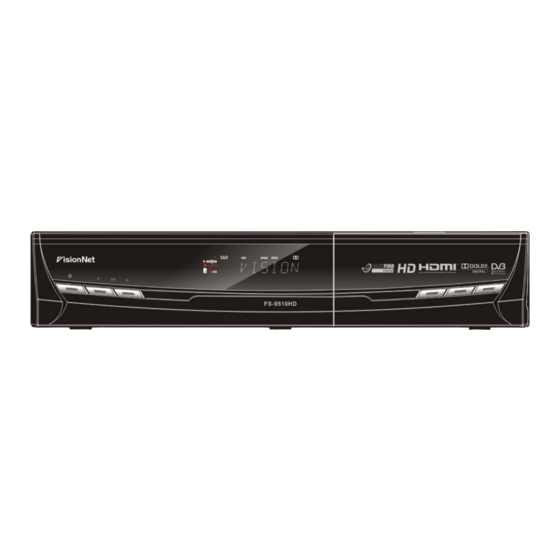
Hardware Description Front Panel Configuration POWER BUTTON : Press to switch between STANDBY and POWER ON modes. CH Up/Down button : Press to change services in normal mode, or to move highlighted-bar in menu mode. VFD Display : The VFD consist of 8-digit letter and various icons. These letters and icon display the current status of receiver such as service name, service information and so on. -
Page 10: Vfd(Vacuum Fluorescent Display)
VFD(Vacuum Fluorescent Display) 1. (EURO) : Indicates that current channel is pay channel. 2. (PLAY) : Turned on during playback. 3. (REWIND) : Turned on during rewind in playback mode. 4. (PAUSE) : Indicates that current channel is paused. 5. (F.F) : Turned on during fast forward in playback mode. 6. -
Page 11: Rear Panel Configuration
Rear Panel Configuration 1. LNB IN Connects a satellite antenna LNB cable. 2. LNB OUT Connects to another STB for loop-through. 3. SPDIF : Connects to the audio system using a S/PDIF cable. (digital audio) 4. VIDEO : Connects to the TV or VCR using a RCA cable. (Composite video output / Yellow) 5. -
Page 12: Remote Control Unit
Remote Control Unit 1. POWER : Turns the STB On/Off. 2. TV/RADIO : Switches between TV and Radio. 3. MUTE : Turns the sound On/Off. 4. Resolution : To select the resolution format. Each time you press the Resolution button, the resolution changes in the following sequence: 576i >... - Page 13 Color Buttons a. RED : Used for special function in menu. RED key is used to sort lists in service list or go to previous day search in EPG or make/delete the current position as a bookmark. b. GREEN : Used for special function in menu. Green key is used to set favorites setting in service list or go to the next bookmark position.
- Page 14 Volume Up & Down : To change the Volume. Channel Up & Down: To change service channel. Recording : To start Recording. Play / Time shift : Display the progress bar of playback when no progress bar is displayed. Start playback with normal speed. Return to normal speed from trick mode.. Repetition (*): This key is used to play back a recording repeatedly.
-
Page 15: Connections Diagram
Connections Diagram Receiver to TV with Digital A/V Output Connect the satellite antenna cable to LNB IN. Connect the HDMI Cable to the HDMI Connector of the TV. Connect SPDIF to Digital audio input of the equipment(Digital Audio) NOTE : Depending on the A/V equipment you own, there are various ways you can connect the STB. -
Page 16: Receiver To Tv With Analog A/V Output
Receiver to TV With Analog A/V Output Connect the satellite antenna cable to LNB IN. Connect the Component to the Component input of the TV. Connect the RCA to the RCA input of the TV. NOTE : The component connection(YPbPr) is recommended for Digital TV. The composite connection(RCA cable) is recommended for analogue TV Connecting to Dish Using Single DISH... -
Page 17: Using Diseqc Switch
Using DiSEqC switch Connect the cable of DiSEqC switch to LNB IN. Using DiSEqC motor Connect the cable of DiSEqC motor to LNB IN. -
Page 18: Guide Of Functions
Guide of Functions Selecting a Service To select the desired service (channel), please refer to the instructions below. Using CH UP/DOWN buttons You can navigate between services by pressing CH UP/DOWN buttons. Whenever you press the CH UP(DOWN) button, current service will be changed to next/previous service. Please press CH UP or CH DOWN button until you fine the service you want to watch. -
Page 19: Using Recent Service List
Using Recent Service List To return to the previous service that you were watching, press RECALL button for a short time. To display recent service list, press the RECALL button for a little bit longer time. To chose the service from the recent service list, use the ARROW button to select, then press the OK button. -
Page 20: Favorite Group
Press the EPG button, then the EPG menu will be displayed. Use the ARROW buttons to move to other services or to see previous/next guide. Press the EPG button once to view full EPG with multi service list, and press it twice to view the additional EPG information of a specific channel service. -
Page 21: Audio Track
The subtitle will be displayed in the selected language at the bottom of the screen. To turn OFF the subtitle from the screen, Select ‘Off’ from the subtitle language list. NOTE : When program does not provide subtitle information, SUBTITLE button is not active. Audio Track User can select the audio language list by pressing the AUDIO(YELLOW) button. - Page 22 In the PIP mode, you can change primary and sub with the PIP SWAP button. If you press the PAGE UP/DOWN button, the location of the sub picture is changed. If you press the PIP SERVICE LIST button, you can see the list of services of sub picture.
-
Page 23: Pvr (Personal Video Recorder) Function
PVR (Personal Video Recorder) Function Recording You can select a recording storage device with the following sequence : Menu > Configuration > Recording Option > Record Device. Default is set to ‘USB’. Recording methods There are 3 type recording methods. (Instant Recording / Time Scheduled Recording / Event Scheduled Recording). - Page 24 Event Scheduled Recording via EPG : In the EPG menu screen, you can choose the event you wish to schedule or record. While watching the LIVE TV screen, press the EPG button to access the EPG menu screen. Go to the event which you wish to view at the time indicated on the EPG schedule, then press OK.
-
Page 25: Recording Edit
Recording Edit Press the REC button while recording to see the recording message window. Pause : Select Pause Recording then press OK to pause the current recording process. Duration : Set recording duration. Press LEFT/RIGHT ARROW button to change recording duration. - Page 26 During recording, press the PLAY/TIMESHIFT button to show the Play bar screen. While the Play bar is shown on your screen, you may use the LEFT/RIGHT ARROW button to move (forward & backward) freely within recorded time. If you press the STOP button, it will go to LIVE and you may press PREV FILE button to view the recorded file from the beginning.
-
Page 27: Time Shifting
Time Shifting You can select a storage device for a temporary file of the Time shifting with the following sequence: Menu > Configuration > Recording Option > TimeShift Device. Default storage device is set to ‘USB’ If pressing the PAUSE button during Time shift, the live video is paused but the temporary recording for time shift is continued at the selected storage device. -
Page 28: Playback (Play List)
Playback (Play List) You can playback many files with the Playlist which you access by the PLAYLIST button. In the Playlist, you can check and playback recorded files, multimedia movie files, MP3 music files, and image files. With the LEFT/RIGHT ARROW button, go to the Recorded Files, Imported Files, Music and Photo category and check &... -
Page 29: Imported Files
Imported Files If you press RIGHT ARROW button in Recorded Files, you can go to Imported File menu. Locate the file(s) you wish to play with the UP/DOWN button and press the OK button to enjoy the movie. To choose a particular selection of files, select a desired file and press the RED button. -
Page 30: Trick Mode
When the play bar is on, user can move / jump between the bookmarks by pressing the GREEN button. If you wish to delete any Bookmarks, go to that bookmark by pressing the GREEN button, then press the RED button to delete the current bookmarks. -
Page 31: Menu Map
Menu Map Main Menu 1. Storage Manager 2. Timer Settings 3. Service List Manager 4. Data Transfer System Tools 1. Recording Option 2. Parental Control 3. Display Setting 4. Time Setting 5. Language Setting 6. A/V Output Setting Configuration 1. Dish Setting 2. -
Page 32: Main Menu Of Guide
Main Menu of Guide To display the menu, press the MENU button at any time. You can select the sub menus by using the ARROW buttons. The selected sub menu becomes highlighted. After selecting (highlighting) the sub menu you want to access, press the OK button. -
Page 33: Service List Manager
Service List Manager Service List Manager menu will appear when you press the OK button. You can select Edit Mode by pressing the YELLOW button. Lock Services : All service lists will be shown on the left side of the window, the middle will show the list of service to be locked. -
Page 34: Data Transfer
Set Favorite Services : Use the ARROW and OK buttons to select your desired favorite group. Once, favorite group is chosen, the left side window will show all service lists and the middle window will only show the selected services of the favorite group selected. By using the ARROW and OK buttons, you may ADD the desired services to a favorite group or DELETE any from the favorite group. -
Page 35: Configuration
Configuration Recording Option Recording Stop Message : Set 'On' : When you press the STOP button while recording, then a confirmation window is displayed. Set 'Off' : When you press the STOP button while recording, the STB will stop the recording process immediately / instantly with no extra confirmation message. -
Page 36: Display Setting
Display Setting Info Box position : Set a position of the information window. Info Box Display Time : Set the time duration of the information window being displayed on the screen after changing services. Volume Bar Display Time : Set the time duration of the volume bar being displayed on the screen after changing audio volumes. - Page 37 NOTE : The menu and operation languages can be changed depending on the country sold. Available languages are subject to change without prior notice.
-
Page 38: A/V Output Setting
Audio Language : Select the default language for the audio when changing services. If no other language is provided, then the default language of current will be automatically selected. Subtitle Language : Select the default language for subtitle when changing service. A/V Output Setting TV Type : Select the TV types.(PAL/NTSC/Auto) In Auto mode, the STB is automatically selected to NTSC or PAL... -
Page 39: Installation
Installation Dish Setting Select the satellite/antenna and LNB settings for service search. The values that are set in this menu will be available for selection in other service searching menus. Satellite : Select the satellite which you want to do a search for. -
Page 40: Service Search
Using USALS : Dish Longitude : Enter the longitude position of the antenna using the NUMERIC buttons. Dish Latitude : Enter the latitude using the NUMERIC buttons. Go To : Press the OK button to rotate the dish to the selected antenna position. - Page 41 Setting menu directly. Start Search : Press the OK button to start a search.
-
Page 42: Network Setting
Advanced Search Mode : Satellite : Press the OK button to select the target satellite for search. Frequency : Select the frequency from the list to search. Symbol rate : Enter the symbol rate by using the NUMERIC buttons. Polarity : Select the polarity. (Vertical/Horizontal) Video PID : Enter the video PID using the NUMERIC buttons. -
Page 43: System Information
and restore default setting. System restore to stored position : This menu allows you to restore the stored values including service data and system parameters. Press the OK button to restore all data. Store system data : If you want to use system parameters and service data in the future, this menu allows you to store current state. - Page 44 NOTE : The displayed information of each CAMs may be different depending on the CAM used.
-
Page 45: Troubleshooting
Troubleshooting Problem Solution Check the main power cable and check that it is plugged into a suitable power outlet. Does not display any Check the STB main power switch ‘ON’ at the rear message on the front panel. of the STB. See ‘Does not display any message on the front panel’... -
Page 46: Specifications
Specifications Tuner & Channel Decoder Input Connector F-type, IEC 169-24, Female Loop through out F-type, IEC 169-24, Female Frequency Range 950MHz ~ 2150MHz Input Impedance 75Ω, unbalanced Signal Level -65 to -25dBm LNB Power 13/18VDC, max.400mA 22KHz Tone (22±2)KHz, (0.6±0.2)V DiSEqC Control V1.0/1.2/USALS Compatible Demodulation... - Page 47 Audio / Video & Data IN/OUT CVBS Video Output, Audio L, R Output Component YPbPr Video Output HDMI Video & Audio Output OPTIC Dolby Digital (SPDIF) RS-232C 9 pin D-SUB (Male) type, Transfer rate 115Kbps USB 2.0 Host Support. (5 Vdc 500 mA max.) Ethernet RJ45 connector, 100 Mbps Front Panel...
- Page 48 Memo...
- Page 51 High Definition Digital Satellite Receiver FS-9510HD V.10011e...
Need help?
Do you have a question about the FS-9510HD and is the answer not in the manual?
Questions and answers