
Related Manuals for VisionNet HAWK

Summary of Contents for VisionNet HAWK
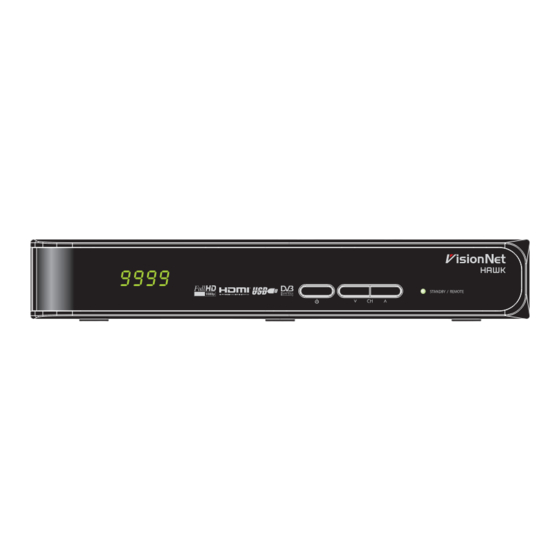
- Page 1 Full HD Digital Satellite Receiver Digital Innovation Life User's Manual HAWK 9999 HAWK...
-
Page 3: Table Of Contents
Contents Contents 1 Introduction Features ......Accessories ......The Remote Control . - Page 4 Scanning for One Channel ....4 Watching TV Channel List ......Channel List Preferences .
- Page 5 Playing Music ......Playing Media files from Other Devices ... . Accessing Other Devices .
- Page 6 Parental Control ......Maintaining the Digital TV Receiver ....Sharing Channel Data .
-
Page 7: Introduction
1 Introduction 1.1 Features Beyond simply receiving satellite signals, this digital TV receiver has many convenient and advanced features: • This receiver has two slots for CA modules and pay-TV cards. See Watch- ing Pay Channels on page 26. • Users can use removable storage devices to record TV programmes. It is possible to schedule this receiver to record not only a single TV pro- gramme but also every episode of a series using the programme guide. -
Page 8: Accessories
1.2 Accessories The following accessories are included with the digital TV receiver. Remote control Batteries Power adapter HDMI cable Jack-to-RCA cable TV mount bracket (optional) (optional) Remote control User guide extender (optional) 1.2 A... -
Page 9: The Remote Control
1.3 The Remote Control Use the remote control to control the digital TV receiver. Make sure that bat- teries are installed correctly in the remote control. I... - Page 10 : Turn the digital TV receiver on or off. : Mute the sound. This button also can be used to change the picture resolution. Press and hold this button until the current resolution is displayed. Repeatedly press it to change the resolution, then press the EXIT button to return it to the original button function.
-
Page 11: Getting Started
Use these buttons to scroll lists. TV/RAD: Switch between TV channels and radio stations. INFO: Display information about the current programme. Use these buttons to watch two different channels at the same time. See Watching Two Channels Simultaneously on page 25. 1.4 Getting Started Install the digital TV receiver properly, referring to Installation... -
Page 12: The Apps Screen
1.5 The Apps Screen Press the MENU button to open the apps screen. The apps screen displays various app icons in multiple folders, as follows: • CAS: See Watching Pay Channels on page 26. • Data Transfer: See Sharing Channel Data on page 55. - Page 13 Note While some apps, such as Calendar, are easy to use, other internet-based apps may be unavailable or restricted, depending on the country, so this guide does not cover every app provided by this receiver. To access the customary setting menus, select Settings or, alternatively, press the red button to quickly access it.
-
Page 14: Installation
2 Installation Install the digital TV receiver, limited by the specifications shown in the table below. Maximum power consumption 28 W when in operation 0.5 W when in standby mode 220 mm × 35 mm × 145 mm Size Weight 0.6 kg Operating temperature 32–113 °F, 0–45 °C... -
Page 15: Satellite Dish Connection
2.1 Satellite Dish Connection Connect the cable from the satellite dish to 2.2 TV Connections This digital TV receiver has two video connectors for use by a TV. • HDMI • Composite video Use an HDMI connector to connect the receiver to a TV for the best picture quality. -
Page 16: Composite Video Connection
Note Some HDMI cables and TVs may not be compatible with the receiver due to differing HDMI specifications. Composite Video Connection Insert a jack-to-RCA cable’s jack into the A/V OUT socket on the receiver, then insert the RCA plugs on the other end into the TV’s composite video and audio input sockets. -
Page 17: Network Connection
2.4 Network Connection Connect the receiver’s port to the router using a network cable. For details on how to configure the network settings, see Network Settings page 50. 2.5 Mounting the Receiver on a TV If necessary, mount the receiver on the TV to save space. Install the TV mount bracket on the back of the TV, and then attach the receiver to the bracket, as illustrated by the drawings above. - Page 18 Connect the remote control extender to the IR Rec. socket on the receiver. Make sure that the extender does not face directly into light sources, such as lamps or displays. Directing light at the extender may interfere with remote control signal transmission. 2.5 M...
-
Page 19: Scanning For Channels
3 Scanning for Channels 3.1 Satellite Dish Settings LNB Settings A group of satellite dish settings must be properly configured for each de- sired satellite before performing a channel scan. Open the apps screen and select Settings > Dish Setting. There are two signal bars on the lower part of the screen. -
Page 20: Unicable Settings
Rename a satellite: Choose Satellite and select a satellite. Press the red but- ton and then enter a new name using the on-screen keyboard. Edit a satellite’s longitude: Choose Satellite and select a satellite. Press the green button and then modify the longitude. Clear all transponders of a satellite: Choose Satellite and select a satellite. -
Page 21: Using Diseqc 1.2
With USALS, the receiver can pinpoint all visible satellites through calcula- tions using the dish coordinates and the built-in database of satellite posi- tions. Using DiSEqC 1.2 Open the apps screen and select Settings > Positioner Setting. Set Posi- tioner DiSEqC 1.2 and then repeat these steps for every desired satellite. -
Page 22: Using Usals
It may be useful to set limits to the movement scope of the dish for easier manipulation. Repeat these steps two times to set a limit position for the east and the west. 1. Choose Go to Reference from Positioner Command for the dish to re- turn to the reference point. -
Page 23: Scanning For Satellite Tv Channels
3.3 Scanning for Satellite TV Channels Open the apps screen and select Settings > Service Search. Three methods are available to scan for satellite TV channels. • Scanning all available transponders for every channel • Scanning for multiple channels that a specific transponder carries. •... -
Page 24: Scanning For Every Channel
Scanning for Every Channel Three methods are available for scanning for every channel. • Set Search Mode to Auto. With this method, the receiver uses its numer- ous database of transponders when scanning for channels. Choose Time Calibration and determine how long the receiver should wait to get time information from each transponder. -
Page 25: Scanning For One Channel
• TRANSMISSION: Specify the modulation method used for the transpon- der. DVB-S2 is usually used for HD channels. Make sure that the common options are properly configured before select- Start Search to start a channel scan. Scanning for One Channel To scan for only one specific channel, set Search Mode to Advanced. -
Page 26: Watching Tv
4 Watching TV Use the channel buttons or the numeric buttons to change channels. When changing channels, a dialogue box appears showing information about the current programme on the current channel, such as programme title and running time. Pressing the INFO button also displays the programme in- formation dialogue box. -
Page 27: Channel List
4.1 Channel List Use the channel list to change channels more easily. Press the button to open the channel list. Switch to a specific channel: Place the focus on a channel entry using the navigation or numeric buttons, and then press the button. -
Page 28: Tv Programme Guide
abled, pressing the EXIT button closes the channel list without changing channels. • View only filtered list: With this enabled, choosing a channel category filters out channels that are not in the chosen category. • Logical channel number: Some channels have their own channel num- bers, and others don’t. -
Page 29: Programme Guide Preferences
buttons to browse the channel timeline. Skip backward or forward by a day: Press the red button or the green but- ton. Change the timeline view: Pressing the button alternates the timeline view between channel-based view and time-based view. Change the time unit: Press the button and set EPG Time scale shorter... -
Page 30: Controlling Audio
information. Users can set the receiver to access the MediaHighway pro- gramme guide when the receiver turns on, to save time. Press the but- ton and set Start MHW-Epg Automatic to On. Note The MediaHighway programme guide may be not available, depending on the country. -
Page 31: Displaying Subtitles
4.4 Displaying Subtitles When the subtitle symbol is highlighted on the programme information dialogue box, it indicates that subtitles are available in one or more lan- guages for the current programme. Press the Subtitle button and choose a subtitle language to display subtitles. 4.5 Watching Two Channels Simultaneously Users can simultaneously watch two different channels contained in the same transponder, with one channel shown in an inset window. -
Page 32: Viewing Teletext
4.6 Viewing Teletext The teletext symbol highlighted on the programme information dia- logue box indicates that teletext pages are available with the current chan- nel. Press the Teletext button to display the teletext page. Each teletext page has a page number. Enter a page number to view a dif- ferent teletext page. -
Page 33: Watching Subchannels
4.8 Watching Subchannels Particular channels, such as sports channels or film channels, may have subchannels (multi-feed). For example, a film channel may use subchannels to air a single film with regular minutes-long intervals at the same time. The subchannel symbol highlighted on the programme information dia- logue box indicates that the current channel has multiple subchannels. -
Page 34: Managing Channels
4.10 Managing Channels Press the button to open the channel list, and press Sort channels: Repeatedly pressing the red button sorts channels by a dif- ferent category. Search for channels: Press the yellow button and enter search criteria using the on-screen keyboard. Lock or unlock channels: Press the blue button and select Lock/Unlock Ser- vices. -
Page 35: Hbbtv
Choose a favourites group, then select one or more channels. Whenever a channel is selected, it appears in the favourites group on the middle of the screen. To select a different favourites group, press the green button and select a favourites group. Remove channels from a favourites group: Press the blue button, select Favorites, and then press the green button to display the list of favourites groups. - Page 36 When watching a channel, a rounding circle may appear in the upper-right corner of the screen to indicate that HbbTV services are available. Press the red button to access the channel’s HbbTV services via the Internet. Note The receiver must be connected to the Internet to use HbbTV services. HbbTV services may not be available, depending on the TV station.
-
Page 37: Recording Tv
5 Recording TV This digital TV receiver can record TV programmes onto a removable hard drive or flash drive. However, flash drives are not recommended for record- ing. Connect a removable hard drive to one of the receiver’s USB ports. For de- tails on how to manage removable storage devices, see Managing Storage Devices... -
Page 38: Manually Scheduling Tv Recordings
Manually Scheduling TV Recordings Manual scheduling of programmes is sometimes needed because the pro- gramme guide is not always consistent with the actual broadcasting time. There may be changes in broadcast schedules or delays due to other pro- gramming. Open the apps screen and select Schedule. Add a recording event: Press the green button. -
Page 39: Playing Recordings
erences on page 33. Pause the live programme: Press the pause button . Press it again to re- sume. Skip backward or forward: Press the play button to display the progress bar. Press the left or right navigation button. Repeatedly pressing the yellow button changes the skip interval from 10 seconds to 10 minutes. - Page 40 of a programme. Specify how much later the receiver should finish re- cording. • TimeShift Start: With this set to Auto, the receiver begins time-shift re- cording whenever changing channels. With this set to Manual, pressing the pause button begins time-shift recording. With this set to Off, time-shifting is disabled.
-
Page 41: Playing Media Files
6 Playing Media Files This digital TV receiver can play not only TV recordings but also many kinds of media files, including photos, music, and videos. Connect a removable hard drive or flash drive to one of the receiver’s USB ports. 6.1 Managing Storage Devices To manage removable storage devices connected to the receiver, open the apps screen and select... -
Page 42: Managing Files
Device and select a removable storage device. Press the red button and then confirm to remove it. Check a storage device: Choose Current Device, select a storage device, and then choose Storage Check. If any faults are found, they are automatic- ally repaired. -
Page 43: Playing Recordings And Videos
Move files or folders into another folder: Select one or more files or folders using the red button, and press the blue button. Select Move to Folder choose a subfolder or the upper folder. Copy files or folders onto another storage device: Select one or more files or folders using the red button, and press the blue button. -
Page 44: Viewing Photos
Play fast forward or backward: Press the forward button or the backward button . Repeatedly pressing theses buttons changes the playback speed. Skip to the previous or next recording or video: Press the previous button or the next button Add a bookmark to a recording: When playing a recording, users can add bookmarks to the recording for easier navigation. -
Page 45: Slideshow Preferences
Slideshow Preferences On the list screen, press the RECALL button. • Slide Time: Adjust the slideshow speed. • Repetition: Determine whether or not to repeat slideshows. • Title: Determine whether or not to display file names. • Downscale: Determine whether or not to display a reduced size. Installation to finish. -
Page 46: Playing Media Files From Other Devices
6.6 Playing Media files from Other Devices This receiver can play media files from computers or other DLNA-enabled devices, such as TVs and tablets, connected to the receiver via a network. For example, when a computer and the receiver is connected to the same network, the receiver accesses the computer to play the computer’s media files, or vice versa. -
Page 47: Apps
7 Apps Press the MENU button to open the apps screen. Most apps require an in- ternet connection for proper operation. 7.1 Web Browser Use the Web Browser app to surf the Internet. Note Web Browser cannot play flash video, which is heavily used on the web. Pressing the MENU button displays a toolbar, including a web address field... -
Page 48: Navigating Webpages
Navigating Webpages A pointer is available to help users navigate webpages. Use the navigation buttons to move the pointer. To see another webpage, move the pointer over a link and press the button. Enter a web address: Press the MENU button, select the web address field, and then enter a web address using the on-screen keyboard. -
Page 49: Entering Text
Open the home page: Press the MENU button and select the home page icon Entering Text Switch to a different language keyboard: Press the MENU button and select the keyboard icon . A list appears, showing available keyboard layouts. Choose a keyboard layout, and then choose a keyboard language. Restart Webzeal to put the chosen keyboard into use. -
Page 50: Free Tv
Note Some videos may not play properly, depending on how they are en- coded. View in full screen: Press the button. To exit full screen, press it again. Pause and resume playback: Press the pause button , and press the play button to resume. -
Page 51: Internet Radio
Delete a TV station: Place the focus on a TV station entry, press the yellow button, and then select Yes. Clear all TV stations: Place the focus on a TV station entry, press the yellow button, and then select All. 7.5 Internet Radio+ Use Internet Radio+ to listen to internet radios. -
Page 52: Rss News
7.6 RSS News Use the RSS News app to view frequently updated information from web- sites, such as blog entries and news headlines. Add a new RSS subscription: Press the red button. Specify the RSS source’s details and web address, and then select to finish. -
Page 53: Tv Portal
7.8 TV Portal+ TV Portal+ is a web portal, run by this receiver’s manufacturer, that brings to- gether web content dedicated for consumer electronics from diverse web- sites. There are multiple web categories, including news and multimedia. Use the navigation buttons to navigate the web categories and the but- ton to select an item. -
Page 54: Weather Forecast
Note It is not possible to play files that are not completely downloaded. 7.10 Weather Forecast Use the Weather Forecast app to get weather forecasts for thousands of places around the world. Add a city: Press the red button to display a list showing countries. Select a country and then select one of its cities. -
Page 55: Plugin Server Settings
PlugIn Server Settings The PlugIn server’s web address may need to be reconfigured properly. For information about the PlugIn server, contact the local distributor. Open the app screen and select Download > Setting. Place the focus on Plugin Server, press the red button, and then enter a new web address. A... -
Page 56: Preference Settings
8 Preference Settings 8.1 Language Settings Open the apps screen and select Settings > Language Setting. • Menu Language: Determine what language to use for the interface. • Audio Language: A TV programme may provide audio in two or more languages. -
Page 57: Proxy Server Settings
It may be more convenient to set the router for dynamic IP addresses so that the receiver can automatically connect to the network. Turn on DHCP DHCP is enabled on the router. If DHCP is not available, specify the network details, including IP address and gateway. -
Page 58: Audio And Video Settings
• Daylight Saving: To apply daylight saving time, specify the country where the receiver is located. • Clock Mode: Determine which to use between 12-hour and 24-hour clock formats. Wake Up Mode Sleep Mode, see Setting Up Timers on page 27. 8.4 Audio and Video Settings Open the apps screen and select Settings... -
Page 59: On-Screen Display Settings
• Sound Mode: Generally, an audio track has two sound channels. De- termine which sound channel to use by default. • Power Saving in Standby Mode: With this enabled, the receiver’s front display shows nothing when in standby mode. With this disabled, it dis- plays the current time. -
Page 60: Parental Control
8.6 Parental Control TV programmes are rated according to their level of violence, nudity, and restricted language. It is possible to set the receiver to block programmes rated a certain class or higher to prevent children from watching them. It is also possible to lock specific apps so that children or others can’t access them. -
Page 61: Sharing Channel Data
• System restore to stored position: Restore the receiver using the stored settings and channels. • Store system data: Back up all settings and channels. • Delete stored position: Clear all stored settings and channels. Sharing Channel Data It is possible to share the receiver’s settings and channel data with other re- ceivers of the same kind, using a flash drive. -
Page 62: Online Update
appears showing available update files. If the receiver fails to recognize the flash drive, open the apps screen and select Download > Storage. Se- lect an update file and press the red button. Never turn off the receiver until the update process is complete. Online Update Online software updates may be available, depending on the country. -
Page 63: Legal Notices
Appendix Legal Notices The terms HDMI and HDMI High-Definition Multime- dia Interface, and the HDMI Logo are trademarks or registered trademarks of HDMI Licensing LLC in the United States and other countries. Manufactured under license from Dolby Laborator- ies. Dolby and the double-D symbol are trademarks of Dolby Laboratories. -
Page 64: Correct Disposal Of This Product
Correct disposal of this product This marking shown on the product or its literature indicates that it should not be disposed with other household wastes at the end of its working life. To prevent possible harm to the environment or human health from uncontrolled waste disposal, please separate this from other types of wastes and recycle it responsibly to pro- mote the sustainable reuse of material resources. - Page 65 This product is under continuous development. Due to changes or improve- ments, some descriptions and illustrations in this guide may differ slightly from the actual product.
- Page 66 Memo...
- Page 68 Full HD Digital Satellite Receiver HAWK 70001 051300...
Need help?
Do you have a question about the HAWK and is the answer not in the manual?
Questions and answers