Table of Contents
Advertisement
Quick Links
C
ONTENTS
I
NSTRUCTIONAL
L
OCKING
P
LACING AND
D
A96
...............................................4
........................................................... 4
I
...........................................6
........................................................ 7
.................................................... 7
C
/U
NLOCKING THE
R
ECEIVING
......................................................... 14
.................................................... 14
................................................. 15
................................................ 16
V
.......................................................... 16
P
C
.............................................................. 17
.............................................................. 18
....................................................... 20
....................................................... 20
................................................................ 21
................................4
............................................... 5
.............................................. 8
.................................. 8
O
/ O
N
FF
............................................ 9
.............................. 10
P
HONE
C
ALLS
.................................. 16
............................................ 17
.............................. 17
'
............................ 19
...................... 13
1
Advertisement
Table of Contents

Subscribe to Our Youtube Channel
Related Manuals for Micromax A96


Summary of Contents for Micromax A96
-
Page 1: Table Of Contents
ONTENTS ........4 NDROID DVANTAGE ..........4 IRST ............4 ISCLAIMERS ..........5 NSTRUCTIONAL CONS ...........6 ETTING TARTED ............7 HONE AYOUT ............ 7 SIM C NSERT ..........8 NSERT EMORY ........8 URNING YOUR PHONE ..........9 HARGING THE ATTERY ......10 OCKING NLOCKING THE HONE... - Page 2 ..............21 WIPE .......... 21 SING THE INCH ............22 OUBLE ........22 HANGE THE RIENTATION ........23 ’ SING THE ANDSET ..........23 CREEN ........... 24 AUNCHER CONS ............. 24 ONTEXT ............ 25 PTIONS ENUS ......25 WITCH ETWEEN CREENS ....
- Page 3 ..40 ONNECTING TO ETWORKS AND EVICES ........41 ONNECT TO THE NTERNET ........... 43 BT D EVICES ........44 ANAGING CCOUNTS ......... 45 SE A OOGLE CCOUNT ............45 TART MAIL ..........45 ONFIGURING ............46 SING ........... 46 OOGLE EARCH ........
-
Page 4: The Android A Read M E First
Micromax A96 comes with Jelly Bean 4.2.2 that is capable of performing various functions just like your personal computer and can be personalized according to your own needs. For example, you can add and remove applications or upgrade existing applications to improve the functions. -
Page 5: Cons
Other product logos and company names mentioned herein may be trademarks or trade names of their respective owners. *Operator tariff shall be applicable for SMS. **Micromax privacy policy is available at www.micromaxinfo.com. NSTRUCTIONAL CONS Before you start, please familiarize yourself with the icons you will see... -
Page 7: Phone Layout
HONE AYOUT SIM C NSERT To insert the SIM card: Switch off your phone and remove the rear cover. Remove the battery and insert the SIM card(s) correctly in the card slot(s), as illustrated in the following image: Place back the battery and rear cover. Please keep the SIM Card out of the reach of children. -
Page 8: Insert Memory
Finally, place back the battery and rear cover. Use only compatible memory cards approved by Micromax with this device. Incompatible memory cards may damage the card or the device and corrupt the data stored in the card. -
Page 9: Charging Theb
You can charge the device with a travel adapter or connecting the device to a PC with a USB cable. Tip: You can also use a compatible USB charger to charge your battery. Use only Micromax approved chargers and cables. -
Page 10: Screen Lock
Unapproved chargers or cables can cause battery to explode or damage your device. We suggest you charge the battery for 4 hours continuously for the first time. OCKING NLOCKING THE HONE You may need to provide PIN, password, draw a pattern, take your face in front of the phone screen, speak something for voice recognition, or simply slide to unlock your phone. - Page 11 Note: You can also set other locking methods as desired from Screen lock. Other screen locking methods available in your A96 include: Slide: Just wake up the screen and slide the lock icon towards the unlock icon to unlock your phone.
- Page 12 the None option.
-
Page 14: Make A Call
AKE A on the main menu or the home screen to dial the desired number. to enter the desired number to be dialed. to open the Call log and select a number to make call. to open the Contacts and select the number to make call. -
Page 15: Conference Call
call. to listen via the speaker. to view the dial pad. to end the call. ONFERENCE Your device supports conference calls (network service) between more than two people. If you dial or accept a new call when you are already on a call, you can merge the calls into a conference call. -
Page 16: Make A Videoc
between a select numbers of participants depending to the service provider. AKE A IDEO Your Handset supports video calling using which you can talk face to face with your friends via real time video streaming. You need to fulfill the following conditions for video calling: ... -
Page 17: Isable Hone
To end a call, tap the icon. ISABLE HONE ALLS Some locations may require you to disable all the wireless features of your mobile. The Airplane Mode enables you to disable all incoming and outgoing calls, Wi-Fi, and BT connections. To activate the airplane mode: Press and hold the Power button and then select Airplane mode. -
Page 18: Sensors
You can adjust the volume of your handset by using the volume keys on the right side of the handset as shown: ENSORS Your phone has gravity sensors to detect gravity and display correct orientation based on the motion. → Display You can disable the auto-rotate feature from →... -
Page 20: Using The Touch Tap And Hold
AP AND Tap and hold an item to view the list of actions based on the selected item and condition. Also, you can move an item from the Apps screen to the home screen using this method, as shown in the following image: RAG AN Tap and hold an item and move your finger on the screen until you... -
Page 21: Scroll
CROLL To scroll a list, slide your finger across the surface of the screen upwards or downwards (without dragging an item). WIPE Place a finger on the screen and steadily slide your finger in the desired direction. For example, when you are viewing a picture, to view the next picture, swipe left. -
Page 22: Double - Tap
OUBLE Tap quickly twice on a webpage, map, or other screen to zoom. For example, double-tap a section of a webpage in the browser to zoom in to that section. You can also double-tap to control the Camera zoom, in Maps, and in some other applications. HANGE THE RIENTATION On most screens, the orientation of the screen changes as you rotate... -
Page 23: Using The Handset Keys
’ SING THE ANDSET The phone’s buttons offer a lot of functions and shortcuts. Button Press Press and hold Back: Opens the previous screen you were working on. If the onscreen keyboard is open, closes the keyboard. Menu: Opens a menu with items that affect the current screen or application. -
Page 24: Launcher Icons
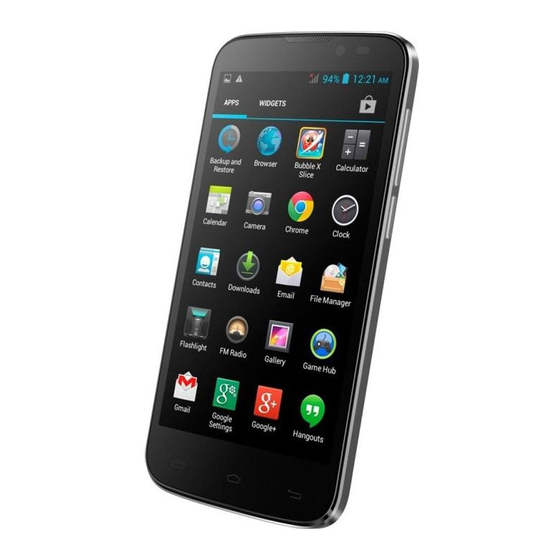
AUNCHER CONS There are total five launcher icons that will be present on the home screen of your A96, as shown in the following image. Apart from the launcher icon, you can add, remove, or move other launcher icons from the home screen. -
Page 25: Options Menus
Context Menu Not all screens have context menus. If you tap on a screen that has no context menu, nothing happens. PTIONS ENUS Options menus contain list of options that apply to specific items on the screen. You need to tap and hold an item on the screen to view the option list. -
Page 26: Earrange Tems On The Ome Creen
EARRANGE TEMS ON THE CREEN You can rearrange items on the home screen as shown below: USTOMIZE CREEN When the device is in default mode, you will see limited predefined icons. You can place desired indicator icons, widgets, shortcuts to applications, and other items on the home screen. - Page 27 finger hold. Rearrange or Remove Widgets and Icons on your Home Screen Long press and hold the widget or icon you want to move. Drag the widget or icon to a new location on the screen. Press and hold on an icon in the home screen and then drag the widgets or application to the Remove label at the top- center of the screen.
-
Page 29: Open The Notifications Panel
The phone provides you with various notifications to alert you of various events. Notification icons inform you of new messages and events. When you receive a notification, its icon appears in the status bar, along with a brief summary. PEN THE OTIFICATIONS ANEL... -
Page 30: Toolkit
OOLKIT Open the Notifications panel and tap the icon to access various tools and settings available on your handset. You can view back the list of notifications by tapping the icon and navigate to the Settings section of your phone by tapping the icon. -
Page 32: Create And Send Multimedia Message
You can use Messaging to exchange text and multimedia messages. A message becomes an MMS if you send it to an email address or add multimedia file(s) to it. REATE AND ULTIMEDIA ESSAGE To create a multimedia message: Tap the icon to go to messaging and then tap compose a message. -
Page 33: Lock A Message
Tap to forward the message. Tap Forward. Add a contact or enter the number on which the message is to be forwarded. to send the message from SIM1 or to send the message from SIM2. You can also copy message text, save message to SIM card, view message details and delete message from the list of options. -
Page 34: Using The Onscreen Keyboard
Tap to lock the message. Tap Lock to lock the selected message. You can unlock the locked messages by tapping and holding the desired message and then tapping Unlock. SING THE NSCREEN EYBOARD Some applications display the keyboard by default. In others, you will be required to tap a text field, where you want to enter text, to open the keyboard. - Page 35 Tap this icon to select desired contact from phonebook Tap once to capitalize the next letter you type. Tap and hold for caps lock. Use the icon to erase characters Press space or a punctuation mark to enter the highlighted suggestion.
-
Page 37: Camera
AMERA Take a Picture or Video Tap the icon from the Application menu to open the camera. Adjust the exposure and other camera settings by tapping the icon, as required. Point the lens on the subject you want to click a photograph ... -
Page 38: Gallery
recording and the icon to resume the video recording. ALLERY You can use the Gallery to view pictures and play videos and share files. To view pictures: Tap the icon in the Application Menu or the gallery icon in camera mode, as shown below: Gallery Tap an album to open and view its contents. -
Page 39: Fm Radio
enjoy the features of your music player. Press the phone’s volume up/down keys on the right side of the mobile phone to adjust the volume. Note: You can use an SD card to enhance the storage capacity for your multimedia files such as music, photos, emails, and so on. FM R ADIO Application Menu →... -
Page 40: Connecting To Networks And Devices
proceed. Tap the icon to view and play the list of stored recordings. -
Page 41: Onnect To The Nternet
Connection and select the SIM on which data connection is to be enabled. Connect to Internet via your Phone You can use your A96 as a modem and connect your PC or laptop to the Internet, when required. You can do this via: ... - Page 42 The driver installation window will pop-up on your PC or laptop. Install the driver as instructed. You can now start using the Internet service via your A96. Note: Your mobile operator will charge you based on your GPRS data usage.
-
Page 43: Pair With Bt Devices
You will be prompted to confirm passkey on both devices. Tap Pair to confirm the passkey and pair the devices. On successful pairing, your phone connects to the device. Tap Micromax A96 at the top of the scanned device list to make your A96 visible on other devices. -
Page 45: Why Use A Google Account
You can set up an account on your device. You can do this by going → Add account → You may add various types of accounts, depending on your applications. SE A OOGLE CCOUNT Your Google Account lets you take full advantage of Google applications and services that you may want to use, such as Gmail, Maps, Play Store, etc. -
Page 46: Using E-Mail
If the settings are not downloaded automatically, please opt for the Manual Setup. If necessary, please contact your service provider for detailed description. SING To compose an email: Go to → Email/Gmail. If you are using several email accounts then select the account you want to send the mail from. -
Page 47: Synchronize Contact List
your phone. Go to to access Google Search. → YNCHRONIZE ONTACT To synchronize contacts with an account, you will need to first have an account added in the phone. If the desired account does not exist then please add it first. To synchronize the contact list: to open the list of contacts. -
Page 49: Maps
You phone comes with a host of applications to make your life easier and more convenient. Explore the various applications and the features that come with your A96 handset and enjoy the advantage. Google Maps is a web based service offered by Google Inc. which offers you access to various map based services. -
Page 50: Widgets
To open Google Map: Go to to start using Google Maps. → IDGETS Widgets allow placing application shortcuts on your home screen. You can now place analog clock, your recent call logs, and other such sections of your phone on the home page and access them directly! To view the list of widgets available, just tap the launcher icon on the Home screen and swipe through menu icons to the widgets... -
Page 51: Taskbar
experience. To download applications, games, movies, and books from the Android Market: Configure and activate your Internet connection. Go to to access the Google Android Market. → View the details and download items, as desired. Note: Not all items are free of cost in the Android Market. ASKBAR Taskbar displays the recent apps and sections used by you. - Page 52 Or you may also tap and hold the same and an option “Remove from list” will appear. Tap the option and the app will be removed.
-
Page 53: Safety Precautions
Remember to comply with legal requirements and local restrictions when using the phone. Your Phone’s radio waves may interfere with inadequately shielded medical devices. Consult a physician or manufacturer of the medical device to know whether they are adequately shielded from external Radio Frequency. -
Page 54: Taking Care Of Your Device
Flight is influenced by interference caused by the phone. It is illegal to use a phone on the airplane. Please turn off your phone during a flight. Professional service: The phone must be installed or repaired by Micromax authorized personnel. You are likely to suffer a huge risk when you install or repair this phone by yourself, which also goes against the warranty rules. -
Page 55: Battery Recommendations
Note: Micromax will not bear any responsibility for any incompliance with the above mentioned guidelines or improper usage of the mobile phone. All rights reserved. Reproduction, transfer, distribution or storage of part or all of the contents in this document in any form without the prior written permission of Micromax is... - Page 56 strictly prohibited.
Need help?
Do you have a question about the A96 and is the answer not in the manual?
Questions and answers