Table of Contents
Advertisement
Quick Links
Advertisement
Table of Contents

Subscribe to Our Youtube Channel
Related Manuals for Yardworks YW65PHP

Summary of Contents for Yardworks YW65PHP
- Page 1 Instruction Manual 6.5HP High Pressure Petrol Pump Model: YW65PHP WARNING! Read all safety warnings and all instructions. Failure to follow the warnings and instructions may result in electric shock, fire and/or serious injury. Save all warnings and instructions for future reference.
-
Page 2: Table Of Contents
TABLE OF CONTENTS WARRANTY …………………………………………. INTRODUCTION ……………………………………… SPECIFICATIONS ……………………………………. KNOW YOUR PRODUCT ………………………………. PACK CONTENTS ……………………………………. DESCRIPTION OF SYMBOLS …………………………… GENERAL SAFETY INSTRUCTIONS ………………………. ADDITIONAL SAFETY INSTRUCTIONS FOR PUMPS ………… SET-UP & INSTALLATION ……………………………… OPERATION …………………………………………. MAINTENANCE ……………………………………… SPARE PARTS ………………………………………. -
Page 3: Warranty
WARRANTY YARDWORKS TWO YEARS LIMITED WARRANTY Your YARDWORKS product is covered for a period of 2 years from the ORIGINAL date of purchase and is intended for home use only. The warranty covers faulty parts or workmanship. The warranty is only made available by returning the product to your point of purchase with a confirmed cash register receipt. -
Page 4: Introduction
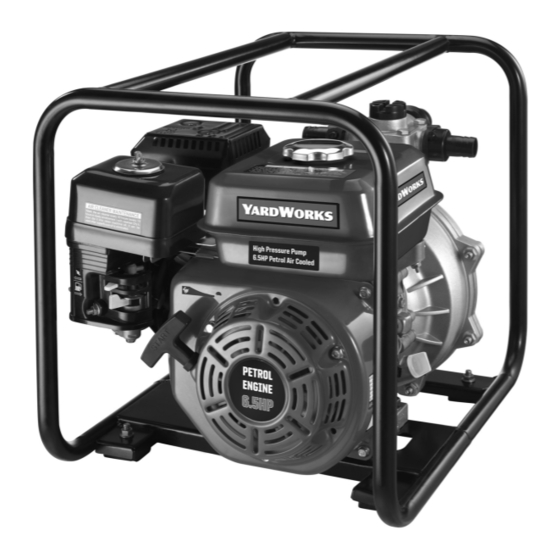
INTRODUCTION Congratulations on purchasing the YARDWORKS 6.5HP Petrol High Pressure Water Pump. We aim to provide quality products at an affordable price. Before using, it is most important that you read and follow the instructions in this manual, even if you feel you are quite familiar with this type of product. -
Page 5: Know Your Product
KNOW YOUR PRODUCT 1. Priming Cap 6. Throttle Lever 2. Fuel Cap 7. Fuel Lever 3. Fuel Tank 8. Choke Lever 4. Motor Housing 9. Air Filter 5. Recoil Starter 10. Exhaust WARNING! THIS PRODUCT IS NOT SUITABLE FOR USE WITH DRINKING(POTABLE) WATER. - Page 6 KNOW YOUR PRODUCT (cont.) KNOW YOUR PRODUCT (cont.) 11. Discharge Outlet 12. Pump Housing 13. Suction Inlet 14. Drain Screw 15. Oil Fill Plug 16. Low Oil Sensor 17. On/Off Switch 18. Spark Plug...
- Page 7 KNOW YOUR PRODUCT (cont.) 19. 5m Suction Hose 20. 25.4mm (1”) Outlet Cap 21. 25.4mm (1”) Collar 22. 25.4mm (1”) Hose Adaptor 23. 25.4mm (1”) Hose Clamp 24. 25.4mm (1”) O-ring 25. 40mm (1 ”) Inlet/ Outlet Cap 26. 40mm (1 ”) Collar 27.
-
Page 8: Pack Contents
PACKED CONTENTS 1 x 6.5HP Petrol High Pressure Water Pump 2 x 40mm (1 ”) Hose Adaptors 1 x 5m Suction Hose 3 x 40mm (1 ”) Hose Clamps 2 x 25.4mm (1") Outlet Caps 3 x 40mm (1 ”) O-rings 2 x 25.4mm (1") Collars 1 x Filter 2 x 25.4mm (1") Hose Adaptors... -
Page 9: General Safety Instructions
GENERAL SAFETY INSTRUCTIONS 1) WORK AREA a) Do not operate pump in explosive atmospheres, such as in the presence of flammable liquids, gases or dust. Engine may create sparks which may ignite the dust or fumes. b) Never run engine in an enclosed area. Exhaust gases contain deadly, poisonous carbon monoxide, which has no odor or taste. -
Page 10: Additional Safety Instructions For Pumps
ADDITIONAL SAFETY INSTRUCTIONS FOR PETROL PUMPS 1) Never refuel while engine is running or hot. Fuel spilled on a hot engine could result in a fire or explosion. 2) Use caution when handling petrol. Refuel in well-ventilated area. Do not overfill fuel tank and do not spill fuel. -
Page 11: Setup & Installation
SETUP & INSTALLATION Positioning The Pump Fig. 1 Place the pump close to the water that is required to be pumped (Fig. 1). Note: Ensure the pump is no further than 5m away from the water's edge. 2. Fill the engine crank case with oil (not included). Note: SAE 10W-30 oil is recommended, refer to the maintenance section for more information. - Page 12 SETUP & INSTALLATION (cont.) 6. Align and screw the collar of the assembled inlet adaptor onto the thread on the Fig. 5 suction inlet (13) port of the pump (Fig. 5). Note: Ensure the collar is tightly fastened onto the suction inlet (13); failure to do so may result in an air leak.
-
Page 13: Operation
OPERATION Pre Operation Inspections Environment Conditions The operation of a four-stroke (unleaded) engine is affected by: 1. Temperature a. Working in low temperatures could lead to difficult cold starting. b. Working in very high temperatures could lead to difficult hot starting due to evaporation of the fuel. c. - Page 14 OPERATION (cont.) Air Filter The air filter (9) must always be in perfect working order, to prevent debris and dust from being sucked into the engine thus reducing the efficiency and life of the machine. 1. Always keep the air filter (9) free of debris and in perfect working order. 2.
- Page 15 OPERATION (cont.) 3. Turn the engine on/off switch (17) to "ON" position (Fig. 11). Fig. 11 4. Hold the recoil starter (5) handle firmly and pull it slightly until the Fig. 12 compression position is reached, and then pull it swiftly all the way out. Slowly return the recoil starter (5) handle to its original position (Fig.
-
Page 16: Maintenance
MAINTENANCE Storing the Pump Fig. 15 Before storing the pump, it is recommended to empty the pump body of any water. Turn the drain screw (14) anti-clockwise and remove from the pump body. This will drain any excess water. Replace the drain screw (14) (Fig. 15). Changing the Oil Note: After the first 25 hours of use the engine oil requires to be replaced, and then every 50 hours after that. - Page 17 MAINTENANCE (cont.) Removing, installing and inspecting of the spark plug 1. Remove the spark plug lead. 2. Remove the spark plug (18) using the spanner supplied (Fig. 19). 3. Clean the electrode (m) with a metal brush and remove any carbon build-up. Fig.
-
Page 18: Spare Parts
SPARE PARTS Limited spare parts are available subject to availability. Please contact your local Bunnings Special Orders Desk to order the required spare parts. Most common spare parts listed below Spare Part Part No. Air Filter SPYW65PHP-08019 Fuel Tank Filter SPYW65PHP-1103 Fuel Tank Cap SPYW65PHP-1102... -
Page 19: Troubleshooting
TROUBLE SHOOTING Symptom Possible Cause Corrective Action Unit runs but delivers little or Leak in suction hose or piping Tighten suction hoses and use thread sealer. no water Clogged suction strainer Clear debris from suction strainer Water level below pump intake Lower suction hose into water Pump not primed Fill pump with water before trying to prime...
Need help?
Do you have a question about the YW65PHP and is the answer not in the manual?
Questions and answers