Table of Contents
Advertisement
Advertisement
Table of Contents

Related Manuals for Thermomix TM31


Summary of Contents for Thermomix TM31
- Page 1 Thermomix Tm31 insTrucTion manual Retain for future reference!
-
Page 3: Table Of Contents
Table of conTenTs Note: all handling instructions apply for Thermomix TM31-1C with 220 … 240 V and Thermomix TM31-4C with 110 … 127 V Notes for your safety ..................5 Technical data ....................8 Introduction/Customer service ..............9 Your Thermomix TM31 ................. 10 Before you start .................... - Page 4 Table of conTenTs Adjustment of preset time ................. 30 Temperature buttons and illuminated temperature indicators ....... 30 Indicator for remaining heat ................31 Soft start ......................31 Gentle heating setting ..................31 Varoma temperature setting ................32 Speed selector ....................32 Gentle stir setting ....................
-
Page 5: Notes For Your Safety
• Disconnect the appliance from mains power supply instruction manual carefully before using your Thermomix before cleaning and if appliance is not used for a pro- TM31 for the first time and be sure to take particular note longed period of time. of the following. - Page 6 • Hold measuring cup firmly while operating the • Be sure to place the Thermomix TM31 on a clean, solid, Thermomix TM31 at medium (3–6) and higher (7–10) even and non-heatable surface, particularly when using speed levels or when pressing the turbo button to the Varoma.
-
Page 7: Property Damage
Vorwerk Thermomix. between the Thermomix TM31 and external heat sources • Use only the Thermomix TM31 measuring cup to close such as radiators, hot plates, ovens, hobs, etc. the opening in the mixing bowl lid. Do not cover mixing Do not place the Thermomix or its connecting cable on bowl lid with towels or similar items. -
Page 8: Technical Data
Max. power consumption 1,300 W 1,500 W 1,500 W Voltage 120 V 127 V 110 V Dimensions and weight excl. Varoma Varoma Thermomix TM31 height 30.0 cm height 11.8 cm width 28.5 cm width 38.5 cm depth 28.5 cm depth 27.5 cm... -
Page 9: Introduction/Customer Service
Thermomix customer service: see page 42. Thermomix. Preparing tasty and healthy food becomes fast and easy. Vorwerk International strecker & co. Cooking with Thermomix saves you time for other activities. Verenastrasse 39 8832 Wollerau This instruction manual will familiarize you step by step switzerland with your new Thermomix. -
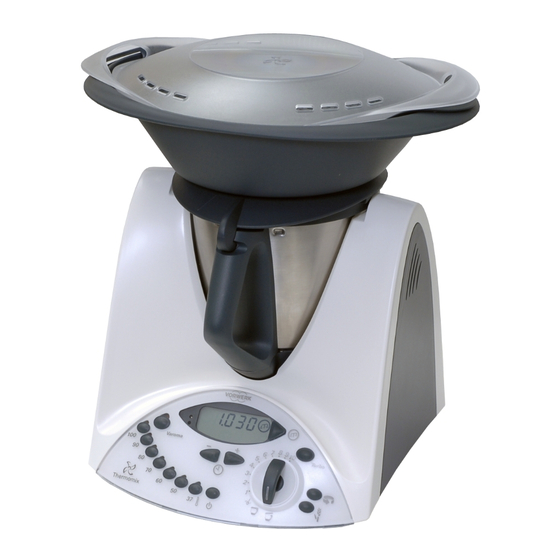
Page 10: 10 Your Thermomix Tm31
THerMoMIx TM31 After opening the packaging please check that all Thermomix TM31 components are included. These are: • Thermomix TM31 including mixing bowl and lid with sealing ring • Simmering basket • Stirring attachment (butterfly whisk) • Measuring cup • Spatula... - Page 11 Mixing bowl base Sealing ring for mixing knife Mixing knife Mixing bowl lid Stirring attachment (butterfly) Spatula with safety disk Varoma Simmering basket Varoma lid Measuring cup Varoma tray Sealing ring for mixing bowl lid Varoma dish your Thermomix TM31...
-
Page 12: Before You Start
3 . The arrow must point to the handle of the TM31 bowl. Then turn the lid in a clockwise direction 4 until you hear it “click” into place, make sure to turn it all the way to the stop. -
Page 13: How To Remove The Mixing Knife
cauTIon Danger of scalding by splashing hot food never try to open mixing bowl lid by force. only open the mixing bowl lid after the speed selector is pointing to open lid position and the food or liquid in the TM bowl has stopped moving. -
Page 14: How To Insert The Mixing Knife
before you sTarT How to insert the mixing knife To re-insert the mixing knife, follow the ‘removal’ steps in the reverse order. Put the mixing knife back into the mixing bowl 1 by pushing it through the opening in the bottom of the bowl 2 . noTIce risk of damage by leaking out food ensure sealing ring of mixing knife is fitted to the knife bearing. -
Page 15: Accessories
Before you start using your Thermomix TM31 we would like to present its accessories in more detail. They are proof of a well thought out design. Every part has been designed intelligently and serves several purposes. 2.0 litre Mixing bowl 1.5 litre... -
Page 16: Mixing Bowl Lid, Measuring Cup
The mixing bowl lid is used to close the mixing bowl. For safety reasons your Thermomix TM31 will not start working unless the lid has been positioned and locked correctly. Never try to force the lid open when the appliance is locked. -
Page 17: Simmering Basket
Simmering basket The simmering basket for the Thermomix TM31 is made of high-quality plastic. Like the measuring cup, the basket is a multi-purpose item: • Filtering of fruit and vegetable juices. Chop and make a puree in the Thermomix TM31, then insert the simmering basket into the mixing bowl and use it as a filter when pouring the juice out. -
Page 18: Spatula
The spatula 1 is another example of the intelligent design of the Thermomix. • The Thermomix TM31 spatula is the only instrument you may use to mix or stir the ingredients in the mixing bowl 2 . Push it from above into the bowl through the opening in the lid. -
Page 19: Stirring Attachment (Butterfly)
Stirring attachment (butterfly) • The butterfly 3 (here positioned on mixing knife 4 ) will help you to achieve best results when whipping cream or beating egg whites. It is also the perfect utensil for the preparation of creamy puddings or cream mixtures. • When boiling milk or preparing puddings or sauces the butterfly allows a constant movement of ingredients. -
Page 20: Varoma
All parts are made of high-quality, food compatible plastic. noTIce • always store the Varoma with its lid closed 1 . • use Varoma only with Thermomix TM31 (not suitable for microwave, oven or other appliances). How to combine the Varoma parts... -
Page 21: How To Use The Varoma Correctly
How to use the Varoma correctly Your Varoma is an accessory designed for the Thermomix TM31 and can only be used with the TM31. Before you can start steam cooking with the Varoma you will need to set up your Thermomix TM31 correctly. - Page 22 100°C, developing hot steam. The steam rises through the opening in the mixing bowl lid of the Thermomix TM31 into the Varoma. The food is cooked gently in the hot steam. Please note that the maximum Varoma temperature is 120°C, depending on what ingredients you are using, e.g.
- Page 23 cauTIon Danger of scalding by hot steam and hot condensed water • Touch only the handles at both sides of Varoma. • Hold Varoma lid in such a way that the rising steam or hot dripping liquid cannot come into contact with you when taking it off. • Mind hot steam which will continue to rise up out of opening of mixing bowl lid when remov ing the entire Varoma.
-
Page 24: Practical Work With The Varoma
accessorIes Practical work with the Varoma This description explains clearly how easy it is to use the Varoma. Observe the following basic rules for using the Varoma: • Place enough water in the mixing bowl. IMporTanT: 30 minutes steam cooking requires 0.5 litre (500 g) of water, for every additional 15 minutes an additional 250 g. -
Page 25: Working With The Thermomix Tm31
(suspended cupboards, shelving) and around them to prevent damage from hot escaping steam. Find a permanent place in your kitchen for your Thermomix TM31 right from the start so that it is ready at hand whenever you need it. Starting the Thermomix TM31 Pull the electric cable lightly from the housing and connect it to the mains supply. -
Page 26: Explanation Of Symbols On Control Panel
In this way, the integrated scales will work perfectly. If you do not need your Thermomix TM31 for a prolonged period of time please disconnect it from mains supply as you do with most electric appli- ances (economizing on power consumption;... -
Page 27: Multi-Function Display
Step 2: Press tare button. Wait for the tone “beep” and the display will show the scales 0.000 3 . IMporTanT: When pressing the tare button do not touch the Thermomix or lean anything against it. Step 3: Put in the first ingredient (2.0 kg max.) and check the quantity on the display 4 . -
Page 28: Further Information About Weighing
After pressing the tare button the Thermomix remains in the weighing mode for 5 minutes unless another button is pushed or the speed selector is turned. After these 5 minutes the Thermomix returns to the timer mode. When the tare button is pressed once more the 5 minutes start again. -
Page 29: Timer Buttons And Timer Display
To switch off the buzzer turn the speed selector back to IMporTanT: Heating and cooking are only possible if a time period has been preset. Working with the Thermomix TM31... -
Page 30: Adjustment Of Preset Time
90°C (194°F) is set the related light will start flashing. As the Thermomix heats up the lights for 37°C, 50°C, 60°C, 70°C and 80°C (99, 122, 140, 158 and 176°F, respectively) light up one after the other until 90°C (194°F) is reached. -
Page 31: Indicator For Remaining Heat
Thermomix TM31. Then the temperature sensor can measure the actual temperature correctly and control soft start accordingly. If using the Thermomix TM31 to process food that has not been heated or cooked in the appliance (e.g. prepar ing a gravy from hot meat juices) you should only increase the speed slowly and gradually. -
Page 32: Varoma Temperature Setting
This temperature setting is used for steam cooking (see page 21 ff.) and sautéing ingredients. noTIce never heat up the mixing bowl when empty. Speed selector Turn the speed selector to start the Thermomix TM31. The following speeds are available: Designation speed level revolution/min. -
Page 33: Mixing/Blending
Turbo button Use the turbo button 4 to operate the Thermomix TM31 at maximum speed. The turbo function only works as long as this button is pressed and held. It is also useful for an “alternating” mode. If, for example, you wish to coarsely chop a large quantity of food, press the turbo button 3 or 4 times (repeat as necessary). -
Page 34: Clockwise/Counter-Clockwise Operation
Thermomix TM31 can move Place your Thermomix TM31 on a clean, solid, even and non-heatable surface so that it cannot slip. Keep a sufficient distance from the edge of this surface to prevent Thermomix TM31 from falling down. -
Page 35: Things To Remember
In sleep mode, power consumption of the Thermomix TM31 is less than 1 W. If you do not use the Thermomix TM31 for a prolonged period of time disconnect it from mains power supply. Electronic motor protection... -
Page 36: Cleaning
As with all kitchen appliances or tableware you should clean all parts of your Thermomix TM31 – especially the mixing knife, the mixing bowl, the mixing bowl lid and its sealing ring – thoroughly before using it for the first time and after every usage. -
Page 37: How To Clean The Mixing Knife
How to clean the mixing knife To clean the mixing knife hold it under running water with the mixing knife pointing upwards, as shown in picture 2 . In order to facilitate the cleaning, use a brush or clean it in the dishwasher. IMporTanT: Do not leave the mixing knife in dish water for a long time as this may damage the gasket system of the knife bearing. -
Page 38: How To Clean The Main Appliance
• Disconnect the appliance from mains power supply before cleaning and if appliance is not used for a prolonged period of time. • Do not immerse the Thermomix TM31 in water. clean with a damp cloth only. no water or dirt must be allowed to enter the housing. -
Page 39: Notes For Your Own Recipes
The easy to understand step by step design of our recipes enables you Settings: 7 sec/speed 5 to prepare your own recipes with your Thermomix TM31. 1 set timer to 7 seconds 2 turn speed selector to 5... -
Page 40: Troubleshooting
Thermomix TM31 will show the 1 by pulling the mains plug: cause for the error on the display. If the display shows e.r 23, 28, 32, 38, 39, 70 “e.r”... -
Page 41: Legal Regulations/Copyright
EU-Member States: US market As owner of an electrical or electronic product, you Please note that, to date, the Thermomix TM31 are not allowed by law (according to EU-Directive (the “Appliance”) has and is only being produced, 2002/96/EC of 27 January 2003 on waste electrical... -
Page 42: Warranty/Customer Service
The Thermomix TM31 may only be repaired by the responsible Vorwerk customer service or an authorised Vorwerk repairer. Use only parts provided with the Thermomix TM31 (page 10–11) or original spare parts from Vorwerk Thermomix. Never use the Thermomix TM31 in combination with parts or equipment not provided by Vorwerk Thermomix.
Need help?
Do you have a question about the TM31 and is the answer not in the manual?
Questions and answers