
Summary of Contents for CTcoin Blackbird 3300
- Page 1 Coin Counter OPERATION INSTRUCTIONS Blackbird 3300 CTcoin A/S Helsingborggade 9 • DK-5100 Odense C Tel. +45 6312 7550 • Fax +45 6312 7551 www.ctcoin.com • ctcoin@ctcoin.com...
-
Page 2: Table Of Contents
Content 1. Introduction ……………………………………………..………….…………………… 3 2. Technical Specifications ...…………………………………………….……………… 4 3. Key Panel ……………..…….…………………………………………...…….…………. 4 4. Precautions .………………………………………………...…….……………………… 5 5. Operation Procedures ………………………………………….. …….……………….. 5 6. Reject small coins mixed ……………………….……………..…….……………….. 8 7. Set up the Coin Tube Holder …………………………………………..…….………… 9 8. -
Page 3: Introduction
Introduction The coin counter is a heavy duty, high speed coin counting machine. Before operating the machine, please read this manual carefully. Do not operate the machine until you understand the contents of this document. Should you have any questions, please contact local distributor or sales agent for further advice. -
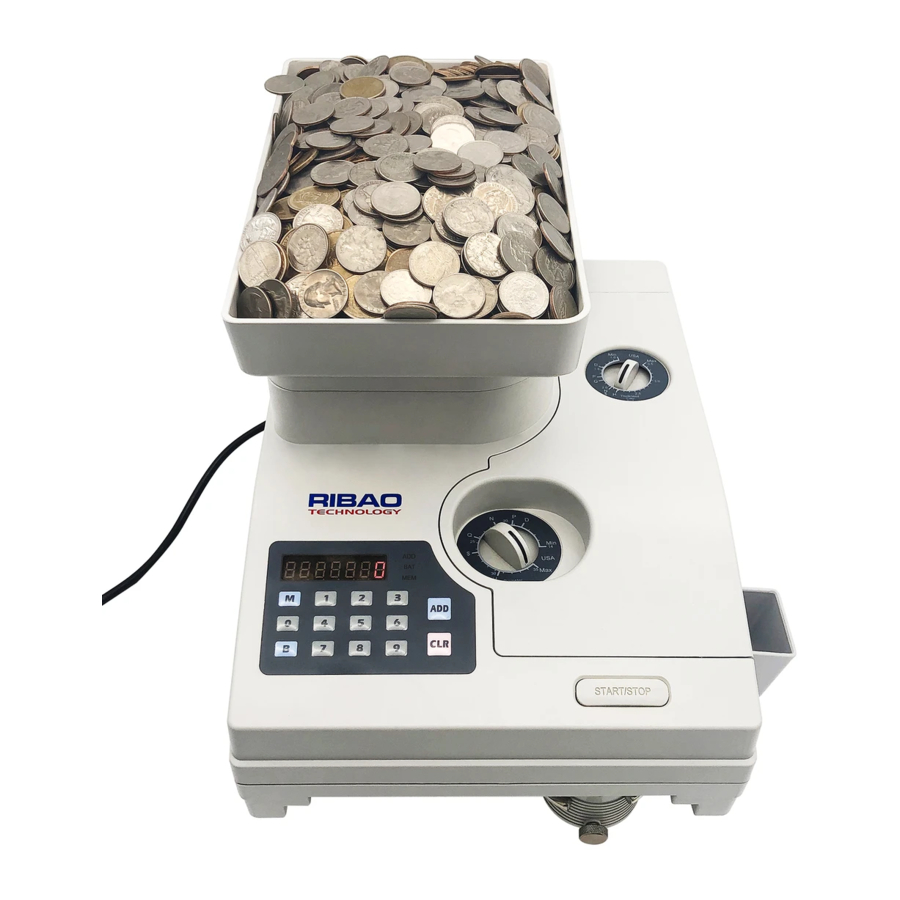
Page 4: Technical Specifications
Technical Specifications Counting Speed ……… 2300 Coins/Min.(for coins with a diameter of 15 mm or .5906 inches) Hopper Capacity ………... 3600 coins (without the hopper extender installed for coins diameter of 15 mm and thickness of 1.1 mm.) 12000 coins (with the hopper extender installed for coins diameter of 15 mm and thickness of 1.1 mm.) Countable Coin Size ……... -
Page 5: Precautions
Precautions · Before putting the coins into the Hopper, please remove all paper scraps, lint, rubber bands, etc., which may be mixed with the coins. · Foreign objects may cause jamming or faulty counting. · Do not open the Top Cover when coins are in the Hopper. ·... - Page 6 § Set the Coin Thickness Adjusting Knob to the desired denomination according to the thickness of the coin in millimeters. § Fix a coin bag, or a coin tube onto the coin outlet Attachment. When you use coin bag, please place the bottom of the coin bag on the floor, or on a stand, to prevent the machine from tipping over, Install the Coin Reject Box onto the side of the machine.
- Page 7 § When counting is completed, press CLR key to clear the display, The count display will revert to “0”. § After counting is completed, if the counting number on the display should be reserved in memory, press the M key; Press and hold this key for five seconds and the display will show the total count stored in memory .
-
Page 8: Reject Small Coins Mixed
The default batch quantities can be changed as following steps: · Press both B key and M key, then turn on the power, the machine will enter into the “batch changing mode” and the display show “bAt- SEt”; ·Press B key to select the default memorized default batch quantities which you want to change;... -
Page 9: Set Up The Coin Tube Holder
§ If the Coin Reject Box can not afford the quantity of rejected small coins, you can install the Coin Reject Coin Bag Attachment onto the side of the machine, then install the Coin bag on it. § Put the coins into the Hopper and press the START/STOP key to start the counting. -
Page 10: Troubleshooting
§ Install the Hook Holder on the Coin Tube Holder as right diagram. § According to the denomination of the coin you will counted, Select the Coin Interior Tube and Paper Tube. Drop the Coin Interior Tube down into the Tube Holder. §... -
Page 11: Daily Maintenance
Centrifugal Disc Jamming: If foreign objects are mixed with coin in the Hopper, jamming may occur between the Centrifugal Disc and the Coin Guide Plate. § Open the Side Cover. § Then, pull up the Front Feed Pulley Arm and push &... -
Page 12: How To Replace The V-Belt
How to replace the V-belt § Open the upper cover, pull the Front Feed Pulley Arm upward, then remove the V-Belt 322 and V-belt 564 from the machine, then, put on a new V-Belt on the Pulleys. § The tension of the Feed Belt can be adjusted by adjusting the position of the nutj.
Need help?
Do you have a question about the Blackbird 3300 and is the answer not in the manual?
Questions and answers