
Related Manuals for Tevion AJ-19LHC3


Summary of Contents for Tevion AJ-19LHC3
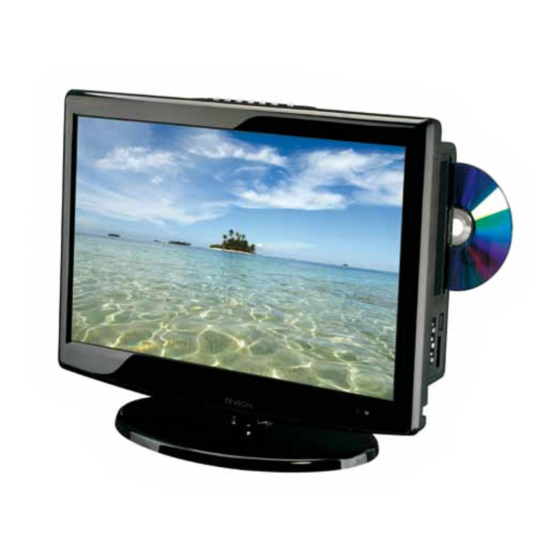
- Page 1 48cm (19”) HD LCD TV with DVD Player Instruction Manual • Model Number AJ-19LHC3 After Sales Support TEL: 1300 886 649...
-
Page 2: What Your 1 Year Warranty Means
48cm (19”) HD LCD TV with DVD Player What your year warranty means Great care has gone into the manufacture of this product and it should therefore provide you with years of good service when used properly. In the event of product failure within its intended use over the course of the year after the date of purchase, we will remedy the problem as quickly as possible once it has been brought to our attention. -
Page 3: Table Of Contents
Contents What your 1 year warranty means Welcome Important safety instructions Safety precautions Connections and functions Accessories list Installing the antenna Remote control Inserting the batteries in the remote control Connecting your VCR or Video Camera Satellite/Cable TV set-top box connections Connecting an external DVD Player PC connections Earphone connections... -
Page 4: Welcome
Welcome Congratulations on choosing to buy a TEVION® product. All products brought to you by TEVION® are manufactured to the highest standards of performance and safety, and, as part of our philosophy of customer service and satisfaction, are backed by our comprehensive Year Warranty. -
Page 5: Important Safety Instructions
Important safety instructions To prevent any injuries, the following safety precautions should be observed in the installation, use, servicing and maintenance of equipment. Before operating this equipment, please read this manual completely, and keep it nearby for future reference. 1) Read these instructions. 2) Keep these instructions. - Page 6 Important safety instructions 15) Refer all servicing to qualified service personnel. Servicing is required when the TV has been damaged in any way, such as power supply cord or plug is damaged, liquid has been spilled or objects have fallen into the TV, the TV has been exposed to rain or moisture, does not operate normally, or has been dropped.
-
Page 7: Safety Precautions
Safety precautions Power supply: • Do not touch the power plug with wet hands. Doing so may cause an electric shock. • Do not use a damaged power cord, plug or loose outlet. Doing so may cause an electric shock. •... - Page 8 Safety precautions Installation: • Do not place containers with any liquids or small metallic objects on top of the unit. If liquid enters the unit or any metal object falls into the unit, it may result in short-circuit, fire, or electric shock. •...
- Page 9 Safety precautions Use and maintenance: • Disconnect the power cord from the wall outlet during an electrical storm. Not doing so may result in fire or electric shock. • Do not insert any metal objects, such as a screw driver, paper clip, or bent wire into the ventilation openings or AV terminals.
-
Page 10: Connections And Functions
Connections and functions 1) Volume up/right orientation(VOL+). 2) Volume down/left orientation(VOL-). 3) TV channel up/up orientation(CH+). 4) TV channel down/down orientation(CH-). 5) MENU/ENTER(MENU). 6) Select the input signals/Exit the menu (INPUT). 7) POWER ON/OFF. • Indicator light 8) DVD Play. •... -
Page 11: Accessories List
Accessories list The configuration of the components may look different from the following illustration. User’s Power Remote Batteries guide cord Adaptor control After Sales Support 1300 886 649... -
Page 12: Installing The Antenna
Installing the antenna Make sure to connect the coaxial cable to the analogue/digital input of the TV. Wall Jack with F-Connector Coaxial antenna cable Analogue + Digital 75 Ω External antenna After Sales Support 1300 886 649... -
Page 13: Remote Control
Remote control POWER: Press to turn the TV set on or off. MUTE: Press to mute the sound, press again to restore the sound. SOURCE: Press to select various input sources. PMODE: Select picture mode. SMODE: Select sound mode. AUDIO/l/ll AUDIO: Select to the different audio modes. - Page 14 Remote control DVD SETUP: Bring up DVD SETUP menu to the screen (DVD MODE). A-B: Repeat from A to B under DVD mode. ANGLE: Change the play angle under DVD mode. REPEAT: Select repeat mode under DVD mode. SUBTITLE: To switch the dialogue at the bottom of the screen under DVD and TV mode /HOLD: : DVD Play/Pause.
-
Page 15: Inserting The Batteries In The Remote Control
Inserting the batteries in the remote control 1. Open the cover completely. 2. Insert the two supplied batteries (AAA 1.5V). Ensure that the polarities (+ and -) of the batteries are aligned correctly. 3. Slide back the cover. NOTES: 1. Check the polarity(+.-) of the batteries in the remote control. 2. -
Page 16: Connecting Your Vcr Or Video Camera
Connecting your VCR or Video Camera Connecting to the Composite terminal: Connection to the terminals of other equipment differ by manufacturer and models. VIDEO Composite cable Connect the LCD TV’s Composite in the terminal to the VCR’s Composite Out terminal using the Composite cable. NOTE: Make sure the colour of the terminals and the colour of the cable are the same. -
Page 17: Satellite/Cable Tv Set-Top Box Connections
Satellite/Cable TV Set-Top Box connections Connecting to the Composite terminal: In order to watch Cable TV, subscribe to your local TV provider and install the separate receiver (Set-top box). Connection to the terminals of other equipment differ by manufacturer and models. -
Page 18: Connecting An External Dvd Player
Connecting an external DVD player Connecting to the Component terminal: Connection to the terminals of other equipment differ by manufacturer and models. Component connection cable Component audio cable 1. Connect LCD TV’s Y, Pb, Pr terminal to the DVD’s Out terminal using the external cable. -
Page 19: Pc Connections
PC connections Connection to the terminals of other equipment differ by manufacturer and models. NOTE: Please check your PC instruction manual for the correct settings. PC Audio Cable Analogue RGB (D-Sub 15 pin) Cable 1. Connect the LCD TV’s PC Input terminal to the PC’s RGB terminal using the D-Sub cable. -
Page 20: Earphone Connections
Earphone connections Connect the earphone jack into the earphone OUT terminal. Earphones Audio Cable After Sales Support 1300 886 649... -
Page 21: Powering The Lcd Tv
Powering the LCD TV Turn the power ON\OFF To turn the power ON or OFF, press the “POWER” button on the LCD TV or on the remote control. Using the In-built DVD player • The DVD loader will accept the disc automatically but will not play when in DTV or any other mode. -
Page 22: Operating The Menus
Operating the Menus 1. Press the “POWER” button to turn the LCD TV on. 2. Press the “MENU” button on the remote control, the on-screen menu will appear on the screen. 3. Use the left and right keys to select your main option. Picture menu: Sound menu: Allows you to make adjustments... - Page 23 Customising the Picture Settings Use the / buttons to select the PICTURE menu (as the picture above), press the button to enter the menu. The PICTURE menu includes the following options: Picture Cycles among picture display modes: Standard, Dynamic, Mode mild and user.
- Page 24 Customising the Sound Settings Use the / buttons to select the SOUND menu (as the picture above), press button to enter the menu. The SOUND menu includes the following options: Sound Mode Allows you to select among: Standard, Music, Movie, Sports and User. NOTE: Sound can only be adjusted in “User”...
- Page 25 Customising the Timer Settings Use the / buttons to select the TIMER menu (as the picture above), press button to enter the menu. The TIMER menu includes the following options: Use the / buttons to select the position, and use the / Clock button to set the time.
- Page 26 Customising the SETUP Settings Use the / buttons to select the OPTION menu (as the picture above), press button to enter the menu. The SETUP menu includes the following options: Language Allows you to select the menu language. Audio Language Allows you to select the audio language.
- Page 27 Customising the LOCK Settings Use the / buttons to select the LOCK menu (as the picture above), press the button to enter the menu. NOTE: You should enter a code to operate the menu. (the current default code is 0000) The LOCK menu includes the following options: Lock System Allows you to turn on or off the system lock.
- Page 28 Customising the Channel Settings Use the / buttons to select the “Channel” menu (as the picture above), press the button to enter the menu. The “Channel” menu includes the following options: Auto Scan Press button to start auto tuning (It contains ATV and DTV signals).
- Page 29 Customising the Channel Settings Program edit: Press the button to enter the submenu as the following picture Delete Select a channel, and press the “RED” button to delete the channel. Rename Select a channel, and press the “GREEN” button, then you can use the / buttons to select the position of the channel’s name you want to change, and press the / buttons to change the character, press the /...
-
Page 30: Electronic Programme Guide
Using the EPG menu (Electronic Programme Guide) EPG is an Electronic Programme Guide provided by the channels suppliers, it gives you today plus the next 7 days. To access the EPG menu, press the EPG button on the remote control while on TV or DTV mode only, and the menu will appear on your screen. - Page 31 Storage menu Press the source button and select “Storage” in the source item. 1. Press the / buttons to select Photo, Music or MOVIE. 2. Press the / buttons to select the file which you want to play. 3. Press the “OK” button to play. Press the button to select Play or Pause.
- Page 32 In-built DVD menu Press the source button and select the DVD in the source item. Press the “DVD-SETUP” key, it will show the main menu. Press the / buttons to choose the sub menu and press the button to enter the sub menu. Press the / buttons to move the highlight to the item you wish to select and press the button to enter the item.
- Page 33 SD card menu Press source button and select the DVD in the source item. Press card button on the remote control to select the source. Press the / button to select the document and press OK to enter. Press the / button to select the file which you want to play. Press button to select Play or Pause.
-
Page 34: Specifications
Specifications MODEL AJ-19LHC3 Panel System 19” inch LCD panel Max Brightness(cd/m2) Dynamic Contrast 1000:1 Televison System HD DVB-T, PAL DK/BG/I, SECAM DK/BG Inputs/Ouputs ATV/DTV(RF 75Ω) CVBS input/Audio(L/R) HDMI input 1 (Best for 1080i) YPbPr 1 (Best for 720P) VGA input... - Page 35 Specifications 1(Support DVD/CD/CDR/CD-RW/DVD-RW) SPDIF output Earphone output OSD Language Multi Language Speaker consumption 2×3W Power supply DC 12V, 4A Power Waste <48W Power standby <1W After Sales Support 1300 886 649...
-
Page 36: Faq's
FAQ’s Do not use other functions that are not mentioned in this user’s manual. In case a problem occurs with your LCD TV, please take the following steps first before calling the after sales support line. If the problem still occurs, turn the power off and contact our customer after sales support line.
Need help?
Do you have a question about the AJ-19LHC3 and is the answer not in the manual?
Questions and answers