Table of Contents
Advertisement
Available languages
Available languages
Quick Links
OFF
ON
HIGH
LOW
WARNING
FOR YOUR SAFETY
Improper installation,
adjustment, alteration,
service or maintenance
can cause injury or property
damage. Read the installation,
operation and maintenance
instructions thoroughly before
installing or servicing this
equipment.
®
Owners Manual
Manual del Usuario
Model No.
GWT501A
FOR YOUR SAFETY
For Outdoor Use Only
(Outside any enclosure)
Solamente Para Uso En
Exteriores
(Fuera de cualquier recinto)
PARA SU SEGURIDAD:
Una instalación, ajuste,
alteración, reparación o
mantenimiento inadecuados
puede causar lesiones o daños a
la propiedad. Lea atentamente
las instrucciones de instalación,
funcionamiento y mantenimiento
del equipo antes de instalarlo o
ponerlo en marcha.
WARNING
ADVERTENCIA
Advertisement
Chapters
Table of Contents

Related Manuals for Endless Summer GWT501A


Summary of Contents for Endless Summer GWT501A
- Page 1 ® Owners Manual Manual del Usuario Model No. GWT501A HIGH WARNING FOR YOUR SAFETY For Outdoor Use Only (Outside any enclosure) Solamente Para Uso En Exteriores (Fuera de cualquier recinto) WARNING ADVERTENCIA FOR YOUR SAFETY PARA SU SEGURIDAD: Improper installation, Una instalación, ajuste,...
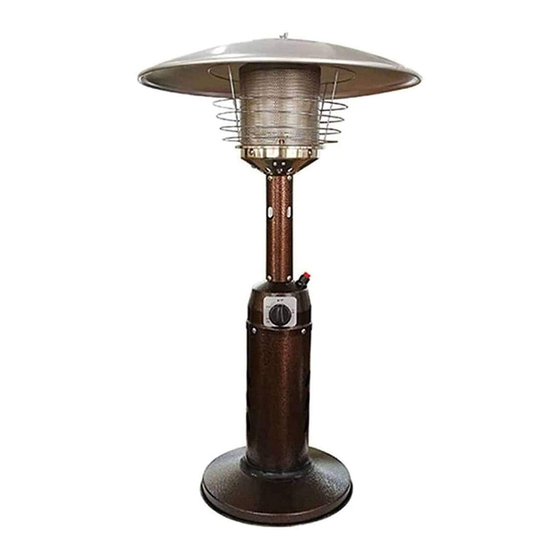
- Page 2 • Using it in an enclosed space can kill you. • Never use this appliance in an enclosed space such as a camper, tent, car or home. Owner’s manual: model GWT501A portable outdoor heater 500150...
-
Page 3: Table Of Contents
NFPA 54, Storage and Handling of Liquefied Petroleum Gases, ANSI/NFPA 58 or manual to him or her to CSA B149.1, Natural Gas and Propane Installation Code. save for future reference. Owner’s manual: model GWT501A portable outdoor heater 500150... -
Page 4: Safety First
(approximately 45 minutes after use). Notice: This product should not be used with any fuel other than liquid propane. Use of other fuels will detract from heaters performance and will void your warranty. Owner’s manual: model GWT501A portable outdoor heater 500150... - Page 5 For your nearest Blue Rhino retailer visit • Do not clean heater with combustible or corrosive cleaners. Use warm, www.bluerhino.com. soapy water. • Do not paint engine, engine access panel or dome. Owner’s manual: model GWT501A portable outdoor heater 500150...
-
Page 6: Hardware & Component Listing
Base ..56-06-002 Weight Plate . . . 56-01-041 Extension Hose . 56-01-043 Lock-Up Mount Bracket ..56-01-044 Owner’s manual: model GWT501A portable outdoor heater 500150... -
Page 7: Assembly Instructions
Note: You must follow all steps to properly assemble heater. Step 1 – Attach Emitter Screen Line up 4 holes on bottom of Emitter Screen with corresponding holes in Emitter Bottom, and insert (4) Medium Screws in holes until tight. Owner’s manual: model GWT501A portable outdoor heater 500150... -
Page 8: Step 2 Attach Top Wire Guard
Step 4–Attach Dome Cap Lay Dome Cap on dome covering 3 Nuts and line up center holes. Insert threaded end of Finial through cap and screw into center of dome until secure. Owner’s manual: model GWT501A portable outdoor heater 500150... -
Page 9: Step 5-Center Lockup
Line up threads on canister with those on regulator, insert and rotate canister clockwise until they fit snugly together. HAND TIGHTEN ONLY. Be careful not to cross threads when screwing in canister. Owner’s manual: model GWT501A portable outdoor heater 500150... -
Page 10: Step 7 Check For Leaks
Step 8 – Install Access Panel Slide top tab of Access Panel inside Shroud Cover. Lower bottom of Panel until closed, and rotate Knob until lock flange rotates inside of slot on plastic ring. Owner’s manual: model GWT501A portable outdoor heater 500150... -
Page 11: Step 9 Securing Tank
(not provided) to secure your cylinder. Note: Once you have read “safety first” and successfully completed Steps 1 – 9, you are ready to begin operating your heater. Owner’s manual: model GWT501A portable outdoor heater 500150... -
Page 12: Operation
2 & 3. 6. Once burner is lit, rotate Knob to desired heating level. If you experience any ignition problem, turn off the heater and gas supply, and consult “Troubleshooting” on page 14. Owner’s manual: model GWT501A portable outdoor heater 500150... -
Page 13: Re-Lighting
2. Turn off gas at bottle/cylinder. 3. Remove access panel. 4. Unscrew gas line from regulator. 5. Close access panel. Note: After use, some discoloration of the emitter screen is normal. Owner’s manual: model GWT501A portable outdoor heater 500150... -
Page 14: Operation Checklist
After Operation q Gas control is in OFF position. q Gas tank valve is OFF q Disconnect Gas line. q Heater is upright in a secure location. Owner’s manual: model GWT501A portable outdoor heater 500150... -
Page 15: Troubleshooting
Place heater on a level surface Heater is level Clean burner Dirt or film on reflector and emitter Clean reflector and emitter Thick black smoke Blockage in burner Remove blockage and clean burner inside and outside Owner’s manual: model GWT501A portable outdoor heater 500150... -
Page 16: Maintenance
TIP: Use high-quality automobile wax to help maintain the appearance of your heater. Apply to exterior surfaces from the pole down. Do not apply to emitter screen or domes. Owner’s manual: model GWT501A portable outdoor heater 500150... -
Page 17: Storage
Caution: Use only original equipment replacement parts. Use of unauthorized parts or modification of parts will void warranty and create an unsafe condition. Caution: Always allow heater to cool before attempting service. Owner’s manual: model GWT501A portable outdoor heater 500150... -
Page 18: Warranty
Vendor. Blue Rhino Global Sourcing, LLC 104 Cambridge Plaza Drive Winston-Salem, North Carolina 27104 USA (800) 762-1142 24 Hour Fax: (336) 659-6743 CustomerService@BlueRhino.com Owner’s manual: model GWT501A portable outdoor heater 500150... -
Page 19: Specifications
Maximum - 150 psi Minimum - 5 psi Engine: IPP E8 Safety Features: Oxygen Depletion Sensor (ODS) shutdown system 100% Burner shut-off Tilt Switch Manufacturer: Blue Rhino Global Sourcing, LLC Made In: China Owner’s manual: model GWT501A portable outdoor heater 500150... - Page 20 • El usarla en un espacio cerrado puede ser fatal. • Nunca use esta unidad en un espacio cerrado como en un campero, tolda, vehículo o en la casa. Manual de usuario e instrucciones de montaje: calentador de exterior portátil, GWT501A 500150...
- Page 21 Combustibles, ANSI Z223.1/NFPA 54, Manejo y Almacenamiento de Gases otra persona, entréguele este Licuados de Petróleo, ANSI/NFPA 58 o CSA B149.1, Código de Instalación de manual para futuras consultas. Propano y Gas Natural. Manual de usuario e instrucciones de montaje: calentador de exterior portátil, GWT501A 500150...
-
Page 22: La Seguridad, Lo Primero
• Durante el funcionamiento, no toque el conjunto del quemador. La almacenen o utilicen líquidos superficie del emisor del calentador puede alcanzar temperaturas próximas inflamables, gasolina, vapor. a los 870º C (1600º F). Manual de usuario e instrucciones de montaje: calentador de exterior portátil, GWT501A 500150... - Page 23 • No limpie el calentador con limpiadores combustibles o corrosivos. Utilice distribuidor Blue Rhino más cercano, visite agua templada y jabonosa. www.bluerhino.com • No pinte el motor, el acceso al motor o la cúpula. Manual de usuario e instrucciones de montaje: calentador de exterior portátil, GWT501A 500150...
-
Page 24: Instrucciones De Montaje
Placa del peso . . . 56-01-041 Manguera de Extensión ..56-01-043 Soporte de Montaje de Cierre ..56-01-044 Manual de usuario e instrucciones de montaje: calentador de exterior portátil, GWT501A 500150... -
Page 25: Componentes Generales Y Características
Emisión de Calor con los agujeros correspondientes en la parte Inferior del Conjunto de Emisión de Calor, inserte (4) Tornillos Medianos y apriételos hasta que queden seguros Manual de usuario e instrucciones de montaje: calentador de exterior portátil, GWT501A 500150... -
Page 26: Paso 2 Acoplar La Protección De Alambre Superior
Ponga la tapa sobre la cúpula haciendo coincidir los 3 pernos con los agujeros. Inserte el extremo roscado del Florón a través de la Tapa y atorníllelo en el centro de la Cúpula hasta que quede seguro. Manual de usuario e instrucciones de montaje: calentador de exterior portátil, GWT501A 500150...
Need help?
Do you have a question about the GWT501A and is the answer not in the manual?
Questions and answers