Table of Contents
Advertisement
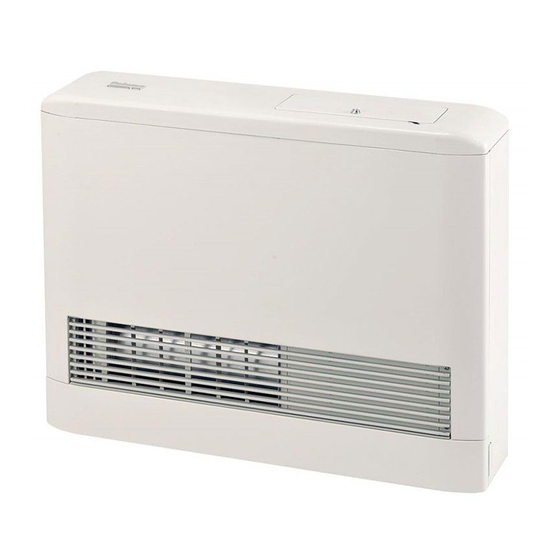
Owner's Guide
and
Installation Instructions
Paloma Room Sealed
Gas Space Heaters
Models
PRS-150N
PRS-250N
PRS-250CN
PRS-150L
PRS-250L
PRS-250CL
Note: This heater must be installed with a genuine Paloma room sealed flue kit. Failure to install a genuine Paloma
room sealed flue kit will result in a potentially unsafe installation and the heater warranty will become null and void.
For installation of the flue kit refer to the installation instructions supplied with the flue kit.
This heater must be installed and serviced by a qualified person.
Please leave this guide with the householder or responsible officer.
Advertisement
Table of Contents

Related Manuals for Paloma PRS-150N

Summary of Contents for Paloma PRS-150N
-
Page 1: Installation Instructions
PRS-250CL Note: This heater must be installed with a genuine Paloma room sealed flue kit. Failure to install a genuine Paloma room sealed flue kit will result in a potentially unsafe installation and the heater warranty will become null and void. - Page 2 PATENTS This gas space heater may be protected by one or more patents or registered designs in the name of Rheem Australia Pty Ltd or Paloma Co., Ltd. ® Registered trademark of Rheem Australia Pty Ltd. ™ Trademark of Rheem Australia Pty Ltd.
-
Page 3: Table Of Contents
CONTENTS HOUSEHOLDER OR RESPONSIBLE OFFICER The ‘About Your Heater’ section is intended for the householder or responsible officer. The ‘Installation Section’ is intended for the installer but may be of interest ABOUT YOUR HEATER .............................. 4 SAFETY ..................................5 SAVE A SERVICE CALL ............................6 REGULAR CARE ..............................7 OPERATION ................................8 Heater Overview ..............................8... -
Page 4: About Your Heater
Congratulations for choosing a Paloma room sealed gas space heater. Paloma room sealed gas space heaters are suitable for indoor installation only and require the installation of a genuine Paloma room sealed flue kit. HOW DO I KNOW IF THE HEATER IS INSTALLED CORRECTLY? Installation requirements are detailed in the “Installation”... -
Page 5: Safety
For your safety do not operate the heater before reading this instruction booklet. Warning: This heater is designed to be installed in a fixed position with a Paloma room sealed flue kit (supplied separately). The heater must not be operated unless a genuine Paloma room sealed flue kit is installed. -
Page 6: Save A Service Call
SAVE A SERVICE CALL Check the items below before making a service call. You will be charged for attending to any condition or fault that is not related to manufacture or failure of a part. Note: The heater fans will continue operating for a few minutes after the heater is turned off. This is normal operation. HEATER NOT OPERATING •... -
Page 7: Regular Care
REGULAR CARE Regular care should be performed by the householder as frequently as required, however the heater and power supply cord should be visually checked for damage before every operation and the air filter should be checked on a weekly basis. Warning: If the heater has been operating, ensure it has sufficiently cooled before attempting any maintenance procedure. -
Page 8: Operation
OPERATION HEATER OVERVIEW CONTROL PANEL OVERVIEW Note: 'Central Control' LED is present on PRS-250CN and PRS-250CL commercial models only. Commercial models also have a remote Power LED and Filter LED located on the top of the heater (refer to "Central Control Connection &... -
Page 9: To Turn The Heater Off
OPERATION TO TURN THE HEATER OFF • Turn the heater OFF by pressing and releasing the heater ‘Power’ button. The burner, digital display and all LED’s will extinguish however the fan will continue to operate for a few minutes to cool down the heater and prevent a build up of residual heat (fan run on). - Page 10 OPERATION Press and release the ‘Set Times’ button once. The ‘Timer 2 Off’ LED will illuminate and the Timer 2 ‘off time’ will be shown on the digital display. The Timer 2 ‘off time’ can now be programmed by operating the ▲ and ▼ arrow buttons as previously explained in step 2.
-
Page 11: Auto Off Timer Operation
OPERATION Turning Timer(s) OFF (deselecting a timer) To deselect a timer, press and release the selected timer button (‘Timer 1’ or ‘Timer 2’ button). The relevant timer button LED will extinguish and the burner will turn on (because the Power button is turned ON). Note: If a second timer was also selected and the current time was outside the timers programmed on period and pre-heat time, the burner would not operate when the first timer is deselected. -
Page 12: Child Lock Mode
OPERATION CHILD LOCK MODE A child lock mode is available to prevent children interfering with and/or inadvertent operation of the heater controls. To activate child lock mode: Press and hold down the ▲ and ▼ buttons simultaneously for three seconds then release both buttons. -
Page 13: Installation
Warning: This heater is designed to be installed in a fixed position with a room sealed flue kit (supplied separately). THE HEATER MUST NOT BE OPERATED UNLESS A GENUINE PALOMA ROOM SEALED FLUE KIT IS INSTALLED. For installation of the flue kit refer to the installation instructions supplied with the flue kit. -
Page 14: Minimum & Maximum Room Sizes
Specified Maximum Room Size by Heater Model (room length X width) Very Cold Cold Cool Mild PRS-150N/L 30 m 35 m 48 m 54 m PRS-250N/L 52 m... -
Page 15: Flueing
FLUEING THE HEATER MUST NOT BE OPERATED UNLESS A GENUINE PALOMA ROOM SEALED FLUE KIT IS INSTALLED. The following information is provided here as a guide only; for installation of the flue kit refer to the installation instructions supplied with the flue kit. -
Page 16: Flue Location
Warning: Any horizontal flue terminal installed in areas subject to snow must terminate a minimum of 1.5 metres above ground level or any structure that may accumulate snow to prevent the flue terminal from becoming blocked. This heater does not require additional ventilation when correctly installed with a Paloma room sealed flue kit. INSTALLATION STANDARDS & REQUIREMENTS The flue kit must be installed: •... - Page 17 FLUEING AS/NZS 5601.1 Figure 6.2 flue terminal location guide. All dimensions are measured to the nearest part of the flue terminal. Minimum Clearances (mm) Item Natural Draught Fan Assisted Below eaves, balconies and other projections: • Appliances up to 50 MJ/h input •...
-
Page 18: Gas Connection
GAS CONNECTION All gas work must be carried out by a qualified person and in accordance with the Australian Gas Installations Standard AS 5601 or AS/NZS 5601.1, and local authority requirements. CONNECTION SIZES Model PRS-150 PRS-250 & PRS250C Gas Connection Size R½/15 R½/15 GAS INLET... -
Page 19: Electrical Connection
ELECTRICAL CONNECTION The electrical installation must comply with AS/NZS 3000, AS/NZS 5601 or AS/NZS 5601.1 and any local requirements. This heater is equipped with a 10A 3 pin plug socket which requires a 10 amp general purpose outlet (GPO) that is connected to a 240V AC 50 Hz M.E.N. -
Page 20: Central Control Connection & Operation - Commercial Models Only
ELECTRICAL CONNECTION CENTRAL CONTROL CONNECTION & OPERATION – COMMERCIAL MODELS ONLY PRS-250CN and PRS-250CL commercial models can be controlled by an external central control system, such as a time clock or BMS, which can be programmed to turn the heater (or group of heater's) ON or OFF at scheduled times. -
Page 21: Connecting Heater Exhaust & Air Intake
Warning: The exhaust connection MUST be made in accordance with these instructions using only genuine Rheem or Paloma parts. Failure to adhere to these instructions may cause combustion products to be discharged into the room in which the heater is located resulting in serious injury or death. -
Page 22: Connecting Heater Air Intake
CONNECTING HEATER EXHAUST & AIR INTAKE CONNECTING HEATER AIR INTAKE Warning: Ensure air intake hose is not stretched or kinked. Push heater air intake hose over manifold assembly air intake connection until recess inside air intake hose connector is located over flange on manifold assembly air intake connection. Secure connection with cable tie (supplied in heater standard back cover kit). -
Page 23: Heater Back Cover Kit Installation
HEATER BACK COVER KIT INSTALLATION The heater back cover kit is supplied with the heater. The back cover kit attaches to the rear of the heater and the top cover rear edge is located over the two back cover kit wall brackets (to locate and mount back cover kit wall brackets refer to the installation instructions supplied with the flue kit). - Page 24 COMMISSIONING EXTRA WIDE BACK COVER KIT INSTALLATION Warnings: Warning: Before installing the back cover kit, ensure the heaters exhaust tube and air intake hose are firmly connected. Warning: Ensure that nothing (including air intake hose) is in contact with metallic parts of the heaters exhaust tube.
-
Page 25: Commissioning
COMMISSIONING COMMISSIONING MUST ONLY BE UNDERTAKEN BY A PROPERLY QUALIFIED PERSON. COMMISSIONING PROCEDURE Ensure the position of the heater complies with the installation requirements of this manual, AS/NZS 5601.1 and local authority requirements. Ensure the flue system and the location of the flue terminal complies with the installation requirements of this manual, the manual supplied with the flue kit, AS/NZS 5601.1 and local authority requirements. -
Page 26: Commissioning Tests & Adjustment Procedures
Flue Type Setting Table (Shaded area = Required flue type setting) Total Flue Length (metres) No. of Bends* * Two 45° bends = 1 bend. ** Vertical flue terminations only. Flue systems with a horizontal flue termination must not have more than two bends. Paloma factory setting is '00'. - Page 27 COMMISSIONING ADJUSTING BURNER GAS PRESSURE The gas pressure delivered to the burner by the heaters gas proportional control valve must be adjusted for both its low and high rate and must be adjusted according to the heater model and gas type. A dual port differential type manometer is required to adjust the burner gas pressure.
- Page 28 17. Isolate power by unplugging heater from power point. 18. Reassemble heater in reverse order of steps 6 ~ 2. Burner Gas Pressure Table Burner Pressure Burner Pressure Gas Type Model Low Rate High Rate PRS-150N 0.08 0.34 PRS-250N 0.08 0.53 PRS-250CN 0.08 0.53 PRS-150L 0.10...
-
Page 29: Fault Indication
FAULT INDICATION The heater is equipped with self diagnostic capabilities. If a fault is detected, the control panel display will show a two digit code in the 'Room' area and the power LED will flash red. In the example opposite the control panel display shows fault code 11. If an error code occurs the heater will 'lock out' and will not operate until the fault has been rectified and the heater is reset. -
Page 30: Service Procedures
SERVICE PROCEDURES ONLY AN AUTHORISED PERSON MAY REPAIR OR SERVICE A GAS APPLIANCE For peak performance it is suggested that the space heater be serviced by your nearest Rheem Service Department or Accredited Service Agent annually or prior to every winter. Only genuine replacement parts should be used on this heater and flue system. -
Page 31: Dimensions And Technical Data
DIMENSIONS AND TECHNICAL DATA SPECIFICATIONS PRS-250N PRS-250L PRS-150N PRS-150L PRS-250CN PRS-250CL Output (kW) Maximum heating capacity (Maximum room size) Refer to "Minimum & Maximum Rom Sizes" on page 14 Electrical supply voltage 220 ~ 250 Volts AC 50Hz Gas connection R½/15... - Page 32 This page is intentionally blank...
- Page 33 This page is intentionally blank...
- Page 34 This page is intentionally blank...
-
Page 35: Warranty
The decision of whether to repair or replace a faulty component is at Paloma/Rheem’s sole discretion. If you require a call out and we find that the fault is not covered by the Paloma/Rheem warranty, you are responsible for our standard call out charge. If you wish to have the relevant component repaired or replaced by Rheem, that service will be at your cost. - Page 36 DOCUMENT Rheem will repair or replace a faulty component of your Paloma gas space heater if it fails to operate in accordance with its specifications as follows: Where the heater is installed in a single-family domestic dwelling – Paloma Gas Space Heater Models PRS-150N, PRS-150L, PRS250N &...
Need help?
Do you have a question about the PRS-150N and is the answer not in the manual?
Questions and answers