Table of Contents
Advertisement
Model No. 831.30681
Serial No.
Serial
Number
Decal
If you are MISSING PARTS or
require INFORMATION on how
to operate this product, call
1 - 888 - 936 - ICON
(1 - 888 - 936 - 4266).
To schedule REPAIR SERVICE
or to purchase parts,
call SEARS toll-free at:
1 - 800 - 4 - MY - HOME
(1 - 800 - 469 - 4663)
24 hours a day, 7 days week.
CAUTION
Read all precautions and instruc-
tions in this manual before using
this equipment. Keep this manual
for future reference.
®
USER'S MANUAL
Visit our website at
www.sears.ca
Advertisement
Table of Contents

Related Manuals for Freespirit 920 S EKG

Summary of Contents for Freespirit 920 S EKG
- Page 1 Model No. 831.30681 USER'S MANUAL Serial No. Serial Number Decal If you are MISSING PARTS or require INFORMATION on how to operate this product, call 1 - 888 - 936 - ICON (1 - 888 - 936 - 4266). To schedule REPAIR SERVICE or to purchase parts, call SEARS toll-free at: 1 - 800 - 4 - MY - HOME...
-
Page 2: Table Of Contents
TABLE OF CONTENTS IMPORTANT PRECAUTIONS ..............2 BEFORE YOU BEGIN . -
Page 3: Before You Begin
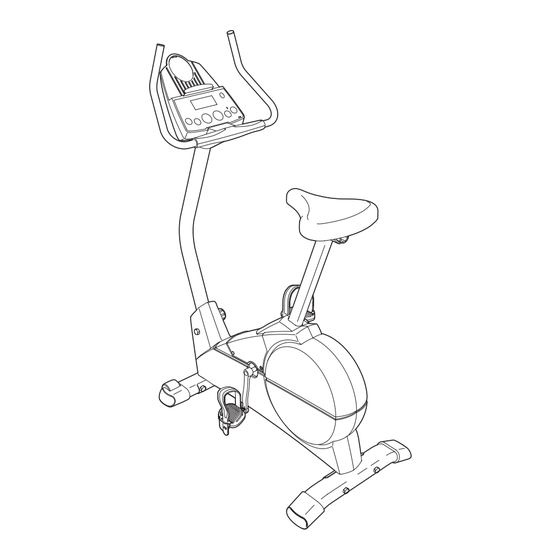
The FreeSpirit ® 920 S EKG offers an impressive array serial number before calling. The model number is of features to let you enjoy this healthful exercise in 831.30681. The serial number can be found on a the convenience and privacy of your home. -
Page 4: Assembly
ASSEMBLY Assembly requires two persons. Place all parts of the exercise cycle in a cleared area and remove the packing materials. Do not dispose of the packing materials until assembly is completed. Assembly requires the included tools and your own adjustable wrench and Phillips screw- driver Use the part drawings below to identify the small parts used in assembly. - Page 5 1. Identify the Front Stabilizer (2), which has Wheels (30) on the ends. While another person lifts the front of the Frame (1) slightly, attach the Front Stabilizer to the Frame with two M10 x 112mm Carriage Bolts (65) and two M10 Black Nylon Locknuts (63).
- Page 6 5. Connect the wire harness on the Handgrip Pulse Sensor (15) to the indicated wire harness on the Console (16). Insert both wire harnesses into the open- ing in the bottom of the Console. Then, insert the metal tube on the Handgrip Pulse Sensor into the opening in the bottom of the console.
- Page 7 9. Identify the Left Pedal (24), which is marked with an “L.” Using an adjustable wrench, firmly tighten the Left Pedal counterclockwise into the Left Crank Arm (42). Tighten the Right Pedal (not shown) clockwise into the Right Crank Arm. Important: Tighten both Pedals as firmly as possible.
- Page 8 INSTALLING THE RECEIVER FOR THE OPTIONAL CHEST PULSE SENSOR If you purchase the optional chest pulse sensor (refer to page 18), follow the steps below to install the receiver and the short jumper wire included with the chest pulse sensor. 1.
-
Page 9: How To Operate The Exercise Cycle
HOW TO OPERATE THE EXERCISE CYCLE HOW TO ADJUST THE SEAT POST HOW TO ADJUST THE UPRIGHT For effective exer- The upright can be cise, the seat adjusted to the should be at the height that is the Seat proper height. As most comfortable for Upright you pedal, there... - Page 10 FEATURES OF THE CONSOLE or computer and play special iFIT.com CD programs (CD’s are available separately). IFIT.com CD programs The advanced console offers a selection of features automatically control the resistance of the crosstrainer designed to make your workouts more enjoyable and and prompt you to vary your pace as a personal train- effective.
- Page 11 CONSOLE DESCRIPTION resistance level, calories, fat calories, or heart rate) is currently shown. Note: When the distance is Refer to the drawing on page 10. Note: If there is a shown, the word Miles or the letters Kms will thin sheet of clear plastic on the face of the con- appear;...
- Page 12 show the resistance level for six seconds. When HOW TO USE THE MANUAL MODE a Smart program is selected, the display will show the time remaining in the program instead of the elapsed time. Turn on the console. In addition, the left pace indicator will appear in the Note: The console requires four “D”...
- Page 13 can change the resistance level by pressing the + HOW TO USE A SMART PROGRAM and – buttons. However, when the current period of the program is completed, the resistance level will automatically change if a different resistance Turn on the console. setting is programmed for the next period.
- Page 14 HOW TO CONNECT YOUR PORTABLE STEREO HOW TO CONNECT YOUR CD PLAYER, VCR, OR COMPUTER Note: If your stereo has an RCA-type AUDIO OUT jack, see instruction A below. If your stereo has a 1/8” LINE OUT jack, see instruction B. If your To use iFIT.com CD’s, the crosstrainer must be con- stereo has only a PHONES jack, see instruction C.
- Page 15 HOW TO CONNECT YOUR HOME STEREO HOW TO CONNECT YOUR COMPUTER Note: If your stereo has an unused LINE OUT jack, Note: If your computer has a 1/8” LINE OUT jack, see instruction A below. If the LINE OUT jack is see instruction A.
- Page 16 HOW TO CONNECT YOUR VCR B. Plug one end of a 1/8” to RCA stereo audio cable (available at electronics stores) into the jack Note: If your VCR has an unused AUDIO OUT jack, beneath the console. Plug the other end of the see instruction A below.
- Page 17 Press the play button on your CD player or HOW TO USE IFIT.COM CD AND VIDEO VCR. PROGRAMS A moment after the play button is pressed, your personal trainer will begin guiding you through To use iFIT.com CD’s or videocassettes, the your workout.
- Page 18 Follow the on-line instructions to start the HOW TO USE PROGRAMS DIRECTLY FROM program. OUR WEB SITE When you start the program, an on-screen count- down will begin. Our Web site at www.iFIT.com allows you to play iFIT.com audio and video programs directly from the Return to the crosstrainer and begin exercising.
-
Page 19: Maintenance And Troubleshooting
MAINTENANCE AND TROUBLESHOOTING Inspect and tighten all parts of the exercise cycle reg- • For the most accurate heart rate reading, hold the ularly. Replace any worn parts immediately. metal contacts for about 15 seconds. To clean the exercise cycle, use a damp cloth and a •... -
Page 20: Conditioning Guidelines
CONDITIONING GUIDELINES The following guidelines will help you to plan your During the first few minutes of exercise, your body exercise program. Remember that proper nutrition uses easily accessible carbohydrate calories for ener- and adequate rest are essential for successful results. gy. - Page 21 SUGGESTED STRETCHES The correct form for several basic stretches is shown at the right. Move slowly as you stretch—never bounce. 1. Toe Touch Stretch Stand with your knees bent slightly and slowly bend forward from your hips. Allow your back and shoulders to relax as you reach down toward your toes as far as possible.
-
Page 22: Part List
PART LIST—Model No. 831.30681 R0902A Key No. Qty. Description Key No. Qty. Description Frame Flywheel Axle Front Stabilizer Flywheel Bearing Rear Stabilizer “C” Magnet Rear Endcap Left Crank Arm Seat Post Reed Switch/Wire Seat Bracket Crank Bearing Handlebar Endcap M5 Nut Foam Grip Adjustment Cable Seat Adjustment Knob... -
Page 23: Exploded Drawing
EXPLODED DRAWING—Model No. 831.30681 R0902A... -
Page 24: How To Order Replacement Parts
7 days a week. To help us assist you, please be prepared to give the following information: • the MODEL NUMBER of the product (831.30681) • the NAME of the product (FreeSpirit ® 920 S EKG exercise cycle) •...
Need help?
Do you have a question about the 920 S EKG and is the answer not in the manual?
Questions and answers