
Related Manuals for 360 Vision VisionDome

Summary of Contents for 360 Vision VisionDome
- Page 1 360_VisionDome_Int_&_Ext_Inst_manual_V2.03_2006-03-14.doc Page 1 of 25 VisionDome Installation Manual 360 Vision Technology Ltd VisionDome and Vision-i-Dome Installation and Operating Manual ©360 Vision Technology Ltd Version 2.03...
-
Page 2: Table Of Contents
11. Internal VisionDome False Ceiling Mount Installation ......13 EXTERNAL VisionDome (Mounting) .............15 12. External VisionDome Wall Mount Installation........15 13. Exploded View of External VisionDome Wall Mount ......16 14. External VisionDome Soffit Mount Installation (optional).....18 15. External Pole Mount Installation (optional) ..........19 16. -
Page 3: Internal And External Vision Domes
For correct operation, use a suitable cable (Overall Screened single Twisted Pair) and run to each VisionDome. Cable the Data + and Data – to the first Dome and then back out onto the next Dome. Ensure that all but the last VisionDome are left unterminated. Only the last VisionDome should be terminated. -
Page 4: Address Settings For Twisted Pair Installations
When controlling VisionDomes using Twisted Pair RS485, it is necessary to set the address switches in the VisionDomes. Charts showing the address switch settings for the internal and external VisionDomes are included with the Quick-Start-Guides. For VisionDomes use 360-Quick-Start-Guide-VisionDome For Vision-i-Domes use 360-Quick-Start-Guide-Vision-i-Dome Vision-i-Domes On Screen Menus - advanced features. -
Page 5: Cable & Wiring Requirements
1.25 mm 125m 1.50 mm 150m 2.50 mm 250m 100m Distances are measured in metres To ensure optimum VisionDome performance these parameters must be adhered to. Failure to do so will invalidate the warranty. ©360 Vision Technology Ltd Version 2.03... -
Page 6: Coax Telemetry Settings & Control
Page 6 of 25 VisionDome Installation Manual Coax Telemetry Settings & Control VisionDome can also be controlled also using ‘up the coax’ control signals from either a VisionMatrix or a 3 party controller capable of sending 360-Vision Coax Protocols. No setup is necessary as all signals are sent direct to the camera associated with the... -
Page 7: Visiondome Initialisation
VisionDome Installation Manual 360 VisionDome Initialisation When powering the VisionDome up for the first time, it may be necessary to just power up the camera module and to not power up the Pan & Tilt mechanism – this therefore allows the... -
Page 8: Click-On Lanyard Fixing
Page 8 of 25 VisionDome Installation Manual Click-On Lanyard Fixing. The lanyard is supplied fastened inside the VisionDome external top cover. To fasten it to the ‘dome-inner’ pull the keyhole end downwards and attach it as described below: Lanyard Keyhole end... -
Page 9: Internal Visiondome And Vision-I-Dome (Mounting)
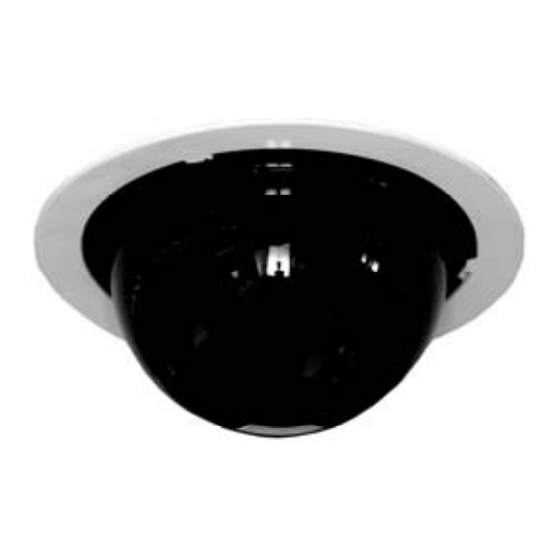
Page 9 of 25 VisionDome Installation Manual INTERNAL VisionDome and Vision-i-Dome (Mounting) Internal VisionDome Ceiling & Wall Mount Installation NB :- When Handling the VisionDome, handle carefully so that the main electronics and motor mechanism are not damaged. Ceiling VisionDome Wall VisionDome Step 1 –... - Page 10 Connect coax centre core to COAX VID Connect the screen to COAX SCN VisionDome (Internal) CONNECTION BOARD Step 3 – Fit dome body Align the security screw mount to the security screw socket on either the wall or ceiling mount bracket –...
- Page 11 VisionDome. Push and twist clockwise for a clean and easy fit. Step 6 – Power up After ensuring all fixings are secure, connect the VisionDome to the supplied PSU, power up and proceed to programming. (See section 18 - Adjustment of Gain and Lift) ©360 Vision Technology Ltd...
-
Page 12: Internal Corner Mount Installation (Optional)
360_VisionDome_Int_&_Ext_Inst_manual_V2.03_2006-03-14.doc Page 12 of 25 VisionDome Installation Manual Internal Corner Mount Installation (optional) (The Internal Corner Mount Adapter is an optional extra accessory part) For Internal Corner Mount please fasten the adapter to the corner of the walls using suitable fixings, then follow the instructions for wall mounting. -
Page 13: Internal Visiondome False Ceiling Mount Installation
Page 13 of 25 VisionDome Installation Manual Internal VisionDome False Ceiling Mount Installation NB :- When Handling the VisionDome, handle carefully so that the main electronics and motor mechanism are not damaged. False Ceiling VisionDome SPACE FOR CABLES ABOVE VisionDome 10mm (0.4”) - Page 14 VisionDome Installation Manual Step 1 – Cut hole and fit support plate. Cut a hole in the false ceiling tile ensuring adequate weight considerations of the VisionDome and support plate. Attach the supplied Lanyard in order to secure the unit.
-
Page 15: External Visiondome (Mounting)
VisionDome Installation Manual EXTERNAL VisionDome (Mounting) External VisionDome Wall Mount Installation NB :- When Handling the VisionDome, handle carefully so that the main electronics and motor mechanism are not damaged Mounting Bracketry for Wall Mounted External Domes ©360 Vision Technology Ltd... -
Page 16: Exploded View Of External Visiondome Wall Mount
360_VisionDome_Int_&_Ext_Inst_manual_V2.03_2006-03-14.doc Page 16 of 25 VisionDome Installation Manual Exploded View of External VisionDome Wall Mount WALL BRACKET TOP COVER LANYARD CAMERA ASSEMBLY CAPTIVE SCREWS INNER COVER CAPTIVE SCREW FOR FIXING INNER COVER LANYARD CAPTIVE SCREWS FOR FIXING EXTERNAL ACRYLIC EXTERNAL ACRYLIC ©360 Vision Technology Ltd... - Page 17 External VisionDome and fasten screws. Step 6 – Power up After ensuring all fixings are secure, connect the VisionDome to the supplied PSU, power up and proceed to programming. (See section 18 Adjustment of Gain and Lift) ©360 Vision Technology Ltd...
-
Page 18: External Visiondome Soffit Mount Installation (Optional)
External VisionDome Soffit Mount Installation (optional) (The Soffit adaptor is an optional extra accessory part) NB :- When Handling the VisionDome, handle carefully so that the main electronics and motor mechanism are not damaged For Soffit installations, please use the Soffit adaptor and Gasket. -
Page 19: External Pole Mount Installation (Optional)
360_VisionDome_Int_&_Ext_Inst_manual_V2.03_2006-03-14.doc Page 19 of 25 VisionDome Installation Manual External Pole Mount Installation (optional) (The External Pole Mount Adaptor is an optional extra accessory part) For Pole mount installations, please follow the instructions for Wall mounting and add the Pole mount adaptor to affix to the Pole. -
Page 20: External Corner Mount Installation (Optional)
360_VisionDome_Int_&_Ext_Inst_manual_V2.03_2006-03-14.doc Page 20 of 25 VisionDome Installation Manual External Corner Mount Installation (optional) (The External Corner Mount Adapter is an optional extra accessory part) For External Corner Mount please fasten the adapter to the corner of the walls using suitable fixings, then follow the instructions for Wall mounting. -
Page 21: External Swan-Neck Installation (Optional)
When the external swan-neck is purchased at the same time as an external VisionDome, the VisionDome top cover will be fitted to the swan-neck at the factory. If they are ordered separately then the swan-neck must be fastened to the top cover during installation. It is necessary to include the two gaskets. -
Page 22: External Visiondomes - Video Signal
Before proceeding to Programming, please ensure the video signal is acceptable. The VisionDome is able to be remotely adjusted for Gain and Lift when video signals are compromised due to poor / old cabling or where the distances are further than originally thought. -
Page 23: Visiondome And Vision-I-Dome Data
360_VisionDome_Int_&_Ext_Inst_manual_V2.03_2006-03-14.doc Page 23 of 25 VisionDome Installation Manual VisionDome and Vision-i-Dome DATA Technical Information ViD-18COP04 ViD-22COP04 VDE-18COP01 VDE-18CMP01 VDE-26CMP01 Sony 18xC Hitachi 22xC Sony18xC Sony 18xCM Sony 26xCM Dome Camera EX45BP VKS214ER EX48BP EX480BP EX980P Internal Dome Internal Dome External Dome... - Page 24 360_VisionDome_Int_&_Ext_Inst_manual_V2.03_2006-03-14.doc Page 24 of 25 VisionDome Installation Manual ViD-18COP04 ViD-22COP04 VDE-18COP01 VDE-18CMP01 VDE-26CMP01 Freeze Presets Auto Flip Level adjustment for colour/mono change over 32 with 8 present 32 with 8 present 32 with 8 present * Privacy Zones on screen...
-
Page 25: Warranty & Safety Issues
These products contain static electricity sensitive devices. Please take appropriate precautions when handling to minimise static damage to the sensitive circuitry. Please handle the VisionDome or Vision-i-Dome with care, as improper handling may cause damage within this unit. Avoid at all costs pointing the camera directly towards a bright light source (sunlight), or expose the camera to intensive light situations as this may damage the camera pick-up device.
Need help?
Do you have a question about the VisionDome and is the answer not in the manual?
Questions and answers