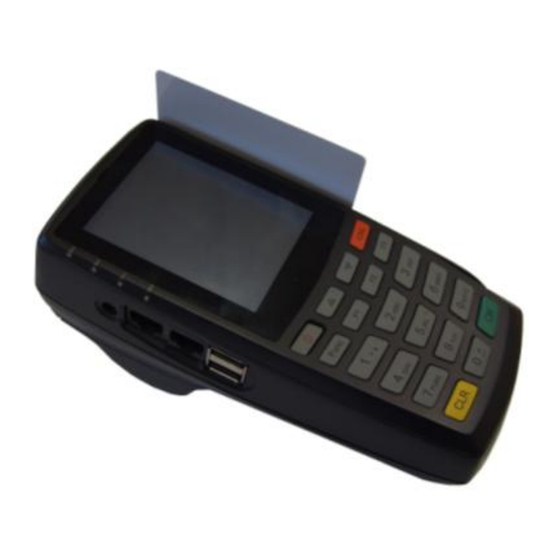
Summary of Contents for Exadigm NX2200 Series
- Page 1 NX2200 Series User Guide 2 8 7 1 P u l l m a n S t r e e t , S a n t a A n a , C A 9 2 7 0 5 P h o n e . 9 4 9 . 4 8 6 . 0 3 2 0 F a x .
- Page 2 The information contained in this document is subject to change without notice. ExaDigm makes no warranty of any kind with regard to this material, including, but not limited to, the implied warranties or merchantability and fitness for a particular purpose.
-
Page 3: Table Of Contents
18.0 Regulatory Notices and Certifications ..............15 18.1 Part 15 of FCC Rules ....................15 18.2 Part 68 of FCC Rules ....................16 18.3 SAR Labeling ......................16 18.4 UL Standards ......................16 © 2012 ExaDigm, Inc. Page 3 of 17 Rev. 1/0812... -
Page 4: Nx2200 Handheld Mobile Terminal
Small paper roll (thermal 2 ¼ x 1.38”) Installing the NX2200 When installing the ExaDigm NX2200 for countertop, use a location near a power outlet and Ethernet connectivity if using this option. Carefully plug the AC adapter into the terminal (the plug should insert into the power receptacle on the left side of the terminal) and secure it to a live electrical outlet. -
Page 5: Terminal Components
The figure below shows the ports used to connect the terminal to a power source, Ethernet port and various devices such as PIN pads using the multi-port connector. Power 2 USB Ports Ethernet RS-232 Port © 2012 ExaDigm, Inc. Page 5 of 17 Rev. 1/0812... -
Page 6: Installing A Paper Roll
3. To install slide the battery under the locking tabs and push down. 4. Replace the battery door by inserting the top hedge in first, slide up until it snaps into place. © 2012 ExaDigm, Inc. Page 6 of 17... -
Page 7: Sim Chip Installation
The metallic contact on the SIM card must be placed face down (toward the contacts on the unit). 7. Close the door by pushing down and slide the gate up to lock it. © 2012 ExaDigm, Inc. Page 7 of 17 Rev. 1/0812... -
Page 8: Powering Terminal
10.2 GSM/GPRS Before you use the terminal to do live transactions with TCP/IP connections, you need to make sure the modem is activated by inserting the SIM card. Contact your network carrier, ISO or ExaDigm to confirm activation. 10.3 Ethernet Connect the Ethernet cable to the Ethernet port (LAN) on the side of the terminal. -
Page 9: Connecting External Readers
To get a letter press the corresponding number and then the alpha key until the letter is displayed. Number Alpha 1 Alpha 2 Alpha 3 Alpha 4 Alpha 5 Alpha 6 SPACE ‘ “ & < > © 2012 ExaDigm, Inc. Page 9 of 17 Rev. 1/0812... -
Page 10: Qwerty Keyboard
To input symbols press the [?123] key on the touch screen the number and symbol screen will display. Press the [ALT] key for additional characters. To backspace and clear characters use the [DEL X] key or [CLEAR] on the keypad. © 2012 ExaDigm, Inc. Page 10 of 17 Rev. 1/0812... -
Page 11: Color-Coded Keys
2. Go to Admin 3. Go to System 4. Go to User Manager 5. Enter User Name and Password to access Note: Only Admin (Manager) level has access to this menu. © 2012 ExaDigm, Inc. Page 11 of 17 Rev. 1/0812... -
Page 12: Managing User
15.2.4 Passwords are not stored in the system alone. Data with a combination of password and User ID is encrypted with SHA1 algorithm and kept in the system. © 2012 ExaDigm, Inc. Page 12 of 17 Rev. 1/0812... -
Page 13: User Rules
16.0 Data Retention The ExaDigm payment application is set to purge all cardholder information (all transactions) after reaching the customer defined retention period. The terminal will warn the user before purging, giving a chance to settle the transactions to the payment processor. - Page 14 If offline transaction is supported (Defined in a Configuration Variable Object) “Save Full Track Data in Database” flag is active in Transaction Object iii. If current transaction is performed offline (or Store and Forward). © 2012 ExaDigm, Inc. Page 14 of 17 Rev. 1/0812...
-
Page 15: Battery And Charger Safety
Avoid dropping the battery and charger. If the battery or charger is dropped, especially on a hard surface, and the user suspects damage, contact ExaDigm for inspection. Improper battery or charger use may result in a fire, explosion, or other hazard. -
Page 16: Part 68 Of Fcc Rules
Customers are not to attempt to fix the equipment on their own. ExaDigm Inc recommends connecting the equipment to an AC surge protector to avoid damage to the equipment in the event of electrical surges. - Page 17 "CAUTION: To reduce the risk of fire, use only No. 26 AWG or larger (e.g., 24 AWG) UL Listed or CSA Certified Telecommunication Line Cord" For other TNV accessibility "Disconnect TNV circuit connector before accessing other port" or equivalent. © 2012 ExaDigm, Inc. Page 17 of 17 Rev. 1/0812...


Need help?
Do you have a question about the NX2200 Series and is the answer not in the manual?
Questions and answers