Table of Contents
Advertisement
NX2200e User Guide
Copyright 2016 ExaDigm, Inc.
All Rights Reserved.
Printed in USA
Warranty
The information contained in this document is subject to change without notice.
ExaDigm makes no warranty of any kind with regard to this material, including, but not limited to, the
implied warranties or merchantability and fitness for a particular purpose.
ExaDigm shall not be liable for errors contained herein or for incidental or consequential damages in
connection with the furnishing, performance, or use of this material.
Documentation
All documentation is located at
www.exadigm.com
and is subject to change.
Advertisement
Table of Contents

Related Manuals for Exadigm NX2200e

Summary of Contents for Exadigm NX2200e
- Page 1 The information contained in this document is subject to change without notice. ExaDigm makes no warranty of any kind with regard to this material, including, but not limited to, the implied warranties or merchantability and fitness for a particular purpose.
-
Page 2: Table Of Contents
NX2200e User Guide Table of Contents NX2200e Handheld Mobile Terminal ............4 Accessories, Parts and Peripherals ............4 Installing the NX2200e ................4 Terminal Components ................. 5 4.1 Front View ..................5 Terminal Ports .................... 5 Top View ..................... 5 Installing a Paper Roll ................. - Page 3 NX2200e User Guide 18.1 Part 15 of FCC Rules ............... 17 18.2 Part 68 of FCC Rules ............... 17 18.3 SAR Labeling ................... 18 18.4 UL Standards ................... 18 © 2016 ExaDigm, Inc. Page 3 of 18 Rev. 3/0316...
-
Page 4: Nx2200E Handheld Mobile Terminal
Lithium-ion Battery Installing the NX2200e When installing the ExaDigm NX2200e for countertop, use a location near a power outlet and Ethernet connectivity if using this option. Carefully plug the AC adapter into the terminal (the plug should insert into the power receptacle on the left side of the terminal) and secure it to a live electrical outlet. -
Page 5: Terminal Components
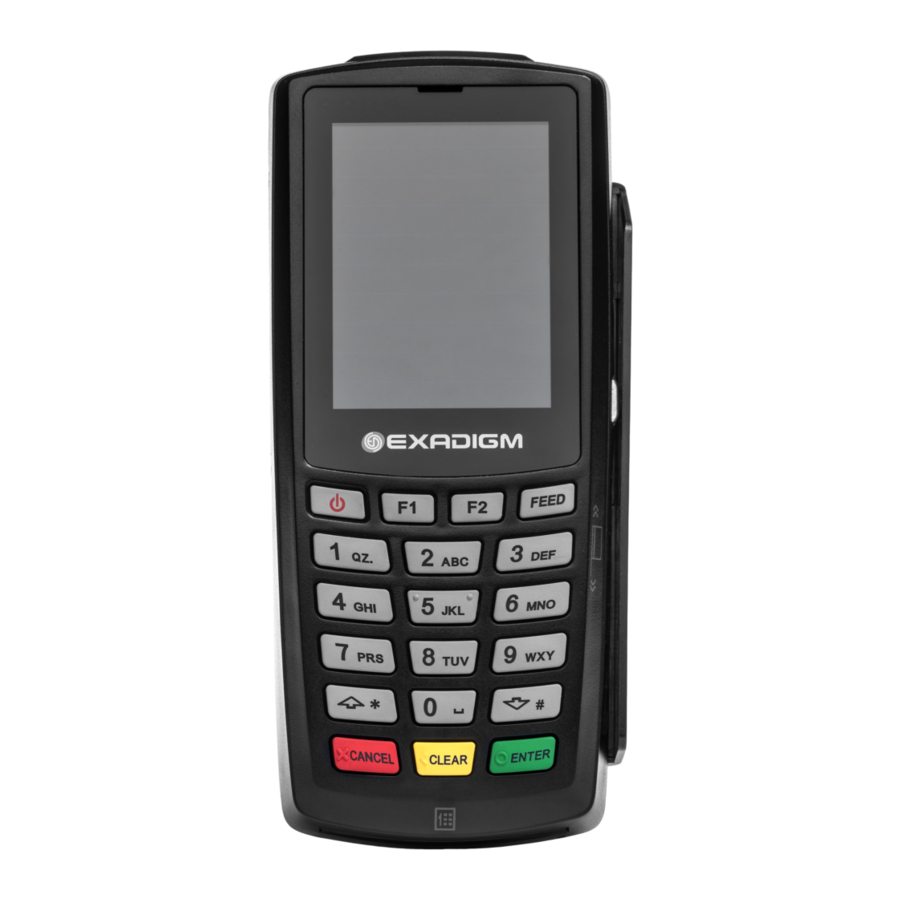
NX2200e User Guide Terminal Components Front View LED Lights Screen Magnetic Card Reader Power ON/OFF Feed Key 2 Programmable Function Keys Up/Down Arrow Cancel Key Enter Key Clear/Backspace Key Smart Card Reader Terminal Ports The figure to the right shows the ports used to... -
Page 6: Installing A Paper Roll
Installing a Paper Roll A paper roll is required to print receipts and reports. The NX2200e uses thermal 2 ¼ x 1.38” paper rolls. 1. Place forefinger under flap at the bottom of the terminal and pull forward using force. -
Page 7: Sim Chip Installation
NX2200e User Guide SIM Chip Installation Note: SIM chips are only used in HSPA equipped terminals. The SIM chip slot is located with the terminal face down under the battery compartment. Unscrew the screw located on the top of the battery cover. -
Page 8: Powering Terminal
10.2 HSPA Before you use the terminal to do live transactions with TCP/IP connections, you need to make sure the modem is activated by inserting the SIM card. Contact your network carrier, ISO or ExaDigm to confirm activation. 10.3 Ethernet Connect the Ethernet cable to the Ethernet port (LAN) on the side of the terminal. -
Page 9: Alpha/Numeric Keypad
NX2200e User Guide 11.0 Alpha/Numeric Keypad To get a letter, press the corresponding number and then continue pressing until the letter is displayed. Number Alpha 1 Alpha 2 Alpha 3 Alpha 4 Alpha 5 Alpha 6 SPACE „ “ &... -
Page 10: Color-Coded Keys
NX2200e User Guide For numeric only entry menus the following keypad will display: 12.0 Color-Coded Keys The color-coded keys perform the following tasks: Red CANCEL Key: Press the red key to cancel the current operation or return to the previous menu. -
Page 11: Terminal Functions
NX2200e User Guide 14.0 Terminal Functions 14.1 View Transactions 1. Go to End Of Day 2. Go to View Trans 3. For Batch a. Go to Batch b. The following will display 1/XX 01/01/01 XX:XX Credit Sale Trn ID X... -
Page 12: Hot Keys
NX2200e User Guide 14.2 Hot Keys Additional functions are available from the View Trans menu. Press the hot keys to access the options. 1. Go to End Of Day 2. Go to View Trans 3. Go to Batch (or the other options) -
Page 13: Managing User
NX2200e User Guide 15.1 Managing User Security manager provides the user interface to manage users. To access the user management area, the highest level (manager) credential is required to perform the following operations: Add User Edit User i. Unlock ii. -
Page 14: User Passwords
16.0 Data Retention The ExaDigm payment application is set to purge all cardholder information (all transactions) after reaching the customer defined retention period. The terminal will warn the user before purging, giving a chance to settle the transactions to the payment processor. -
Page 15: Security Features
NX2200e User Guide 2. Go to App Setup 3. Go to Security Setup 4. Go to Retention Period 5. Enter the hours in XXXXX 6. Press ENTER 16.1 Security Features 16.1.1 Variable Object Security Features The application uses a module named Transaction Engine Variable Object to recognize if a variable is keeping any of the following account data: ... -
Page 16: Battery And Charger Safety
17.0 Battery and Charger Safety ExaDigm assumes no liability for improper use, care or charging of batteries if the following safety guidelines are not followed. Refer to the warranty provisions for your products and components. Proper battery and charger safety is necessary to ensure the terminal will perform to its potential and reduce the risk of overheating, igniting or explosion, resulting in serious bodily harm or property damage. -
Page 17: Regulatory Notices And Certifications
FCC Part 15 Class B Digital Device The NX2200e has been tested and found to comply with the limits for a Class B digital device, pursuant to part 15 of the FCC Rules. These limits are designed to provide reasonable protection against harmful interference in a residential installation. -
Page 18: Sar Labeling
Customers are not to attempt to fix the equipment on their own. ExaDigm Inc recommends connecting the equipment to an AC surge protector to avoid damage to the equipment in the event of electrical surges.
Need help?
Do you have a question about the NX2200e and is the answer not in the manual?
Questions and answers