Table of Contents
Advertisement
Advertisement
Table of Contents

Related Manuals for Verint Nextiva HDR 1800

Summary of Contents for Verint Nextiva HDR 1800
- Page 1 Nextiva HDR 1800 v1.0 User Guide November 2010...
- Page 2 The entire risk as to the use, results and performance of information, links, tools and materials provided or referenced herein is assumed by the user. Verint Systems Inc. shall not be liable for damages resulting from the use, misuse or unlawful use of the information, links, tools, and materials contained or referenced herein.
-
Page 3: Table Of Contents
Contents Safety ........... . . iii Preface . - Page 4 Contents Chapter 3: Configuring the HDR 1800 ......15 Getting Started ........... . . 16 Discovering the HDR 1800 .
-
Page 5: Safety
Always observe the following precautions to reduce the risk of injury and equipment damage: The Nextiva HDR 1800 is for indoor use only. The Nextiva HDR 1800 should be placed on a secure flat surface or mounted using optional hardware. -
Page 7: Preface
Preface The Nextiva® High Definition Receiver (HDR ) 1800 User Guide presents information and procedures on installing, configuring, and using the HDR 1800. Audience This guide has been prepared for the following audience: Managers IT system administrators Engineers ... -
Page 8: Contacting Service And Support
Thursday); 9:00 am to 5:30 pm (Friday) Related Documentation The following documentations contain related information: Nextiva HDR 1800 Quick Install Guide Nextiva Administrator Guide, version 6.1 Nextiva Third-Party PTZ Camera and CCTV Keyboard Integration Guide, version 6.1 ... -
Page 9: Summary Of Changes
Summary of Changes This section lists technical updates and new material added to the Nextiva HDR 1800 User Guide. Revision 2 — October 2010 This is the second edition of the Nextiva HDR 1800 User Guide. Revision 1 — April 2010 This is the first edition of the Nextiva HDR 1800 User Guide. -
Page 11: Chapter 1: Overview Of The Hdr 1800
Chapter Overview of the HDR 1800 The Nextiva® High Definition Receiver (HDR ) 1800 is a powerful enterprise-class, H.264 enabled video decoder/receiver designed for large-scale, geographically distributed operations. The HDR 1800 combine excellent performance, high-defnition technology, and H.264 video decompression to enhance the functionality and versatility of Nextiva Virtual Matrix implementations. -
Page 12: Hardware Overview
One Mic-in, 1/8in (3.5mm) stereo jack CAUTION: The Nextiva HDR 1800 is enclosed in a non-weatherproof casing and should be placed in a location that is not exposed to the outdoor environment. For the HDR 1800, the following two figures represent the front and rear views of the unit. -
Page 13: Product Dimensions And Weight
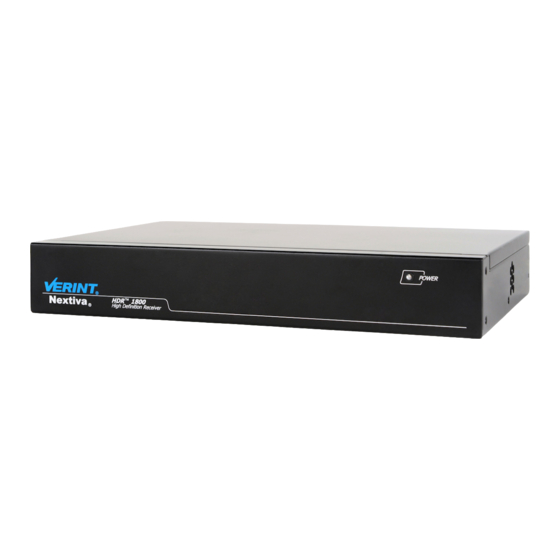
Chapter 1 Overview of the HDR 1800 Figure 1.1: HDR 1800 Front View POWER Nextiva HDR 1800 High-Definition Receiver Power LED Figure 1.2: HDR 1800 Rear View Network DVI-D Power BNC Connector Line-out RS-232 Input Connectors (RJ-45) Connector button DVI-D LINE-OUT... -
Page 14: Monitor Configuration
Monitor Configuration Monitor Configuration You can connect either one monitor (Single monitor configuration) or two monitors (Dual monitor configuration) to the HDR 1800. In a Dual monitor configuration, the first monitor in the configuration must be connected to the DVI-D connector on the HDR 1800; the second monitor can be connected to either the VGA or BNC connectors. -
Page 15: Frame Rate And Performance
Chapter 1 Overview of the HDR 1800 Frame Rate and Performance The HDR 1800 supports H.264, MPEG-4, MJPEG video decoding at up to 1920x1080 screen resolution. In general, the performance for displaying video on monitors varies depending on the tile layout, screen resolution, compression mode, and bitrate. The following table lists performance values for the maximum frame rate: NOTE: The performance values listed below are provided for reference only. -
Page 17: Chapter 2: Installing The Hdr 1800
Chapter Installing the HDR 1800 This chapter focuses on the physical installation of the HDR 1800. Network and other physical settings for the HDR 1800 are configured in Nextiva Video Management System (VMS); for more information, see Chapter 3, “Configuring the HDR 1800”. -
Page 18: Package Contents
One set of rack-mount brackets One set of wall-mount brackets Six screws (Philips M4 6mm pan head) × Four bumpons One AC100-240V 90W/+19V power adaptor One Nextiva HDR 1800 Quick Installation Guide www.verint.com/video_solutions... -
Page 19: Installing The Hdr 1800
Chapter 2 Installing the HDR 1800 Installing the HDR 1800 This section explains how to install an HDR 1800. To ensure that the HDR 1800 functions properly, consider the following: Verify the outlet where you will connect the HDR 1800 for proper polarity. Use a standard ... - Page 20 Installing the HDR 1800 Screw the rack-mount brackets to the HDR 1800 using 12 in-lb (1.35 N-m) force with 6 screws (provided). Slide the unit into the 1U mounting space in the rack cabinet and ensure that the fan airflow is not blocked.
-
Page 21: Connecting The Hdr 1800
Chapter 2 Installing the HDR 1800 Screw the wall-mount brackets to the HDR 1800 using 12 in-lb (1.35 N-m) force with 4 screws (provided). Place the HDR 1800 on the wall and ensure that there is enough space on the sides of the unit for ventilation. -
Page 22: Connecting Monitors
Connecting the HDR 1800 Secure the power connector to the receptacle by tightening the screws on each side of the connector. Plug the 19V DC +/-5% power cable into an outlet or surge-protection device. Connecting Monitors You can connect either one monitor (Single monitor configuration) or two monitors (Dual monitor configuration) to the HDR 1800. -
Page 23: Connecting A Cctv Keyboard
Chapter 2 Installing the HDR 1800 Connecting a CCTV Keyboard The HDR 1800 supports all RS-232 and RS-422 CCTV keyboards supported in Nextiva VMS. The HDR 1800 provides two serial ports for connecting CCTV keyboards: COM1: RS-232 (DB9) COM2: RS-422 (DB9) ... -
Page 24: Powering On The Hdr 1800
Powering On the HDR 1800 Powering On the HDR 1800 Once the power and network cables and monitors are connected to the HDR 1800, you can power it on. To power on the HDR 1800: Make sure the power adaptor for the HDR 1800 is connected to a power outlet (or surge- protection device). -
Page 25: Chapter 3: Configuring The Hdr 1800
Chapter Configuring the HDR 1800 This chapter focuses on the configuring the HDR 1800 in Nextiva Video Management System (VMS). The following topics are discussed: Getting Started............16 Discovering the HDR 1800 . -
Page 26: Getting Started
CCTV keyboards (see “Configuring the HDR 1800 in Virtual Matrix” on page 37). NOTE: Ensure that the Nextiva HDR 1800 is running the correct firmware for your Nextiva VMS configuration before you run the system setup wizard. -
Page 27: Discovering The Hdr 1800
Chapter 3 Configuring the HDR 1800 Discovering the HDR 1800 Nextiva VMS, version 6.1 includes the HDR 1800 Service Generator. The HDR 1800 Service Generator interfaces with HDR 1800s installed on the Nextiva network. Before you can use an HDR 1800 with Nextiva VMS, you must add it and configure it for use with Nextiva VMS. - Page 28 Discovering the HDR 1800 Partially Discovered: The HDR 1800 is discovered and network and monitor output settings can now be configured for it. This is the initial configuration state when an HDR 1800 is first added to the Nextiva system. Fully Discovered: The HDR 1800 transitions to the Fully Discovered state when ...
- Page 29 Chapter 3 Configuring the HDR 1800 To discover manually an HDR 1800: Under Global Settings > Adaptors, click HDR 1800 Service Generator. The HDR 1800 Service Generator Browser pane is displayed on the right: Click the Add button. The Unit Discovery window appears. Enter the IP address of the HDR 1800 that you want to discover in the IP Address box.
-
Page 30: Configuring Network Settings
Configuring Network Settings Configuring Network Settings Before adding an HDR 1800 to Nextiva VMS, you must configure its network settings. This involves setting a static IP address and subnet mask for the HDR 1800. By default, the HDR 1800 is DHCP (Dynamic Host Configuration Protocol) enabled. If you have a DHCP server, the HDR 1800 automatically obtains an IP address upon initial startup from the DHCP server;... - Page 31 Chapter 3 Configuring the HDR 1800 1800s to display only Partially Discovered HDR 1800s by clicking the Filter button and selecting Partially Discovered from the pick list. Select the Network tab. Verint Video Intelligence Solutions...
-
Page 32: Configuring Monitor Output Settings
Configuring Monitor Output Settings Type a static IP address for the HDR 1800 in the IP Address box. In the Subnet Mask box, type the subnet mask for the subnet the HDR 1800 is located on. Type the IP address of the server that acts as the access point to another network in the Gateway IP Address box. - Page 33 Chapter 3 Configuring the HDR 1800 To configure monitor output settings for the HDR 1800: In the HDR 1800 Service Generator Browser pane, select a Partially Discovered HDR 1800 that you want to configure. The configuration parameters for the HDR 1800 appear directly below the HDR 1800 Service Generator Browser pane.
- Page 34 Configuring Monitor Output Settings For a Dual monitor configuration: 1) Select the Monitor 2 option. The configuration settings for Monitor 2 are enabled. In a Dual monitor configuration, the Connector Type for the first monitor in the configuration automatically switches to DVI and the system prevents you from changing this setting.
-
Page 35: Registering The Hdr 1800 With Nextiva Vms
Chapter 3 Configuring the HDR 1800 Registering the HDR 1800 with Nextiva When an HDR 1800 is registered with Nextiva VMS, you can use the System Setup Wizard to add the HDR 1800 to Physical and Logical Groups, configure physical settings (audio output, aspect ratio, serial ports, etc.) for the HDR 1800 in the Physical View, as well as configure the HDR 1800 in Nextiva Virtual Matrix (assign Monitor IDs, startup video sources, and CCTV keyboards). -
Page 36: Registering The Hdr 1800 With Nextiva Vms
Registering the HDR 1800 with Nextiva VMS Click the Register/Unregister button. Once the HDR 1800 is updated with the new configuration, its configuration state changes to Fully Discovered: You can now use the System Setup Wizard to add the Fully Discovered HDR 1800 to Physical and Logical Groups in Nextiva VMS;... -
Page 37: Adding The Hdr 1800 To Physical And Logical Groups
Chapter 3 Configuring the HDR 1800 Adding the HDR 1800 to Physical and Logical Groups Once the HDR 1800 is configured and registered with the Nextiva system, you add it to Physical and Logical Groups in Nextiva VMS using the System Setup Wizard. This makes the HDR 1800 available in Physical and Logical Views in Nextiva Control Center where you can view and configure its physical settings (see “Viewing and Configuring Physical Settings”... -
Page 38: Adding The Hdr 1800 To Physical And Logical Groups
Adding the HDR 1800 to Physical and Logical Groups Click Next to assign the video outputs configured on the HDR 1800 to Logical Groups. NOTE: The number of video outputs available to the HDR 1800 depends on the number of tiles configured. -
Page 39: Viewing And Configuring Physical Settings
Chapter 3 Configuring the HDR 1800 Click Finish to complete the procedure. Once you add the HDR 1800 to Physical and Logical Groups in the Nextiva system, you configure physical settings for the HDR 1800 (see “Viewing and Configuring Physical Settings”... -
Page 40: Viewing General Properties
Viewing and Configuring Physical Settings Viewing General Properties The General tab displays general parameters for the HDR 1800. To view general properties for the HDR 1800: In Nextiva Control Center, select System Components > Devices. Select Physical View. Physical devices appear in a hierarchal tree in the Devices pane. Expand the group where the HDR 1800 you want to view general properties for is located and select it. -
Page 41: Viewing Network Settings
Chapter 3 Configuring the HDR 1800 Viewing Network Settings The Network tab displays the IP address, subnet mask, and gateway configured on the HDR 1800. These settings are provided for informational purposes only. They cannot be modified in the Network tab. To modify network settings for the HDR 1800, see “Configuring Network Settings” on page 20. -
Page 42: Setting Audio Output
Viewing and Configuring Physical Settings Setting Audio Output You can configure the HDR 1800 to output audio associated with a specific video output (or tile) to external audio equipment. NOTE: Connect external audio equipment to the LINE-OUT connector on the HDR 1800. Audio output can only be set for a single video output (or tile) configured on the HDR 1800. -
Page 43: Setting Aspect Ratio
Chapter 3 Configuring the HDR 1800 Setting Aspect Ratio Setting aspect ratio on the HDR 1800 allows you to set the way video images are displayed on monitors. You can choose to either: keep aspect ratio to etains the width-to-height ratio of the video images displayed on ... -
Page 44: Configuring Serial Ports
Viewing and Configuring Physical Settings In the Misc section, select one of the following options for the Keep Aspect Ratio parameter: True: The original width-to-height ratio of the video images displayed on all video outputs (or tiles) configured on the HDR 1800 will be retained. False: Video images displayed on all video outputs (or tiles) configured on the HDR ... - Page 45 Chapter 3 Configuring the HDR 1800 In the Browser pane, select the serial port (RS-232 or RS-422) that you want to configure. The configuration parameters for the serial port are displayed: Specify the required values, following the manufacturer’s documentation for the keyboard: Baud Rate: The Baud Rate measures the transmission speed and is calculated in ...
-
Page 46: Updating The Firmware
Viewing and Configuring Physical Settings Updating the Firmware You can update the firmware on the HDR 1800 by using the following procedure. To update the firmware on the HDR 1800: In Nextiva Control Center, select System Components > Devices. Select Physical View. -
Page 47: Configuring The Hdr 1800 In Virtual Matrix
Chapter 3 Configuring the HDR 1800 Configuring the HDR 1800 in Virtual Matrix When you add the HDR 1800 to Physical and Logical Groups in the Nextiva system, all video outputs (or tiles) configured on the Devices pane are added as monitors in Nextiva Virtual Matrix. You then use Nextiva Virtual Matrix to assign Monitor IDs and startup video sources to each monitor configured on the HDR 1800, as well as configure on-screen display (OSD) settings for the monitors. - Page 48 Configuring the HDR 1800 in Virtual Matrix To allow Nextiva VMS to automatically assign sequential Monitor IDs: In Nextiva Control Center, select System Components > Virtual Matrix. Select Monitors from the tree view in the left pane. In the Monitors pane on the right side, select the entry in the table corresponding to the monitor that you want to assign a Monitor ID to.
-
Page 49: Assigning Startup Video Sources To Monitors
Chapter 3 Configuring the HDR 1800 Assigning Startup Video Sources to Monitors This section describes the procedure for assigning a startup video source to a monitor on the HDR 1800. To assign a start up video source to a monitor: In Nextiva Control Center, select System Components >... -
Page 50: Adding A Cctv Keyboard
Configuring the HDR 1800 in Virtual Matrix Adding a CCTV Keyboard When connected to an HDR 1800 and integrated with Nextiva VMS, CCTV keyboards can be used to control PTZ cameras, including panning, tilting, and zooming the cameras; calling camera patterns and presets;... - Page 51 Chapter 3 Configuring the HDR 1800 In the Keyboards pane on the right side, click the Add button in the toolbar to add a keyboard entry to the table. Enter a name for the keyboard in the Keyboard Name box. TIP: Enter a meaningful name to facilitate identification.
-
Page 52: Customizing On-Screen Display
Configuring the HDR 1800 in Virtual Matrix Customizing On-screen Display You can customize the on-screen display (OSD) settings for video outputs (or monitors) configured on the HDR 1800. Configurable parameters for OSD include: Time Formats Date Formats Live Video Positions and Colors ... -
Page 53: Resetting The Hdr 1800 To Partially Discovered State
Chapter 3 Configuring the HDR 1800 Resetting the HDR 1800 to Partially Discovered State If you want to modify network or monitor output settings for the HDR 1800, you need to first reset it to Partially Discovered state. The procedure to reset the HDR 1800 to Partially Discovered state varies depending on whether the HDR 1800 is in: Fully Discovered state, where only network and monitor output settings are configured for ... -
Page 54: Resetting The Hdr 1800 To Partially Discovered State
Resetting the HDR 1800 to Partially Discovered State The configuration state for the HDR 1800 changes to Partially Discovered. You can now reconfigure network and monitor output settings for the HDR 1800; see “Configuring Network Settings” on page 20 and “Configuring Monitor Output Settings” on page 22 ... - Page 55 Chapter 3 Configuring the HDR 1800 Expand the physical group where the HDR 1800 you want to reset to Partially Discovered state is located and select it. Click the Delete button. A confirmation message appears. Click Yes to continue. The HDR 1800 is removed from all Physical and Logical Groups in the system. All video outputs (or monitors) configured on the HDR 1800, and all keyboards connected to it are also removed from Nextiva Virtual Matrix.
-
Page 56: Restoring Factory Default Settings
Restoring Factory Default Settings To reassign a HDR 1800 to another Nextiva site: CAUTION: The HDR 1800 will appear in Fully Discovered state on the local Nextiva site, and offline on the other Nextiva site. From the other Nextiva site, you must manually remove the HDR 1800 from the Physical and Logical Groups and from the Nextiva Virtual Matrix. - Page 57 Chapter 3 Configuring the HDR 1800 To restore factory default settings on the HDR 1800: In the HDR 1800 Service Generator Browser pane, select an HDR 1800 in Partially Discovered or Foreign Site state. Click the Reset Factory Settings button. You are prompted to confirm the action. CAUTION: Restoring factory default settings on an HDR 1800 installed on another Nextiva site (Foreign Site state), removes the HDR 1800 from the other site.
-
Page 59: Appendix A: Specifications And Configuration
Appendix Specifications and Configuration The following topics are discussed: Technical Specifications ..........50 Factory Default Configuration . -
Page 60: Technical Specifications
Technical Specifications Technical Specifications The following table presents the technical specifications for the Nextiva HDR 1800 : Video Outputs/Connectors One Digital DVI-D connector (with HDMI support using an HDMI male to DVI male connector - not provided) One VGA (RGB) connector... - Page 61 Appendix A Specifications and Configuration Power Input Voltage 19V DC +/-5%, Terminal Block, ENERGY STAR Power supply Power Consumption 20W, max. 30W Physical Enclosure 1U Metal case with flange mount (black) Dimensions 11W × 7.5D × 1.7H in. (280W × 190D × 44H mm) Weight 5.7lb (2.6Kg) Operating Temperature...
-
Page 62: Factory Default Configuration
Factory Default Configuration Factory Default Configuration The Nextiva HDR 1800 is programmed at the factory with the following configuration: Component/Parameter Default Settings Serial ports (RS-232 and RS-422) Bit rate: 115200 bps Data bits: 7 Parity: odd Stop bit: 2 Network... -
Page 63: Glossary
Glossary Configuration Assistant A proprietary graphical program used to configure and update the firmware of the S1100 edge devices. Decoder This glossary is common to the Nextiva line of See Receiver. edge device products. DHCP Access Point (Dynamic Host Configuration Protocol) A communication hub for connecting wireless communication... - Page 64 Glossary Point-to-Point Connection (Local Area Network) A computer network that The association of a transmitter and a receiver to spans a relatively small area. A LAN can connect view video coming from an analog camera on an workstations, personal computers, analog monitor.
- Page 65 Glossary RS-422 TTLS A standard interface approved by the Electronic (Tunneled Transport Layer Security) Industries Alliance (EIA) for connecting serial cryptographic protocol that creates a secure TLS devices, designed as an alternative to the older tunnel. RS-232 standard because it supports higher data rates and greater immunity to electrical VSIP interference.
-
Page 67: Index
Index casing of the unit configuration default default configuration enclosure, unit equipment list factory default configuration loading default configuration options, when ordering a device panel of unit reset to factory default RoHS RS-422/485 Verint Video Intelligence Solutions... - Page 69 For more information, please visit us at www.verint.com/video_solutions Americas: info@verint.com EMEA: marketing.emea@verint.com APAC: marketing.apac@verint.com All other trademarks and product names are the property of their respective owners. The information in this document may be superseded by subsequent documents. Revision 1...
- Page 70 www.verint.com/video_solutions...
Need help?
Do you have a question about the Nextiva HDR 1800 and is the answer not in the manual?
Questions and answers