Table of Contents
Advertisement
Quick Links
Advertisement
Table of Contents

Related Manuals for Aquathin AquaKING RO

Summary of Contents for Aquathin AquaKING RO
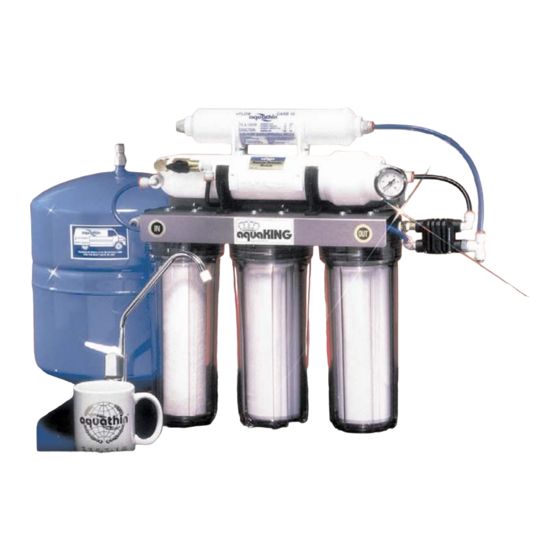
- Page 1 Getting Started With Your AquaKING RO and RO DI Water Purification System OWNER’S MANUAL (In full color at www.aquathin.com) Includes installation and maintenance information AN ISO 9001:2008 QMS REGISTERED /CERTIFIED COMPANY (IMS 0192 & NQA-12635) © 2009 Aquathin Corporation. All rights reserved.
- Page 2 Aquathin Corporation. Every effort has been made to ensure that the information in this manual is accurate. Aquathin Corporation is not responsible for printing or clerical errors. Aquathin Corporation Aquathin Business Centre...
- Page 3 Authorized Aquathin Dealer. You could not have picked a better time to consider the many benefits of becoming a member of the ever growing Aquathin Family. The Next Quarter Century Celebration Begins ! Aquathin manufactures a broad spectrum of unique...
- Page 4 Highest quality water treatment systems and support good enough for my home...my family. And that is my promise to you ! I love my Aquathin!! FOR THE BEST TASTE IN LIFE & 30 Years Pure Excellence ...and another Quarter Century re-inventing the water industry!
-
Page 5: Table Of Contents
Getting to Know Your AquaKing System 23 A Look At The Key Components Aquathin Sediment Filter Granular Activated Carbon Aquathin Reverse Osmosis Membrane Aquathin Deionization Module Operating Parameters Pressure Chlorine and Chloramines Sediment Iron Hardness and More © 2009 Aquathin Corporation. All rights reserved. - Page 6 A - Specifications ppendix B - Replacement Schedule 44 Replacement Components and Schedule Maintenance Log ppendix C - Connections Sink Mounted Faucet Assembly John Guest Speedfit® Fittings AquaKING Series Installation Diagram ppendix D - Schematic © 2009 Aquathin Corporation. All rights reserved.
-
Page 7: Getting Started
— pure drinking and cooking water free of any and all dangerous contaminants. As the new owner of an Aquathin RO/DI water purification system there is a totally new experience awaiting you. You and your family will be amazed at the delightful new taste of your tap water—it’s like owning... - Page 8 AquaKING system operates at peak efficiency. While 45PSI is enough to produce water with the exceptional purity required to pass Aquathin standards, you may find water flow to the faucet is less than optimal, and that your holding tank will not store much water.
-
Page 9: Unpack The System
For porcelain sinks, a For granite counter-tops, Dremmel® tool and ¾" you will need to have a silicon carbide grinding professional drill a ½" wheel or a Glass & Tile hole. carbide spade-tipped bit. © 2009 Aquathin Corporation. All rights reserved. -
Page 10: Planning The Installation
Planning the Installation Review the following instructions completely before proceeding. (See installation diagram on page 48.) Aquathin AquaKING systems are comprised of several compact components which fit easily beneath most kitchen sinks. We encourage you to establish the desired location of each of the components before proceeding. -
Page 11: Installing The Feed Water Saddle Valve
4) The valve is closed in this position. Turn on the MAIN supply valve to pressurize cold water line. Immediately check for any signs of leaks. 5) Set aside compression fittings for later use connecting yellow feed tubing to system. © 2009 Aquathin Corporation. All rights reserved. -
Page 12: Installing The Drain Saddle Valve
Attach saddle to drain pipe and tighten saddle whenever the two screws evenly. possible. (See Figure 8 the next Figure 5, page.) Mounting the Drain Saddle Valve © 2009 Aquathin Corporation. All rights reserved. -
Page 13: Preparing To Mount The Main Assembly
(A pilot hole using a 1⁄16" drill bit is recommended for particle board side-walls.) NOTE: Do not hang the assembly until tubing connections have been made (following pages.) 5¼" 5¼" Figure 7, Spacing between keyholes (diagram not drawn to scale) © 2009 Aquathin Corporation. All rights reserved. -
Page 14: Mounting The Deionization Module
Mounting the Deionization Module (If purchased as DIMS VS AK 40 DI complete) The Aquathin 4 stage Deionization (DI) module can be placed anywhere convenient inside the cabinet. Keep the distance between the main assembly, storage tank, and DI module as short as possible. -
Page 15: Making The Tubing Connections
You have completed the bulk of the installation tasks. All that remains is connecting tubing between the components. Three lengths of tubing have been supplied: Yellow tubing to connect the feed water saddle valve to the inlet on the main assembly. © 2009 Aquathin Corporation. All rights reserved. -
Page 16: Connect Cold Water Supply Line
Connecting Tubing to John Guest Speedfit® Fittings Aquathin systems make extensive use of John Guest Speedfit® fittings. These high quality components provide secure, leak free seals and make it easy to connect and disconnect tubing without the use of tools. -
Page 17: Connect Drain Line
Be sure to allow for this loop when you measure. (See Figure 8 on page 14.) A self-adhesive tubing clip has been provided to secure the drain loop. © 2009 Aquathin Corporation. All rights reserved. -
Page 18: Connect Di Module To Main Assembly
Outlet to DI Module inlet horizontally onto Figure 15 the mounting screws. You may wish to remove the main assembly and adjust the screws to make the connection as secure as possible. © 2009 Aquathin Corporation. All rights reserved. -
Page 19: Prepare Storage Tank
OUTLET of the DI module and the “T” connector on the tank ball valve. (See Figure 17, right) Figure 17, DI Module to Storage Tank Connection © 2009 Aquathin Corporation. All rights reserved. -
Page 20: Connect Gac Post Filter
Leave the handle on the tank ball valve closed at this time. Congratulations! You have completed the installation of your Aquathin AquaKING water purification system. You are now ready to begin making pure, Aquathin quality drinking water. Starting Your System 1) Open the chrome faucet on the sink top. - Page 21 Flushing is the single most important maintenance function needed to keep your system operating at peak efficiency. This simple operation only takes a few minutes and extends the service life of the reverse osmosis membrane. © 2009 Aquathin Corporation. All rights reserved.
-
Page 22: Flushing
Replace the red lock clip. This process solves 99% of leaking connections. If the leak persists, trim ¼" – ½" off the end of the tubing and try again. © 2009 Aquathin Corporation. All rights reserved. -
Page 23: Getting To Know Your Aquaking System
Carbon Adsorption, Reverse Osmosis, and Deionization. By carefully matching the components utilizing these methods, Aquathin has earned a patent to assure your system produces water which meets or exceeds the standards for bio-compatibility and purity. A LOOK AT THE KEY COMPONENTS... -
Page 24: Granular Activated Carbon
A custom designed and extremely efficient High Flow (XF-HRO) spiral wound Reverse Osmosis Membrane produces up to 45 gallons (~170 liters) of purified water per day. The Aquathin RO Membrane utilizes the unique properties of a semi-permeable material which allows passage of pure water molecules while... -
Page 25: Aquathin Deionization Module
EPA EST. NO. 52531-FL-01 The Aquathin Reverse Osmosis Membrane used in this system can tolerate significantly higher concentrations of oxidizing contaminants like iron and manganese than RO membranes found in other systems, as well as a much higher degree of hardness. -
Page 26: Operating Parameters
In general, the higher the pressure (up to 100 PSI), the better the performance of the membrane at rejecting contaminants. The Aquathin HRO TFC membrane will hold up very well when the pH of the feed water is between 2 and 11. -
Page 27: Sediment
TFC Reverse Osmosis Membrane. Therefore, it is essential to remove chlorine from your feed water before it reaches the RO membrane. Your Aquathin RO/ DI system includes a pre-filter containing a special grade of grade of Granular Activated Carbon (GAC) which will very effectively remove chlorine and chloramines from your tap water. -
Page 28: Hardness And More
Hard water means you use more soap and cleaning agents because they first have to “clean” the water before they clean anything else. © 2009 Aquathin Corporation. All rights reserved. - Page 29 10 grains of hardness. Otherwise you need an expensive water softener just for the RO system. Your Aquathin can be installed on hard water up to 25 grains due to the patented flush. 2) There is a disclaimer that those units may not be installed on microbiologically unsafe water.
-
Page 30: M Aintenance And Servicing
M a i n t e n a n c e a n d S e r v i c i n g Minimal work is required to keep your Aquathin AquaKING system in peak operating condition. Simply follow a regular schedule of flushing and replace the filter modules as recommended. -
Page 31: Filter Replacement
(use the water for watering plants, etc.) then flush the membrane for 5-10 minutes as described above. FILTER REPLACEMENT After 12 months of use, it is time to replace the Aquathin sediment pre-filter, the Aquathin twin GAC carbon filters, and the Aquathin Deionization Module to insure your system continues to produce water within Aquathin parameters. -
Page 32: Replacing The Sediment Pre-Filter
Replacing the Aquathin GAC Pre-filters The twin unidirectional, GAC pre-filters are in the middle canister and the canister on the right. Follow the same procedure as described for replacing the sediment pre- filter (above). © 2009 Aquathin Corporation. All rights reserved. -
Page 33: Replacing The Aquathin Di Module
DI module with the storage tank before connecting the tubing to the DI module. (As the tank fills with water for the first time, it will be subjected to a strong but continually diluting solution of chlorine.) © 2009 Aquathin Corporation. All rights reserved. -
Page 34: Returning The System To Service
Check for leaks around the tops of the pre-filter canisters. If water is seeping from any of the canisters turn the cold water supply off, move the manual flush valve to the “Flush” position, and then © 2009 Aquathin Corporation. All rights reserved. - Page 35 Allow the system to produce a full tank of water. Drain off and discard the initial tank of water. Do not use for cooking or drinking. You are now ready to enjoy great tasting, pure Aquathin water for another 12 months! © 2009 Aquathin Corporation. All rights reserved.
-
Page 36: Frequently Asked Questions
Q: How long will my GAC pre-filters last before they need to be replaced? A: Your Aquathin AquaKING system has been designed to operate within a wide range of tap water conditions. These conditions vary greatly across municipalities, so it is difficult to state precisely how long your pre-filters will last. - Page 37 You can invest in a reliable and inexpensive resistivity meter (available from your local Authorized Aquathin Dealer) or you can send samples to them for analysis. (Poor rejection rates may also be an indication of a clogged pre-filter, so check that filter first.) A large...
- Page 38 This false claim was probably first made by companies wanting to boost sales of filters incapable of removing dissolved minerals and dangerous heavy metals. ASK your Authorized Aquathin Dealer for a copy of “5th Function of Water”. Q: Will hot water ruin my RO membrane? A: YES! Hot water over 100°...
- Page 39 Q: How can I keep informed about Aquathin? A: “Splash News Bulletin”, “Forum Q&A”, “Allergic Reaction”, “Biz Bank”, “Tech Bank”, and “Quote Bank” are all FREE services to all Authorized Aquathin Dealers and their Customers to keep you abreast of technology updates and industry news.
-
Page 40: Limited Warranty
L i m i t e d W a r r a n t y Aquathin Corporation warrants to the original owner each AquaKING Series Water Purification System to be free from defects in materials and workmanship for as long as you own the product. -
Page 41: What We Will Do To Correct An Inconvenience
Upon notice, we will repair or replace covered defective parts, free of charge. If it is necessary to return the product to an Aquathin Dealer for service, the buyer must pay for any shipping or travel costs. Aquathin Dealer will pay for any return shipping charges in the U.S. -
Page 42: Ppendix A - Specifications
Hardness (CaCO < 427 mg/l Iron (Fe) & Manganese < 3.0 mg/l (Mn) Hydrogen Sulfide (H 0.00 mg/l * Every system is equipped with our unique combina- tion pre-filter to remove sediment and chlorine. © 2009 Aquathin Corporation. All rights reserved. - Page 43 You can obtain specifics about your water supply from either your local water department or your local Authorized Aquathin Dealer. If the parameters of your water do not fall within the specified ranges as noted above, please contact your local Aquathin Dealer for further treatment options.
-
Page 44: Ppendix B - Replacement Schedule
4 Stage Aquathin High Flow RO 2-3 years (as needed) XF-HRO Membrane GAC Post Filter 2-3 years (as needed) CARB10 Purchase Date: _________________________________ Purchased From: _______________________________ ______________________________________________ Serial/Model Number:____________________________ Pressure Gauge Initial Reading: ____________________ © 2009 Aquathin Corporation. All rights reserved. -
Page 45: Maintenance Log
Maintenance Log Module Replaced Date © 2009 Aquathin Corporation. All rights reserved. -
Page 46: Ppendix C - Connections
Connections Sink Mounted Faucet Assembly © 2009 Aquathin Corporation. All rights reserved. -
Page 47: John Guest Speedfit® Fittings
To remove tubing: Remove the red Lock-Clip Push Collet up against body of the fitting, which will release the internal teeth. While compressing Col- let, pull out the tubing. © 2009 Aquathin Corporation. All rights reserved. -
Page 48: Aquaking Series Installation Diagram
AquaKING DIMS Installation Diagram 1) Sink Mounted Faucet 5) Main Assembly 2) Drain Saddle Valve 6) Flush Valve 3) Feed Water Valve 7) Deionization Module 4) Tank Ball Valve 8) GAC Post-Filter © 2009 Aquathin Corporation. All rights reserved. -
Page 49: Ppendix D - Schematic
Schematics © 2009 Aquathin Corporation. All rights reserved. - Page 50 © 2009 Aquathin Corporation. All rights reserved.
- Page 51 © 2009 Aquathin Corporation. All rights reserved.
- Page 52 EPA EST. NO. 52531-FL-01 © 2009 Aquathin Corporation. All rights reserved.
Need help?
Do you have a question about the AquaKING RO and is the answer not in the manual?
Questions and answers