Table of Contents
Advertisement
Advertisement
Table of Contents

Subscribe to Our Youtube Channel
Related Manuals for Body Solid Endurance E300


Summary of Contents for Body Solid Endurance E300
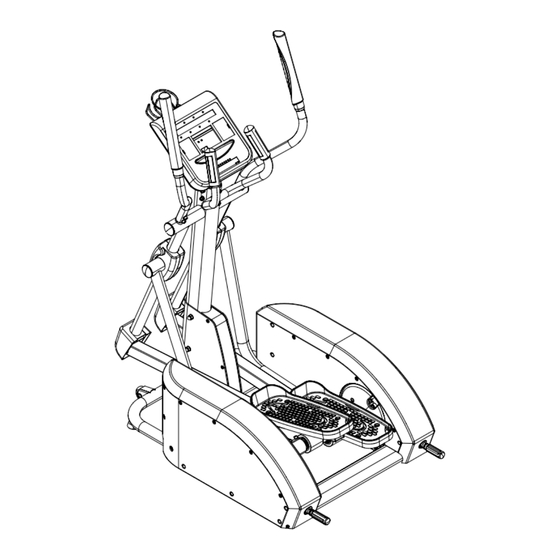
- Page 1 E300 Endurance E300 Elliptical ® User Manual v. 092209...
-
Page 2: Table Of Contents
Table of Contents Table of Contents......................... Introduction............................ Important Safety Information.................... Before You Begin.......................... Assembly............................6 - 25 Console Overview........................26 - 27 Console Operation........................28 - 34 Monitoring Your Heart Rate....................Stretching & Flexibility......................Warm-Up/Cool Down Exercises..................37 - 43 Maintenance........................... -
Page 3: Introduction
Introduction Congratulations!! Thank you for purchasing your new Endurance ® Elliptical. With state-of-the-art technique, robust frame structure and superior ergonomic design, Endurance ® Ellipticals set a new standard for excellence. Endurance ® El- lipticals can improve your quality of life by keeping you fit and healthy, increasing your energy levels and enhancing your lifestyle. -
Page 4: Important Safety Information
Important Safety Information Save this Owner’s Manual! Before beginning any fitness program, you should obtain a complete physical examination from your physician. When using exercise equipment, you must always take basic precautions, including the following: Read all instructions before using your Endurance ® Elliptical. These instructions are written to ensure your safety and to protect the unit. -
Page 5: Before You Begin
Before You Begin The Endurance ® E300 is carefully tested and inspected before shipment. We have shipped the unit in several pieces that require assembly. Carefully unpack the unit in a clear area and lay the pieces on the floor near the area where you plan to use the equipment. - Page 6 Step 1 IMPORTANT: DO NOT tighten hardware until instructed to do so. Slide Upright (F) slightly into Mainframe (A) as shown. Connect the harness from Upright (F) to the harness on Mainframe (A). Completely slide Upright (F) into Mainframe (A) and secure using: Three 168 (M10x80 allen head bolt) Nine 87 (M10 flat washer) Three 96 (M10 crown nut)
- Page 7 Step 1 Above shows STEP 1 assembled and completed.
- Page 8 Step 2 Insert Mainframe Cover (K) into Mainframe (A) and secure using: Six 63 (M5x12 phillips pan head bolt) Six 88 (M6 flat washer)
- Page 9 Step 2 Above shows STEP 2 assembled and completed.
- Page 10 Step 3 Insert Right Stride Frame (R) and Left Stride Frame (N) onto Upright (F). Secure Right Stride Frame (R) to Upright (F) using: One 78 (M10x20 hex head bolt) One 90 (M10 spring washer) One 84 (M10 washer) Insert End Cap (122) into Right Stride Frame (R). Secure Left Stride Frame (N) to Upright (F) using: One 78 (M10x20 hex head bolt) One 90 (M10 spring washer)
- Page 11 Step 3 Above shows STEP 3 assembled and completed.
- Page 12 Step 4 Lift and place Right Junction Frame (P) onto Shaft Sleeve (163) and secure using: Four 54 (M8x12 allen head) Four 86 (M10 flat washer) Lift and place Left Junction Frame (Q) onto Shaft Sleeve (163) and secure using: Four 54 (M8x12 allen head) Four 86 (M10 flat washer)
- Page 13 Step 4 Above shows STEP 4 assembled and completed.
- Page 14 Step 5 Connect Leg (L) to Right Stride Frame (R) using: One 81 (M10x81.5 hex head bolt) One 98 (M10 nut) NOTE: It is recommended that two adults align and secure the Legs to the Stride Frame. Connect Leg (M) to Left Stride Frame (N) using: One 81 (M10x81.5 hex head bolt) One 98 (M10 nut) NOTE:...
- Page 15 M10*81.5 Hex Bolt and one M10*1.5 Hex Nut. Please ensure that Pedal Arm is aligned in the center of roller wheel while tightening Step 5 M10*81.5 bolt (Figure 5a). Repeat for the left side. Note: It is recommended that 2 adults align and secure the Pedal Tube Assemblies to the Handrail Assemblies.
- Page 16 Step 6 Connect Bracket Cover (30) to Right Stride Frame (R) using: One 66 (M5x12 phillips head pan screw) NOTE: Do not overtighten screw, this will damage Bracket Cover (30). Connect Bracket Cover (30) to Left Stride Frame (N) using: One 66 (M5x12 phillips head pan screw) NOTE: Do not overtighten screw, this will damage Bracket Cover (30).
- Page 17 Step 6 Above shows STEP 6 assembled and completed.
- Page 18 Step 7 Insert Right Arm (G) into Right Stride Frame (R) and secure using: Three 77 (M8x16 allen head bolt) Three 86 (M8.4 flat washer) Insert Left Arm (I) into Left Stride Frame (N) and secure using: Three 77 (M8x16 allen head bolt) Three 86 (M8.4 flat washer)
- Page 19 Step 7 Above shows STEP 7 assembled and completed.
- Page 20 Step 8 Connect Upper Console Wire and Heart Rate Wires to the back of Console (15). NOTE: The single Heart Rate ground spade connector is connected to the left of the red console harness. Ensure that all wires are secure inside console.
- Page 21 Step 8 Above shows STEP 8 assembled and completed.
- Page 22 Step 9 Connect the harness on Handle Bar (E) to the harness on Upright (F) as shown. Connect Handle Bar (E) to Upright (F) using: Two 68 (M8x120 allen head bolt) Eight 86 (M8.4 washer) Four 95 (M8 crown nut) Two 69 (M8x75 allen head bolt) NOTE: Ensure that all wires are secure inside Handle Bar (E) and Upright (F).
- Page 23 Step 9 Above shows STEP 9 assembled and completed.
- Page 24 Step 10 Connect Water Holder (119) to Upright (F) using: Three 67 (M5x12 pan head bolt) Tighten all installed assembly hardware at this time. Congratulations!! The installation of your new Elliptical is complete.
- Page 25 Step 10 Above shows STEP 10 assembled and completed.
-
Page 26: Console Overview
Console Overview Take a few moments to review the console layout. Below is an overview of the con- sole buttons and their different functions. Control Buttons Message Window Profile Window Training Diagram Program Profiles... -
Page 27: Console Overview
Console Overview START Press the START button to enter the Quick Start Mode. In Pause Mode, the START button is used to resume the exercise session. ENTER/SCAN In Program Mode, the ENTER/SCAN button is used to confirm the values you set. During exercise, press the ENTER/SCAN button once and the main console window is placed in Auto Scan Mode. -
Page 28: Console Operation
Console Operation There are two information windows on the console: MESSAGE WINDOW The MESSAGE WINdOW displays Program Names, Messages, TIME, DISTANCE, SPEED, STRIDE/MIN, CALORIES, PULSE, RESISTANCE LEVEL and CALORIE/HOUR. Console Message Window PROFILE WINDOW This 10 X 14 LED PROfILE WINdOW displays Program Profile, Tension (Resistance) Bar, Heart Rate Bar (HR Programs only), Lap Progress Display and Lap Counter. -
Page 29: Console Instructions
Console Operation LAP DISPLAY Console Instructions Lap Display shows your progress around a virtual track. Lap Display also shows the resistance level in the first column. Every dot in the resistance column represents an LAP DISPLAY - Shows your progress around an virtual track. This also shows the tension increment of two resistance levels. - Page 30 Console Operation QUICK START MODE The Quick Start Program allows the user to quickly start using the machine without the use of preset programs. To enter Quick Start (Manual) Mode: Plug power adapter into wall outlet. Plug the adapter cord into the power input located on the lower front-left side of the unit.
-
Page 31: Program Profiles
WEIGHT will show in Message Window. Use the +/- buttons to set weight. Press ENTER/SCAN WEIGHT will show in Message Window. Use the +/- buttons to set weight. Press ENTER/SCAN to confirm weight setting. Weight default is 150 pounds. Weight settings can range from 70 to confirm weight setting. - Page 32 Console Operation InTErvAL ProgrAMS ovErvIEw These programs give users the best of both worlds. Lower intensity levels can provide effective fat burning while higher intensity levels can provide effective cardiovascu- lar training. The E300 combines these benefits in three effective Interval programs. InTErvAL This program simulates interval training thru a series of two hill profiles.
- Page 33 Console Operation DURING OPERATION The Console will display and update calculated workout data in each of the windows. The Console will continue to count down until TIME has reached 0:00. Use the MORE /LESS buttons to adjust the resistance level at any time during your workout ses- sion.
- Page 34 Console Operation STANDARD TO METRIC CONvERSION The console allows the user to display the readout in either standard or metric units depending on the user’s needs. To adjust the readout, press the PAUSE/RESET button for 2 seconds. The current readout, whether standard or metric, is displayed on the MESSAGE WINdOW.
-
Page 35: Monitoring Your Heart Rate
Monitoring Your Heart Rate To obtain the greatest cardiovascular benefits from your exercise workout, it is im- portant to work within your target heart rate zone. The American Heart Association (AHA) defines this target as 60% -75% percent of the Maximum Heart Rate. The Maximum Heart Rate may be roughly calculated by subtracting the user’s age from 220. -
Page 36: Stretching & Flexibility
Stretching & flexibility Flexibility is an important component of physical fitness and needs to be addressed in a resistance training program. The two main purposes for stretching are injury preven- tion and a faster rate of recovery from exercise. Stretching should be performed in both the warm up and cool down phases of a training session. -
Page 37: Warm-Up/Cool Down Exercises
Warm Up/Cool down Exercises UPPEr Back Cross Arm in Front of Chest MUSCLE(S) AFFECTED: latissimus dorsi and teres major Stand or sit with the right arm slightly flexed (15° to 30°) and adducted across the chest. Grasp the upper arm just above the elbow, placing the left hand on the posterior side of the upper arm. - Page 38 Warm Up/Cool down Exercises lOwEr Back Semi-Leg Straddle MUSCLE(S) AFFECTED: spinal erectors Sitting, knees flexed 30 to 50 degrees, let the legs totally relax. Point the knees outward; the lateral side of the knees may or may not touch the floor. Lean forward from waist and reach forward with extended arms;...
- Page 39 Warm Up/Cool down Exercises chEST/ShOUldEr Straight Arms Behind Back MUSCLE(S) AFFECTED: deltoids and pectoralis major Standing, place both arms behind back. Interlock fingers with palms facing each other. Straighten arms fully. Slowly raise the straight arms; hold for 10 to 15 seconds. Keep head upright and neck relaxed.
- Page 40 Warm Up/Cool down Exercises aNTEriOr OF Thigh aNd hiP FlEXOr Side Quadricep Stretch MUSCLE(S) AFFECTED: quadriceps and iliopsoas Lie on left side with both legs straight. Place left forearm flat on floor and upper arm perpendicular to floor. Place left forearm at 45° angle with torso. Stretching the quadriceps Flex right leg with heel of right foot moving toward buttocks.
- Page 41 Warm Up/Cool down Exercises POSTEriOr OF Thigh Stretching the hamstrings Semistraddle (Figure Four) with emphasis on insertion of the hamstrings and calves MUSCLE(S) AFFECTED: gastrocnemius, hamstrings and spinal erectors Sit with the upper body nearly vertical and legs straight. Place sole of left foot on left side of right knee. The lateral side of left leg should be resting on the floor.
- Page 42 Warm Up/Cool down Exercises grOiN Butterfly MUSCLE(S) AFFECTED: adductors and sartorius Sitting with the upper body nearly vertical and legs straight, flex both knees as the soles of the feet come together. Pull feet toward body. Place hands on feet and elbows on legs. Pull torso slightly forward as elbows push legs down;...
-
Page 43: Warm-Up/Cool Down Exercises
Warm Up/Cool down Exercises hiPS Forward Lunge (Fencer) MUSCLE(S) AFFECTED: iliopsoas, rectus femoris 1. Standing, take a long step forward (as with the lunge) with the right leg and flex the right knee until it is directly over the right foot. Keep right foot flat on floor. -
Page 44: Maintenance
Maintenance Maintenance Instructions Your Endurance ® E300 Elliptical has been manufactured to withstand many hours of use with CLEANING/MAINTENANCE - minimal maintenance. Here are some maintenance tips to keep your Endurance ® E300 Ellipti- Your CG3 Elliptical has been manufactured to withstand many hours of use with minimal cal running at its best. -
Page 45: Troubleshooting Guide
Troubleshooting Guide Symptom Solution Possible Cause DC adapter is not plugged Plug DC adapter into wall outlet. into wall outlet? Console has no power. DC adapter is not plugged into the E300? Plug DC adapter into the E300 power socket. Console cable is not connected? Verify that the console cable is connected properly. -
Page 46: Parts List
Endurance ® E300 Parts List Part # Ref# Quantity Description @2XSZ MAINFRAME @2XTF HANDLE BAR @2XTC UPRIGHT @2X7V ARM (RIGHT) @2X7U ARM (LEFT) @2XV4 MAINFRAME COVER @2MJY @2MK4 @2YAR STRIDE FRAME (LEFT) @2YAT JUNCTION FRAME (RIGHT) @2YAU JUNCTION FRAME (LEFT) @2YAP STRIDE FRAME (RIGHT) 01FD... - Page 47 Endurance ® E300 Parts List Part # Ref# Quantity Description 2H66 HEX HEAD BOLT M10*1.5-210 21NP HEX HEAD BOLT (ZINC) M12*1.75-110 2LXT SOCKET HEAD BOLT CAP (BLACK) M12X1.75-55 2J78 SOCKET HEAD CAP BOLT (ZINC w/PLASTIC) M8x1.25-12 2Y04 TRUSS HEAD TAPPING SCREW (K-TYPE ZINC) M5x16-8 0K94 TRUSS HEAD TAPPING SCREW...
- Page 48 Endurance ® E300 Parts List Part # Ref# Quantity Description 22RR NUT (ZINC) M10*1.5,T8 21X8 SPACER 01HR TRANSFORMER 01HU POWER SOCKET 01J8 REED SWITCH 01HL MOTOR 2MXU WIRE ASSEMBLY 1100MM 22AWG 7C 2MXV WIRE ASSEMBLY 1300MM 22AWG 7C 2MY0 WIRE ASSEMBLY 350mm 22AWG 2C 2XYR CHEST STRAP...
-
Page 49: Parts List
Endurance ® E300 Parts List Part # Ref# Quantity Description 2UTT BALL BEARING 2205 2NHZ C-RING (BLACK) B-52 2X71 ARBOR COLLAR (A) 2PJQ LINKING SEAT 2HMD SOCKET TRUSS HEAD BOLT (ZINC w/PLASTIC) M10x1.5-80 0JEJ C-RING A-25 0KNM M10X1.5 T=8 25VV C-RING (BLACK) B-47 2XXU... -
Page 50: Hardware
Endurance ® E300 Hardware (Actual Size Shown) -
Page 51: Hardware
Endurance ® E300 Hardware (Actual Size Shown) - Page 52 Endurance ® E300...
-
Page 53: Exploded View
Exploded View... - Page 54 Serial number is Located on the Frame E 300 Model name Purchase Date : _______________________________ Serial number : _______________________________ Customer Tech Support Hotline Toll Free: 1-800-556-3113 Phone: 1-708-427-3555 Fax: 1-708-427-3556 Hours: M-F 8:30-5:00 CST E-Mail: service@bodysolid.com...
Need help?
Do you have a question about the Endurance E300 and is the answer not in the manual?
Questions and answers