
Related Manuals for Clavia Nord Piano 88


Summary of Contents for Clavia Nord Piano 88
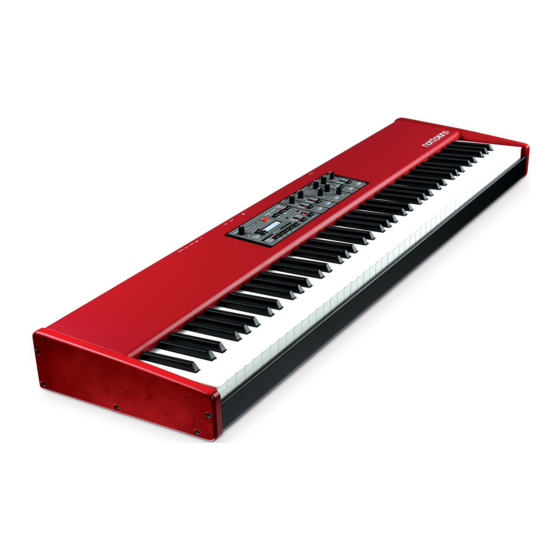
- Page 1 User Manual Nord Piano OS Version 1.x Part No. 50312 Copyright Clavia DMI AB Print Edition 1.2...
-
Page 2: Important Safety Instructions
CAUTION - ATTENTION The lightning lash with the arrowhead symbol within an equilateral triangle is intended to alert the user to the RISK OF ELECTRIC SHOCK presence of uninsulated voltage within the products en- DO NOT OPEN closure that may be of suficient magnitude to constitute a risk of electric shock to persons. -
Page 3: Table Of Contents
Transfer pianos to the Piano ... . . 20 Piano Type......13 Deleting a piano . -
Page 4: Thank You
Since the Nord Piano is designed as an “open system”, each and every piano in the Nord Piano can be replaced by you. This is done using the You are probably very eager to start using your new instrument, and free Nord Sound Manager application. -
Page 5: The Piano
Piano Library V5 play sustained notes. The Nord Piano is compatible with version 5 of the piano sounds in the Another thing that the String Resonance produces is a crescendo Nord Piano Library. We have spent a lot of time and effort in creat- effect. -
Page 6: Knobs & Buttons
Piano Effects The front panel of the Nord Piano has three main areas, Program, Piano, and Effects. We’ll familiarize ourselves briely with the panel here and de- scribe the functions in detail in the following chapters. On the left upper part of the panel are the Master Level knob that controls the entire instrument’s output level at the two output jacks and the head- phone output. -
Page 7: Audio Connections
PEDAL Audio connections USB Connection The USB connection is used for the Nord Piano to communicate with a Headphones personal computer in order to update the OS or to add or replace any of the piano sounds. The computer can run the Nord Sound Manager This is where you connect a ¼"... -
Page 8: Pedal Connection
The Nord Triple Pedal has the functionality of three pedals in one unit. The Nord Piano has one input for the Nord Triple Pedal. If this pedal is The right pedal is the sustain pedal. If you operate this, all the notes that unavailable, you can use a standard, non-continuous sustain pedal. -
Page 9: About The Programs
Getting Started Let’s take a few minutes to get familiar with the Nord Piano. The user interface is designed to be as intuitive as possible, and to perform as well as you do in a live situation. We hope that you soon will feel conident in using it, and by following this short chapter, we will go through most of the functions. -
Page 10: Live Mode
Turn on Effect 1 and select the A-Wa1. The A-Wa is a automatic, dynamic Wah-wah effect. It will affect Use the Piano Model selector to select one of the electric pianos that the sound depending on the volume of the signal. -
Page 11: Acoustics
Play and hold a chord with your left hand, and while the sound decays, play some staccato notes with your right hand. You can However, If you want the piano sounds to respond more easily to key- hear that some of the new notes excites the held notes, making board velocity, you can set this with the Kbd Touch feature. -
Page 12: Master Level
The LCD will show the active program number, the name of the pro- Nord Piano, at the L/R and the headphone gram and the name of the piano model that the programs uses. If you outputs. edit a program, an asterisk will appear next to the program number, at the upper left of the display. -
Page 13: Programs 1 ~ 5
Harpsichords buttons. The type of a piano has been determined by the Bith at the Nord If the Live memory is selected and you decide you wish to store HQ. You cannot move a piano from one type to another. -
Page 14: Transpose Clear
The Active LED will be lit whenever a transpose value have been set. the sustain pedal on a acoustic piano. The Nord Triple Pedal is dy- namic, you can control the level of the noise by the force you use when This transposition will also affect the MIDI output from the Nord you operate the sustain pedal. -
Page 15: Effect 1
Equalizer Effect 1 offers three different types of effects: The Nord Piano has a 3-band EQ with treble, bass and a sweep-able Tremolo, Auto-Panning, and 2 types of Wah-Wah. midrange (4 kHz, 100 Hz and 200 Hz ~ 8 kHz). The frequencies can be boosted/attenuated with +/- 15 dB. -
Page 16: System Menu
There is one exception, one menu setting that doesn’t get automatically stored when you power off the Piano, and this is the MIDI Local On/Off setting. This always reverts to Local On every time the Nord Piano is powered up. -
Page 17: Dump All
This allows you to perform a MIDI SysEx dump of all the Programs in the Nord Piano. Press the Store button to perform the transmission. In the MIDI chapter on page 26 is a description on how the Nord Piano receives a Sys Ex dump. -
Page 18: System Requirements
The Nord Sound Manager is the application that allows you to organize the various memory areas, the partitions in the Nord Piano. It is also used to download pianos or programs to the Nord Piano or to upload any of these items - called sounds - from the Nord Piano memory to the computer hard drive. -
Page 19: The Toolbar
Download This is only available if you right-click on Select the partition that you wish to work in with the Tabs. The Piano an empty location that does not contain a tab allows you to change the content of the piano partition and the sound. -
Page 20: The Quick Tour
Transfer pianos to the Piano Download Queue When the Nord Piano leaves the factory, the Piano partition is illed with sounds. In order to be able to download additional pianos, you may You can add several sounds, one by one, using the drop method, or have to delete some of the factory pianos. -
Page 21: Organize The Program Partition
When you click on Download a dialogue appears to inform you that the content of the destination bank in the Nord Piano will be replaced with that of the source ile. If you select All in the destination bank drop down, you can replace all the sounds in a partition with those on a folder structure on the hard drive. -
Page 22: Menus
This will make a backup of all the pianos, programs, Live programs sound in the Nord Piano. and the menu settings in the Nord Piano. The ile that is created on the hard drive will have the extension .npb. Backing up the entire memory... -
Page 23: Edit
Restore (Ctrl+R) Drag a program from one bank/list to another bank/list in either direc- To restore a previously saved backup ile to the Nord Piano, select this tion. option and browse to a backup ile on the hard drive (ile extension Press the Ctrl-key on the computer keyboard to copy a selection .npb) and click Open. -
Page 24: Tabs
The left part of the text area will present any conirmations or error messages from the Nord Sound Manager. Name The right part will indicate of a Nord Piano is connected to the com- puter and in communication with the Nord Sound Manager. The OS The name of the item. -
Page 25: About The Midi Imp
Nord Piano (or use the USB capabilities). Controllers Local On/Off In the MIDI Menu (see page 16), you can select if the Nord Piano should transmit and/or receive Control Change messages. Local Off may be used when you use a sequencer to record and play back from Nord Piano. -
Page 26: Program & Controller Dumps
Mono Output Acoustic Model String Resonance Sending program dumps Acoustic Model Pedal Noise Connect the MIDI OUT on the Nord Piano to the MIDI In on the EQ On/Off receiving device (or use the USB capabilities). EQ Treble EQ Mid... -
Page 27: Midi Implementation Chart
True Voice Mode 1: Omni On, Poly - Mode 2: Omni O, Mono - Mode 3: Omni Off, Poly - Mode 4: Omni Off, Mono - O = Yes - X = No Model: Nord Piano OS v1.x Date: 2010-04-02... -
Page 28: Index
28 | Nord PiaNo User MaNUal os v1.X Index Acoustics 14 Left Out 7 Up/Down buttons 12 Auto-Panning 15 Live 10 Upload 20 A-Wa 15 Live Mode 13 Loc 23 Local 16 Local Control 16 Wah-Wah 15 Backup 22 Bank Down 22...
Need help?
Do you have a question about the Nord Piano 88 and is the answer not in the manual?
Questions and answers