
Related Manuals for Meyra-Ortopedia 2.663

Summary of Contents for Meyra-Ortopedia 2.663
- Page 1 Operating manual SCOOTER, Model 2.663 – 3-wheel Model 2.664 - 4-wheel Model 2.764 - 4-wheel XL m o v e p e o p l e .
-
Page 2: Table Of Contents
Specifications....................8 Use........................8 Adjustment....................9 Life.span......................9 Overview...................... 10 Model: 2.664 4-wheel, 2.764 4-wheel XL ............10 Model:2.663 3-wheel ..................11 Control panel ......................12 Driving lock ......................12 Battery charging socket ..................12 Handling.the.SCOOTER................13 Functional checks ....................13 Locking the SCOOTER ..................13 Drive key ......................14... - Page 3 Driving.behaviour..................21 Direction of travel ....................21 Acceleration rotary grip , foot accelerator ..........21 Actuator ......................22 Driving speed ......................22 Forward driving speed ..................22 Backwards driving speed ................22 Left/right turns....................23 Brakes......................24 Operating brake ....................24 Parking brake .....................24 Braking the SCOOTER................24 Dosed braking ....................24 Emergency braking ..................24 Braking distance ....................24...
- Page 4 Components....................29 Seat ........................29 Seat compartment ..................29 Turning the seat ....................30 Removing the seat ..................30 Attaching the seat ..................30 Swivelling up the arm support ..............31 Adjusting the angle of the arm support .............31 Arm support compartment ................31 Adjusting the back support ................32 Lordosis adjustment ..................32 Adjusting the distance seat to tiller ............32 Steering column ....................33...
- Page 5 Kilometric performance ..................43 Hill climbing ability ..................43 Fuses ........................44 Lighting .......................44 Model 2.663 / 2.664 ....................45 Model 2.764 - 4-wheel XL ..................48 Meaning of the labels on the SCOOTER............ 51 Symbols .......................51 Meaning of the symbols on the type plate ............52 Inspection.certificate..................
-
Page 6: Introduction
For users with visual impairments the ☞ .. N ote: PDF-files of the above mentioned doc- Please note that the illustrated uments can be accessed on our web- equipment variants can deviate site < www.meyra-ortopedia.com >. from your model. ☞ Contact your specialist dealer We have therefore also listed chapters when required. -
Page 7: Indications
INDICATIONS ACCEPTANCE If the following indications occur we All products are checked for faults recommend the application of this in the factory and packed in special mobility product: boxes. ☞ Extremely limited walking abilities ☞ .. N ote: in the scope of the basic require- However, we request that you ment to move around in your own check the vehicle for possible... -
Page 8: Specifications
SPECIFICATIONS . Attention: The SCOOTER is an environment- friendly electronic vehicle. It was de- The general capability of the driv- veloped to extend the mobility of er to participate in traffic must be persons with health-related or age- given! related restrictions. This model is a SCOOTER for driving ☞... -
Page 9: Adjustment
ADJUSTMENT LIFE.SPAN The specialist dealer hands your We expect an average lifespan of SCOOTER over under consideration about 5 years for this product, as far of all relevant safety regulations in an as the product is applied for its des- operationally ready state and adjust- ignated purpose and all maintenance ed to your demands. -
Page 10: Overview
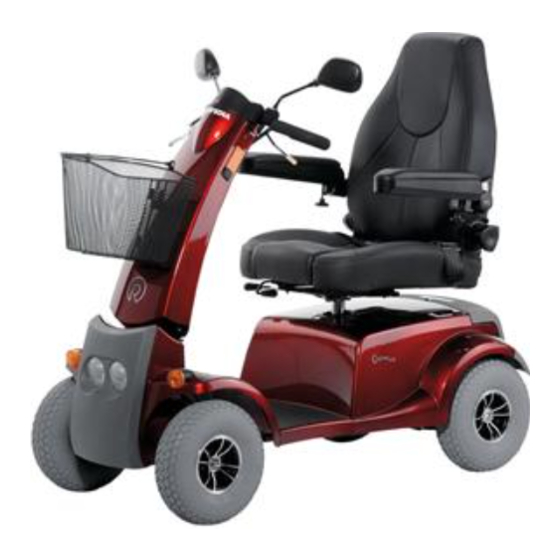
OVERVIEW Model:.2.664.4-wheel,.2.764.4-wheel.XL The overview shows the most important components and operating equipment. Pos. Description Pos. Description 1 Seat 10 Actuator 2 Handle bar grip 11 Control panel 3 Hand brake 12 Front basket 4 Steering column 13 Lever for steering column lock- ing device 5 Drive key 14 Lever for seat lock... -
Page 11: Model:2.663 3-Wheel
Model:2.663.3-wheel The overview shows the most important components and operating equipment. Pos. Description Pos. Description 1 Seat 10 Actuator 2 Handle bar grip 11 Control panel 3 Hand brake 12 Front basket 4 Drive key 13 Lever for steering column lock-... -
Page 12: Control Panel
Control.panel ☞ .. N ote: The function and meaning of the keys and symbols are explained in the separate operating manual < Control panel with LCD-Dis- play >. Driving.lock (4) Driving lock (0) Key position 0 (OFF) (1) Key position 1 (Push mode) (2) Key position 2 (ON) Battery.charging.socket (5) Battery charging socket... -
Page 13: Handling.the.scooter
HANDLING.THE.SCOOT- . Attention: Observe the safety and general handling instructions < Electronic vehicles >! Functional.checks The functions and safety of the SCOOTER must be checked before the start of each journey. ☞ Hereto observe chapter < Pre-op- eration checks >. Locking.the.SCOOTER In order to secure the SCOOTER against unpermitted use, switch off... -
Page 14: Drive Key
Drive.key Position.of.drive.key ☞ Therefore also observe the operat- ing manual < Control panel with LCD-display >! Position OFF The driving key is inserted parallel to the steering column as far as possible into the driving key socket (0). – For switching off turn the driving key from the position (1)+(2) as far as possible counter clockwise (0). -
Page 15: Director
Director The desired driving speed is achieved through activation of the director via the: – the actuator as a seesaw device for thumb activation (standard), – the actuator as a finger seesaw le- ver (option), – the actuator as a thumb or finger seesaw lever (option) (1), –... -
Page 16: Drive-/Push Mode
Drive-/push.mode ☞ .. N ote: ☞ The weight of the SCOOTER makes corresponding steering and push- ing forces necessary. ☞ Switch the SCOOTER into the push mode only for manoeuvring on a level surface. Selecting.the.motor.mode For this insert the driving key into the socket and turn 90°... -
Page 17: Selecting.the.operation
SELECTING.THE.OPERA- TION In order to obtain operational readi- ness of the SCOOTER the following directions are to be carried out in the indicated order. ☞ Note: Before first use the drive batter- ies should be charged through the charging socket (1). ☞... - Page 18 2.. Adjusting.the.steering.column The steering column is to be adjusted so that the SCOOTER can be steered comfortably and safely. – For adjusting the steering column press the lever of the steering col- umn locking device (1) down. ☞ Hereto observe chapter < Steering column >.
-
Page 19: Pre-Operation.checks
PRE-OPERATION.CHECKS ☞ Therefore observe the operating manual < Control panel with LCD- display >! Before starting to drive, the following should be checked: ☞ the battery charging condition (1). ☞ the preselected maximum final speed setting (2). -
Page 20: Battery Charging Procedure
Battery.charging.procedure For the battery charging procedure park and secure the SCOOTER on a level surface. ☞ View chapter < Securing the SCOOTER >. 1. Swivel the cover of the battery charging socket to the side and plug the battery charger into the battery charging socket (1). -
Page 21: Driving.behaviour
DRIVING.BEHAVIOUR Speed is determined by motion of the director: – The actuator (1), – the acceleration rotary grip, – the foot accelerator as well as the preselected final speed. . Attention: Drive especially carefully during the first journeys! ☞ Preselect the lowest final speed for this purpose. -
Page 22: Actuator
Actuator The driving direction is determined through the activation side of the ac- tuator. Forward motion Press cap with thumb Right dent Pull lever with hand Left (option) Rearward travel Press cap with thumb Left dent Pull lever with hand Right (option) Driving.speed... -
Page 23: Left/Right Turns
Left/right.turns In order to drive curves, move the steering column to the right or left with the handles, depending on the desired curve radius. ☞ Curves are to be driven through at adequate speed. . Attention: Danger of tilting when turning around, especially on slopes and hills! The SCOOTER features and automatic... -
Page 24: Brakes
BRAKES Emergency.braking Let the actuator (director) independ- . Attention: ently jump back into the zero-posi- If the braking force reduces imme- tion. – The SCOOTER brakes down at diately have the brakes repaired by shortest distance. a specialist workshop. • An abrupt braking when driving ☞... -
Page 25: Hand Brake
Hand.brake The handbrake is fit with a drum brake on each front wheel. . Attention: For optimal braking effect the drum brake is to be kept free of grease, oil, gunge and dust. – Dan- ger of accidents! Locking.the.hand.brake – Pull the brake lever (1). –... -
Page 26: Loading.and.transportation
LOADING.AND.TRANS- Transport.of.people.inside.a. motor.vehicle PORTATION To determine if your individual SCOOT- ☞ Do not use the back support, arm ER is approved as a seat for transport supports or steering column in or- inside a motor vehicle, please look at der to lift the SCOOTER! the type plate. -
Page 27: Transport Security
Transport.security ☞ View document safety and general handling instructions < Electronic vehicles > chapter < Transport in motor vehicles or conveyors >. 1.. Establish.electrical.safety ☞ For this observe the regulations of the respective transport company. –. Switch.the.SCOOTER.off Switch off the SCOOTER and pull out the driving key. -
Page 28: Reducing The Size Of The Scooter
Reducing.the.size.of.the. SCOOTER For storage or the transport (e.g. in a car), the size of the SCOOTER can be reduced as follows (1). 1. Switch off the SCOOTER and pull out the drive key. 2. Remove the front basket. ☞ See section entitled < Front bas- ket >. -
Page 29: Components
COMPONENTS Seat ☞ .. N ote: The seat supplied [1] may vary from the one shown in the illustration. The seat with upholstered arm sup- ports can be swivelled, height adjust- ed and removed. ☞ .. N ote: Entry/exiting, into/from a SCOOT- ER standing laterally to the surface gradient, is only permitted when the seat is not turned. -
Page 30: Turning The Seat
Turning.the.seat The seat can be turned for an easier transfer to or from the seat. – In order to turn the seat, turn the locking lever (1) as far as possible counter-clockwise. – When the desired seat setting is reached, let the locking lever (1) lock into place again. -
Page 31: Swivelling Up The Arm Support
Swivelling.up.the.arm.support The arm supports can be swivelled up for an easier transfer to/from the seat (1). Adjusting. the. angle. of. the. arm. support Depending on the version, the angle of the arm support can be adjusted continuously by turning the adjust- ment knob (2). -
Page 32: Adjusting The Back Support
Adjusting.the.back.support To adjust the angle of the back sup- port turn the right or left hand- wheel (1) until the desired position is reached. Lordosis.adjustment Turn the handwheel (2) in the desired direction for a lordosis adjustment. Adjusting. the. distance. seat. to. tiller After engaging the locking lever (3) the distance of the seat to the tiller... -
Page 33: Steering Column
Steering.column Adjusting.the.steering.column For continuous adjustment of the steering column press down the lever of the steering column locking device (1) down. . Attention: Steady the steering column with one hand on the handlebar when doing this in order to prevent an uncontrolled swivelling up of the steering column. -
Page 34: Rear Compartment
Rear.compartment The lockable compartment (1) serves for transport of for example the charger (2). ☞ .. N ote: ☞ Locking and unlocking the com- partment is done with the driving key. ☞ Do not place hot objects onto the compartment. ☞... -
Page 35: Retaining Strap
Retaining.strap The retaining strap [1] serves to hold a person sitting inside the SCOOTER in place. – Additional stabilisation of the sit- ting position. – Prevents the user from slipping forwards out of the seat (e.g. dur- ing abrupt braking). The retaining strap is screwed onto Adjustment.of.belt.length the bottom of the seat. -
Page 36: Maintenance
MAINTENANCE An incorrect or neglected cleaning and maintenance results in a limita- tion of the product liability. Maintenance The following maintenance schedule gives you a guide for carrying out the maintenance. ☞ They do not give information about the actual extent of work required on the vehicle. -
Page 37: Maintenance Schedule
Maintenance.schedule WHEN WHAT REMARK Before.starting. General Carry out test yourself or with a helper. Test for faultless op- eration. Checking.the.mag- Carry out test yourself or with a helper. netic.brake If the electric wheelchair Move the selection le- can be pushed, have the ver for the drive/push brakes repaired... - Page 38 WHEN WHAT REMARK Do it yourself or with the Every.6-8.weeks Wheel.attachments aid of a helper. (depending on dis- Wheel nuts or screws tance covered) Securely tighten any loos- are to be checked for ened wheel nuts or screws tight fit and retighten again af- ter 10 operating hours or resp.
-
Page 39: Lighting
Lighting ☞ .. N ote: If a turn-signal bulb is defective, the remaining one blinks at double frequency. Replacing. defective. filament. bulbs ☞ .. N ote: Have a defective bulb replaced by a specialist workshop. Adjusting.the.headlights The housing of the light (1) must be adjusted so that the light cone is vis- ible on the driving surface. -
Page 40: Fuses/Connections
Fuses/connections Mains-/battery.fuses The mains/battery fuse is located be- tween the plus-conduits of the bat- tery connection cable inside a fuse bracket (1). Replace.fuse Before replacing a fuse, place and secure the SCOOTER on a horizontal, level surface. ☞ Therefore observe chapter < Secur- ing the SCOOTER >. -
Page 41: Fault.correction
FAULT.CORRECTION Fault Cause Remedy display shows A main-/battery fuse is Insert a new charging nothing after activa- defect. fuse or have it repaired tion. in a specialist work- shop. Batteries deep dis- Have it repaired by the charged specialist workshop. Error E-- is shown in the The actuator moved Switch the SCOOTER... -
Page 42: Information For The Specialist Dealer
Maintenance and Service manuals can ER can be adjusted through the pro- be retrieved from our website < www. gramming device. meyra-ortopedia.com >. You can for ☞ example find the following informa- Therefore observe the correspond- ing < Maintenance- and service tion in these manuals: manual >. -
Page 43: Technical.data
TECHNICAL.DATA The kilometric performance is greatly reduced by: Kilometric.performance – frequent uphill driving, – insufficient charging condition of Kilometric performance depends to a the drive batteries, large extent on the following factors: – low ambient temperature – battery condition, (e.g. in winter), –... -
Page 44: Fuses
Fuses ☞ Therefore observe chapter < Fuses/connections >. Mains-/battery fuse: ............2 x 100 A Battery charging fuse..............15 A Lighting Headlight bulb: ......Filament bulb 12 V / 15 W P26S Front indicator: ......Filament bulb 12V/10W BA15S Tools No tools are required for the adjustments described in this operating manual. -
Page 45: Model 2.663 / 2.664
All data within the following table relates to the standard version of the stated model. Dimensional tolerance ± 1 cm, ± 2°. Model:............2.663.(3-wheel).2.664.(4-wheel) Type plate: ..................at the seat brace Class of use as per DIN EN 12184 ..............Class C Life span: ...................... - Page 46 Transport.dimensions (without basket, without seat): Length (3-wheel/ 4-wheel): .............. 1370 / 1370 mm Width: ......................680 mm Height (steering column folded-over): ............740 mm Climatic.data: Ambient temperature: ..............-25 °C to +50 °C Storage temperature with drive batteries: ........-25 °C to +50 °C Storage temperature without drive batteries: .......
- Page 47 Weights: Max. permissible total weight: ............... 375 kg Permitted axle load front:................120 kg Permitted axle load rear: ................260 kg max. permissible user weight: ............... 180 kg Max. loading in front basket: ................10 kg Empty weight (with seat, batteries) (3-wheel/ 4-wheel): ....138 / 150 kg Weight of single component: Seat: ........................22 kg XL-Seat: ........................28 kg...
-
Page 48: Model 2.764 - 4-Wheel Xl
Model.2.764.-.4-wheel.XL All data within the following table relates to the standard version of the stated model. Dimensional tolerance ± 1 cm, ± 2°. Model:................2.764.-.4-wheel.XL Type plate: ..................at the seat brace Application class acc. to DIN EN 12184: ............Class C Life span: ...................... - Page 49 Transport.dimensions (without basket, without seat): Length (4-wheel): ..................1520 mm Width: ......................680 mm Height (steering column folded-over): ............740 mm Climatic.data: Ambient temperature: ..............-25 °C to +50 °C Storage temperature with drive batteries: ........-25 °C to +50 °C Storage temperature without drive batteries: .......
- Page 50 Weights: Max. permissible total weight: ............... 400 kg Permitted axle load front:................120 kg Permitted axle load rear: ................285 kg max. permissible user weight: ............... 200 kg Max. loading in front basket: ................10 kg Empty weight (with seat, batteries): .............. 160 kg Weight of single component: Seat: ........................22 kg XL-Seat: ........................28 kg...
-
Page 51: Meaning Of The Labels On The Scooter
Meaning.of.the.labels.on.the.SCOOTER Attention! Read the operating manuals and other provided doc- umentation. Do not lift the SCOOTER at the arm supports or leg supports. Removable parts are not suited for carrying the vehicle. Drive mode Push mode Push only on level surfaces. Indication for charging socket Attachment possibility of the transport securing sys- tem. -
Page 52: Meaning Of The Symbols On The Type Plate
Meaning.of.the.symbols.on.the.type.plate Manufacturer Order number Serial number Production date (Year – Calendar week) Permitted user weight Max. permissible total weight Permitted axle loads Max. permissible rising gradient Max. permissible falling gradient Max. permitted final speed This product type is approved as a seat within a motor vehicle This product type is not approved as a seat within a motor ve- hicle. -
Page 53: Inspection.certificate
INSPECTION.CERTIFICATE Recommended.safety.inspection.1st.year (at.least.every.12.months) Vehicle.data: Stamp of specialist dealer: Model: Signature: Delivery note no.: Place, date: Serial-no. (SN): Next safety inspection in 12 months Date: Recommended.safety.inspection.3rd.year Recommended.safety.inspection.2nd.year (at.least.every.12.months) (at.least.every.12.months) Stamp of specialist dealer: Stamp of specialist dealer: Signature: Signature: Place, date: Place, date: Next safety inspection in 12 months Next safety inspection in 12 months... -
Page 54: Warranty./.Guarantee
WARRANTY./.GUARAN- Interferences through radiation sources such as mobile phones with high transmission power, HiFi-equip- ment and other extreme interference We accept legal liability for this prod- radiators outside of norm specifica- uct within the scope of or general tions cannot be declared as warranty terms and conditions and warranty or guarantee claims. -
Page 55: Warrantee / Guarantee Section
Warrantee./.Guarantee.section Please fill out! Copy if necessary and send the copy to the specialist dealer. Warranty / Guarantee Model designation: Delivery note no.: SN (view type plate): Date of delivery: Stamp of the specialist dealer: Inspection.certificate.for.transfer Vehicle.data: Serial-no. (SN): Stamp of specialist dealer: Model: Signature: Place, date:... - Page 56 Your specialist dealer: MEYRA-ORTOPEDIA Vertriebsgesellschaft mbH Meyra-Ring 2 · D-32689 Kalletal-Kalldorf P.O. Box 1 703 • D-32591 Vlotho Fon +49 (0)5733 922-311 Fax +49 (0)5733 922-9311 info@meyra-ortopedia.de www.meyra-ortopedia.de m o v e p e o p l e . 205 316 801 (Status: 2012-01) Original operating manual! Subject to technical modifications! •...
Need help?
Do you have a question about the 2.663 and is the answer not in the manual?
Questions and answers