Advertisement
Available languages
Available languages
Quick Links
http://waterheatertimer.org/UPM-timers-and-manuals.html
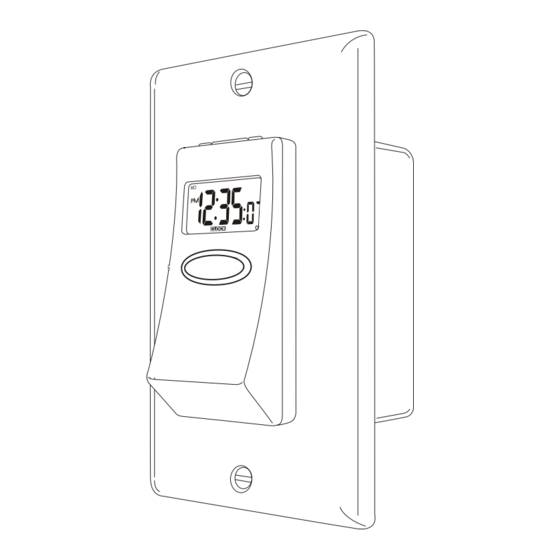
ETW350
electronic programmable timer
OWNERS
MANUAL
Congratulations on your
purchase of a UPM timer.
Please take the time to
read and understand this
manual so you can begin
to enjoy the security and
energy saving benefits this
product has to offer.
One-Touch
Countdown
FEATURES
20 ON/OFF settings
Countdown timer -
"One-Touch Countdown"
3 random functions
12/24 hour clock
15A, 1800W loading
single pole
GETTING STARTED
setting the clock
MO
1
Go to
CLOCK
using
CLOCK
ON
2
Press SET
3
Day select with
MO
1
4
Press SET
CLOCK
ON
3 5 7 9
5
Hour select with
2
6
4
Press SET
Press SET
7
6
Minute select with
Minute select with
8
8
Press SET
10
9
Second select with
10
Press SET
To toggle between 12/24 hour format, press RND during clock setting
To activate/deactivate Daylight Saving Time (DST) function, press and hold
CLOCK
both
and
together for 3 seconds in
mode; solid
for DST
memory backup
* This UPM wall switch timer comes with built in memory backup protection. In the
event of a power outage, all program and clock settings will remain in memory.
CAUTION!
TO AVOID FIRE, SHOCK, OR DEATH; SHUT OFF POWER SUPPLY AT
*
THE CIRCUIT BREAKER OR FUSE AND TEST THAT THE POWER IS
OFF BEFORE WIRING.
This timer must NOT be used on loads exceeding 1800W.
Handle installation with caution to prevent any risk of electrical shock
that could cause serious injury or death. If you are not sure about any
part of the given instructions, consult a qualified electrician.
All wiring must comply with applicable codes and regulations.
PROGRAM SETTINGS
MO TU WE TH FR SA SU
1
Program select with
MO TU WE TH FR SA SU
1
PROGON
PROGON
2
Press SET
2 4 6 8
3
Day select with
3 5 7
4
Press SET
5
Hour select with
Programs are arranged in a circular pattern
with the clock and countdown functions:
6
Press SET
CLOCK
Program 1-20
CD
7
Minute select with
8
Press SET
disable program/master disable
1
For single disable select PROGRAM with
For master disable go to
CLOCK
using
X
2
Press SET
1
2
4
3
Press ON/OFF to disable ( X )
4
Press SET 3 times to exit (single disable)
3
OR press SET 4 times to exit (master)
Repeat steps
1
to
4
to undo disable ( X )
INSTALLATION
1
Disconnect the power supply at the circuit breaker or fuse before
proceeding with the installation.
2
Remove existing switch and identify the wires in the wall box.
3
Using the supplied wire nuts, securely fasten the wires on the timer
to the wires in the wall box according to diagram.
Connect the black (hot) wire on the timer to the hot wire in the
wall box.
Connect the blue (hot) wire on the timer to the hot wire in the
wall box coming from the light fixture.
Connect the white (neutral) wire on the timer to the two
neutral wires in the wall box.
For proper grounding, connect the green (ground) wire on
the timer to the ground "screw" found inside the wall box.
4
Mount timer into the wall box carefully.
5
Restore power supply at the circuit breaker or fuse.
COUNTDOWN TIMER
The to-the-second countdown feature of this timer starts from the ON or OFF
position and counts down to zero when activated.
1
Select CD mode using
CD
PROGON
2
Press SET
3
Start ON or OFF select with
4
Press SET
5
Hour select with
1
CD
PROGON
6
Press SET
3 5 7 9
2
7
Minute select with
4
6
8
Press SET
9
8
Second select with
10
10
Press SET
Press Countdown or the One-Touch Countdown Button to start the countdown timer.
Stop countdown timer with Countdown (or One-Touch Countdown Button) or On/Off.
INSTALLATION DIAGRAM
ETW350
Blue
White
LOAD
Black
Green
Screw
Power Source
Random function indicator
RANDOM FUNCTION
short/long random
3
Short random from
CLOCK
1
OR Long random from
CD
1
2
Press RANDOM
Flashing
RND
for short random
3
2
Flashing
L RND
-
for long random
* Short random 45-90 minutes, long random 90-180 minutes
programmable random
4
1
Select program 20 with
3
2
Press RANDOM
1
3
Set program 20 to desired random time
2
4
RND
Solid
for programmable random
* Programmable random 45-90 minutes
Deactivate random function with RND or ON/OFF
GETTING STARTED
button placements
1
SET - activates set functions
2
CD - activates countdown timer
8
3
R - reset
4
RND - activates random functions
2
1
5
- scrolls through selections
3
5
6
ON/OFF - manual on/off control
6
4
7
Main On/Main Off
7
8
One-Touch Countdown Button
display
Weekday indicators
Disabled program icon
MO TU WE TH FR SA SU
X
AM/PM
L -
RND
SET
CLOCK CD
PROGONOFF
ON/OFF indicator
Set function indicator
Clock function indicator
TROUBLESHOOTING
problem
solution
LCD display seems "frozen".
Press reset button to reset
Buttons won't respond.
timer.
Programmed ON/OFF times
Ensure that the program
don't execute.
disable feature is not enabled.
Programmed ON/OFF times
Ensure that the random
don't execute at specified
function is not enabled.
times.
TECHNICAL SPECIFICATIONS
Program: 20 programs
Ratings:
120V AC, 15A
Max Load: 1800W resistive, single pole
Min switching time: 1 minute
Advertisement

Related Manuals for UPM ETW350


Summary of Contents for UPM ETW350
- Page 1 OR press SET 4 times to exit (master) Stop countdown timer with Countdown (or One-Touch Countdown Button) or On/Off. * This UPM wall switch timer comes with built in memory backup protection. In the Repeat steps to undo disable ( X ) Deactivate random function with RND or ON/OFF event of a power outage, all program and clock settings will remain in memory.
- Page 2 3 secondes dans la fonction horloge.Solide pour DST. Arrêter la minuterie à compte à rebours en appuyant sur Countdown, sur la touche * La minuterie UPM est protégée par une mémoire de sauvegarde. En cas de panne de Appuyer sur R ÉGLER 3 fois pour sortir (simple) One-Touch Countdown ou sur On/Off.
Need help?
Do you have a question about the ETW350 and is the answer not in the manual?
Questions and answers