Table of Contents
Advertisement
Advertisement
Table of Contents

Related Manuals for SKY-WATCHER Star Discovery Mount


Summary of Contents for SKY-WATCHER Star Discovery Mount
- Page 1 INSTRUCTION MANUAL Star Discovery Mount SL26032014 V1 Copyright © Sky-Watcher...
-
Page 2: Table Of Contents
A simple mount, yet efficient ....................2 Part II: Getting Started Parts description ........................ 3 Installing the Star Discovery mount for an observation ............3 Preparing the telescope for an observation ................ 5 Aligning the finder scope ....................7 Part III: Astronomy with the Hand Control Initial setup ........................ -
Page 3: Part I: Introduction
No re- setup is required in one observing session. If not enough the Star Discovery mount can host the SynScan Version 4, the latest SynScan GO-TO handset. This handset can drive the Sky Discovery mount to any object selected... -
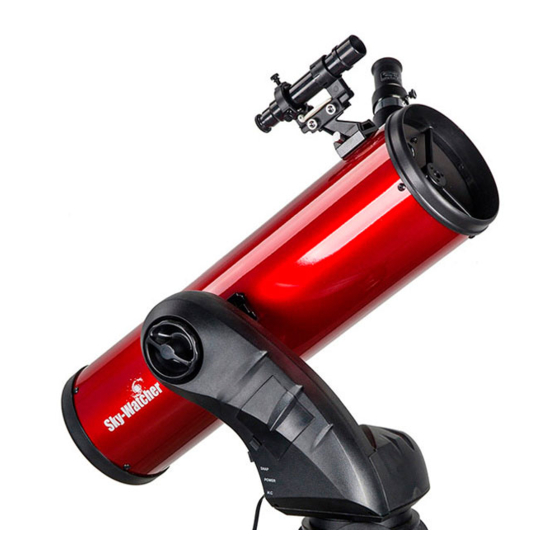
Page 4: Part Ii: Getting Started
A2 Leg support for Hand Controller B2 Leg support for SynScan A3 Mounting bracket assembly B3 Connection cable for SynScan Installing the Star Discovery mount for an observation Fig. 2 Fig. 1 Fig. 3 Install the base on the observation point. Extend the legs at desired height and level the base 1). -
Page 5: Part V: Astronomy With The Synscan Version
8 contacts (RJ45 model) inside the corresponding slot on the SynScan Version 4, then the 6 contacts connector to the slot on position 4. If you often use your Star Discovery mount it useful Sky-Watcher rechargeable battery (7AH or 17AH) that can be... -
Page 6: Preparing The Telescope For An Observation
Part II: Getting Started Preparing the telescope for an observation If you already know how to use a telescope you may skip this section, otherwise this section will help you to understand the basics you need to make an observation. Inside the instrument box you will find two eyepieces, one with a Fig. - Page 7 Part II: Getting Started The 23mm eyepiece delivers a larger view of objects with fewer enlargement, as if “seen from a further distance” than with the 10mm. When observing it is advisable to first use the 23mm to center the object inside the field of view to get an “overview” of the surroundings, then use the 10mm to get “closer”...
-
Page 8: Aligning The Finder Scope
Part II: Getting Started Aligning the finder scope The 6x24 finder scope is a small fixed magnification scope mounted on the optical tube. When it is correctly aligned with the telescope, objects can be quickly located and brought to the center of the field. The alignment should be done at first use and over time if the alignment is no more accurate. -
Page 9: Part Iii: Astronomy With The Hand Control
16 for proper setup instructions. In order to allow the celestial object tracking function to work properly, the Star Discovery mount needs the input of the local latitude. Without this information the mount will not be able to track objects in the sky. -
Page 10: Quick Setup
(according to the enlarged view to the right – set to 21° on image as example). 5. By pressing the handset button 2 and 3 simultaneously, the Star Discovery Mount will recognize the local latitude. telescope towards... -
Page 11: Using The Hand Controller For Astronomy
The basic movements of the Star Discovery mount are directional movement, slewing, and tracking. The tracking rate is sidereal rate. Sidereal rate means the Star Discovery mount will move automatically on both vertical and horizontal axis to keep a sky object centered on the field of view. -
Page 12: Part Iv: Terrestrial Photography
Part IV: Terrestrial Photography Part IV: Terrestrial Photography The Star Discovery mount is also perfectly suited to shoot amazing panoramic images or do video cruising automatically. But not only… It is also perfect for lightweight astrophotography, time lapse photography, wide view and panorama photography, video panning and so many more activities. -
Page 13: General Operations
Part IV: Terrestrial Photography It is also possible to attach two devices on the mounting bracket by using the secondary accessory plate. You will find the secondary accessory plate and two screws inside the box. To mount the secondary accessory plate: locate two threads on the internal side of the mounting bracket (part 1) and use the two screws... -
Page 14: Camera Cruising Function
6 preset positions (a to f) using the SNAP interface of the Star Discovery mount. The camera used for this application should have an external shutter control port which can connect to the mount's SNAP port with a proper cable. The SNAP port is a 2.5 mm 3-segment stereo jack and the trigger... -
Page 15: Panoramic/Matrix Photography
Press buttons (SET) and (a) to save the position. The Star Discovery mount will double the movement to get the full field of view. - Page 16 Part IV: Terrestrial Photography 2. Set the lowest altitude angle of photography: look through the view finder of the camera and use the (DOWN)/(UP) buttons to slew the altitude axis to the desired lowest point of photography, and then press button (SET) and button (DOWN) to save the position. 3.
-
Page 17: Moving The Mount Around
No re-setup is required in one observing session. Moving the mount around In many situations, like aligning the Star Discovery mount on bright stars, it will be needed to move the mount at different speeds with the directional keys. Here is how to perform this... -
Page 18: Initial Setup
Part V: Astronomy with the SynScan Version 4 The following table lists the available speeds: Speed Usage One turn in 48h: very slow speed to accurately center objects inside a high 0.5X magnification eyepiece field of view. One turn in 24h: quite slow speed to center objects inside an eyepiece field of view. -
Page 19: Aligning The Star Discovery Mount
Press (1) to start the alignment process. • Press (2) to skip the alignment process. Aligning the Star Discovery Mount The menu offers two alignment methods: Brightest Star Alignment Method and 2-Star Alignment Method. The difference between these two methods is that for the Brightest Star Alignment Method the SynScan Version 4 proposes you two bright stars where in the 2-Star Alignment Method you choose two alignment stars from a list. - Page 20 Part V: Astronomy with the SynScan Version 4 3. The hand control will generate a list of the brightest stars within the selected horizontal region. The list is sorted by the brightness of the star and with the brightest stars at the top of the list.
-
Page 21: The 2-Star Alignment Method
Part V: Astronomy with the SynScan Version 4 4. If the 1st alignment star is not a planet, the SynScan hand control will now display “Alignment Successful”. Press (ENTER) to complete the alignment process. After pressing (ENTER) to complete the alignment process the SynScan hand control will display the alignment menu again. -
Page 22: Locating Objects
Part V: Astronomy with the SynScan Version 4 4. The SynScan hand control will now display “Alignment Successful”. Press (ENTER) to complete the alignment process. After pressing (ENTER) to complete the alignment process the SynScan hand control will display the alignment menu again. Press the button (ESC) twice until the SynScan hand control displays «... - Page 23 Part V: Astronomy with the SynScan Version 4 Locating Planets and the Moon Press the (PLANET/7) shortcut key. The screen will display “SOLAR SYSTEM” in the top row. Use the two scrolling keys to select the planet through a list in the bottom row, which includes: Mercury, Venus, Mars, Jupiter, Saturn, Uranus, Neptune, Pluto, and the Moon.
- Page 24 Part V: Astronomy with the SynScan Version 4 The User Defined Objects menu (up to 25 objects can be defined) Defining New Objects: Press the (USER/9) shortcut key. The screen will display “USER OBJECT”. Press the scroll keys until “New Object” is displayed on the screen, then press the (ENTER) key.
-
Page 25: Identifying Objects
Part V: Astronomy with the SynScan Version 4 The Tour menu The SynScan hand control can generate a list of the most famous deep sky objects which appear in the current sky. Any proposed object can be selected and the SynScan hand control can point the telescope toward it automatically. -
Page 26: The Synscan Version 4 Menu Tree
The SynScan Version 4 menu tree is a useful reference to the menus that the controller will display when connected to the Star Discovery Mount. In this manual only the most important functions were explained in detail to help the user to start observing with Star Discovery. -
Page 27: Appendix: Tips For Observing The Sky
Appendix: Tips for observing the sky Appendix: Tips for observing the sky Sky conditions Sky conditions are usually defined by two atmospheric characteristics, seeing, or the steadiness of the air, and transparency, light scattering due to the amount of water vapor and particulate material in the air. - Page 28 Sky-Watcher offers this product with the best available quality in accordance with the legislation of the local market, and reserves the right to modify or discontinue, without prior notice to you,...
Need help?
Do you have a question about the Star Discovery Mount and is the answer not in the manual?
Questions and answers