
Related Manuals for ARC AOS6SE1


Summary of Contents for ARC AOS6SE1
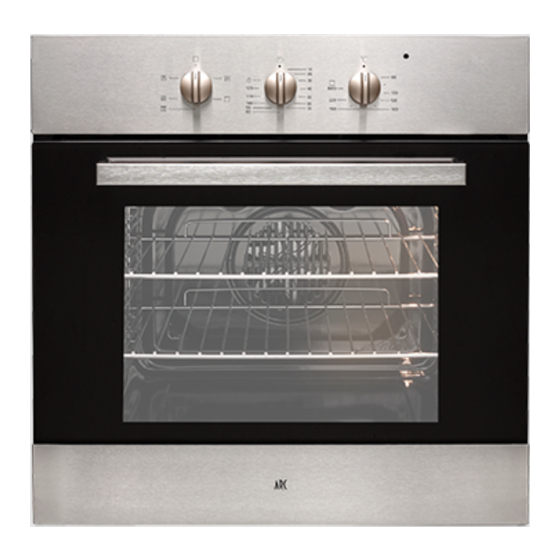
- Page 1 600mm Fan-assisted Oven Stainless Steel Manual MODEL AOS6SE1 Installation and Operation...
-
Page 2: Multifunction Oven
Multifunction Oven Instructions for installation and use... -
Page 3: Close-Up View
We recommend that you read the instructions in this owner’s manual carefully before use for the best performance and to extend the life of your appliance, as it will provide you with all the instructions you required to ensure its safe installation, use and maintenance. Always keep this owner’s manual close at hand since you may need to refer to it in the future. -
Page 4: How To Use Your Oven
A. Control Panel B. Cooking mode selection knob C. Cooking temperature selection knob D. Electronic programmer-Allows you to programme the desired cooking by selecting the cooking time and the end cooking time. It can also be used as a timer (only available on certain models) E. - Page 5 Position of thermostat knob “C”: Between 60 a nd Max. The top circle and bottom heating elements, as well as the fan will come on alternately .Since the heat remains constant and uniform throughout the oven, the air cooks and browns food uniformly over its entire surface. With this mode, you can also cook various dishes at the same time, as long as their respective cooking temperatures are the same .A maximum of 2 racks can be used at the same time, following the instructions in the section entitled: “Cooking On More Than One Rack”.
- Page 6 Position of thermostat knob “C”: Between 60 a nd 250 . The rears heating element and the fan come on, guaranteeing delicate heat distributed uniformly throughout the oven. This mode is ideal for baking and cooking delicate foods-especially cakes that need to rise, and for the preparation of certain tartlets on 3 shelves at the same time.
- Page 7 button is pressed. B. Set the time of ending (23 hours 59 minutes maximum): Press the button to set the time of ending; The oven starts immediately, AUTO will flash. When the set time of ending is reached, the roast process will shut automatically.
-
Page 8: How To Keep Your Oven In Shape
Timer The longest time frame can be set is 23 hours and 59 minutes. For setting time, press the function button repeatedly until the square symbol above “ ” flashes, and press “+” or “-” button until the time supposed shows on the display. -
Page 9: Practical Cooking Advice
Open the door fully ; lift up and turn the small levers located on the two hinges ; Grip the door on the two external sides and close it approximately half Way. Unlock the door by pressing on the clamps F, and then pull the door tow- ards you lifting it out of its seat. - Page 10 and prevent the same from dripping onto the oven bottom. When using this mode, we recommend you set the thermostat to the highest setting. However, this does not mean you cannot use lower temperatures, simply by adjusting the thermostat knob to the desired temperature. Setting “fan assisted grill”, only with the oven door shut, is extremely useful for grilling foods rapidly, as the distribution of heat makes it possible not only to brown the surface, but also to cook the bottom part.
- Page 11 with lard or bacon on the top. Selector knob Food to be cooked Weight Cooking rack Preheating Thermostat Cooking setting (in kg ) position from time knob time bottom (Minutes) setting (Minutes 1 Convection Duck 65-75 Roast veal or beef 70-75 Pork roast 70-80...
- Page 12 8 Fast cooking Frozen food Pizza Courgette and prawn pie Country style spinach pie 30-35 Turnovers Lasagne Golden Rollsi 25-30 Chicken morseis 15-20 Pre-cooked food Golden chicken wings 20-25 Fresh Food Biscuits(short pastry) 15-18 Fruitcake Cheese puffs 10-12 9 Pizza Pizza 15-20 Roast veal or beef...
- Page 13 Installation (following the manufacturer’s instructions); When in doubt about operating the appliance; Replacing the electrical socket when it is not compatible with the appliance plug. The temperature probe is a part of thermostat, if damaged; the whole shall be replaced by authorized service person.
- Page 14 The panels of the adjacent cabinets must be made of heat-resistant material .In particular ,cabinets with a veneer exterior must be assembled with glues which can withstand temperatures of up to 100 In compliance with current safety standards, contact with the electrical parts of the oven must not be possible once it has been installed.
- Page 15 Inner dimensions of the oven Width 43.5cm Depth 40cm Height 32cm Inner Volume of the oven 56 liters Voltage and Frequency of Power Supply: 220-240V ~50/60Hz or 50Hz Meaning of crossed –out wheeled dustbin: Do not dispose of electrical appliances as unsorted municipal waste, use separate collection facilities. Contact you local government for information regarding the collection systems available.
Need help?
Do you have a question about the AOS6SE1 and is the answer not in the manual?
Questions and answers