Advertisement
Table of Contents
- 1 Consumer Information
- 2 Parts
- 3 Assembling the 3-In-1 Activity Center
- 4 Assembling Wheels to Base
- 5 Assembling Seat to Walker Tray
- 6 Battery Safety Information
- 7 Attaching Trays and Toys to Base
- 8 Instructions for Music Keyboard
- 9 Instructions for Changing Height of Seat
- 10 Instructions for Rocking Feature
- 11 Instructions for Stationary Activity Feature
- 12 To Convert Back to Rocker or Walker
- Download this manual
Lil' Playstation
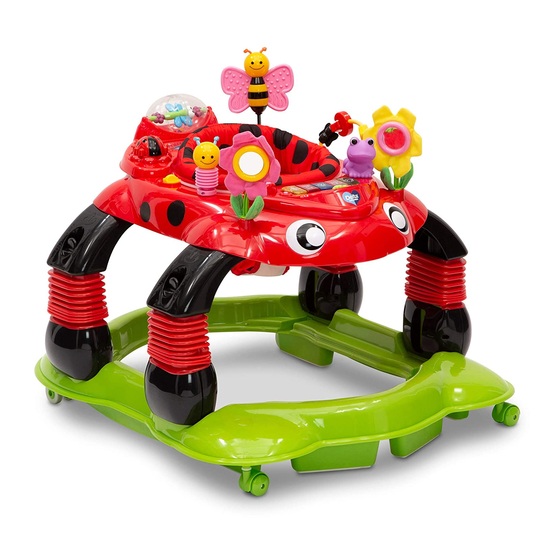
3-in-1 Activity Center
ASSEMBLY INSTRUCTIONS
ADULT ASSEMBLY REQUIRED
Styles and colors may vary
Required: Phillips Screwdriver
IMPORTANT: Read all instructions before assembly and use of the
walker/stationary activity center
Keep the instructions for future reference
(D)
Customer Care Tel. 1-(800)-377-3777
www.DeltaChildrensProducts.com
DCP Cat # 01-28-11-V9
Advertisement
Table of Contents

Summary of Contents for Delta Lil’
- Page 1 Lil’ Playstation 3-in-1 Activity Center ASSEMBLY INSTRUCTIONS ADULT ASSEMBLY REQUIRED Styles and colors may vary Required: Phillips Screwdriver IMPORTANT: Read all instructions before assembly and use of the walker/stationary activity center Keep the instructions for future reference Customer Care Tel. 1-(800)-377-3777 www.DeltaChildrensProducts.com DCP Cat # 01-28-11-V9...
-
Page 2: Consumer Information
DO NOT use if any parts are missing or broken. function. • To reduce the chance of child slipping out of seat, always Contact Delta Children’ s Products Customer Service check when used in the walker/ stationary activity center Department at 1.212.645.9033 for replacement parts mode that both feet of child just touch the floor. - Page 3 Parts IMPORTANT! Please remove all parts from the package and identify them before assembly. square slots to fit square pins round slots to fit round pins Square pin Round pin close-up close-up (B) Legs x4 Front (A) Footboard x1 (swivel casters) (C) Large Nuts x4 Back Tray Back...
- Page 4 Assembling The 3-in-1 Activity Center • A ssemble the legs to the base: Press the leg button and insert it into the mounting hole at the base as illustrated (Fig. A, B & C). NOTE: Legs with square shaped pins enter the square holes at the base. Legs with round shape pins enter the round holes at the base. • O nce completed, make sure all legs are adjusted to the same height level. NOTE: Rear legs are keyed to rear tray mounts. Round pin Square pin close-up close-up • A ssemble Walker Tray to Base: • C onnect the legs with the walker tray as shown in FIG D. Then secure the large plastic nuts (x4) onto bolt clockwise as illustrated in FIG F &G. • Make sure all plastic nuts are fully hand tightened down. Back Walker Top Base front Front Front Front Photo diagram of step 2 Customer Care www.DeltaChildrensProducts.com Tel.
- Page 5 Assembling Wheels to Base • A ssemble the front and rear wheels as illustrated in FIG G. • Push down on wheels until they are in a fully seated position. • Insert the stair stopper into the receiving hole as illustrated in FIG G. • Repeat with five other stoppers and make sure they are properly inserted. Back Non-Swivel Stair Stoppers Front Swivel Assembling Seat to Walker Tray • A ssemble the seat pad to the plastic ring by inserting the (8x) tabs on the •Take completed seat assembly and Slide (4x) plastic ring tabs through seat pad into slots located around the seat ring as shown in FIG H. holes and insert the seat to the walker tray as illustrated in FIG H (a). elevated part of seat pad needs to be aligned with most elevated area of the seat ring when assembled Back of Seat Fabric seat...
- Page 6 Battery Safety Information BATTERY SAFETY INFROMATION • Never short-circuit the battery terminals. • Use only batteries of the same or equivalent In exceptional circumstances, batteries may type as recommended. leak fluids that can cause a chemical burn • Do not charge non-rechargeable batteries. injury or ruin your product.
- Page 7 Attaching Trays and Toys to Base • I nsert the sides of the 2 toy trays into the walker top base first, then the fronts into the trays. (Check to make sure that the toy trays are firmly attached to walker top base.) Back Front • I nsert and snap the toys into walker top base in the designated locations. •For toy B you will also need to place the “C” around the stem of the toy after you insert through top base. Back Front Back Front Customer Care www.DeltaChildrensProducts.com Tel. 1-(800)-377-3777...
- Page 8 Instructions For Music Keyboard • M USIC FUNCTION FRONT TOY TRAY – Switch ‘on’ the music function by activating the ‘on/off’ switch. select music by sliding the 3 POSITION SELECT MUSIC BUTTON “Bee” to the left and right as illustrated in FIG M. POSITION 1 - plays Piano Sounds , POSITION 2- plays Animal Sounds, POSITION 3 - plays Melodies. •Press down keyboard and drum buttons to activate music. Bee Button On/Off Switch Keyboards Drum Button Instructions For Changing Height of Seat •ALWAYS REMOVE BABY FROM WALKER WHEN CHANGING FUNCTIONS •ADJUSTING THE SEAT HEIGHT – To adjust the height, press leg button first located on each leg and either elevate or lower the leg to the desired position as illustrated in FIG N (4x). Remember to adjust one leg at a time and one position at a time per leg be sure they are in the same Height level before use. •Once in a fully locked position, push downward on legs to ensure legs are in a locked position. NOTE: The activity center can be adjusted to 3 different height levels. Make sure all legs are adjusted to the same height level when adjusting the height of the seat. Customer Care www.DeltaChildrensProducts.com Tel. 1-(800)-377-3777...
- Page 9 Instructions For Rocking Feature •ALWAYS REMOVE BABY FROM WALKER WHEN CHANGING FUNCTIONS • R OCKING FUNCTION – To use: Pull the rocking bar down and into a fully locked position on both sides of walker base as shown in FIG O. Once in a fully locked position, Push upward on rocking bar to ensure they are locked. To close: Push the rocking leg buttons inward first while pushing upward on the rocking bar into a locked position as Illustrated in FIG Oa. O(a) Instructions For Stationary Activity Feature •FOR USE ONLY WHEN USING AS STATIONARY ACTIVITY CENTER •ALWAYS REMOVE BABY FROM WALKER WHEN CHANGING FUNCTIONS •SEAT SWIVEL FUNCTION – For seat to swivel, lift and rotate the red knob • Check to make sure all stationary legs are on a level surface and all 4 legs in position as shown in FIG R. To lock seat in place, lift and rotate red are touching the floor before placing child into seat. knob in position as shown in FIG S. • S TATIONARY ACTIVITY FUNCTION – Pull the rocking bar down and into Note: For the red knob to rotate, make sure that the indent in the white seat a fully locked position, on both sides of walker base as shown in FIG P. ring is lined up with the red knob. Once in a fully locked position Push upward on rocking bar to ensure they are locked. IMPORTANT: Always lock the seat in walker function. •Pull out and rotate all 4 stationary legs to a fully locked position as shown •DO NOT spin baby in seat, only permit baby to rotate the seat. in FIG P(a). Once all 4 stationary legs are in a fully locked position, Push downward seat in lock position seat in swivel position seat in lock position seat in sw...
- Page 10 To Convert Back to Rocker or Walker •ALWAYS REMOVE BABY FROM WALKER WHEN CHANGING FUNCTIONS •To close rotate all 4 stationary legs inward into a fully locked position as shown in FIG Q. • P ush the rocking leg buttons inward first while pushing upward on the rocking bar into a locked position as Illustrated in FIG Q(a). • Once in a fully locked position, Push upward on rocking bar to ensure they are locked. Q(a) Customer Service www.DeltaChildrensProducts.com Tel. (800) 377-3777...
- Page 11 Notes Customer Service www.DeltaChildrensProducts.com Tel. (800) 377-3777...
- Page 12 Manufactured for and distributed by: 114 West 26th Street, New York, NY 10001 Customer Service Tel. 1-(800)-377-3777 www.DeltaChildrensProducts.com customerservice@DeltaChildrensProducts.com MADE IN CHINA...
Need help?
Do you have a question about the Lil’ and is the answer not in the manual?
Questions and answers