Table of Contents
Advertisement
Advertisement
Table of Contents

Summary of Contents for Telecor DP200
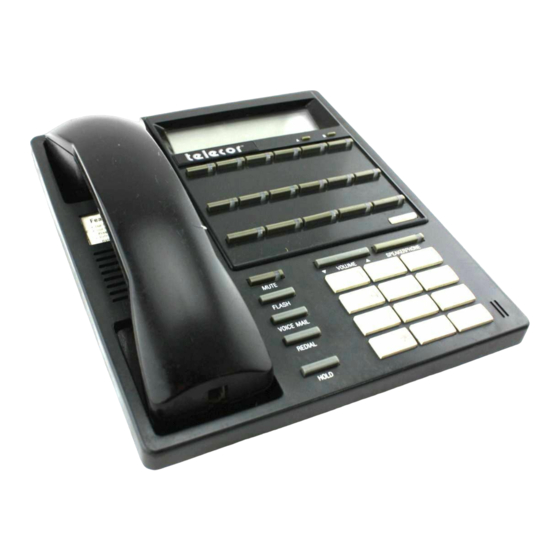
- Page 1 Telecor Display Phone ™ Model 200 (DP200) User’s Guide Telecor, Inc.
-
Page 2: Copyright Notice
This manual and the software described in it are copyrighted, with all rights reserved. Under the copyright laws, neither this manual nor the software may be copied, in whole or in part, without the written consent of Telecor, Inc. except as provided in the applicable Telecor, Inc. -
Page 3: Fcc Information
This equipment requires USOC: RJ11 and FIC: 02LS2 which are provided in the installation of the Telecor VS1 Phone System. An FCC compliant telephone cord and modular plug is provided with this equipment. This equipment is designed to be connected to the telephone network or premises wiring using a compatible modular jack which is Part 68 compliant. - Page 4 CS-03 Information (Canada) NOTICE: The Industry Canada label identifies certified equipment. The certification means that the equipment meets certain telecommuni- cations network protective, operational and safety requirements. The Department does not guarantee the equipment will operate to the user's satisfaction. Before installing this equipment, users should ensure that it is permissible to be connected to the facilities of the local telecommunications company.
-
Page 5: Table Of Contents
Conventions in this Guide ............x Font Styles Used ..............x OVERVIEW .................... 1 Overview of the Telecor Display Phone Model 200 (DP200) . 3 The Character Display ............. 4 Internal Call Display ............... 5 External Calls Transferred by a Receptionist ........5 Feature Status Display .............. - Page 6 Retrieving a Parked Call ..............32 Paging Over a Paging Zone ..........32 Using Personal Speed Dials ..........33 System Speed Dials ..............33 Customizing the DP200 Display Phone ........ 34 Feature Buttons ................34 Customizing Feature Buttons ..........34 Reviewing Feature Buttons ........... 36 Customizing Extension View Buttons (DSS/BLF) ......
- Page 7 Contents Switching to Headset Mode ............44 Cordless Phone and Modem Port ..........45 Disabling Call Waiting Tones ............45 Handsfree ..................46 Turning the Ringer On or Off ............47 VOICE MAIL ..................49 Overview of Voice Mail ............51 Gaining Access to Your Voice Mail ........
- Page 8 Extensions ................66 Turning Off Redirecting New Voice Mail Message ....66 INSTALLATION ..................67 Installation Overview ............. 69 Installing Your DP200 Display Phone ......... 69 For a Desktop Phone ............. 70 For a Wall Mount Phone ............71 REFERENCE ..................73 Feature Buttons and Access Codes ........
-
Page 9: Welcome
Welcome Welcome Welcome to the Telecor™ Display Phone Model 200 (DP200) User’s Guide. This guide is designed to help you use the DP200 Display Phone for effective and efficient call processing. Please read this guide carefully. Follow the instructions and recommendations provided to ensure proper operation of the DP200 Display Phone. -
Page 10: Conventions In This Guide
Telecor DP200 Display Phone User’s Guide Conventions in this Guide The Telecor™ Display Phone Model 200 (DP200) User’s Guide can help you use your phone quickly and effi- ciently. There are some word and symbol conventions to help you along the way. -
Page 11: Overview
The DP200 Display Phone has a 2 line by 16 character display, which gives you useful information about the calls you are handling. The Feature button enables you to switch between name and extension. -
Page 12: The Character Display
DP200 Display Phone Speakerphone on/off button The Character Display The DP200 Display Phone is equipped with a 2 line by 16 character display that gives you useful information about the calls you are handling. When the DP200 Display Phone is not in use, your name or station appears on the top line and the date and time are displayed on the second line. -
Page 13: Internal Call Display
External Calls Transferred by a Receptionist If your company has a receptionist who uses the Telecor Attendant98™ CTI client application, the receptionist can transfer calls with a Text Message and Caller ID. Note Stations using the Telecor Connect98™ CTI client application can also send Text Messages that can be viewed at DP200 Display Phone stations. -
Page 14: Feature Status Display
Telecor DP200 Display Phone User’s Guide Press the Feature button to switch between the Text Message display, Caller ID Name, and Caller ID Number display. 1*Xfer:Attendant Figure 6 External call with (913) 555-6676 Caller ID display Note Caller ID must be installed to support this feature. -
Page 15: Voice Mail Status Display
Overview Fwd to DND Forward to DND on H F + C W T – Call waiting on/off Figure 9 Status display Handsfree on/off Voice Mail Status Display Press the Feature button twice to display the number of new Voice Mail messages and the number of old messages stored in your Voice Mail. -
Page 16: Standard Feature Buttons
Custom Feature Buttons The DP200 Display Phone has 12 Custom Feature buttons. Each Feature button has a system default setting. However, you can set up the features you use the most by dialing a two-digit code, and then following the voice prompts. - Page 17 Overview In addition to the 12 Custom Feature buttons, the DP200 Display Phone also has five Line Appearance buttons for incoming calls. Three of the five buttons can be changed to Extension View buttons, otherwise known as DSS/BLF buttons or Direct Station Select/Busy Lamp Field. You can use the A, B and C Extension View buttons to call or transfer calls to the extensions you dial most often.
-
Page 18: Basic Operation
This section describes how to use the Telecor Display Phone Model 200 (DP200) for basic call processing. Making an Internal Call To make an internal call using the DP200 Display Phone, complete the following steps: 1. Lift the handset. •... -
Page 19: Making An External Call
1> 00:04 Internal Figure 3 Internal call with extension displayed Making an External Call To make an external call using the DP200 Display Phone, complete the following steps: 1. Lift the handset. 2. Press 9 for an external line. •... -
Page 20: Enabling Direct External Dial Tone
Basic Operation Note To make an internal call when Direct External Dial FLASH Tone is enabled, press the Feature button, FLASH and then dial the extension. Enabling Direct External Dial Tone To enable the Direct External Dial Tone feature, complete the following steps: 1. -
Page 21: Answering A Call
Telecor DP200 Display Phone User’s Guide Answering a Call When a call arrives and your DP200 Display Phone is idle, the phone rings and the button status lamp blinks. LINE 1 Lift the handset. • button status lamp turns on. The... -
Page 22: Answering Multiple Calls
Basic Operation Answering Multiple Calls If you are using and you receive a second call, a LINE two-beep call waiting tone sounds and the status lamp for the incoming call on blinks. LINE 2 1. Press the button once to preview the call. LINE 2 button status lamp continues to blink. -
Page 23: Placing A Call On Hold
Telecor DP200 Display Phone User’s Guide Placing a Call On Hold Feature button enables you to suspend a call HOLD without completely disconnecting. Callers placed on hold will hear Music On Hold or Promotions On Hold. Calls can also be taken off hold at other extensions using the Call Pickup feature. -
Page 24: Redialing An External Number
• The last external number is redialed. Using the Speakerphone The DP200 Display Phone is equipped with a Speaker- phone that enables you to speak to callers without picking up the handset. You can use the Speakerphone when making and receiving calls. -
Page 25: Answering A Call With The Speakerphone
Telecor DP200 Display Phone User’s Guide Dial the extension or number you want to call. • If dialing an external number, press 9 + the number. Answering a Call with the Speakerphone To answer a call ringing at your station with the Speaker- phone: 1. -
Page 26: Advanced Features
The DP200 Display Phone gives you the ability to decide what to do with your calls. “Blind” call processing means that you do not have to answer a call to use the DP200 Display Phone features. Blind call processing is performed only by using the customizable Feature buttons on the DP200 Display Phone. -
Page 27: Blind Transfer To Voice Mail
Extension 101. For more information, see “Customizing Feature Buttons,” page 34. Conference Rooms The Telecor VS1 phone system includes three Conference Rooms that you can gain access to by dialing the extension assigned to the Conference Room. Each Conference Room accepts up to 16 callers (this can be any combination of internal and external callers). -
Page 28: Gaining Access To A Conference Room
Each Conference Room can be accessed by anyone connected to the Telecor VS1 phone system. You can use the DP200 Display Phone to transfer calls into a Confer- ence Room, or join the conference. The conference terminates automatically after all callers hang up. The Conference Room is then available for a new conference. -
Page 29: Conference Calling
Telecor DP200 Display Phone User’s Guide Conference Calling Feature button enables you to create a CONFERENCE conference call between three people without using the Conference Rooms. Note When the person who initiates the conference call hangs up, the conference is terminated. -
Page 30: Forwarding Calls
Advanced Features Forwarding Calls The DP200 Display Phone enables you to forward your calls directly to another extension on the Telecor VS1 phone system or to your Voice Mail. In addition, you can forward calls from another extension to ring at your extension. -
Page 31: Forwarding Calls To Your Voice Mail
Feature button. FORWARD CANCEL CANCEL Do Not Disturb (DND) You can set up the DP200 Display Phone to forward calls to your Voice Mail using the Do Not Disturb (DND) feature. Do Not Disturb blocks calls from your station and forwards them based on the system settings, such as to your Voice Mail or to other stations. -
Page 32: Forwarding Calls From An Extension
The second line of the display shows the date and time. Forwarding Calls From an Extension You can use your DP200 Display Phone to forward calls from a specific extension to ring at your station. To forward calls from a specific extension to ring at your station: 1. -
Page 33: Cancelling Forwarding
Telecor DP200 Display Phone User’s Guide Cancelling Forwarding To cancel forwarding features, complete the following steps: 1. Lift the handset, or press the SPEAKERPHONE button. SPEAKERPHONE 2. Press the Feature button. FORWARD CANCEL FORWARD CANCEL • You hear a two-beep tone. -
Page 34: Picking Up A Call In A Group
Parking a Call The Park feature enables you to park a call in one of 10 Park Zones on the Telecor VS1 phone system. Parked calls can be retrieved from any extension. While parked, callers hear on hold music. -
Page 35: Retrieving A Parked Call
Page Zone that you dial. Use Page All to make an announcement that is broadcast over all Page Zones set up on your Telecor VS1 phone system. Note Page Zones are set up by your system installer. -
Page 36: Using Personal Speed Dials
Page Zone. See “Customizing Feature Buttons,” page 34. Using Personal Speed Dials You can program 10 Personal Speed Dials on your DP200 Display Phone using the Feature button programmer. Personal Speed Dials are assigned numbers 0–9. For more information on programming a Personal Speed Dial, see “Programming Personal Speed Dials,”... -
Page 37: Customizing The Dp200 Display Phone
System Speed Dial, you hear an error tone. Customizing the DP200 Display Phone Your DP200 Display Phone can be customized according to how you want to process calls. The information on the following pages gives you instructions for customizing your DP200 Display Phone features. - Page 38 Advanced Features To customize a Feature button, complete the following steps: 1. Lift the handset, or press the SPEAKERPHONE button, and then dial 7801. • A voice prompt says “You have accessed the Feature button programmer.” 2. Press 2, when prompted, to program a new Feature button.
-
Page 39: Reviewing Feature Buttons
When finished, press * to return to the main menu or hang up. Customizing Extension View Buttons (DSS/BLF) Three of the five Line Appearance buttons on the DP200 Display Phone can be customized as Extension View buttons, known as Direct Station Select/Busy Lamp Field (DSS/BLF) buttons. -
Page 40: Customizing An Individual Extension View Button
Advanced Features Customizing an Individual Extension View Button 1. Lift the handset, or press the SPEAKERPHONE button, and then dial 7801. • A voice prompt says “You have accessed the Feature button programmer.” 2. Press 2, when prompted, to program a new Feature button. -
Page 41: Guest Mailboxes
Changing the Number of Phone Lines The DP200 Display Phone can be customized for up to five phone lines. The A, B, and C Extension View buttons can be used for additional phone lines. -
Page 42: Programming Personal Speed Dials
Programming Personal Speed Dials You can program up to 10 Personal Speed Dials (0–9) on the DP200 Display Phone. For more information on using Personal Speed Dials, see “Using Personal Speed Dials,” page 33. -
Page 43: Reviewing Personal Speed Dials
Telecor DP200 Display Phone User’s Guide Press 3, when prompted, to gain access to the Personal Speed Dial menu. A voice prompt says “To review a Personal Speed Dial, press 1; to program a Personal Speed Dial, press 2; to program other Feature buttons, press *.”... -
Page 44: Setting Up Office Or Warehouse Mode
(The PROGRAM PRGM Program switch is located on the right side of your DP200 Display Phone.) • By default, the DP200 Display Phone is set for Office Mode. 2. Press the button to switch between VOLUME VOLUME Office Mode and Warehouse Mode. -
Page 45: Changing The Page Volume
Telecor DP200 Display Phone User’s Guide Note Switching between Office Mode and Warehouse Mode automatically returns the Page Volume, Ring Select and Ringer Volume settings to the program defaults. 3. Slide the switch to the left to return to PROGRAM the main status display. -
Page 46: Changing The Ringer Volume
SPEAKERPHONE your ringer. Program Mode Figure 7 Ring Select Ring Select Note The DP200 Display Phone has 12 different ringer sounds. When you press the button, you VOLUME hear a sample of each ring. 4. Slide the switch to the left to return to... -
Page 47: Switching To Headset Mode
You can use your DP200 Display Phone with either a headset or handset. To install the headset, plug it into the handset jack, which is located on the bottom of the DP200 Display Phone. Leave the handset in the cradle. -
Page 48: Cordless Phone And Modem Port
Advanced Features Cordless Phone and Modem Port The DP200 Display Phone is equipped with a port that you can use to plug in a 900 MHz cordless phone or a modem. • Both the cordless phone and your DP200 Display Phone ring when you receive a call. -
Page 49: Handsfree
Telecor DP200 Display Phone User’s Guide Fwd to DND Figure 10 Call Waiting tones H F+ C W T – turned off Press the Feature button CALL WAITING ON again to enable Call Waiting tones. • When Call Waiting is on, CWT is followed by a + sign. -
Page 50: Turning The Ringer On Or Off
Using the switch on your DP200 Display Phone, RINGER you can turn the ringer on or off. The switch is RINGER located on the right side of your DP200 Display Phone RINGER next to the switch. Slide the switch to PROGRAM... -
Page 51: Voice Mail
VOICE MAIL gain access to Voice Mail features. To use the Voice Mail features when you have gained access to Voice Mail, use the DP200 Display Phone keypad. Gaining Access to Your Voice Mail 1. Lift the handset, and then press the... -
Page 52: Stopping A Recording
Telecor DP200 Display Phone User’s Guide • Press 7 to send a message or forward a Voice Mail message to one or more extension, see “Sending a Message to an Individual or Group,” page 57 or “Forwarding a Voice Mail Message to an Individual or a Group,”... -
Page 53: Listening To A Voice Mail Message
Voice Mail Listening to a Voice Mail Message Buttons on the DP200 Display Phone can act similar to the controls of a tape recorder while listening to your Voice Mail. Lift the handset, and then press the VOICE MAIL Feature button. If prompted, dial your passcode. -
Page 54: Setting Up Voice Mail Features
Telecor DP200 Display Phone User’s Guide • Press 9 to hear the date and time of the message. • Press * to exit your Voice Mail. Setting Up Voice Mail Features The following is a list of the Voice Mail Setup Options menu. -
Page 55: Creating Or Changing Your Voice Mail Passcode
Voice Mail Creating or Changing Your Voice Mail Passcode Creating a passcode for your Voice Mail is recommended to ensure security. 1. Lift the handset, and then press the VOICE MAIL VOICE MAIL Feature button. 2. Press 2 to gain access to the Setup Options menu. -
Page 56: Setting Up Your Name In The Dial By Name Directory
Telecor DP200 Display Phone User’s Guide Setting Up Your Name in the Dial By Name Directory A caller trying to reach you without knowing your extension can reach you by entering the first three letters of your last name in your company’s Dial by Name directory. -
Page 57: Sending A Message To An Individual, Group, Or Range Of Extensions
Voice Mail Sending a Message to an Individual, Group, or Range of Extensions At some point, you may need to send a message to an individual, group, or a range of extensions. Sending a Message to an Individual or Group To send a Voice Mail message to an individual or group, complete the following steps: Lift the handset, and then press the... -
Page 58: Sending A Message To A Range Of Extensions
Telecor DP200 Display Phone User’s Guide Sending a Message to a Range of Extensions To send a message to a range of extensions, complete the following steps: Lift the handset, and then press the VOICE MAIL Feature button. VOICE MAIL •... -
Page 59: Forwarding A Voice Mail Message To An Individual Or Group
Voice Mail Forwarding a Voice Mail Message to an Individual or Group To forward a Voice Mail message to an individual or group, complete the following steps: Press 7 after listening to a Voice Mail message. Dial the individual extension of the person or group receiving the message. -
Page 60: Gaining Access To Your Voice Mail From Another Internal Phone
Telecor DP200 Display Phone User’s Guide Dial the last extension in the range—225. Press #. • You are prompted to record a prefacing message. Use this time to give any necessary information to those receiving the message. Gaining Access to Your Voice Mail From Another Internal Phone Lift the handset and dial 6 + your extension. -
Page 61: Voice Mail Notification On A Digital
Voice Mail Voice Mail Notification on a Digital Pager The Telecor VS1 business telephone system can be customized to place a call to your pager when you receive a new Voice Mail message. This is an important feature when you are expecting a call, or message, and you are not at your office. -
Page 62: Gaining Access To Basic Voice Mail Notification Settings
Telecor DP200 Display Phone User’s Guide Gaining Access to Basic Voice Mail Notification Settings Lift the handset, and then press the VOICE MAIL VOICE MAIL Feature button. If prompted, dial your passcode. Press 2 to gain access to the Voice Mail Setup Options menu, and then press 7 to gain access to Voice Mail Notification. -
Page 63: Turning Off Basic Voice Mail Notification On A Digital
Voice Mail Turning Off Basic Voice Mail Notification on a Digital Pager Gain access to the Basic Voice Mail Notification settings by following Steps 1-4 of “Gaining Access to Basic Voice Mail Notification Set- tings,” page 62. Press only the # key when prompted to enter a pager number for Voice Mail Notification. -
Page 64: Setting Up Voice Mail Notification To Up To Three Digital
Telecor DP200 Display Phone User’s Guide Press 2 to gain access to the Voice Mail Setup Options menu, and then press 7 to gain access to Voice Mail Notification. Press 2 to set up the Advanced Voice Mail Notification options. -
Page 65: Cancelling Voice Mail Notification To Multiple
Voice Mail Cancelling Voice Mail Notification to Multiple Pagers Press 1 while in the Advanced Voice Mail Notification options of your Voice Mail. This enables you to enter the settings for the first pager. 2. Press only the # key when prompted to enter a pager number for Voice Mail Notification. -
Page 66: Redirecting New Voice Mail Messages To Other Extensions
Telecor DP200 Display Phone User’s Guide Press the number of minutes between pages, followed by the # key. Note The Paging Interval can be set up from a minimum of 1 minute to a maximum of 34,464 minutes. If you enter an interval greater than 34,464 minutes, the system sets the interval to 34,464 minutes. -
Page 67: Installation
Installation Installation Overview The DP200 Display Phone can be installed for either desktop or wall mount use. To begin assembling your phone, remove the phone, the handset and cord, the baseplate, and the line cords from the package. Installing Your DP200 Display Phone... -
Page 68: For A Desktop Phone
Telecor DP200 Display Phone User’s Guide For a Desktop Phone When the DP200 Display Phone is assembled for desktop use, the upper end of the housing is positioned higher than the lower end, as shown in Figure 2. Program switch... -
Page 69: For A Wall Mount Phone
Installation For a Wall Mount Phone When the DP200 Display phone is assembled for wall mount use, the upper end of the housing is tilted back, as shown in Figure 3. Figure 3 Wall Mount installation 1. Plug the short line cord into the line jack in the housing. - Page 70 Telecor DP200 Display Phone User’s Guide 7. Plug the short line cord into the wallplate. 8. Align the keyholes in the baseplate bottom with the mounting posts on the wallplate. Slip the baseplate over the wallplate posts and slide the phone down as far as it will go.
-
Page 71: Reference
This following list contains all Feature button codes and a description of each function. Use these codes to custom- ize your DP200 Display Phone Feature buttons. Note You must dial a zero if the second digit in the access code is preceded by a zero. To customize a Feature button for Pickup Group (03), for example, press 0, then press 3. - Page 72 Telecor DP200 Display Phone User’s Guide Dial (07 + number)—Dial a specific number. If program- ming an outside number, include a 9 and appropriate long distance digits prior to the number. Do Not Disturb On/Off (08)—Turn on or off the Do Not Disturb setting.
- Page 73 Reference Personal Speed Dial (38)—Gain access to the Personal Speed Dial feature. Pickup Extension (01)—Answer a call ringing at another extension. Pickup Group (03)—Answer a call ringing at any phone in your group. Pickup Specific Extension (02 + Extension)—Answer a call ringing at a specific extension.
-
Page 74: Feature Keystrokes
Telecor DP200 Display Phone User’s Guide Feature Keystrokes You can use any of the following features by using the appropriate keystrokes on the phone keypad. Feature Keystroke Sequence ACD Log Off 7001 ACD Log On 7000 + ACD Account Code... -
Page 75: Appendix A
Index Appendix A LIMITED HARDWARE WARRANTY This is the warranty between Telecor, Inc., together with entities under its control (hereinafter called “we”, “us” or “Telecor”), and the original end user of Telecor brand product (hereinafter called “you”). Warranty Term We warrant all products manufactured by us to be free from defects in material and workmanship under normal use and service for one (1) year. -
Page 76: Limitation Of Liability
TELECOR BE LIABLE FOR ANY CLAIM BY ANY OTHER PARTY. In no event shall Telecor’s total liability to you for all damages, losses, and causes of action (whether in contract, tort [including negligence], or otherwise) exceed the amount paid by you for the product. -
Page 77: Appendix B
ROM (the “Software”), and any associated documentation, are licensed to you by Telecor, Inc. (“Telecor”) for use with Telecor brand telephone system hardware. You own the media, if any, on which the Software is recorded, and the physical embodiment of the written documentation, if any, but Telecor retains title to the Software. - Page 78 To the extent you are receiving Software on media, Telecor warrants that such media is free from defects in materials and workmanship under normal use for a period of ninety (90) days from the date of purchase as evidenced by a copy of the receipt. Telecor warrants that the physical embodiment of the written documentation is free from defects in materials and workmanship under normal use for a period of ninety (90) days from the date of purchase as evidenced by a copy of the receipt.
-
Page 79: Index
Index Index character display 4–9 external calls 5–6 A Feature button 6, 14, 16 transferred by a receptionist 5 answering a call 16–17, 20 transferred by an Auto multiple calls 17 Attendant 6 using the Speakerphone 20 internal call 5–6 Automatic Call Distribution (ACD) 7, Conference Calling 26 38, 75, 78... - Page 80 Telecor DP200 Display Phone User’s Guide Mute 8 Voice Mail 8 Extension Status 78 System Speed Dial 34 Extension View buttons 3, 9, 36–37 Voice Mail 51 additional monitoring Feature buttons 3 features 37–38 Feature keystrokes 78 Automatic Call Distribution...
- Page 81 Index installation 69–71 Page All Feature button 32 desktop 70 Page Over Zone 76 wall mount 71–72 Page Over Zone Feature button 33 internal call 13–14 Page Volume 41–42 making 13–14 changing settings 42 internal dial tone 19 Page Zone 1 78 Page Zone 2 78 Paging 32, 76, 78 over a Paging Zone 32...
- Page 82 Telecor DP200 Display Phone User’s Guide Redial button 3, 8, 19 Text Message 16 redialing a number 19, 78 Transfer 56, 77 Redirecting Voice Mail Messages 66 blind 56 Reset Extension 78 to your Voice Mail 56 Ring Select 41–43 to a specific extension 77 changing 42–43...
- Page 83 Index to a range of extensions 57 to an individual 57 wall mount installation 71–72 setting up features 54, 61–66 Warehouse Mode 41-43 Caller ID announcement 54 setting up 41–43 Dial by Name 54 Work Groups 38 greeting 54 monitoring 38 passcode 54 playback order 54 Setup Options menu 54...
Need help?
Do you have a question about the DP200 and is the answer not in the manual?
Questions and answers