Table of Contents
Advertisement
Advertisement
Table of Contents

Subscribe to Our Youtube Channel
Related Manuals for Akai MPD26


Summary of Contents for Akai MPD26
- Page 1 OPERATOR'S MANUAL ENGLISH ( 1 - 28 ) WWW.AKAIPRO.COM...
-
Page 3: Key Features
MIDI IN of the external device. If you would like to use another MIDI controller in your setup, connect a 5-pin MIDI cable from the MIDI OUT of the external MIDI device to the MIDI IN of the MPD26. -
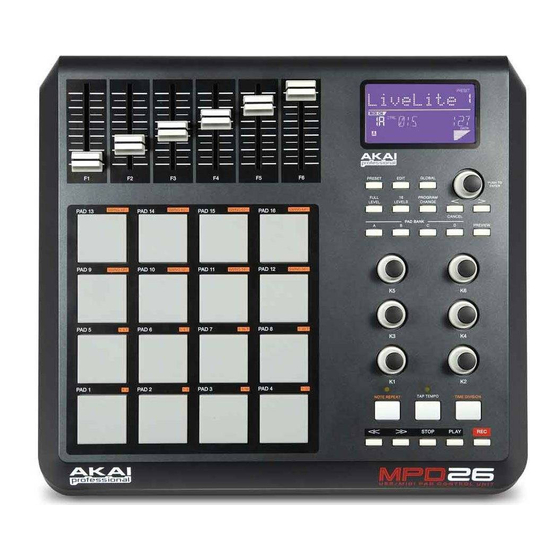
Page 4: Top Panel Overview
4 5 6 14 15 LCD – The display is used for navigating menus, displaying data, and affecting change on MPD26’s options and parameters. [VALUE] (Push to Enter) – This dial is used to increment and decrement Presets, parameter values and settings. -
Page 5: Rear Panel Overview
MIDI data to and from your computer and may also be used to send MIDI data from your computer to a device attached to the MIDI OUT port of the MPD26. MIDI OUT – Use a five-pin MIDI cable to connect the MIDI OUT of the MPD26 to the MIDI IN of an external device. -
Page 6: Displaying Information
DISPLAYING INFORMATION As you are working with the MPD26, the LCD will help you keep track of what values are being sent to external devices. There are several kinds of information that the MPD26 will display while in use: NOTE, AFTERTOUCH (Channel Pressure), CONTROL CHANGE, MIDI MACHINE CONTROL (MMC), and PREVIEW MODE information. -
Page 7: Midi Machine Control (Mmc)
COMMAND used to send transport control messages to hardware record or playback machines. example, pressing [PLAY] on the MPD26 sends an MMCPLAY message to a connected multi-track recorder, which begins playing. When you press [STOP] on the MPD26, the deck also stops. -
Page 8: About Modes
The MPD26 has four different modes of operation. Each mode can be accessed by pressing the corresponding button on the MPD26. Following is a short description of each mode: Preset Mode This mode allows you to load, save and copy Presets. A Preset is a collection of information about how different faders, knobs, and pads will behave. -
Page 9: Preset Mode
MPD26 every time. The MPD26 features different Preset banks which you can load and write to. When you turn on the MPD26, it will automatically go into Preset Mode and Preset 1 will be displayed on the screen. You can also press the [PRESET] button at any time to call up this mode. -
Page 10: Navigating Edit Mode
EDIT MODE Pressing [EDIT] calls up Edit NAVIGATING EDIT MODE Mode. In this mode, you can edit the settings of the currently Press [EDIT] to enter Edit Mode. selected Preset. The settings To select the controller you wish to edit, simply engage it – this will vary depending on the controller prompt the screen to display the available event types for the particular editing... - Page 11 EDITING PADS The pads on the MPD26 can be set to transmit Note or Program Change information when they are hit. The default operation of the pads is set to Note, which means that the pad will generate Note On/Off messages to trigger sounds.
-
Page 12: Note Parameters
3. Press [>] to select the next field. Note: When not used via USB, only pads assigned to port A will transmit MIDI information via the 5-pin MIDI port on the back of the MPD26. NOTE FIELD This field sets the MIDI Note Number that the pad will transmit when it is hit. -
Page 13: Program Change Parameters
PROGRAM CHANGE PARAMETERS The following list of parameters can be accessed if the pad event type is set to Program Change. MIDI CHANNEL FIELD Program Change messages can be sent on one of two MIDI Ports, A or B, and one of 16 MIDI Channels on each port (i.e. A7). You may also assign Program Change to use the MIDI Common Channel. - Page 14 EDITING KNOBS & FADERS The knobs and faders on the MPD26 can be set to transmit Control Change or Aftertouch information. In addition, the endless knobs may also be assigned as an Increment/Decrement function. The default operation of knobs and faders is to transmit Control Change information.
-
Page 15: Control Change Parameters
MIDI PORT/CHANNEL FIELD Note: When not used via USB, only knobs and faders assigned to port A will be transmitted via the 5-pin MIDI port on the back of the MPD26. CONTROL CHANGE FIELD In this field you can set which MIDI CC # the knob or fader will transmit when it is used. -
Page 16: Aftertouch Parameters
MIDI PORT/CHANNEL FIELD Note: When not used via USB, only knobs and faders assigned to port A will be transmitted via the 5-pin MIDI port on the back of the MPD26. MINIMUM RANGE FIELD This field is used to specify the minimum value that the knob or fader can transmit. -
Page 17: Increment/Decrement Parameters (Knobs Only)
INCREMENT/DECREMENT PARAMETERS (knobs only) The endless knobs on the MPD26 may also be used as an increment/decrement NRPN function. This allows you to use the knob to increment and decrement through parameters as opposed to sending an absolute value. Please note that the implementation of NRPN functions depends strictly on the software with which you will be using the MPD26. -
Page 18: Editing Note Repeat
EDITING NOTE REPEAT The MPD26 features the Note Repeat function, which can be found on our legendary Music Production Center (MPC) models. With Note Repeat enabled, you can repeatedly trigger a sound by simply holding down a pad. The sound will be retriggered at a rate equivalent to the currently selected Time Division. With the Note Repeat feature, you can record a phrase that would be difficult to record in real time, such as 16 beat hi hat, snare roll, etc…... -
Page 19: Note Repeat Button Mode
NOTE REPEAT BUTTON MODE The following screen will appear if you select “TOGGL-MOTRY” on Page 1. In this field, you can select whether the [NOTE REPEAT] button will behave in a momentary (MTY) fashion, where pressing the button turns on the Note Repeat function and releasing it turns it off, or in a toggle (TGL) manner, where pressing the button turns on the Note Repeat function and pressing again turns it off. -
Page 20: Editing Time Division
The Time Division feature works in conjunction with Note Repeat. When Note Repeat is enabled and a pad is held down, the MPD26 will output notes at a rate equivalent to the Time Division setting. To change to a new Time Division setting, press and hold [TIME DIVISION] and select a new rate by pressing one of Pads 8- 16 (1/4, 1/4T, 1/8, etc.). -
Page 21: Editing Transport Control
MESSAGE FORMAT EDITING TAP TEMPO Each Preset on the MPD26 can have a default tempo associated with it. Every time that the Preset is loaded, the BPM setting will be loaded automatically. To edit the default tempo, press [EDIT] to enter Edit Mode. -
Page 22: Global Mode
In Global Mode, you can send NAVIGATING GLOBAL MODE global messages and make general changes to the way that your Press [GLOBAL] to enter Global Mode. MPD26 functions. Global Mode Use [<] and [>] to navigate through the available pages of options organized under options (shown below). -
Page 23: Midi Common Channel
MIDI Channel or a RESET ALL CONTROLLERS command. ALL NOTES OFF is a special MIDI message used to turn off any notes that might be playing on the MPD26. It is often used to recover from erroneous stuck notes. -
Page 24: Pad Velocity Curve
MIDI velocities, based on a certain ratio of the input / output velocity that characterizes the particular curve. The Pad Velocity Curve feature is intended to help you optimize the pads on the MPD26 for your particular playing style and can add expressivity and control to your performance. -
Page 25: Tap Tempo Average
You can also load preset data into the MPD26 from an external source by “playing” a SysEx file into the MPD26. This can be done with a variety of SysEx applications, many of which are widely and freely available over the Internet. -
Page 26: Program Change Mode
Change or Prog+Bank message on and press There are two different types of Program [ENTER]. Change messages on the MPD26: On Page 2, use the [<] and [>] buttons to move PROG CHANGE – This event will transmit through the different options and use the {VALUE] a regular Program Change message (0- dial to change them. -
Page 27: Resetting Factory Defaults
RESETTING FACTORY DEFAULTS If you ever would like to restore all the presets to the factory default, do the following: Press [>] - this will open the SAVE screen. Press [>] again - This will open the PRESET NAME screen. Press [>] to move past each letter in the current program's name until the last character is reached. -
Page 28: Frequently Asked Questions
Question: Can I use the MPD26 as a MIDI interface for other MIDI devices? Answer: Yes. The MPD26 functions as a MIDI interface and can be used to send or receive MIDI to and from other MIDI devices connected to it. -
Page 29: Troubleshooting
“External”. Also, make sure that the software you set to “Internal”. source. are using is set to send MIDI Clock to the MPD26. My Seq/DAW is set to send Software DAW is not in If your software DAW is not playing, it will not be clock but Note Repeat is play mode. -
Page 30: Technical Specifications
Slave connector x 1 (MIDI over USB) DC IN 6V DC, 1A CONTACT INFORMATION Please visit the Akai Professional website (www.akaipro.com) regularly for additional information, news and firmware upgrades for the MPD26. For additional technical support: EMAIL: support@akaipro.com TEL: 401.658.4032 (U.S) - Page 31 Rev. A...
- Page 32 WWW.AKAIPRO.COM...
Need help?
Do you have a question about the MPD26 and is the answer not in the manual?
Questions and answers