Rinnai RHFE-309FT Operation And Installation Manual
Energysaver space heaters
Hide thumbs
Also See for RHFE-309FT:
- Operation and installation manual (72 pages) ,
- Operation & installation manual (36 pages) ,
- Installation manual (32 pages)
Table of Contents
Advertisement
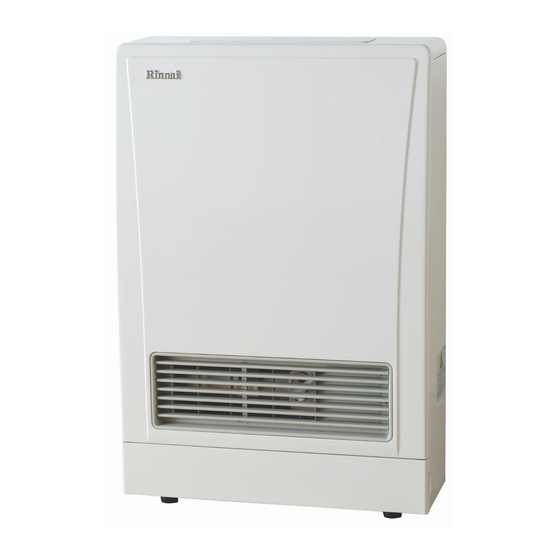
Energysaver
Models: RHFE-309FT & RHFE-559FT
Operation and Installation Manual
Models:
RHFE-309FT
RHFE-559FT
This appliance shall be installed in accordance with:
• Manufacturer's Installation Instructions
• Local Gas Fitting Regulations
• Municipal Building Codes
• AS 5601 Gas Installations, AS/NZS 3000 Wiring Rules
• Any other relevant Statutory Regulations
This appliance must be installed, serviced and removed by an authorised person.
Space Heaters
®
Please note:
Flue System Installation Instructions
enclosed with Flue Terminal packaged
separately.
All Rinnai gas products
are A.G.A. certified.
Distributed and serviced in Australia under a Quality
System certified as complying with ISO 9001 by
SAI Global
Advertisement
Chapters
Table of Contents

Related Manuals for Rinnai RHFE-309FT


Summary of Contents for Rinnai RHFE-309FT
- Page 1 Energysaver Space Heaters ® Models: RHFE-309FT & RHFE-559FT Operation and Installation Manual Models: Please note: RHFE-309FT Flue System Installation Instructions RHFE-559FT enclosed with Flue Terminal packaged separately. This appliance shall be installed in accordance with: • Manufacturer’s Installation Instructions • Local Gas Fitting Regulations •...
-
Page 2: Installation Requirements
INSTALLATION REQUIREMENTS This heater must be installed by an authorised person. The installation must conform to local regulations. The installation must also comply with the instructions supplied by Rinnai. Service and removal must be carried out by an authorised person. -
Page 3: Table Of Contents
Fusible Links: ........................14 Flame Failure Device: ..................... 14 Electrical Fuse: ........................ 14 Power Failure: ......................... 14 SERVICE ..........................14 INSTALLATION MANUAL - TABLE OF CONTENTS ............16 CONTACT INFORMATION ....................29 Rinnai Australia Energysaver® - Operation & Installation Manual... -
Page 4: About Your Energysaver
ABOUT YOUR ENERGYSAVER ® Control Panel Layout - RHFE-309FT / RHFE-559FT Rinnai Australia Energysaver® - Operation & Installation Manual... -
Page 5: Safety
4. Heater must not be located below a power socket-outlet. 5. The local gas and electrical authorities will be able to advise on local regulations. 6. Only the approved flue components specified by Rinnai must be used. Rinnai Australia Energysaver® - Operation & Installation Manual... - Page 6 DO NOT allow children or elderly persons to sleep in the warm air discharge from the heater. DO NOT cover or place articles on or against this heater. Turn ‘OFF’ heater after use. Rinnai Australia Energysaver® - Operation & Installation Manual...
- Page 7 DO NOT place articles in front of the louvres. DO NOT unplug the heater while it is in operation or while the fans are still cycling. DO NOT turn the heater ‘OFF’ by unplugging it from the wall. Rinnai Australia Energysaver® - Operation & Installation Manual...
- Page 8 LEFT SIDE RIGHT SIDE Access panel and Humidifier tray have to be fitted while the heater is in use. Rinnai recommend you fill the tray to the water Pull Gently Remove level indicator as marked. Take care not to Access Panel overfill.
- Page 9 However if odours persist switch ‘OFF’ the appliance and contact Rinnai. Keep flammable materials, trees shrubs etc. away from the flue terminal. Snow Areas - in areas subject to heavy snowfall, keep snow clear of flue terminal at all times.
-
Page 10: Features
The integral humidifier tray can be filled with water as required to raise the humidity level in the room for extra comfort. Tray should not be filled to more than 3/4 full. Rinnai Australia Energysaver® - Operation & Installation Manual... -
Page 11: Customer Information - Operation
15 seconds. After this it will be necessary to press the ‘ON’/ ’OFF’ button ‘OFF’, then ‘ON’ again. If the appliance fails to ignite after 4 attempts, contact Rinnai as a service call may be required. To turn the unit ‘OFF’ Simply press the ‘ON’/’OFF’... -
Page 12: Economy Mode
Select the Economy mode before selecting timer operation. 2. Press the Economy button to start the Economy function. The Economy indicator will glow. 3. Press the Economy button once more to switch ‘OFF’ the economy function. Rinnai Australia Energysaver® - Operation & Installation Manual... -
Page 13: Setting The Clock
This procedure is for setting the ‘ON’/ ‘OFF’ times for Timers. To program the time periods refer page 11. NOTE If during setting no buttons are pressed for 1 minute the setting sequence will automatically cancel and the display will revert to normal display. Rinnai Australia Energysaver® - Operation & Installation Manual... -
Page 14: Operating The Timers
This means that the Override mode will automatically drop out if a programmed starting time is reached. The appliance will then return to operating at the times programmed into the Timer(s). Rinnai Australia Energysaver® - Operation & Installation Manual... -
Page 15: Other Operating Information
Outside Flue Terminal On cold days steam may be discharged from the flue terminal. This is normal with high efficiency ® appliances such as the Energysaver range and does not indicate any fault. Rinnai Australia Energysaver® - Operation & Installation Manual... -
Page 16: Care Of Your Energysaver
DO NOT operate appliance without filter in place. WARNING Regularly check the outside flue terminal to make sure it is clear from plant growth and from other obstructions. Refer “SAFETY” on page 2 for additional requirements. Rinnai Australia Energysaver® - Operation & Installation Manual... -
Page 17: Safety Devices
(refer “SETTING THE CLOCK” on page 10). SERVICE Rinnai Australia has a service and spare parts network in all states. Our service network personnel are fully trained and equipped to give the best service on your Rinnai appliance. If your appliance needs servicing, please ring one of the service contact numbers on the back of this booklet. - Page 18 Rinnai Australia Energysaver® - Operation & Installation Manual...
-
Page 19: Installation Manual - Table Of Contents
Electrical supply ....................20 FLUE INSTALLATION CONFIGURATIONS ............21 FLUE POSITIONING ....................22 Flue terminal location ..................22 HEATER INSTALLATION ..................23 COMMISSIONING .....................24 TROUBLE SHOOTING .....................25 Trouble Shooting Check List ................25 ERROR MESSAGES ....................27 WIRING DIAGRAM ....................28 CONTACTS .......................29 Rinnai Energysaver® - Operation & Installation Manual... -
Page 20: Specifications
Results in ‘room sealed’ appliance. Ignition Direct continuous spark electronic ignition – no pilot. ® Electrical supply 240V 50Hz with supply lead and 3 pin plug. Replace with Rinnai genuine part. Standby power <1W consumption Convection fan... -
Page 21: Dimensions
DIMENSIONS RHFE-309FT GAS INLET 335 mm 124 mm Rinnai Australia Energysaver® - Operation & Installation Manual... - Page 22 DIMENSIONS RHFE-559FT GAS INLET 134 mm 82 mm Rinnai Australia Energysaver® - Operation & Installation Manual...
-
Page 23: Heater Location
This heater must not be installed where curtains or other combustible materials could come into contact with it. In some cases curtains may need restraining. Refer to page 2 for additional safety consideration. ® For all installations, ONLY Rinnai Energysaver Flue components MUST be used. ® The Rinnai Energysaver MUST NOT be flued into ‘natural draft’... -
Page 24: Flue Installation Configurations
‘On Wall’ or ‘Direct’ flue kits for detailed flue installation NOTE instructions. Use only Rinnai Flue components with this appliance. The following configurations are currently available. For alternative configurations contact Rinnai Components DIRECT / EXTENDED Option A (Direct) -
Page 25: Flue Positioning
* AS 5601 : 2004 was current at the time of printing this manual, but may have been superseded. It is the installers responsibility to ensure that the current NOTE version of this standard is used. Rinnai Australia Energysaver® - Operation & Installation Manual... -
Page 26: Heater Installation
The heater does not come supplied with flue components. These are purchased separately. NOTE ® ONLY Rinnai Energysaver Co-Axial Flue System Flue components can be used with this appliance. 240 VOLTS, RISK OF ELECTRICAL SHOCK! Ensure the appliance is disconnected from mains power. -
Page 27: Commissioning
COMMISSIONING For Commissioning Instructions, refer to the Commission sheet attached behind the front panel of the appliance. Rinnai Australia Energysaver® - Operation & Installation Manual... -
Page 28: Trouble Shooting
‘OFF’ Turn Gas ‘ON’. meter Function / Child Lock Set Cancel Function / Child Lock. If you are unsure about the way the unit is operating, contact Rinnai or your Agent. Rinnai Australia Energysaver® - Operation & Installation Manual... - Page 29 Timers may either be inactivated or incorrectly programmed. Repeat programming. Refer to “OPERATING THE TIMERS” on page 11. Timer operates for 30 seconds then cuts Room temperature may be higher than set out. temperature. Adjust temperature upwards if desired. Rinnai Australia Energysaver®- Operation & Installation Manual...
-
Page 30: Error Messages
In all cases, you may be able to clear the Error Message simply by turning the heater ‘OFF’, then ‘ON’ again. If the Error Message still remains or returns on the next operation, contact Rinnai or your nearest service agent and arrange for a service call. -
Page 31: Wiring Diagram
WIRING DIAGRAM RHFE-309FT/RHFE-559FT Rinnai Australia Energysaver® - Operation & Installation Manual... -
Page 32: Contact Information
Tel: (03) 9271 6625 Fax: (03) 9271 6622 Rinnai has a Service and Spare Parts network with personnel who are fully trained and equipped to give the best service on your Rinnai appliance. If your appliance requires service, please call our Helpline. Rinnai recommends that this appliance RHF559-1152(00) be serviced every 2 years.
Need help?
Do you have a question about the RHFE-309FT and is the answer not in the manual?
Questions and answers