Table of Contents
Advertisement
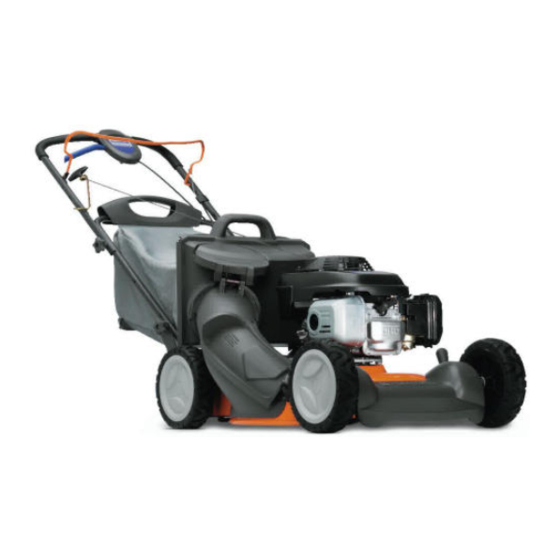
R152SV • R152SVSW
Instruction manual
Please read these instructions care ful ly
and make sure you un der stand them
before using this ma chine.
Anleitungshandbuch
Bitte lesen Sie diese Anleitungen sorg-
fältig durch und vergewissern Sie sich,
daß Sie diese verstehen, bevor Sie die
Maschine in Betrieb nehmen.
Manuel d'instructions
S'il vous plaît lisez soigneusement et
soyez sûr de comprende ces instruc-
tions avant d'utiliser cette machine.
Manual de las instrucciones
Por favor lea cuidadosamente y com-
prenda estas intrucciones antes
de usar esta maquina.
Instructieboekje
Lees deze instructies aandachtig en
zorg dat u ze begrijpt voordat u deze
machine gebruikt.
Manuale di istruzioni
Prima di utilizzare la macchina leggete
queste istruzioni con attenzione ed ac-
certatevi di averle comprese bene.
Advertisement
Table of Contents

Related Manuals for Husqvarna R152SVSW


Summary of Contents for Husqvarna R152SVSW
- Page 1 R152SV • R152SVSW Instruction manual Please read these instructions care ful ly and make sure you un der stand them before using this ma chine. Anleitungshandbuch Bitte lesen Sie diese Anleitungen sorg- fältig durch und vergewissern Sie sich, daß Sie diese verstehen, bevor Sie die Maschine in Betrieb nehmen.
-
Page 2: Table Of Contents
CONTENTS SAFETY RULES ... 3-8 TECHNICAL DATA ...9 OVERVIEW ...10 ASSEMBLY ... 11-14 ADJUSTMENTS...15 START AND STOP ... 16-17 USE ... 18-19 MAINTENANCE ... 20-22 GENERAL INFORMATION ...23 INHALTSVERZEICHNIS SICHERHEITSREGELN ... 3-8 TECHNISCHE DATEN ...9 ÜBERSICHT...10 MONTIEREN ... 11-14 EINSTELLUNG ...15 START UND ABSTELLEN... -
Page 3: Assembly
Safe Operation Practices for Pe des tri an-Controlled Rotary Lawnmowers IMPORTANT: This cutting machine is capable of amputating hands and feet and throwing objects. Failure to observe the following safety instructions could result in serious injury or death. Training • Read the instructions carefully. -
Page 4: Betrieb
Sicherheitsvorkehrungen für Handgeführte Rasenmäher mit Rotationsklinge WICHTIG: Diese mähmaschine kann hände und füsse abtrennen und gegenstände mit hoher geschwindigkeit schleudern. Nichtbeach- tung der folgenden sicherheitsvorschriften könnte schwere oder tödliche verletzungen zur folge haben. I. Schulung • Die Anleitungen sorgfältig durchlesen. Mit den Bedienungsele- menten und der vorschriftsmäßigen Bedienung der Maschine vertraut machen. -
Page 5: Précautions D'utilisation
Solutions pratiques de sécurité de marche pour tondeuse à hélice horizontale pédestre ATTENTION: Ce tracteur de pelouse est capable d’amputer mains ou pieds et de projeter des objets.l’inobservation des règles de sécurité ci-dessous peut être la cause de blessures sérieuses voire mortelles. I. -
Page 6: Operación
Normas de funcionamiento seguro para cortacéspedes giratorios de pie IMPORTANTE: Esta maquina cortadora es capaz de amputar las manos y los pies y de lanzar objetos. Si no se observan las instruc- ciones de seguridad siguientes se pueden producir lesiones graves o la muerte. I. -
Page 7: Onderhoud En Opslag
Veilig werken met handbediende grasmaaimachines BELANGRIJK: Deze maaimachine kan handen en voeten amputeren en voorwerpen wegslingeren. Het niet opvolgen van deze veiligheidsinstructies kan ernstig of dodelijk letsel tot gevolg hebben. I. Training • Lees de instructies aandachtig. Zorg dat u vertrouwd bent met de bedieningselementen en het juiste gebruik van de ma chine. -
Page 8: Funzionamento
Misure operative di sicurezza per tosaerba controllate da pedoni ATTENZIONE: Questo trattorino tosaerba ha una potenza suffi ciente ad amputare mani e piedi e a scagliare oggetti. La mancata os- servanza delle seguenti istruzioni antinfortunistiche potrebbe causare lesioni gravi e persino il decesso della vittima. I. - Page 9 Simboli utilizzati sull'apparato di taglio o nella documentazione fornita unitamente al prodotto. E' importante conoscerne bene il signifi cato. Deze symbolen kunnen op uw machine of in de bij het produkt geleverde documentatie aanwezig zijn. Lees en begrijp de betekenis. R152SV R152SVSW 5,5 / 0–6 20-97...
- Page 10 R152SVSW R152SV...
-
Page 11: Montage
ASSEMBLING Handle Pull up the handle in direction of the arrow. With the handle in up-turned position, tighten the wing-nuts. MONTAGE Griff Griff in Pfeilrichtung hochklappen. Anschließend Flügelmuttern anziehen. MONTAGE Manche Déployez le manche dans la direction de la fl èche. Une fois le manche déployé, serrez les écrous à... -
Page 12: To Empty Grass Catcher
• Slip vinyl bindings over frame. • Lift the rear door (5) on the lawn mower housing and place the grass catcher frame onto the rear door. • The grass catcher is secured to the lawn mower housing when the rear door is low ered onto the grass catcher frame. -
Page 13: To Convert Mower
Assembleren en monteren van de grasvergaarbak • Zet het frame in de grasvergaarbak met het beneden duwboom (4) naar onderen. • Trek de plastic haken over het frame. • Open de achterklep (5) van de grasmaaier en bevestig het frame op de achterklep. •... -
Page 14: Adjustments
R152SV Para Convertir la Segadora PARA EL ENSACADO TRASERO - • El recogedor del césped instalado. PARA EL ACOLCHAMIENTO - • La tapa acolchadora (1) cerrado. PARA NO RECOGER LA HIERBA - • La tapa acolchadora (1) cerrado. • La protección contra la descarga (2) instalada. De Maaier Veranderen VOOR GRASOPVANG ACHTER DE MAAIMACHINE - •... -
Page 15: Filling With Oil
R152SVSW Filling with Oil Fill the engine with engine oil. SAE30 can be used. (Read the enclosed motor operating in struc tions as well.) Ölaffülling Füllen Sie Öl in den Motor. Es kann SAE30 verwendet werden. (Lesen Sie auch die beiliegende Gebrauchsanweisung für den Motor.) Remplissage d’huile... -
Page 16: Starting And Stopping
CHOKE (2) UPPER HANDLE (3) BRAKE YOKE (4) STARTER HANDLE (2) OBERER FÜHRUNGSHOLM (3) BEDIENUNGSHEBEL (4) STARTHANDGRIFF (2) GUIDON SUPÉRIEUR (3) COMMANDE (4) POIGNÉE DE STARTER (2) MANILLAR SUPERIOR (3) MANDO (4) MANGO DE ARRANQUE (2) OVERSTE STUUR (3) BEDIENINGSHENDEL (4) STARTHENDEL (2) MANUBRIO SUPERIORE (3) COMANDO... -
Page 17: Mise En Service
Drive • Forward drive is engaged (1) and disengaged (2) with the clutch bar at the top of the handle. • Select ground speed with gear shift lever (3). The farther toward the handle the lever is pulled, the faster the unit will travel. Lauf •... - Page 18 MAX 15° R152SVSW (1) LOCKED (1) VERSCHLOSSEN (1) VERROUILLÉ (1) BLOQUEADO (1) GESLOTEN (1) LOCKED The mower should not be used on ground that slopes more than 15°. This could cause engine lubrication problems. Gebrauch Der Rasenmäner solite nicht in einem Gelände benützt werden, das eine Neigung von mehr als 15°...
-
Page 19: Maintenance
Mow the lawn twice weekly during the most active periods of growth. Never cut more than 1/3 of the length of the grass, especially during dry periods. Mow with a high cutting height setting the fi rst time. Examine the result and MAX 1/3 lower the mower to the desired setting. - Page 20 Regularly Stop the engine and unscrew the dipstick. The level should be between FULL and ADD. Avoid fi lling with too much oil. Regelmässig Stellen Sie den Motor ab und schrauben Sie den Ölpeilstab heraus. De Ölstand soll swischen FULL and ADD liegen. Vermeiden Sie zu viel Öl einzufüllen. Régulièrement Arrêter moteur et vérifi...
- Page 21 (1) OIL DRAIN PLUG (1) ÖLABLAßSCHRAUBE (1) BOUCHON DE VIDANGE D'HUILE (1) TAPON DE DRENAJE PARA ACEITE (1) AFTAPPLUG OLIE (1) TAPPO DI SCARICO DELL'OLIO Change oil after each season or after 25 hours running time. Run the engine warm, remove the spark plug lead. Remove the drain plug from bottom of engine and drain oil.
- Page 22 Mit der Zeit kann die Geschwindigkeit abnehmen. Regulieren Sie diese wie folgt: TASTE: • Ziehen Sie die Taste (1) an der Gehäuseunterseite gedrückt. • Halten die Taste (1) los, die Geschwindigkeit nimmt nun zu. Sollte ein Rückgang der Geschwindigkeit festgestellt werden, wiederholen Sie die o.g. Schritte um die Regulierung auf die Normalgeschwindigkeit zurückzustellen.
-
Page 23: Informaciones Generales
Nel tempo, la velocità rispetto al suolo potrebbe ridursi. Eseguire le seguenti regolazioni: PULSANTE: • Tirare il pulsante (1) posizionato sulla parte posteriore del telaio. • Premere il pulsante (1). La velocità rispetto al suolo dovrebbe aumentare. Nel caso in cui la velocità rispetto al suolo si sia ridotta, ripetere i passaggi sopra indicati per ripristinare le regolazioni ai valori normali. - Page 24 532 19 40-56 Rev. 1 05.05.05 BY Printed in U.S.A.
Need help?
Do you have a question about the R152SVSW and is the answer not in the manual?
Questions and answers