Husqvarna GX560 Operator's Manual
Husqvarna lawn mower operator's manual
Hide thumbs
Also See for GX560:
- Operator's manual (308 pages) ,
- Original instructions manual (76 pages) ,
- Operator's manual (124 pages)

Related Manuals for Husqvarna GX560


Summary of Contents for Husqvarna GX560
- Page 1 G X 5 6 0 Operator’s Manual Read the operator’s manual careful- ly and make sure that you under- stand the contents before using the lawnmower. 5119617-01...
-
Page 2: Carton Contents
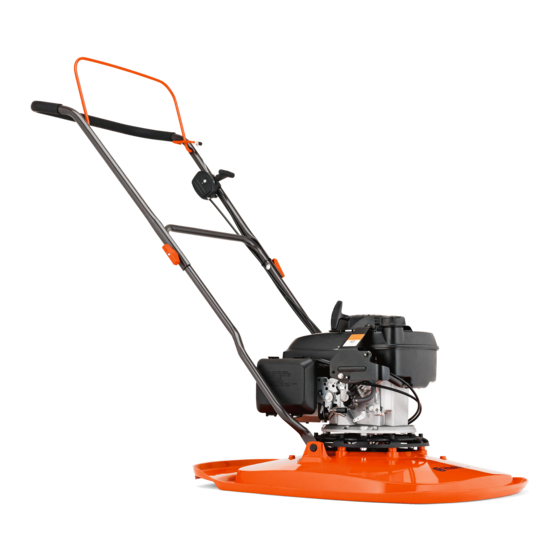
This product may have been purchased with a Wheel Assembly. Please assemble your product in accordance with the relevant Instructions. Wheel Assembly Kits are available from your local stockists. GX560 Operator Presence Control Upper Handle Handle Knob Lower Handle Lower Handle Retaining Clip... - Page 3 The operator is responsible for following the warning and safety instructions in this manual and on the lawnmower. Explanation of Symbols on the GX560 Warning...
- Page 4 Assembly (without wheels) Fitting the Lower Handle to the Lawnmower 1. Feed the hook (A2) attached to the lower handle (A1) halfway through the centre slot of the guide (A3), in the direction indicated by the arrow (A4). 2. Maintaining the hook (A2) in the centre slot of the guide (A3) turn the lower handle (A1) clockwise through 90 position between the hood brackets (A5).
- Page 5 Use 4-stroke automotive detergent oil. SAE 10W-30 is recommended for general use. Assembly (with wheels) 1. Fit the lower handle (E1) to the deck with the lower 2. Attach the wheels (F1) to the wheel frame (F2) with the 3. Fit the wheel frame (G1) to the deck with the lower 4.
-
Page 6: Starting And Stopping
AIR CLEANER Starting and Stopping To Start your Lawnmower 1. Move the handle to the parking position (C2). 2. Connect the spark plug lead. (K). 3. Open the fuel tap (L). 4. Move the Choke control lever to the ‘Choke’ position (M) when starting from cold, and to the ‘Run’... -
Page 7: Adjusting The Cutting Height
Adjusting the Cutting Height • Never use more than 2 cutting height spacers. • Spacers can only be fitted between the blade and the fan and never between blade and the bolt (R). 1. Ensure the Operator Presence Control is released, when the engine has stopped rotating - disconnect the spark plug lead. -
Page 8: Spark Plug
An oily or carboned spark plug makes starting diffi- cult and decreases the efficiency of the engine. Periodically remove the spark plug and clean and adjust when necessary. Never run the engine without a filter or with a dirty filter. This will greatly reduce engine efficiency and lead to engine damage. -
Page 9: Fault Finding
Engine Will Not Start 1. Ensure that the Operator Presence Control is gripped firmly to the upper handle. 2. Check that there is sufficient fuel in the fuel tank and the fuel tap is open 3. Check that the choke control lever is in the cor- rect position:- 'Run’... -
Page 10: Ec Declaration Of Conformity
The maximum A-weighted sound pressure level recorded at oper- ator position under free field semi ane- choic chamber conditions was :- Type... GX560 Engine Manufacturer... Honda GCV160 Width of Cut... 50.5 cm Speed of Rotation of Cutting Device... 3,300 RPM Guaranteed sound power level... - Page 11 We hope you find the links below useful. For further gardening information visit Blower Vacs Brush cutters Cultivators Cylinder lawn mowers Electric Fertiliser chainsaws spreaders Garden tractors Garden vacuums Hover mowers Husqvarna chainsaws Lawn scarifiers Lawn tractors Petrol hedge Ride on lawn cutters mowers Ryobi strimmers Scarifiers Westwood Brush Cutters tractors...
Need help?
Do you have a question about the GX560 and is the answer not in the manual?
Questions and answers