Table of Contents
Advertisement
Available languages
Available languages
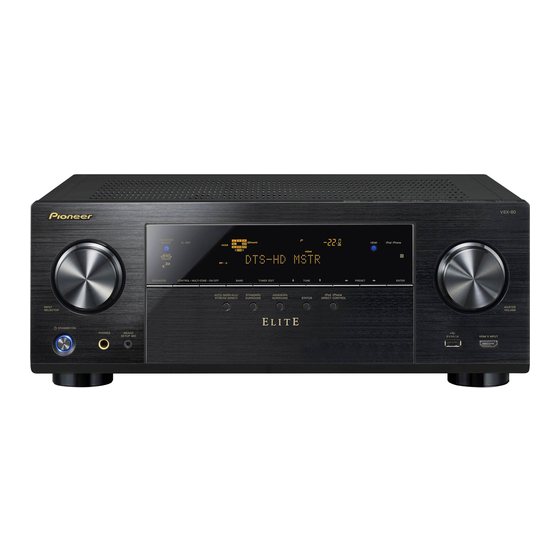
VSX-80
Thank you for buying this Pioneer product. This Quick Start Guide includes instructions for basic connections and operations to
allow simple use of the receiver. For detailed descriptions of the receiver, see the "Operating Instructions" provided on the
included CD-ROM (
).
Merci pour l'achat de ce produit Pioneer. Ce guide rapide contient les instructions relatives aux raccordements et opérations de
base permettant une utilisation simple de ce récepteur. Pour des descriptions plus détaillées du récepteur, référez-vous au
"Mode d'emploi" sur le CD-ROM (
) fourni.
What's in the box
Contenu du carton d'emballage
Remote Control
STANDBY/ON
SOURCE
ALL ZONE STBY
Télécommande
RECEIVER
SUB ZONE CONTROL
MAIN
Z2
Z3
HDZ
SOURCE CONTROL
BD
DVD
SAT
HDMI
USB
ADPT
ROKU
iPod
BT
MHL
NET
TUNER
TV
CD
ALL
VOLUME
TV
VOL
INPUT
STATUS
MUTE
OUT P.
AUDIO P.
VIDEO P.
TOP
TOOLS
MENU
MENU
ENTER
HOME
MENU
RETURN
FM wire antenna
LISTENING MODE
Antenne filaire FM
AUTO
SURR
ADV
CH LV.
MPX
BAND
PTY
PRESET
TUNE
AUDIO
1
2
3
Fav
DISP
4
5
6
7
8
9
CH
D.ACCESS
CLASS
CLR
0
ENTER
CH
DIMMER SLEEP
RCU SETUP
RECEIVER
AAA size IEC R03 dry cell batteries x2
Piles à anode sèche AAA IEC R03 x 2
AV Receiver
Récepteur AV
AM loop antenna
Antenne cadre AM
Power cord
Setup microphone
Cordon d'alimentation
Microphone de configuration
Quick Start Guide
Guide rapide
Register your product at
http://www.pioneerelectronics.com (US)
http://www.pioneerelectronics.ca (Canada)
Protect your new investment
The details of your purchase will be on file for reference in the event of an
insurance claim such as loss or theft.
Receive free tips, updates and service bulletins on
your new product
Improve product development
Your input helps us continue to design products that meet your needs.
Receive a free Pioneer newsletter
Registered customers can opt in to receive a monthly newsletter.
VSX-80
Enregistrez votre produit sur le site Web :
CD-ROM
http://www.pioneerelectronics.com (États-Unis)
http://www.pioneerelectronics.ca (Canada)
Protégez votre nouveau matériel
Warranty sheet
Les renseignements relatifs à votre matériel seront conservés pour
Feuille de garantie
référence en cas de sinistre, tel que la perte ou le vol.
Recevez des conseils, des informations d'entretien
et de mise à jour sur votre nouveau matériel
These quick start guide
Le présent Guide rapide
Contribuez au développement de nos produits
Votre participation nous aide à concevoir des produits qui répondent à
vos besoins.
Recevez gratuitement le bulletin d'informations de
Safety Brochure
Pioneer
Brochure sur la Sécurité
Les clients enregistrés peuvent, s'ils le désirent, recevoir un bulletin
d'informations mensuel.
Advertisement
Table of Contents

Related Manuals for Pioneer VSX-80 Elite


Summary of Contents for Pioneer VSX-80 Elite
-
Page 1: Quick Start Guide
Guide rapide Register your product at Thank you for buying this Pioneer product. This Quick Start Guide includes instructions for basic connections and operations to http://www.pioneerelectronics.com (US) allow simple use of the receiver. For detailed descriptions of the receiver, see the “Operating Instructions” provided on the included CD-ROM ( http://www.pioneerelectronics.ca (Canada) - Page 2 English Enjoy easy multichannel playback with this unit in 3 steps: Connecting up → Initial setup → Basic playback. Connection and initial setup can be performed by referring to this Quick Start Guide, but it is easier when using the Wiring Navi in AVNavigator. Perform connection and initial setup with either method according to the circumstances in which you are using AVNavigator.
-
Page 3: Connecting To The Network Through Lan Interface
Using Built-in AVNavigator ask your nearest Pioneer authorized independent service Connecting to the network through Connecting to a wireless LAN company for a replacement. LAN interface Wireless connection to the network is possible through a • Do not use any power cord other than the one supplied wireless LAN connection. -
Page 4: Operating Environment
Using Built-in AVNavigator (continued) Using Windows PC Using iPad/iPhone/iPod touch Launching the built-in AVNavigator • Launch Internet Explorer and enter the IP address of this Download a free application, iControlAV5, from the App Store. Operate AVNavigator by following the screen prompts of your unit in the address field of Internet Explorer. - Page 5 Using Built-in AVNavigator (continued) ■ Using iPad About using Wiring Navi On an iPad, you can operate AVNavigator for iPad. Download Wiring Navi starts when ‘Wiring Navi’ is pressed on the AVNavigator for iPad from the App Store. After launching AVNavigator screen.
-
Page 6: Connecting The Speakers
Connecting up After installing the speakers, connect them as shown below. Connecting the speakers The receiver will work with just two stereo speakers (the front speakers in the diagram) but using Center Front Right Subwoofer Front Left at least five speakers is recommended, and a complete setup is best for surround sound. (SW) To achieve the comfortable surround sound, install your speakers as shown below. -
Page 7: Connecting Antennas
HDMI/DVI-compatible the power cord once in a while. If you find it damaged, Blu-ray DIsc player ask your nearest Pioneer authorized independent service Connecting antennas company for a replacement. • Do not use any power cord other than the one supplied AM loop antenna with this unit. -
Page 8: Initial Setup
Initial Setup Before you start Automatically setting up for surround sound (MCACC) Put the batteries in the remote control. The Auto Multi-Channel ACoustic Calibration (MCACC) setup The Full Auto MCACC screen appears on your TV. uses the supplied setup microphone to measure and analyze 1a.Full Auto MCACC the test tone that is outputted by the speakers. -
Page 9: Basic Playback
Basic playback Switch on the playback component. Note Multichannel playback E.g.) Turn the Blu-ray Disc player connected to the HDMI • When the remote control cannot be used to operate the unit BD IN terminal on. STANDBY/ON SOURCE – When operating the receiver, press MAIN RECEIVER Switch the input of the receiver. -
Page 10: Listening To Internet Radio Stations
Playback with NETWORK feature included with the iPod and Pioneer disclaims any liability in connection with such Setting the Audio options occurrences. Pioneer does not represent or warrant that Setting the Video options... - Page 12 Français Profitez de la lecture multicanaux sur cet appareil en 3 points seulement : Raccordement → Configuration initiale → Lecture de base. La connexion et la configuration initiale peuvent être réalisées en se référant au présent Guide rapide, mais il est plus facile d’utiliser le Wiring Navi dans l’AVNavigator.
-
Page 13: Mise En Marche
Routeur de temps en temps. Si vous le trouvez abîmé, demandez cette connexion. à votre service après-vente Pioneer le plus proche de le • N’utilisez que le câble de liaison d’accessoire fourni. remplacer. • Certains réglages doivent être effectués pour que le •... - Page 14 Utilisation de l’AVNavigator intégré (suite) Utilisation d’un PC sous Windows Utilisation d’un iPad/iPhone/iPod touch Lancement de l’AVNavigator • Lancez Internet Explorer et saisissez l’adresse IP de cet Téléchargez une application gratuite, iControlAV5, depuis l’App intégré appareil dans le champ d’adresse d’Internet Explorer. Store.
- Page 15 Utilisation de l’AVNavigator intégré (suite) ■ Utilisation d’un iPad À propos de l’utilisation de Wiring Sur un iPad, vous pouvez utiliser AVNavigator pour iPad. Navi Téléchargez AVNavigator for iPad depuis l’App Store. Après avoir lancé AVNavigator for iPad, suivez les instructions à Wiring Navi démarre lorsque vous appuyez sur ‘Wiring Navi’...
-
Page 16: Raccordement Des Enceintes
Raccordement Après avoir installé les enceintes, raccordez-les de la façon ci-dessous. Raccordement des enceintes Avant Caisson de Le récepteur fonctionne avec deux enceintes stéréo seulement (enceintes avant sur le schéma) Gauche Centre Avant Droite grave mais il est conseillé d’utiliser au moins cinq enceintes, et avec une configuration complète le (SW) son surround sera bien meilleur. -
Page 17: Raccordement Des Antennes
Si vous le trouvez abîmé, demandez HDMI IN Antenne cadre AM DIGITAL OUT HDMI OUT à votre service après-vente Pioneer le plus proche de le OPTICAL remplacer. • Utilisez exclusivement le cordon d’alimentation fourni avec cet appareil. -
Page 18: Configuration Initiale
Configuration initiale Avant de commencer Configuration automatique du son surround (MCACC) Insérez des piles dans la télécommande. Lors du calibrage acoustique multicanaux automatique 1a.Full Auto MCACC A/V RECEIVER (MCACC), le microphone de configuration fourni est utilisé Speaker System : Normal(SB/FH) EQ Type pour mesurer et analyser la tonalité... -
Page 19: Lecture De Base
Lecture de base Sélectionnez l’entrée du récepteur. Note Lecture multicanaux Ex.) Appuyez sur BD pour sélectionner l’entrée BD. • Lorsque la télécommande est inopérante sur l’appareil STANDBY/ON SOURCE Appuyez sur AUTO pour sélectionner ‘AUTO – Lorsque vous utilisez le récepteur, appuyez sur MAIN SURROUND’. - Page 20 à tout moment sans préavis, Lecture avec la fonction NETWORK et Pioneer décline toute responsabilité quant à ces Réglage des options audio changements. Pioneer ne certifie ou garantit que les Réglages des options vidéo services de contenus continueront d’être fournis ou...
- Page 24 253 Alexandra Road, #04-01, Singapore 159936 TEL: 65-6472-7555 PIONEER ELECTRONICS AUSTRALIA PTY. LTD. 5 Arco Lane, Heatherton, Victoria, 3202, Australia, TEL: (03) 9586-6300 PIONEER ELECTRONICS DE MEXICO S.A. DE C.V. Blvd.Manuel Avila Camacho 138 10 piso Col.Lomas de Chapultepec, Mexico, D.F. 11000 TEL: 55-9178-4270 K002_B3_En ©...
Need help?
Do you have a question about the VSX-80 Elite and is the answer not in the manual?
Questions and answers
Bluetooth
The Pioneer VSX-80 does not have built-in Bluetooth. Users experiencing poor AirPlay performance have considered buying a Bluetooth adapter to add Bluetooth capability.
This answer is automatically generated