Table of Contents
Advertisement
Advertisement
Table of Contents

Related Manuals for Husqvarna 55C21HV


Summary of Contents for Husqvarna 55C21HV
- Page 1 55C21HV Owner’s Manual 532 18 92-91 12.05.03 BY Printed in U.S.A.
-
Page 2: General Operation
Safe Operation Practices for Walk-Behind Mowers IMPORTANT: THIS CUTTING MACHINE IS CAPABLE OF AMPUTATING HANDS AND FEET AND THROW ING OBJECTS. FAILURE TO OBSERVE THE FOLLOWING SAFETY INSTRUCTIONS COULD RESULT IN SERIOUS INJURY OR DEATH. I. GENERAL OPERATION • Read, understand, and follow all instructions on the machine and in the manual(s) before starting. -
Page 3: Table Of Contents
Please read and retain this manual. The instructions will enable you to assemble and maintain your lawn mower properly. Always observe the “SAFETY RULES”. SERIAL NUMBER: _________________________________... -
Page 4: Assembly
IMPORTANT: THIS LAWN MOWER IS SHIPPED WITH- OUT OIL OR GASOLINE IN THE ENGINE. Your new lawn mower has been as sem bled at the factory with the ex cep tion of those parts left unassembled for ship- ping purposes. All parts such as nuts, washers, bolts, etc., necessary to com plete the as sem bly have been placed in the parts bag. -
Page 5: Assembly
FRAME VINYL BINDINGS TO INSTALL ATTACHMENTS Your lawn mower was shipped ready to be used as a mulcher. To convert mower to bagging or discharging, see “TO CON VERT MOWER” in the Operation section of this man u al. FRONT... -
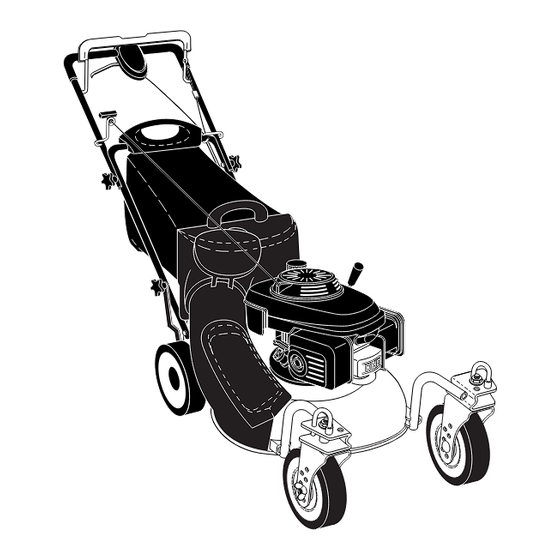
Page 6: Know Your Lawn Mower
KNOW YOUR LAWN MOWER READ THIS OWNER'S MANUAL AND SAFETY RULES BEFORE OPERATING YOUR LAWN MOWER. Compare the illustrations with your lawn mower to familiarize yourself with the location of various controls and adjustments. Save this manual for future reference. -
Page 7: How To Use Your Lawn Mower
The operation of any lawn mower can result in foreign objects thrown into the eyes, which can result in severe eye damage. Always wear safety glasses or eye shields while operating your lawn mower or performing any adjustments or repairs. We recommend standard safety glasses or a wide vision safety mask over spectacles. - Page 8 TO CONVERT MOWER (See Figs. 7 thru 9) Your lawn mower was shipped ready to be used as a mulcher. To convert to rear bagging or side discharging: REAR BAGGING • Remove knob securing mulcher door to mower housing. •...
-
Page 9: To Empty Grass Catcher
2. Mulcher door secured to mower housing with knob. FOR REAR BAGGING - 1. Side discharge defl ector removed. 2. Grass catcher and discharge chute installed with discharge chute secured to lawn mower housing with knob. 3. Round door of discharge chute resting on top of grass catcher. -
Page 10: Before Starting Engine
BEFORE STARTING ENGINE ADD OIL (See Figs. 12 and 13) Your lawnmower is shipped without oil in the engine. For type and grade of oil to use, see “EN GINE” in the Maintenance section of this manual. CAUTION: DO NOT overfi ll engine with oil, or it will smoke on startup. -
Page 11: Operation
• For best results, adjust the lawn mower cutting height so that the lawn mower cuts off only the top one-third of the grass blades (See Fig. 15). If the lawn is over- grown it will be necessary to raise the height of cut to reduce pushing effort and to keep from overloading the engine and leaving clumps of mulched grass. -
Page 12: Lubrication Chart
Use a scraper to clean under deck GENERAL RECOMMENDATIONS The warranty on this lawn mower does not cover items that have been subjected to operator abuse or negli- gence. To receive full value from the warranty, opera- tor must maintain mower as instructed in this manual. -
Page 13: Lawn Mower
Change the oil after every 25 hours of operation or at least once a year if the lawn mower is not used for 25 hours in one year. Check the crankcase oil level before starting the engine and after each fi... -
Page 14: Service And Adjustments
2. Remove engine oil cap; lay aside on a clean surface. 3. Tip lawn mower on its side as shown and drain oil into a suitable container. Rock lawn mower back and forth to remove any oil trapped inside of engine. - Page 15 4. Pivot idler arm assembly to slacken drive belt, then remove drive belt from drive pulley, belt keepers and idler arm. 5. Turn lawn mower on its side. Make sure air fi lter and carburetor are up. 6. Remove screw securing debris shield. Note that the debris shield has a tab which fi...
-
Page 16: Storage
3. Align opposite side of handle with same positioning hole and secure with bolt and knob. Immediately prepare your lawn mower for storage at the end of the season or if the unit will not be used for 30 days or more. LAWN MOWER When lawn mower is to be stored for a period of time, clean it thoroughly, remove all dirt, grease, leaves, etc. -
Page 17: Fuel System
HANDLE (See Figs. 23 and 24) You can fold your lawn mower handle for storage. NOTE: The upper handle has an “anti-fold” bracket located on the left side of the handle. This bracket prevents the upper handle from folding forward, which helps protect control cable(s) from damage. -
Page 18: Troubleshooting Points
1. Depress control bar to upper handle before pulling starter rope. 2. Contact a qualifi ed service center. 3. Replace blade adapter. 4. Move lawn mower to cut grass or other hard surface before starting. 1. Raise cutting height. 2. Replace blade. -
Page 19: Repair Parts
ROTARY LAWN MOWER - - MODEL NUMBER 55C21HV (55C21HVA) PRODUCT NUMBER 954 22 38-90 GEAR CASE ASSEMBLY - - PART NUMBER 532 18 36-99 PART 817 54 10-11 532 16 06-72 532 05 70-72 532 18 39-08 532 16 08-18... - Page 20 ROTARY LAWN MOWER - - MODEL NUMBER 55C21HV (55C21HVA), PRODUCT NUMBER 954 22 38-90...
- Page 21 ROTARY LAWN MOWER - - MODEL NUMBER 55C21HV (55C21HVA), PRODUCT NUMBER 954 22 38-90 PART DESCRIPTION 532 19 05-82 Handle, Grassbag, Rear 532 06 53-22 Hairpin Cotter 532 18 34-83 Rod, Rear Handle, Grassbag 532 19 05-77 Grassbag 532 18 85-06...
- Page 22 ROTARY LAWN MOWER - - MODEL NUMBER 55C21HV (55C21HVA), PRODUCT NUMBER 954 22 38-90...
- Page 23 ROTARY LAWN MOWER - - MODEL NUMBER 55C21HV (55C21HVA), PRODUCT NUMBER 954 22 38-90 PART DESCRIPTION 532 18 53-12 Drive Control Assembly, Complete (Consists of Key Numbers 2 through 7) 532 18 82-79 Cover, Drive Control, Top 532 18 73-53...
Need help?
Do you have a question about the 55C21HV and is the answer not in the manual?
Questions and answers