Table of Contents
Advertisement
Quick Links
Advertisement
Table of Contents

Related Manuals for LevelOne WUA-0600


Summary of Contents for LevelOne WUA-0600
-
Page 1: User Manual
LevelOne User Manual WUA-0600 N_Max Wireless USB Adapter Ver. 1.0.0-0802... -
Page 2: Fcc Warning
Council Directive 89/336/EEC on the approximation of the laws of the Member States relating to electromagnetic compatibility. CE Marking Warning Hereby, Digital Data Communications, declares that this (Model-no. WUA-0600) is in compliance with the essential requirements and other relevant provisions of Directive 1999/5/EC. -
Page 3: Table Of Contents
Table of Content TABLE OF CONTENT.........................V INTRODUCTION ......................... 3 ......................3 ANUAL VERVIEW UNPACKING AND SETUP......................4 ..........................4 EATURES ........................4 ACKAGE ONTENTS ............................5 ETUP HARDWARE INSTALLATION ....................5 USB A ................5 NSTALLATION ROCEDURE FOR DAPTER LED I .......................... -
Page 4: Introduction
Introduction Congratulations on your purchase of LevelOne N_Max Wireless USB Adapter. This manual helps to get familiar with the LevelOne N_Max Wireless LAN Adapter. This manual contains detailed instructions in operation of this product. Please keep this manual for future reference. -
Page 5: Unpacking And Setup
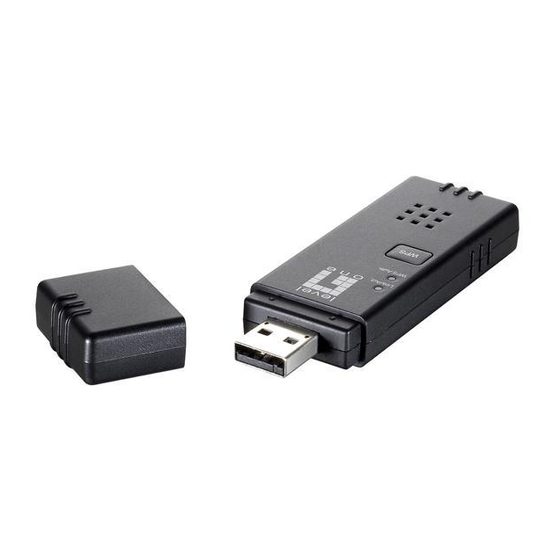
For Maximum Performance use Wireless N Router Package Contents Open the box of the N_Max Wireless USB Adapter and carefully unpack it. The box should contain the following items: WUA-0600 N_Max Wireless USB Adapter Extension Cable Quick Installation Guide CD Manual/Driver/Utility... -
Page 6: Setup
Setup The setup of the Wireless USB Adapter can be performed using the following steps: Visually inspect the USB Adapter and make sure that it is fully plugged in to the USB port. Make sure that there is a well environment that there is no much intrusion to have a better connection. -
Page 7: Hardware Installation
Hardware Installation Installation Procedure for USB Adapter You should install the supplied software BEFORE inserting the Wireless USB Adapter when using Windows 2000, XP or Vista. Note The following installation was operated under Windows XP. (Procedures are similar for Windows 2000.) If you have installed the Wireless Adapter driver &... -
Page 8: Check The Installation
Check the installation The LEDs of the Wireless USB Adapter are clearly visible and the status of the network link can be seen instantly: 1. Once the device is plugged to the station’s USB port, the Link/Act. LED of the Wireless USB Adapter will light up indicating a normal status with power. -
Page 9: Software Installation
Software Installation This section will lead you to install the driver and utility of the N_Max Wireless USB Adapter. Windows 2000/XP/Vista Utility Installation Insert the N_Max Wireless USB Adapter Utility CD into the computer and then the Auto-run screen will appear. Alternatively, open a file browser and double click on the autorun.exe file located in the CD directory. - Page 11 Insert the N_Max Wireless USB adapter into the USB port, the following screen will prompt, click “Next” to continue. Select “Install the software automatically (Recommended)” and click “Next” to continue. The warning message will pop up, please select “Continue Anyway” The software installation has now completed.
- Page 12 The installation program will help you to setup the Wireless LAN utility. Be noted that the Windows XP and Vista have its own Wireless Utility; you can either use the utility of Windows XP/Vista or the provided utility. When the Wireless LAN utility is installed properly, you will see the icon on the Windows task bar. The user can configure the wireless settings using the Wireless USB Adapter Configuration Utility.
-
Page 13: Wireless Utility Configuration
Wireless Utility Configuration Profile The profile settings page allows you to set and save different wireless settings. You can activate the suitable profile according to the environment where the wireless connection is used. To add a profile, click the Add button and configure the following displayed items: System Configure: Configure the wireless network. - Page 14 Infrastructure - An integrated wireless and wired LAN is called an Infrastructure configuration. Select Infrastructure to associate to an AP. Power Save Mode (available when Infrastructure mode is selected as the network type) Enable or disable the power save operation. (Default: CAM) CAM: Constantly awake mode, which always keeps the radio on.
- Page 15 (Package Data Unit) can increase the reliability of transmissions because it increases the probability of a successful transmission due to smaller frame size. If there is significant interference present, or collisions due to high network utilization, try setting the fragment size to send smaller fragments. This will speed up the retransmission of smaller frames.
- Page 16 Click OK to confirm the configuration or click Cancel to cancel the settings. WPA / WPA-PSK: Wi-Fi Protected Access (WPA) employs a combination of technologies to provide an enhanced security solution for wireless networks. The WPA Pre-shared Key (WPA-PSK) mode for small networks uses a common password phrase that must be manually distributed to all clients that want to connect to the network.
- Page 17 AES: Use Advanced Encryption Standard (AES) keys for encryption. WPA2 uses AES Counter-Mode encryption with Cipher Block Chaining Message Authentication Code (CBC-MAC) for message integrity. The AES Counter-Mode/CBCMAC Protocol (AES-CCMP) provides extremely robust data confidentiality using a 128-bit key. Use of AES-CCMP encryption is specified as a standard requirement for WPA2.
- Page 18 TTLS: Tunneled Transport Layer Security. This security method provides for certificate-based, mutual authentication of the client and network through an encrypted channel. Unlike EAP- TLS, EAP-TTLS requires only server-side certificates. EAP-Fast: Flexible Authentication via Secure Tunneling. An authentication method developed by Cisco. Instead of using a certificate, mutual authentication is achieved by means of a PAC (Protected Access Credential) which can be managed dynamically by the authentication server.
- Page 19 MS-CHAP-V2: MS-CHAP v2 is similar to MS-CHAP with the difference that the server also authenticates itself with the client. PAP: PAP provides a simple method for a remote node to establish its identity using a two-way handshake. A username and password pair is repeatedly sent by the remote node across the link until authentication is acknowledged.
-
Page 20: Network
Network The network setting page allows you to set and save different wireless settings. You can activate the suitable profile according to the environment where the wireless connection is used. The displayed items on this page can be described as follows: Sort by: Indicate that the AP list is sorted by SSID, Channel or Signal. - Page 21 The network supports 802.11g connections The network supports 802.11n connections You can press the button on the bottom right corner to display the network status, as shown below. Note The maximum transmit link speed of this wireless USB adapter is 150 Mbps and the maximum receive link speed is 270 Mbps.
-
Page 22: Advanced
Advanced The Advanced page allows you to configure extended features for the wireless network. The displayed items on this page can be described as follows: Wireless Mode: Select 802.11 B/G/N mix or 802.11 B/G mix as the wireless mode. Enable TX Burst: Enable the option to accelerate the data transmit rate. Enable TCP Window Size: Adjust TCP window size automatically for better performance. -
Page 23: Wmm
Wi-Fi Multimedia (WMM), also known as Wireless Multimedia Extensions (WME), is a Wi-Fi Alliance interoperability certification. It provides basic Quality of Service (QoS) features for IEEE 802.11 wireless networks. The displayed items on this page can be described as follows: WMM Enable: Enable WMM function. -
Page 24: Wps
Wi-Fi Protected Setup (WPS) is based on push-button or PIN (Personal Identification Number) entry authentication to provide strong WPA/WPA2 encryption keys to client devices. Users can push a button on the access point and the client device to exchange the encryption key. With a PIN, users can enter a code generated by the client device to connect to the network. - Page 25 Note If WPS fails, click the PBC button few more times to try again. 4. When an access point or a WPS enrollee is connected, you can click Disconnect to disconnect from the connected device, or select another WPS-enabled wireless access point or enrollee, then click Connect to establish connection.
-
Page 26: Radio Setting
Radio Setting Press the Radio On/Off icon to disable or enable the radio signal connection. About This page displays the information of version numbers, configuration utility, firmware and other information regarding this wireless USB adapter. Click the www.level1.com button to visit the LevelOne website for other information. -
Page 27: Network Planning
An ad hoc wireless LAN can be used for a small branch office or SOHO operation. Infrastructure Wireless LAN LevelOne WUA-0600 can also provide access to a wired LAN for wireless workstations. An integrated wired and wireless LAN is called an Infrastructure configuration. A Basic Service Set (BSS) consists of a group of wireless PC users, and an access point that is directly connected to the wired LAN. - Page 28 The infrastructure configuration not only extends the accessibility of wireless PCs to the wired LAN, but also increases the effective wireless transmission range for wireless PCs by passing their signal through one or more access points. A wireless infrastructure can be used for access to a central database, or for connection between mobile workers, as shown in the following figure.
-
Page 29: Technical Specifications
Technical Specifications General IEEE 802.11n (draft 2.0), IEEE 802.11b/g Radio Specification Interface USB Version 2.0 Compliant Data Transfer Rate 1, 2, 5.5, 6, 9, 11, 12, 18, 24, 36, 48, 54Mbps 802.11n (draft 2.0) offering up to 270Mbps Draft N 40MHz Channel Spacing -65dBm @ 64-QAM Receiver Sensitivity Draft N 20MHz Channel Spacing -70dBm @ 64-QAM 54Mbps: Typical -72dBm @ 10% PER (Packet Error Rate) - Page 30 Humidity 10% ~ 95% RH, no condensation Dimensions 82 x 26 x 11mm Certifications EN60960-1, Part 15B, EN301489-1/-17, Part 15C, EN300328...
Need help?
Do you have a question about the WUA-0600 and is the answer not in the manual?
Questions and answers